Acer Veriton A430_51 Generic User Guide
Acer Veriton A430_51 Manual
 |
View all Acer Veriton A430_51 manuals
Add to My Manuals
Save this manual to your list of manuals |
Acer Veriton A430_51 manual content summary:
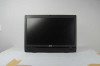
- Acer Veriton A430_51 | Generic User Guide - Page 1
Veriton Series User Guide VT002 - Acer Veriton A430_51 | Generic User Guide - Page 2
Copyright © 2012. All Rights Reserved. Veriton Series User Guide Original Issue: 04/2012 Veriton Series Desktop Computer Model number Serial number Purchase date Place of purchase Visit http://registration.acer.com and discover the benefits of being an Acer customer. - Acer Veriton A430_51 | Generic User Guide - Page 3
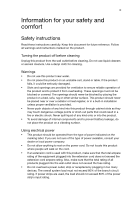
Safety instructions Read these instructions carefully. Keep this document for future reference. Follow all warnings and instructions marked on the wall outlet does not exceed the fuse rating. • Do not overload a power outlet, strip or receptacle by plugging in too many devices. The overall system load - Acer Veriton A430_51 | Generic User Guide - Page 4
only with the supplied power supply cord set. If you need to replace the power cord set, make sure that the new power cord meets the following requirements: detachable type, UL listed/CSA certified, VDE approved or its equivalent, 4.5 meters (15 feet) maximum length. Product servicing Do not attempt - Acer Veriton A430_51 | Generic User Guide - Page 5
servicing. • To avoid the remote risk of electric shock from lightning, do not connect the telephone line to this equipment during lightning or thunderstorms. Disposal instructions www.eiae.org. For lamp-specific disposal information, check www. Acer is committed to offer products and services - Acer Veriton A430_51 | Generic User Guide - Page 6
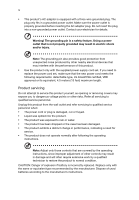
vi Note: The statement above is applicable only to Acer system with an ENERGY STAR sticker. Acer ENERGY STAR qualified products: • Produce less heat and reduce cooling loads, and warmer climates. • Automatically go into "display sleep" and "computer sleep" mode after 10 - Acer Veriton A430_51 | Generic User Guide - Page 7
vii • If you view your monitor more than your documents, place the display at the center of your desk to minimize neck strain. Taking care of your vision Long viewing hours, wearing incorrect glasses or contact lenses, glare, excessive room lighting, poorly focused screens, very small typefaces and - Acer Veriton A430_51 | Generic User Guide - Page 8
viii - Acer Veriton A430_51 | Generic User Guide - Page 9
7 Connecting a monitor 7 Connecting the power cable 8 Turning on your computer 8 Turning off your computer 8 3 Upgrading your computer 9 Installation precautions 10 ESD precautions 10 Preinstallation instructions 10 Post-installation instructions 10 Opening your computer 11 To - Acer Veriton A430_51 | Generic User Guide - Page 10
20 Modem notices 21 Laser compliance statement 23 Digital audio output statement 23 Radio device regulatory notice 23 Canada - Low-power license-exempt radio communication devices (RSS-210) 24 Federal Communications Commission 27 Remark: All images are for reference purposes only - Acer Veriton A430_51 | Generic User Guide - Page 11
1 System tour - Acer Veriton A430_51 | Generic User Guide - Page 12
Microphone-in jack (front) Headphone jack USB ports USB 3.0 USB 3.0 ports (selected models only) Recovery button Network / hard disk drive indicators Power button Rear panel The rear panel of your computer has the following: Icon Description PS/2 mouse port PS/2 keyboard port Serial port - Acer Veriton A430_51 | Generic User Guide - Page 13
3 English Icon USB 3.0 Description USB 3.0 ports (selected models only) Network port Kensington lock slot DP SPDIF Display port (selected models only) SPDIF port (selected models only) HDMI port (selected models only) DC-in jack (selected models only) DVI port (for selected models only) The - Acer Veriton A430_51 | Generic User Guide - Page 14
a circular motion. • Clean your optical drive periodically. Cleaning kits can be purchased from any computer or electronics shop. Note: Please refer to the cleaning kit instructions. - Acer Veriton A430_51 | Generic User Guide - Page 15
2 Setting up your computer - Acer Veriton A430_51 | Generic User Guide - Page 16
your desk or under your table, as long as it does not block the space you need for working and moving. • To place your PC in a vertical position (for selected models) : • Rotate the plastic stabilizers on the side of your computer. • Ensure the plastic stabilizers are extended completely. CAUTION - Acer Veriton A430_51 | Generic User Guide - Page 17
the most part, you only have four things to connect: the mouse, keyboard, monitor and power cable. Note: The peripherals shown in the connections below are for your reference only. Actual device VGA will be disabled. Note: Refer to the monitor manual for additional instructions and information. - Acer Veriton A430_51 | Generic User Guide - Page 18
socket located on the rear panel of your computer. Then plug the other end of the power cable into a power outlet. Turning on your computer After connecting the necessary peripherals and plugging in the power cable, you are now ready to turn the computer on and get to work. To turn on your - Acer Veriton A430_51 | Generic User Guide - Page 19
3 Upgrading your computer - Acer Veriton A430_51 | Generic User Guide - Page 20
all cables from the power outlets. 2 Open your computer according to the instructions on page 11. 3 . 5 See the following sections for specific instructions on the component you wish to install you are a qualified service technician. Post-installation instructions Observe the following after - Acer Veriton A430_51 | Generic User Guide - Page 21
that you have turned off your computer and all peripherals connected to it. Read the "Preinstallation instructions" on page 10. You need to open your computer before you can install additional components. any of these components, contact your dealer or a qualified service technician for assistance. - Acer Veriton A430_51 | Generic User Guide - Page 22
12 To remove a memory DIMM 3 Upgrading your computer English Note: The memory DIMM has only one notch located toward the center of the module. 1 Remove the side panel. 2 Locate the memory DIMM socket on the mainboard. 3 Press the holding clips on both sides of the memory DIMM socket outward to - Acer Veriton A430_51 | Generic User Guide - Page 23
the memory DIMM around and try to insert it again. To reconfigure your computer Your computer automatically detects the amount of memory installed. Run the BIOS utility to view the new value for total system memory and make a note of it. Replacing the hard disk Follow these steps to replace your - Acer Veriton A430_51 | Generic User Guide - Page 24
. 7 Secure the card to your computer with the bracket lock you removed earlier. 8 Replace the computer cover. When you turn on the computer, BIOS automatically detects and assigns resources to the newly installed devices. Note: If you want to replace or upgrade any of these components, contact your - Acer Veriton A430_51 | Generic User Guide - Page 25
4 Frequently asked questions - Acer Veriton A430_51 | Generic User Guide - Page 26
restart your computer. If restarting your computer does not work, contact your dealer or technical support center for assistance. The printer does not work. Do the following: • Make sure the printer is connected to a power outlet and that it is turned on. • Make sure the printer cable is connected - Acer Veriton A430_51 | Generic User Guide - Page 27
drive by using a good (undamaged) disk. If your drive can not read the information on the good disk there may be a problem with the drive. Contact your dealer or technical support center for assistance. System cannot write data on the hard disk or CD-R/CD-RW. Check the following: • Make sure the - Acer Veriton A430_51 | Generic User Guide - Page 28
English 18 4 Frequently asked questions - Acer Veriton A430_51 | Generic User Guide - Page 29
5 Regulations and safety notices - Acer Veriton A430_51 | Generic User Guide - Page 30
provide reasonable protection against harmful interference in a residential installation. This device generates, uses, and can radiate radio frequency energy and, if not installed and used in accordance with the instructions, may cause harmful interference to radio communications. However, there is - Acer Veriton A430_51 | Generic User Guide - Page 31
, Acer, declares that this PC series is in compliance with the essential requirements and other relevant provisions of Directive 1999/5/EC. causes harm to the telephone network, the telephone company may discontinue your service temporarily. If possible, they will notify you in advance. But, if - Acer Veriton A430_51 | Generic User Guide - Page 32
for compliance with Telecom's Telepermit requirements are dependent on the equipment (PC) associated with this device. The associated equipment shall be set to operate within the following limits for compliance with Telecom's Specifications: a There shall be no more than 10 call attempts to the - Acer Veriton A430_51 | Generic User Guide - Page 33
PC) associated with this device. In order to operate within the limits for compliance with Telecom's specifications that Telecom lines will always continue to support pulse dialing. 7 Use of pulse dialing . Should such problems occur, the user should NOT contact the telecom Fault Service. 8 This - Acer Veriton A430_51 | Generic User Guide - Page 34
of use. Please see http://ec.europa.eu/enterprise/rtte/implem.htm for the lastest country list. Canada - Low-power license-exempt radio communication devices ( GHz band To prevent radio interference to the licensed service, this device is intended to be operated indoors and installation outdoors is - Acer Veriton A430_51 | Generic User Guide - Page 35
declare that: Product: Trade Name: Model Number: SKU Number: Personal Computer Acer AcerSystem XXX-xxx ("x" = 0~9, a ~ z, A ~ Z or Blank) Is compliant with the essential requirements and other relevant provisions of the following EC directives, and that all the necessary steps have been taken and - Acer Veriton A430_51 | Generic User Guide - Page 36
product if built with WLAN module or wireless keyboard and mouse. English R&TTE Directive 1999/5/EC as attested by conformity with the following harmonized standard: • Article 3.1(a) Health and Safety affixing CE marking 2011. Easy Lai /Manager Regulation Center, Acer Inc. Feb. 18, 2011 Date - Acer Veriton A430_51 | Generic User Guide - Page 37
America Corporation 333 West San Carlos St., San Jose CA 95110, U. S. A. Tel : 254-298-4000 Fax : 254-298-4147 www.acer.com Federal Communications Commission Declaration of Conformity This device complies with Part 15 of the FCC Rules. Operation is subject to the following two conditions: (1) - Acer Veriton A430_51 | Generic User Guide - Page 38
Remark: All images are for reference purposes only. Actual configuration may vary. V12A2
-
 1
1 -
 2
2 -
 3
3 -
 4
4 -
 5
5 -
 6
6 -
 7
7 -
8
-
9
-
10
-
11
-
12
-
13
-
14
-
15
-
16
-
17
-
18
-
19
-
20
-
21
-
22
-
23
-
24
-
25
-
26
-
27
-
28
-
29
-
30
-
31
-
32
-
33
-
34
-
35
-
36
-
37
-
38
 |
 |

Veriton Series
User Guide
VT00
2