Acer Veriton L4618G Acer Veriton L4610G Desktop Service Guide
Acer Veriton L4618G Manual
 |
View all Acer Veriton L4618G manuals
Add to My Manuals
Save this manual to your list of manuals |
Acer Veriton L4618G manual content summary:
- Acer Veriton L4618G | Acer Veriton L4610G Desktop Service Guide - Page 1
Veriton L4610/L4610G/L4618G/L4619G Service Guide PRINTED IN TAIWAN I - Acer Veriton L4618G | Acer Veriton L4610G Desktop Service Guide - Page 2
Revision History Please refer to the table below for the updates made on Veriton L4610/L4610G/L4618G/L4619G series service guide. Date Chapter Updated II - Acer Veriton L4618G | Acer Veriton L4610G Desktop Service Guide - Page 3
system, or translated into any language or computer language, in any form or by any means, electronic, mechanical, magnetic, optical, chemical, manual or otherwise, without the prior written permission of Acer Incorporated. Disclaimer The information in this guide is subject to change without notice - Acer Veriton L4618G | Acer Veriton L4610G Desktop Service Guide - Page 4
to the current topic. WARNING CAUTION Alerts your to any damage that might result from doing or not doing specific actions. Gives precautionary measures to avoid possible hardware or software problem. IMPORTANT Reminds you to do specific actions relevant to the accomplishment of procedures. IV - Acer Veriton L4618G | Acer Veriton L4610G Desktop Service Guide - Page 5
supports, please read the following general information. 1. This Service Guide provides you with all technical information relating to the BASIC CONFIGURATION decided for Acer -on card, modem, or extra memory capability). These LOCALIZED FEATURES will NOT be covered in this generic service guide. In - Acer Veriton L4618G | Acer Veriton L4610G Desktop Service Guide - Page 6
6 Veriton L4610/L4610G/L4618G/L4619G 7 Hardware Specifications and Configurations 12 Power Management Function (ACPI support function 16 System Utilities...17 BIOS Setup Utility(Main 19 BIOS Setup Utility(Advanced 21 BIOS Setup Utility(Power 26 BIOS Setup Utility(Security 27 BIOS Setup - Acer Veriton L4618G | Acer Veriton L4610G Desktop Service Guide - Page 7
chip-device controller. This motherboard supports up to 8 GB of system memory with dual channel DDR3 1333/ 1066 SO-DIMM. It supports two DDR3 sockets with up to maximum memory of 8 GB, intended for Graphics Interface, is fully compliant to the PCI Express Base Specification revision 2.0. In addition - Acer Veriton L4618G | Acer Veriton L4610G Desktop Service Guide - Page 8
with Dual-channel architecture Accommodates two unbuffered DIMMs and Support Intel Flex Memory Mode Up to 4 GB per DIMM with maximum memory size up to 8 GB Onboard LAN The onboard LAN provides the following features: l Supports PCI ExpressTM 1.1 l Integrated 10/100 /1000 transceiver l Wake-on-LAN - Acer Veriton L4618G | Acer Veriton L4610G Desktop Service Guide - Page 9
jacks for microphone, line-in and line-out BIOS Firmware The motherboard uses AMI BIOS that enables users to configure many system features including the following: l Power management l Wake-up alarms l CPU parameters l CPU and memory timing l Graphic parameters The firmware can also be used to set - Acer Veriton L4618G | Acer Veriton L4610G Desktop Service Guide - Page 10
CN8 5 D IM M 1~ 2 6 OBR 7 F_USB1/4 8 JM IC 1 9 JPHONE1 10 SATA_HDD1 11 SYS_FAN 12 CPU_FAN 13 ME_DISABLE1 14 CLR_CMOS 15 BIOS_W P 16 LPT1 17 C_INTRUSIO N ⑦ ⑧ ⑨ Com ponent LG A1155 socket for Intel® Sandy Bridge desktop processor Internal speaker header Buzzer Power switch DDR3 SO - Acer Veriton L4618G | Acer Veriton L4610G Desktop Service Guide - Page 11
18 COM1 19 F_USB2/3 20 SCN1 21 SATA_ODD1 Onboard serial port header Front panel USB ports MINI PCI Express slot SATA ODD connector This concludes Chapter 1. The next chapter explains how to install the motherboard. 5 - Acer Veriton L4618G | Acer Veriton L4610G Desktop Service Guide - Page 12
1333MHz/1066MHz Total Max 8GB FDI DMI MINI PCI-E X2 SATA 3.0 6Gbps TPM VGA DVI Cougar Point Chipset AUDIO CODEC: ALC662 Intel 82579 SIS 100 F_USB 4Ports RJ-45 & USBx2 USB 2 Ports USB3.0 2 Ports Jack 3 in 1 JMIC JPHONE AMP INT Speaker CARD READER JMB385 Option COM2 SIO IT8728 PRINT PORT 6 - Acer Veriton L4618G | Acer Veriton L4610G Desktop Service Guide - Page 13
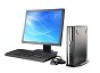
Veriton L4610/L4610G/L4618G/L4619G The com puter's front panel consists of the following: Front view ① ⑧ Lights to indicate hard disk drive status. 6 Network port Lights to indicate the status of wireless LAN comm unications. 7 OBR 8 U S B ports. Recover system back to default setting. - Acer Veriton L4618G | Acer Veriton L4610G Desktop Service Guide - Page 14
⑦ No Icon Com ponent 1 Fan aperture 2 Fan aperture 3 DVI DVI port 4 Serial port 5 Printer connector 6 Microphone-in jack 7 DC connector 8 Monitor port 8 ⑧ D e s c riptio n System FAN 1 System FAN 2 Connects to a display devices(DVI) COM Port Parallel Port Accepts input from - Acer Veriton L4618G | Acer Veriton L4610G Desktop Service Guide - Page 15
9 USB ports. 10 Network port 11 Line-out jack 12 Line-in jack Connects to USB 2.0 devices (e.g.,USB mouse, USB camera). Lights to indicate the status of wireless LAN communications. Accepts audio line-out devices (e.g.,audio CD player,) Accepts audio line-in devices (e.g.,audio CD player,) - Acer Veriton L4618G | Acer Veriton L4610G Desktop Service Guide - Page 16
2 DVI1 Port U se the DVI port to connect the m onitor. 3 LAN1 Port Connect an RJ-45 jack to the LAN port to connect your com puter to the network. 4 USB Ports Use the USB ports to connect USB devices. Use the three . The third jack is for m icrophone. 6 J4 Connect a DC-in jack to J4. 10 - Acer Veriton L4618G | Acer Veriton L4610G Desktop Service Guide - Page 17
System Peripherals The Veriton L4610/L4610G/L4618G/L4619G series computer consist of the system itself, and system peripherals, like a mouse, keyboard, card reader and a set of speakers (optional). This section provides a brief description of the basic system peripherals. Mouse (USB, manufacturing - Acer Veriton L4618G | Acer Veriton L4610G Desktop Service Guide - Page 18
booting to enter BIOS setup Utility. Press while the system is booting to enter Boot Menu. Main Board Major Chips Item PCH AGP controller Super I/O controller Audio controller LAN controller HDD controller Keyboard controller Specification Intel H61 Intel H61 Integrated Graphics ITE IT8728 Realtek - Acer Veriton L4618G | Acer Veriton L4610G Desktop Service Guide - Page 19
controller Video controller resident bus Video Interface Specification Always enabled Up to 2MB per core (exclusive) One-half the processor core clock frequency Enable/Disable by BIOS Setup Specification DVMT is Dynamic Video Memory Technology, Support up to 256MB 32MB Intel H61 Mini PCIE PCI - Acer Veriton L4618G | Acer Veriton L4610G Desktop Service Guide - Page 20
/disable by BIOS Setup Stereo DACs: 44.1k/48k/96k/192k Hz Yes Supported Supported Intel H61 PCI bus 2 Yes Specification Specification ITE8728 LPC bus 1 Yes 9-pin D-type female connector Specification USB 2.0 Support legacy keyboard for legacy mode support up to 8 ports Specification ITE8728 LPC - Acer Veriton L4618G | Acer Veriton L4610G Desktop Service Guide - Page 21
(unpacked) Power Management Devices Power Button USB Keyboard LAN RTC Modem (Ring) S1 (Idle) Enabled Enabled Disabled Disabled Disabled Specification +5℃ to +35℃ -100C ~ +600C (Storage package) 15% to 80% RH 10% to 90% RH 5 ~ 500 Hz:2.20g RMS random, 10 minutes per axis in all 3 axes 5 ~500 Hz - Acer Veriton L4618G | Acer Veriton L4610G Desktop Service Guide - Page 22
). l Disable V-sync to control the VESA DPMS monitor. l Resume method: device activated (Keyboard for DOS, keyboard & mouse for Windows). l Resume recovery time: 3-5 sec. Global Standby Mode l Global power management timer (2-120 minutes, time step=10 minute). l Hard disk drive goes into Standby - Acer Veriton L4618G | Acer Veriton L4610G Desktop Service Guide - Page 23
is no need to run Setup when starting the computer unless you get a Run Setup message. The Setup program loads configuration values into the battery-backed nonvolatile memory called CMOS RAM. This memory area is not part of the system RAM. NOTE: If you repeatedly receive Run Setup messages, the - Acer Veriton L4618G | Acer Veriton L4610G Desktop Service Guide - Page 24
About the Setup Utility The computer uses the latest "American Megatrends Inc." BIOS will support for Windows Plug and Play. The CMOS chip on the motherboard contains the ROM setup instructions for configuring the motherboard BIOS. The BIOS (Basic Input and Output System) Setup Utility displays the - Acer Veriton L4618G | Acer Veriton L4610G Desktop Service Guide - Page 25
and Time items show the current date and time on the computer. If you are running a Windows OS, these items are automatically updated whenever you make changes to the Windows Date and Time Properties utility. BIOS Navigation Keys The BIOS navigation keys are listed below: Key ••'' Enter +/F7 F8 F9 - Acer Veriton L4618G | Acer Veriton L4610G Desktop Service Guide - Page 26
If your motherboard has an item called Firmware Write Protect in Advanced BIOS features, disable it. (Firmware Write Protect prevents BIOS from being overwritten. 3 Create a bootable system disk. (Refer to Windows online help for information on creating a bootable system disk.) 4 Download the Flash - Acer Veriton L4618G | Acer Veriton L4610G Desktop Service Guide - Page 27
BIOS Setup Utility(Advanced) This option displays basic information about your system. Miscellaneous Scroll to this item and press to view the following screen: AHCI PORT1~4 This motherboard supports four SATA channels and each channel allows one SATA device to be installed. Use these items - Acer Veriton L4618G | Acer Veriton L4610G Desktop Service Guide - Page 28
Intel XD Bit This item allows users to enable or disable the Intel XD Bit.Intel VT(Enabled) Intel VT This item allows you to enable or disable the Intel Virtualizationa Technology(Intel VT) function. Video Memory Size(32KB) This item applies to chipset/motherboards capable of the HyperMemory Support - Acer Veriton L4618G | Acer Veriton L4610G Desktop Service Guide - Page 29
Mode, the graphics driver will reserve a fixed portion of the system memory as graphics memory. When set to DVMT Mode, the graphics chip will dynamically allocate system memory as graphics memory, according to system anf graphics requirements. Press to return to the Advanecd BIOS Features page - Acer Veriton L4618G | Acer Veriton L4610G Desktop Service Guide - Page 30
ROM (Disabled) This item enables or disables the onboard LAN option ROM function Press to return to the Advanecd BIOS Features page. PC Health Status On motherboards support hardware monitoring, this item lets you monitor the parameters for critical voltages, temperatures and fan speeds. CPU - Acer Veriton L4618G | Acer Veriton L4610G Desktop Service Guide - Page 31
System Component Characteristics These items display the monitoring of the overall inboard hardware health events, such as System & CPU temperature, CPU voltage, CPU & system fan speed,...etc. • CPU Fan Speed • System Fan Speed • CPU Core • + 1.05V • + 3.30V • + 5.00 V • + 12.0V • 5VSB • VBAT Smart - Acer Veriton L4618G | Acer Veriton L4610G Desktop Service Guide - Page 32
), the suspend mode is suspend to RAM, i.e., the system shuts down with the exception of a refresh current to the system memory. Deep Power off Mode (Enabled) LAN card. You must use an ATX power supply in order to use this feature. Use this item to do wake-up action if inserting the PCIE card. Wake - Acer Veriton L4618G | Acer Veriton L4610G Desktop Service Guide - Page 33
BIOS Setup Utility(Security) This page enables you to set setup administrator and password. Supervisor Password (Not Installed) This item indicates whether a supervisor password has been - Acer Veriton L4618G | Acer Veriton L4610G Desktop Service Guide - Page 34
BIOS Setup Utility(Boot options) This page enables you to set the keyboard NumLock state. Set Priority Order This item enables you to set boot priority order. 1st Boot Device/2nd Boot Device/3rd Boot Device Use these items to determine the device order the computer uses to look for an operating - Acer Veriton L4618G | Acer Veriton L4610G Desktop Service Guide - Page 35
Hard Disk Drive Priority (Press Enter) Scroll to this item and press to view the following screen: Press to return to the Boot Options menu page. Optical Disk Drive Priority (Press Enter) Scroll to this item and press to view the following screen: Press to return to the - Acer Veriton L4618G | Acer Veriton L4610G Desktop Service Guide - Page 36
the Boot Options menu page. Fast Boot (Disabled) If you enable this item, the system starts up more quickly be elimination some of thepower on test routines. Quiet Boot (Enabled) This item enables or disables quiet boot. Halt On (All, But Keyboard) This item defines the operation of the system POST - Acer Veriton L4618G | Acer Veriton L4610G Desktop Service Guide - Page 37
BIOS Setup Utility(Exit) This page enables you to exit system setup after saving or without saving the changes. Save & Exit Setup Use this item enables - Acer Veriton L4618G | Acer Veriton L4610G Desktop Service Guide - Page 38
Chapter3 Machine Disassembly and Replacement To disassemble the computer, you need the following tools: l Wrist grounding strap and conductive mat for preventing electrostatic discharge. l Wire cutter. l Phillips screwdriver (may require different size). NOTE: The - Acer Veriton L4618G | Acer Veriton L4610G Desktop Service Guide - Page 39
General Information Before You Begin Before proceeding with the disassembly procedure, make sure that you do the following: 1. Turn off the power to the system and all peripherals. 2. Unplug the AC adapter and all power and signal cables from the system. 33 - Acer Veriton L4618G | Acer Veriton L4610G Desktop Service Guide - Page 40
Standard Assembly Process 1. Installing the FAN 1.1 Put the two FAN into the chassis and clear up the cable show below. 1.2 Fix the two FAN with eight screws 2. Installing the COM cable and the print cable 2.1 Insert the com cable and the print cable into the chassis ,the com cable follow the mark - Acer Veriton L4618G | Acer Veriton L4610G Desktop Service Guide - Page 41
2.2 Fix the cable with four screws. 3. Installing the Main Board 3.1 Insert the Main Board show bellow. 3.2 Fix the Main Board with five screws. Priority for the two screws 35 - Acer Veriton L4618G | Acer Veriton L4610G Desktop Service Guide - Page 42
3.3 Connect the FAN cable to the Main Board. 3.4 Fix the VGA connector and the DVI connector with four screws. 3.5 Connect the COM port cable and the print cable to the Main Board. 36 - Acer Veriton L4618G | Acer Veriton L4610G Desktop Service Guide - Page 43
4. Installing the CPU 1 2 3 5. Installing the thermal module 5.1 Fix the four screws. 6. Installing the Bracket_Front_IO 6.1 Paste the Antenna to the Bracket_Front _IO,and insert the cable through the hole. The AUX antenna (grey cable) on left The Main antenna (black cable) on right 37 - Acer Veriton L4618G | Acer Veriton L4610G Desktop Service Guide - Page 44
6.2 Fix the Antenna with two screws. 6.3 Insert the cable through the hole of the Main Board, then assembly the Bracket_Front_IO. 1 2 3 4 38 - Acer Veriton L4618G | Acer Veriton L4610G Desktop Service Guide - Page 45
5 6 6 7 6.4 Fix the Bracket_Front_IO with three screws. NOTE: Keep the FAN cable away from the Thermal module 39 - Acer Veriton L4618G | Acer Veriton L4610G Desktop Service Guide - Page 46
7. Installing the Memory 2 1 8. Installing the Speaker 8.1 Put the speaker in order show below, and Fix it with two screws. 1 2 8.2 Connect the speaker cable to the Main Board. 40 - Acer Veriton L4618G | Acer Veriton L4610G Desktop Service Guide - Page 47
9. Installing the HDD 9.1 Fix HDD on the bracket with four screws 9.2 Install the HDD module in chassis in order show below. 1 3 2 1 9.3 Fix the HDD Bracket with two screws. 41 - Acer Veriton L4618G | Acer Veriton L4610G Desktop Service Guide - Page 48
10. Installing the WLAN mini PCI-E card 10.1 Connect the main & aux antenna cable to the WLAN card. AUX (grey) MAIN (black) 10.2 Insert the WLAN card into Main Board. 10.3 Fix the WLAN card with two screws. 42 - Acer Veriton L4618G | Acer Veriton L4610G Desktop Service Guide - Page 49
11. Installing the Front bezel 12. Install the ODD bezel on the ODD. 12.1 Install the ODD bezel on the ODD. 12.2 Fix the ODD bracket with two screws. 43 - Acer Veriton L4618G | Acer Veriton L4610G Desktop Service Guide - Page 50
12.3 Push the ODD into the chassis and fix the ODD module with one screw. 13. Installing the Cover Bottom 13.1 Push the Cover Bottom and fix it with one screw. 14. Installing the Cover Top 14.1 Push the Cover Top and fix it with one screw. 44 - Acer Veriton L4618G | Acer Veriton L4610G Desktop Service Guide - Page 51
15. Installing the Cover Stand 15.1 Fix the Cover Stand with one screw. 45 - Acer Veriton L4618G | Acer Veriton L4610G Desktop Service Guide - Page 52
Standard Disassembly Process 1. Opening the computer 1.1 Remove the one screws fixed in the cover_stand. 1.2 Remove the one screws fixed in the cover_top. 1.3 Drag the cover_top rearward removal. 46 - Acer Veriton L4618G | Acer Veriton L4610G Desktop Service Guide - Page 53
2. Removing the CPU 2.1 Release the four screws fixed in the thermal_module. 2.2 Remove the CPU. 3. Removing the Speaker 3.1 Disconnect the Speaker cable. 47 - Acer Veriton L4618G | Acer Veriton L4610G Desktop Service Guide - Page 54
3.2 Remove the two screws fixed in the Bracket_Front_IO 4. Removing the Memory 4.1 Release the two latch show bellow then remove the Memory. 5. Removing the HDD 5.1 Remove the two screws fixed in the chassis. 48 - Acer Veriton L4618G | Acer Veriton L4610G Desktop Service Guide - Page 55
5.2 Removing the HDD. 6. Removing the WLAN mini pci-e card 6.1 Remove the one screws fixed in the cover_bottom. 6.2 Drag the cover_bottom rearward removal. 49 - Acer Veriton L4618G | Acer Veriton L4610G Desktop Service Guide - Page 56
6.3 Remove the two screws fixed in the WLAN mini PCI-E card. 6.4 Disconnect the main & aux antenna cable from the WLAN mini PCI-E card . 7. Removing the COM port cable and the Print port cable 7.1 Disconnect the COM port cable and the print port cable. 50 - Acer Veriton L4618G | Acer Veriton L4610G Desktop Service Guide - Page 57
7.2 Remove the eight screws fixed in the chassis. 8. Removing the ODD 8.1 Remove the screw fixed in the chassis. 8.2 Remove the ODD. 51 - Acer Veriton L4618G | Acer Veriton L4610G Desktop Service Guide - Page 58
9. Removing the Main Board 9.1 Remove the cover_front_IO four Latch. 9.2 Remove the cover_front_IO 9.3 Remove the three screws fixed in the Bracket_Front_IO. 52 - Acer Veriton L4618G | Acer Veriton L4610G Desktop Service Guide - Page 59
9.4 Release the Bracket_Front_IO. 9.5 Remove the five screws fastening the Main Board to the chassis. 9.6 Disconnect the two FAN cable. 53 - Acer Veriton L4618G | Acer Veriton L4610G Desktop Service Guide - Page 60
. NOTE: RTC battery has been highlighted with the yellow circle as above image shows. Please detach the RTC battery and follow local regulations for disposal. 10. Removing the FAN 10.1 Remove the eight screws fixed in the chassis. 54 - Acer Veriton L4618G | Acer Veriton L4610G Desktop Service Guide - Page 61
Troubleshooting Chapter4 This chapter provides troubleshooting information for the Veriton L4610/L4610G/L4618G/L4619G Service Guide l Power-On Self-Test (POST) l POST Check Points l Error Symptoms List 55 - Acer Veriton L4618G | Acer Veriton L4610G Desktop Service Guide - Page 62
Test (POST) is initiated. Several items are tested during POST, but is for the most part transparent to the user. The Power-On Self Test (POST) is a BIOS memory subsystem l Direct Memory Access (DMA) controller l Interrupt system l Three programmable timers l ROM subsystem l RAM subsystem l CMOS RAM - Acer Veriton L4618G | Acer Veriton L4610G Desktop Service Guide - Page 63
BIOS modules on POST entry and GPNV area. Initialized CMOS as mentioned in the Kernel Variable "wCMOSFlags." Check CMOS diagnostic byte to determine if battery power is OK and CMOS checksum is OK. Verify CMOS checksum manually the CPU. The BAT test is being done on KBC platform specific BIOS modules - Acer Veriton L4618G | Acer Veriton L4610G Desktop Service Guide - Page 64
the BDA, EBDA...etc. 52 Updates CMOS memory size from memory found in memory test. Allocates memory for Extended BIOS Data Area from base memory. Programming the memory hole or any kind of implementation that needs an adjustment in system RAM size if needed. 60 Initializes NUM-LOCK status - Acer Veriton L4618G | Acer Veriton L4610G Desktop Service Guide - Page 65
Checkpoint A2 A4 Description Takes care of runtime image preparation for different BIOS modules. Fill the free area in F000h segment with 0FFh. Initializes the Microsoft IRQ Routing Table. Prepares the runtime language module. Disables the system Initialize - Acer Veriton L4618G | Acer Veriton L4610G Desktop Service Guide - Page 66
2. Memory module. 3. Main board. System works but fails to enter power saving mode when the Power Management Mode is set to Enabled. 1. Enter BIOS Setup and load default settings. In Windows Systems, check settings in Power Management Property of Control Panel. 2. Reload software from Recovery - Acer Veriton L4618G | Acer Veriton L4610G Desktop Service Guide - Page 67
disc. 2. Ensure the CD/DVD-ROM driver is installed properly. 3. CD/DVD-ROM BIOS Setup or Power Management is set to Enabled. For the PCI modem, make sure Wake up by PCI card is set to Enabled. 2. If PCI modem card is used, reinsert the modem card to PCI slot firmly or replace the modem card - Acer Veriton L4618G | Acer Veriton L4610G Desktop Service Guide - Page 68
Action/FRU Video and Monitor Video memory test failed. 1. Remove all non-factory-installed cards. Video adapter failed. 2. Load default settings (if screen is readable). 3. Main board Display problem: 1. Monitor signal connection/cable. - Incorrect colors 2. Monitor No high intensity - Acer Veriton L4618G | Acer Veriton L4610G Desktop Service Guide - Page 69
Chapter5 Jumper and Connector Information Jumper Setting This section explains how to set jumpers for correct configuration of the motherboard. Setting Jumper Use the motherboard jumpers to set system configuration options. Jumpers with more than one pin are numbered. When setting the jumpers, - Acer Veriton L4618G | Acer Veriton L4610G Desktop Service Guide - Page 70
Jumper Settings The following illustration shows the location of the motherboard jumpers. Pin 1 is labeled. Jumper CLR_CMOS Type Disable 1-2: NORMAL 1 2-3: ME disable 1 ME_DISABLE BIOS_WP 3-pin BIOS write protect 1-2: BIOS PROTECT 2-3: NORMAL 1 BIOS_WP To avoid the system unstability after - Acer Veriton L4618G | Acer Veriton L4610G Desktop Service Guide - Page 71
. This motherboard has an LGA775 socket. When choosing a processor, consider the performance requirements of the system. Performance is based on the processor design, the clock speed and system bus frequency of the processor, and the quantity of internal cache memory and external cache memory. 65 - Acer Veriton L4618G | Acer Veriton L4610G Desktop Service Guide - Page 72
Procedure The following illustration shows CPU installation components. A. Read and follow the instructions shown on the sticker on the CPU cap. B. Unload the cap Ÿ Use Return Material Authorization (RMA) requests will be accepted only if the motherboard comes with the cap on the LGA775 socket. 66 - Acer Veriton L4618G | Acer Veriton L4610G Desktop Service Guide - Page 73
two slots. Each module can be installedwith 4 GB of memory; total memory capacity is 8 GB. ※Current AVLc only support 2G per socket. Do not remove any memory module from its antistatic packaging untilyou are ready to install it on the motherboard. Handle the modules onlyby their edges. Do not touch - Acer Veriton L4618G | Acer Veriton L4610G Desktop Service Guide - Page 74
the correct direction. Match the cutout onthe DIMM module with the not chon the DIMM socket. Read and follow the instructions shown on the sticker on the CPU cap. 2. Insert the memory module to the slot and press it down until it seats correctly. 3. Make sure the slot latches cling to the - Acer Veriton L4618G | Acer Veriton L4610G Desktop Service Guide - Page 75
an external mini PCI Express device card. Before installing an add-on card, check the documentation for the card carefully. If the card is not Plug and Play, you may have to manually configure the card before installation. Table A: Supported Wireless LAN Card List for SCN1 Slot Vendor Module - Acer Veriton L4618G | Acer Veriton L4610G Desktop Service Guide - Page 76
Optional Devices Refer to the following for information on connecting the motherboard's optional devices: JMIC1: Front MIC IN Pin Signal Name 1 N/C SPI_ROM1: SPI ROM header This 8 Mb ROM contains the programmable BIOS program. Pin Signal Name Function 1 CHIP SELECT Select chip 2 VCC - Acer Veriton L4618G | Acer Veriton L4610G Desktop Service Guide - Page 77
Data Terminal Ready Ring Indicator No pin Ground F_USB2/3: Front Panel USB Ports The motherboard has four USB ports on front edge. Pin Signal Name 1 VCC 3 PD0 3 PD1 4 PD2 5 PD3 6 PD4 7 PD5 8 PD6 9 PD7 10 ACK 11 BUSK 12 PE 13 SLCT Pin Signal Name 14 ALF 15 ERROR 16 - Acer Veriton L4618G | Acer Veriton L4610G Desktop Service Guide - Page 78
SATA_HDD/SATA_ODD About SATA_HDD1 Connector This motherboard features one SATA HDD1 connector supporting one drive, and you can connect a hard disk drive to the SATA_HDD1 port. About SATA_ODD1 Connector This motherboard features one SATA ODD1 connector supporting one drive, and you can connect - Acer Veriton L4618G | Acer Veriton L4610G Desktop Service Guide - Page 79
Connecting Case Components After you have installed the motherboard into a case, you can begin connecting the motherboard components. Refer to the following: 1 Connect the CPU cooling fan cable to CPU_FAN. 2 Connect the system cooling fan connectors to SYS_FAN. CPU_FAN/SYS_FAN: CPU/System - Acer Veriton L4618G | Acer Veriton L4610G Desktop Service Guide - Page 80
) The LED1 can be used to indicate LAN status. The LED keeps blinking when the LAN is in Active mode. System Status Active LED Blinking LED2 (HDD LED) The LED2 can be used to indicate System Status S0 S1/S3 S4/S5 LED On Blinking Off This concludes Chapter 2. The next chapter covers the BIOS. 74 - Acer Veriton L4618G | Acer Veriton L4610G Desktop Service Guide - Page 81
5 SUBASSY FRONT PANEL TRAY(ACER) 19 ODD 6 BRACKET SUPPORT ODD 20 SCREW_I_M4_8X10 7 SUBASSY COVER 10 SUBASSY BRACKET FRONT IO SEAWOLF 24 SCREW_I_M2_5X5 11 THERMAL MODULE SEAWOLF 25 RETRIEVER_SCR_6-32.PRT, #6-32*3.5 12 BRACKET_HDD 26 MINI HALF PCI E CARD (WIRELESS) 13 SUBASSY COVER TOP(ACER - Acer Veriton L4618G | Acer Veriton L4610G Desktop Service Guide - Page 82
76 - Acer Veriton L4618G | Acer Veriton L4610G Desktop Service Guide - Page 83
FRU List The FRU list will be updated later. 77