Acer Veriton N2110G Acer Veriton N2110G Desktop Service Guide
Acer Veriton N2110G Manual
 |
View all Acer Veriton N2110G manuals
Add to My Manuals
Save this manual to your list of manuals |
Acer Veriton N2110G manual content summary:
- Acer Veriton N2110G | Acer Veriton N2110G Desktop Service Guide - Page 1
Veriton N2110G ThinClient Computer Service Guide SG V1.00 PRINTED IN TAIWAN - Acer Veriton N2110G | Acer Veriton N2110G Desktop Service Guide - Page 2
Revision History Please refer to the table below for the updates made on this service guide. Date 07-31-2012 07-31-2012 Version First Draft V1.00 Chapter Updates ii - Acer Veriton N2110G | Acer Veriton N2110G Desktop Service Guide - Page 3
may be reproduced, transmitted, transcribed, stored in a retrieval system, or translated into any language or computer language, in any form or by any means, electronic, mechanical, magnetic, optical, chemical, manual or otherwise, without the prior written permission of Acer Incorporated. iii - Acer Veriton N2110G | Acer Veriton N2110G Desktop Service Guide - Page 4
in this guide is subject to change without notice. Acer Incorporated makes manual is sold or licensed "as is". Should the programs prove defective following their purchase, the buyer (and not Acer Incorporated, its distributor, or its dealer) assumes the entire cost of all necessary servicing - Acer Veriton N2110G | Acer Veriton N2110G Desktop Service Guide - Page 5
Conventions The following conventions are used in this manual: SCREEN MESSAGES NOTE Denotes actual messages that appear on screen. . Gives precautionary measures to avoid possible hardware or software problems. Reminds you to do specific actions relevant to the accomplishment of procedures. v - Acer Veriton N2110G | Acer Veriton N2110G Desktop Service Guide - Page 6
available on your regional web or channel. If, for whatever reason, a part number change is made, it will not be noted in the printed Service Guide. For ACER-AUTHORIZED SERVICE PROVIDERS, your Acer office may have a DIFFERENT part number code to those given in the FRU list of this printed - Acer Veriton N2110G | Acer Veriton N2110G Desktop Service Guide - Page 7
32 Reinstalling the Speaker Module 33 Reinstalling the Heatsink Assembly 34 Reinstalling the Side Panel 35 Removing the Computer Stand 36 Troubleshooting 37 Hardware Diagnostic Procedure 37 System Check Procedures 37 Power System Check 37 System External Inspection 37 System Internal - Acer Veriton N2110G | Acer Veriton N2110G Desktop Service Guide - Page 8
Beep Codes 46 PEI Beep Codes 46 DXE Beep Codes 46 Undetermined Problems 46 Clearing CMOS 47 BIOS Recovery 48 Creating the BIOS Crisis Recovery 52 Field Replaceable Unit (FRU) List 53 Exploded Diagram 54 Veriton N2110G FRU List 55 Technical Specifications 59 Processor 59 System Board Major - Acer Veriton N2110G | Acer Veriton N2110G Desktop Service Guide - Page 9
Veriton N2110G ThinClient computer. NOTE The items listed in this section are for reference only. The exact configuration of your TC depends on the model purchased. Refer to the FRU list chapter on page 53 for a detailed list of models supported /line-in jacks Veriton N2110G Service Guide 1 - Acer Veriton N2110G | Acer Veriton N2110G Desktop Service Guide - Page 10
Kg. microATX (µATX) 175mm*205mm, 6 Layers Environmental Requirements Aspect Operating temperature Operating humidity Description 0 to 35 °C (32 to 95 °F) 20% to 80% RH non-condensing 2 Veriton N2110G Service Guide - Acer Veriton N2110G | Acer Veriton N2110G Desktop Service Guide - Page 11
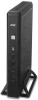
System Tour The pictures and tables in this section illustrate the physical outlook of the computer. Front View No. 1 2 3 ~ 4 5 6 Component Power button/indicator LAN LED indicator USB 2.0 ports Headphone/line-out jack Microphone/line-in jack Veriton N2110G Service Guide 3 - Acer Veriton N2110G | Acer Veriton N2110G Desktop Service Guide - Page 12
Rear Panel No. 1 2 3 ~ 4 5 6 7 8 Component USB 3.0 ports LAN connector HDMI ports USB 2.0 ports Headphone/line-out jack DC-in jack Microphone/line-in jack 4 Veriton N2110G Service Guide - Acer Veriton N2110G | Acer Veriton N2110G Desktop Service Guide - Page 13
the power management configuration • When changing the password or making other changes to the security setup computer. The Setup Main menu will be displayed showing the Setup's menu bar. Use the left and right arrow keys to move between selections on the menu bar. Veriton N2110G Service Guide - Acer Veriton N2110G | Acer Veriton N2110G Desktop Service Guide - Page 14
categories. • Info • Advanced • Boot • Security • Exit In the descriptive table following each of the menu screenshots, settings in boldface are the default and suggested settings. 6 Veriton N2110G Service Guide - Acer Veriton N2110G | Acer Veriton N2110G Desktop Service Guide - Page 15
memory installed on the system. Set the date following the weekday-month-day-year format. Set the system time following the hour-minute-second format. Veriton N2110G Service Guide 7 - Acer Veriton N2110G | Acer Veriton N2110G Desktop Service Guide - Page 16
: The RTC function will not work in S5 when EUP function is enabled. Option Enabled Disabled Enabled Disabled Enabled Disabled On Always Off Enabled Disabled 8 Veriton N2110G Service Guide - Acer Veriton N2110G | Acer Veriton N2110G Desktop Service Guide - Page 17
Boot Parameter Set Boot Priority 1st/2nd/3rd/4th/5th Boot Device Description Option Specifies the boot order from the available devices. EFI Hard Disk CD/DVD Removable Device Network Device Veriton N2110G Service Guide 9 - Acer Veriton N2110G | Acer Veriton N2110G Desktop Service Guide - Page 18
password 1. Use the up/down arrow keys to select password parameter (Change Administrator Password or Change User Password) menu then press Enter. 2. Enter the current password then press Enter. 3. Press Enter twice without entering anything in the password fields. 10 Veriton N2110G Service Guide - Acer Veriton N2110G | Acer Veriton N2110G Desktop Service Guide - Page 19
Exit Parameter Save Changes and Reset Discard Changes and Reset Load Optimized Defaults Description Reset the system after saving the changes of setup menu. Reset without saving. Restore/Load Defaults values for all the setup options. Veriton N2110G Service Guide 11 - Acer Veriton N2110G | Acer Veriton N2110G Desktop Service Guide - Page 20
12 Veriton N2110G Service Guide - Acer Veriton N2110G | Acer Veriton N2110G Desktop Service Guide - Page 21
procedures on how to disassemble the ThinClient computer for maintenance and troubleshooting. Disassembly Requirements To disassemble the computer, you need the following tools: • peripheral cables from the system. 5. Place the system unit on a flat, stable surface. Veriton N2110G Service Guide 13 - Acer Veriton N2110G | Acer Veriton N2110G Desktop Service Guide - Page 22
Disassembly Procedures Removing the Computer Stand 1. Place the computer on its side in a flat surface. 2. Remove the screw securing the computer stand to the chassis. 3. Pull the computer stand away from the chassis. 14 Veriton N2110G Service Guide - Acer Veriton N2110G | Acer Veriton N2110G Desktop Service Guide - Page 23
Removing the Side Panel 1. Remove the four screws securing the side panel to the chassis. 2. Gently pry the sides of the panel away from the chassis (1) then detach the side panel (2). Veriton N2110G Service Guide 15 - Acer Veriton N2110G | Acer Veriton N2110G Desktop Service Guide - Page 24
or with your bare hands. 1. Loosen the six screws that secure the heatsink assembly to the mainboard. 2. Lift the heatsink assembly off the mainboard. 16 Veriton N2110G Service Guide - Acer Veriton N2110G | Acer Veriton N2110G Desktop Service Guide - Page 25
Removing the Speaker Module 1. Disconnect the speaker cable from the mainboard. 2. Remove the two screws securing the speaker module to the chassis. 3. Lift the speaker module from the chassis. Veriton N2110G Service Guide 17 - Acer Veriton N2110G | Acer Veriton N2110G Desktop Service Guide - Page 26
reassembly, note which cable color corresponds to the main (white) and auxiliary (black) connectors. 2. Remove the screw securing the WLAN module to the mainboard. 18 Veriton N2110G Service Guide - Acer Veriton N2110G | Acer Veriton N2110G Desktop Service Guide - Page 27
3. Detach the WLAN module from the mainboard. Note: A circuit board >10 cm2 has been highlighted with the yellow rectangle as above image shows. Please follow local regulations for disposal of detached circuit boards. Veriton N2110G Service Guide 19 - Acer Veriton N2110G | Acer Veriton N2110G Desktop Service Guide - Page 28
board >10 cm2 has been highlighted with the yellow rectangle as above image shows. Please follow local regulations for disposal of detached circuit boards. 20 Veriton N2110G Service Guide - Acer Veriton N2110G | Acer Veriton N2110G Desktop Service Guide - Page 29
Removing the Mainboard 1. Detach the rear IO bracket from the chassis. 2. Remove the four screws that secure the mainboard to the chassis. Veriton N2110G Service Guide 21 - Acer Veriton N2110G | Acer Veriton N2110G Desktop Service Guide - Page 30
regulations for disposal of used batteries. Caution: Risk of explosion if battery is replaced by an incorrect type. Dispose of used batteries according to the instructions. 22 Veriton N2110G Service Guide - Acer Veriton N2110G | Acer Veriton N2110G Desktop Service Guide - Page 31
the yellow rectangle as above image shows. Please follow local regulations for disposal of detached circuit boards. 3. Repeat Step 2 to remove the remaining memory module. Veriton N2110G Service Guide 23 - Acer Veriton N2110G | Acer Veriton N2110G Desktop Service Guide - Page 32
Removing the WLAN Antenna 1. Detach the black antenna cable from the latches that secures it to the chassis. 2. Gently lift the antenna clip with black cable from its socket. 3. Remove the antenna clip with black cable from the chassis. 24 Veriton N2110G Service Guide - Acer Veriton N2110G | Acer Veriton N2110G Desktop Service Guide - Page 33
4. Gently lift the antenna clip with white cable from its socket. 5. Remove the antenna clip with white cable from the chassis. Veriton N2110G Service Guide 25 - Acer Veriton N2110G | Acer Veriton N2110G Desktop Service Guide - Page 34
Reassembly Procedures Reinstalling the WLAN Antenna 1. Insert the antenna clip with white cable into the chassis. 2. Place the antenna clip with white cable into its socket. 26 Veriton N2110G Service Guide - Acer Veriton N2110G | Acer Veriton N2110G Desktop Service Guide - Page 35
1. Insert the antenna clip with black cable into the chassis. 2. Place the antenna clip with black cable into its socket. 3. Secure the black antenna cable to the chassis by inserting it into the latches as shown. Veriton N2110G Service Guide 27 - Acer Veriton N2110G | Acer Veriton N2110G Desktop Service Guide - Page 36
. IMPORTANT When installing DIMM modules, populate the DIMM slots according to the table below: Size 2G 4G DIMM1 (XMM1) 2G DIMM2 (XMM2) 2G 2G 28 Veriton N2110G Service Guide - Acer Veriton N2110G | Acer Veriton N2110G Desktop Service Guide - Page 37
Reinstalling the Mainboard 1. Slide the RTC battery into its socket in the mainboard until it latches into place. 2. Slide the mainboard into the chassis. Veriton N2110G Service Guide 29 - Acer Veriton N2110G | Acer Veriton N2110G Desktop Service Guide - Page 38
3. Secure the mainboard to the chassis using four screws. 4. Align the latches of the rear IO bracket with the chassis (1), then gently push until the bracket latch into place (2). 30 Veriton N2110G Service Guide - Acer Veriton N2110G | Acer Veriton N2110G Desktop Service Guide - Page 39
Reinstalling the SSD Module 1. Insert the SSD module into the mainboard. 2. Secure the SSD module to the mainboard using two screws. Veriton N2110G Service Guide 31 - Acer Veriton N2110G | Acer Veriton N2110G Desktop Service Guide - Page 40
cables to the WLAN card. NOTE: For reference during machine reassembly, note which cable color corresponds to the main (white) and auxiliary (black) connectors. 32 Veriton N2110G Service Guide - Acer Veriton N2110G | Acer Veriton N2110G Desktop Service Guide - Page 41
Reinstalling the Speaker Module 1. Place the speaker module into the chassis. 2. Secure the speaker module to the chassis using two screws. 3. Connect the speaker cable to the mainboard. Veriton N2110G Service Guide 33 - Acer Veriton N2110G | Acer Veriton N2110G Desktop Service Guide - Page 42
or with your bare hands. 1. Place the heatsink assembly into the mainboard. 2. Tighten the six screws that secure the heatsink assembly to the mainboard. 34 Veriton N2110G Service Guide - Acer Veriton N2110G | Acer Veriton N2110G Desktop Service Guide - Page 43
Reinstalling the Side Panel 1. Place the side panel into the chassis then press on all sides until it latches into place. 2. Secure the side panel to the chassis using four screws. Veriton N2110G Service Guide 35 - Acer Veriton N2110G | Acer Veriton N2110G Desktop Service Guide - Page 44
Removing the Computer Stand 1. Push the computer stand into the chassis. 2. Secure the computer stand to the chassis using one screw. 36 Veriton N2110G Service Guide - Acer Veriton N2110G | Acer Veriton N2110G Desktop Service Guide - Page 45
and BIOS beep codes, as well as general troubleshooting instructions. Hardware Diagnostic Procedure 1. Obtain as much detail described in this chapter are only intended to test Acer products. Non-Acer products, prototype cards, or modified options can next page. Veriton N2110G Service Guide 37 - Acer Veriton N2110G | Acer Veriton N2110G Desktop Service Guide - Page 46
computer and all peripherals. 2. Unplug the power cord from the computer. 3. Unplug the network cable and all connected peripheral devices from the computer. 4. Place the computer that all components are Acer-qualified and supported. 10. Reinstall the problems that Veriton N2110G Service Guide - Acer Veriton N2110G | Acer Veriton N2110G Desktop Service Guide - Page 47
information Memory initialization. Configuring memory Memory initialization (other). Reserved for ASL (see ASL Status Codes section below) Memory Installed CPU post-memory initialization is started Veriton N2110G Service Guide 39 - Acer Veriton N2110G | Acer Veriton N2110G Desktop Service Guide - Page 48
AMI progress codes DXE Status Codes Checkpoint 0x60 0x61 0x62 0x63 0x64 Description DXE Core is started NVRAM initialization Installation of the South Bridge Runtime Services CPU DXE initialization is started CPU DXE initialization (CPU module specific) 40 Veriton N2110G Service Guide - Acer Veriton N2110G | Acer Veriton N2110G Desktop Service Guide - Page 49
DXE codes OEM DXE initialization codes Boot Device Selection (BDS) phase is started Driver connecting is started PCI Bus initialization is started PCI Bus Hot Plug Controller Initialization section below) IDE initialization is started IDE Reset IDE Detect IDE Enable Veriton N2110G Service Guide 41 - Acer Veriton N2110G | Acer Veriton N2110G Desktop Service Guide - Page 50
initialization is started SCSI Reset SCSI Detect SCSI Enable Setup Verifying Password Reserved for ASL (see ASL Status Codes section below) Start Interrupt occurred INT 3 breakpoint Overflow, INT 0 instruction Bound Range Exceeded Invalid Opcode (undefined opCode) Device Veriton N2110G Service Guide - Acer Veriton N2110G | Acer Veriton N2110G Desktop Service Guide - Page 51
OEM SEC initialization after microcode loading OEM pre-memory initialization codes OEM PEI post memory initialization codes OEM DXE initialization codes OEM BDS initialization codes Veriton N2110G Service Guide 43 - Acer Veriton N2110G | Acer Veriton N2110G Desktop Service Guide - Page 52
message, or • Emits a series of beep codes POST Error Messages problem with a device configuration. In some cases an error message may include recommendations for troubleshooting or require that you press the Enter key to display recommendations. Follow the instructions Veriton N2110G Service Guide - Acer Veriton N2110G | Acer Veriton N2110G Desktop Service Guide - Page 53
Legacy Option ROM No Console Output Devices are found No Console Input Devices are found Invalid password Error loading Boot Option (LoadImage returned error) Boot Option is failed (StartImage returned error) Flash update is failed Reset protocol is not available Veriton N2110G Service Guide 45 - Acer Veriton N2110G | Acer Veriton N2110G Desktop Service Guide - Page 54
4. Power on the computer. 5. Determine if the problem has been resolved. 6. If the problem does not recur, reconnect the removed devices one at a time until you find the failed FRU. If the problem persists, replace the mainboard. Do not replace a non-defective FRU. 46 Veriton N2110G Service Guide - Acer Veriton N2110G | Acer Veriton N2110G Desktop Service Guide - Page 55
procedure will clear the BIOS supervisor password as well. Use the CMOS1 jumper computer. 14. During POST, press Delete to access the Setup Utility. 15. Press F9 to load the system default values. 16. Press F10 to save the changes you made and close the Setup Utility. Veriton N2110G Service Guide - Acer Veriton N2110G | Acer Veriton N2110G Desktop Service Guide - Page 56
BIOS recovery media and rename it as "amiboot.rom". 3. Eject the BIOS recovery media from the computer. Performing a BIOS Recovery NOTE This procedure is only applicable when the boot block section is still valid reboot system. 10. The BIOS recovery is now completed. 48 Veriton N2110G Service Guide - Acer Veriton N2110G | Acer Veriton N2110G Desktop Service Guide - Page 57
Chapter 5 System Architecture This chapter shows the block diagram and board layout of the Veriton N2110G computer. Block Diagram The core subsystems of the Veriton N2110G computer are depicted in the following block diagram: Veriton N2110G Service Guide 49 - Acer Veriton N2110G | Acer Veriton N2110G Desktop Service Guide - Page 58
Description Front headphone jack Front USB 2.0 port Front USB 2.0 port LAN LED RTC Battery slot Power LED Power button SPI ROM SIO Hudson E1-SB T56N-APU 50 Veriton N2110G Service Guide - Acer Veriton N2110G | Acer Veriton N2110G Desktop Service Guide - Page 59
Mainboard Layout (bottom) This section shows the major mainboard components (bottom view). No. Label 1 XMM2 Description DIMM Slot 2 No. Label 2 XMM1 Description DIMM Slot 1 Veriton N2110G Service Guide 51 - Acer Veriton N2110G | Acer Veriton N2110G Desktop Service Guide - Page 60
. Jumper CMOS1 Type 3-pin Description Clear CMOS Setting (default) 1-2: Normal (default) 2-3: Clear CMOS Before clearing the CMOS, make sure to turn off the system. 52 Veriton N2110G Service Guide - Acer Veriton N2110G | Acer Veriton N2110G Desktop Service Guide - Page 61
this printed Service Guide. You MUST use the local FRU list provided by your regional Acer office to order FRU parts for service. NOTE Follow the local government regulations, or the rules set by your regional office on how to return or dispose of defective parts. Veriton N2110G Service Guide 53 - Acer Veriton N2110G | Acer Veriton N2110G Desktop Service Guide - Page 62
3 Screw M3 X 6L 4 Mainboard 5 Rear IO bracket assembly 6 Auxiliary antenna 7 Bottom cover assembly 8 Computer stand/base 9 Screw M3 X L10.0 10 SSD module 11 Speaker module 12 Main antenna 54 Part No. .5A324.100 56.02Z26.001 23.40A5R.001 25.90AD9.001 Veriton N2110G Service Guide - Acer Veriton N2110G | Acer Veriton N2110G Desktop Service Guide - Page 63
Veriton N2110G FRU List ACER_VN2110G_TC6(NO:91.3HH01.001G) Category ADAPTER Part Name ADAPTER 48W 12V/4A AU799IN Description ADP 48W 12V/4A AU799IN PA40NX-TC6 Acer Part No. 25.VFTD1.001 BOARDS WLAN 802.11ABGN + AUX BLACK 400MM ACON 50.VFTD1.003 50.VFTD1.004 Veriton N2110G Service Guide 55 - Acer Veriton N2110G | Acer Veriton N2110G Desktop Service Guide - Page 64
47.VFTD1.003 47.VFTD1.004 47.VFTD1.005 POINTING DEVICE 56 LOGITECH OPTICAL MOUSE USB M-U0027-O WITH ACER LOGO PRIMAX OPTICAL MOUSE USB MOFGUO WITH ACER LOGO MOUSE OPTICAL USB MU0027-O WITH ACER LO MOUSE OPTICAL MOUSE USB MOFGUO WITH ACER MS.11200.106 MS.11200.107 Veriton N2110G Service Guide - Acer Veriton N2110G | Acer Veriton N2110G Desktop Service Guide - Page 65
CAP L4 NI SCRW M3 CAP D7 6L NI H801 SCRW MACH M1.4 L8 NI SCRW BI M3 L10.0 BLACK ZN SPEAKER L04020A-176-2 TC6 Acer Part No. 86.NBY01.003 86.U5P01.001 86.VFTD1.001 86.VFTD1.002 23.VFTD1.001 Veriton N2110G Service Guide 57 - Acer Veriton N2110G | Acer Veriton N2110G Desktop Service Guide - Page 66
58 Veriton N2110G Service Guide - Acer Veriton N2110G | Acer Veriton N2110G Desktop Service Guide - Page 67
(MB) Thermal Design Power (W) Specification AMD Fusion G-T56N Dual 1.65 N/A 1 18 System Board AMD Hudson A55E FCH Integrated Radeon HD 6320 BCM57781B0KMLG QFN Realtek ALC 269Q-VC2-GR Audio Codec Integrated in the AMD Hudson A55E FCH Super I/O IT8728F/FX Appendix A Veriton N2110G Service Guide - Acer Veriton N2110G | Acer Veriton N2110G Desktop Service Guide - Page 68
Disk (SSD) Drive Item Controller Number of SSD slots Interface Supported capacities 8 GB 16 GB Specification Integrated in the AMD Hudson A55E FCH 1 SATA 3.0 • SANDISK - SDSA5AK-008G • APACER - APS1845008G-ACM • SANDISK - SDSA5AK-016G • APACER - APS1845016G-ACM 60 Veriton N2110G Service Guide - Acer Veriton N2110G | Acer Veriton N2110G Desktop Service Guide - Page 69
Network Interface Item LAN Controller Supports LAN Protocol LAN Connector Type SATA Interface Item SATA Controller Connectors Audio Interface Item Audio Controller Specification Realtek ALC 269Q-VC2-GR Audio Codec Four audio jacks (2 in front and 2 at the back) Veriton N2110G Service Guide 61 - Acer Veriton N2110G | Acer Veriton N2110G Desktop Service Guide - Page 70
62 Veriton N2110G Service Guide - Acer Veriton N2110G | Acer Veriton N2110G Desktop Service Guide - Page 71
FRU list components list 55 exploded view 54 part number updates 53 H hardware exploded view 54 FRU list 53 troubleshooting 37 HDD-ODD bracket remove 18, 32 headphone jack 3, 4 humidity 2 I I/O ports 2 J jack remove 23, 28 microphone jack rear 4 O operating system 1 OS support 1 Index 63 - Acer Veriton N2110G | Acer Veriton N2110G Desktop Service Guide - Page 72
views front view 3 system weight 2 T technical specifications 59 temperature operating 2 troubleshooting BIOS checkpoints 38 BIOS recovery 48 clearing CMOS 47 hardware diagnostic procedure 37 POST error indicators 44 U undetermined problems 46 USB ports front 3, 4 64 rear 4 V video controller 1 - Acer Veriton N2110G | Acer Veriton N2110G Desktop Service Guide - Page 73
65