Acer Veriton X4620G Acer Veriton X4620G Desktop Service Guide - Page 69
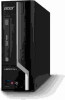
Remove the front I/O board., Remove the two screws that secure the I/O board to
 |
View all Acer Veriton X4620G manuals
Add to My Manuals
Save this manual to your list of manuals |
Page 69 highlights
4. Remove the front I/O board. a. Remove the two screws that secure the I/O board to the bracket. b. Pull the I/O board out of the bracket. Note:Circuit boards >10 cm² has been highlighted with the yellow rectangle as above image shows. Please detach the Circuit boards and follow local regulations for disposal. 61 Chapter 3