Acer X1226AH User Manual
Acer X1226AH Manual
 |
View all Acer X1226AH manuals
Add to My Manuals
Save this manual to your list of manuals |
Acer X1226AH manual content summary:
- Acer X1226AH | User Manual - Page 1
Acer Projector H6540BD/H6545BD/H6522BD/H6521BD/H6521ABD/X1326AWH/ X1226AH/X1126AH/X1623H/X168H/X138WH/X128H/X128HG/X128/ X118H/X118HG/ /D1P1718/ DWX1809/DWX1737/DNX1810/DNX1811 User's Guide Copyright © 2018. Acer Incorporated. All Rights Reserved. Acer Projector User's Guide Original Issue: 03/2018 - Acer X1226AH | User Manual - Page 2
in new editions of this manual or supplementary documents and recorded on the label affixed to your projector. All correspondence concerning your unit should Acer Incorporated. Model number Serial number Date of purchase Place of purchase Acer and the Acer logo are registered trademarks of Acer - Acer X1226AH | User Manual - Page 3
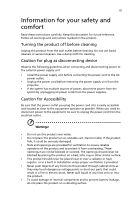
document for future reference. Follow all warnings and instructions marked on the product. Turning the product off power outlet. • Unplug the power cord before removing the power supply unit from the projector. • If the system has multiple sources of power, disconnect power from the system by - Acer X1226AH | User Manual - Page 4
following requirements: detachable type, UL listed/CSA certified, VDE approved or its equivalent, 4.5 meters (15 feet) maximum length. Product servicing Do not attempt to service this product yourself, as opening or removing covers may expose you to dangerous voltage points or other risks. Refer all - Acer X1226AH | User Manual - Page 5
performance, indicating a need for service • the product does not operate normally after following the operating instructions Note: Adjust only those 50cm clearance from walls and free flow of air around the projector is necessary. • Locations where temperatures may become excessively high, such - Acer X1226AH | User Manual - Page 6
down, and follow all changing instructions. • Reset the "Lamp service personnel. • Do not stand the projector on end vertically. It may cause the projector to fall over, causing injury or damage. • This product is capable of displaying inverted images for ceiling mount installation. Only use acer - Acer X1226AH | User Manual - Page 7
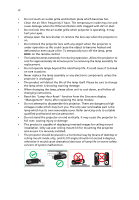
the volume if you can't hear people speaking near you. Disposal instructions Do not throw this electronic device into the trash when discarding. regulations, visit http://www.acer-group.com/public/Sustainability/sustainability01.htm Mercury advisory For projectors or electronic products containing - Acer X1226AH | User Manual - Page 8
maintenance as recommended in this user's guide to maximize the life of your unit. Warning: • Do not look into the projector's lens when the lamp is on. the lamp, please allow unit to cool down, and follow all changing instructions. • This product will detect the life of the lamp itself. Please be - Acer X1226AH | User Manual - Page 9
Link) Control 11 Getting Started 13 Connecting the Projector 13 Turning the Projector On/Off 15 Turning on the Projector 15 Turning the projector off 16 Adjusting the Projected Image 17 Adjusting 36 Management 39 Audio 41 3D 41 Language 42 Appendices 43 Troubleshooting 43 - Acer X1226AH | User Manual - Page 10
LED & Alarm Definition Listing 47 Replacing the Lamp 48 Ceiling Mount Installation 49 Specifications 52 Compatibility modes 65 Regulations and safety notices 70 - Acer X1226AH | User Manual - Page 11
projector. Outstanding features include: • DLP® technology • Enables projecting 3D content via DLP Link Technology: Blue-Ray 3D supported • Acer connection supporting HDCP • Smart detection delivers quick, intelligent source detection • Multi-language onscreen display (OSD) menus • Manual focus/zoom - Acer X1226AH | User Manual - Page 12
below. Check to make sure your unit is complete. Contact your dealer immediately if any thing is missing. English Projector Power cord HDMI cable (option) VGA cable (option) Quick Start Guide Panduan ringkas Ghid de pornire rapidă Stručná příručka Priročnik za hiter začetek Hurtig start - Acer X1226AH | User Manual - Page 13
English 3 Note: When projecting a 4K2K/60Hz signal, use an HDMI Premium certified 4K2K/60Hz cable supporting 18Gbps bandwidth. Trust the cable with the label - Acer X1226AH | User Manual - Page 14
English 4 Projector Overview Projector Outlook Front / upper side 12 34 56 76 7 8 8 11 # Description 1 Lamp cover 2 Air outlet 3 Control panel 4 Power button 5 Zoom ring 6 Air inlet 9 9 10 10 # Description 7 - Acer X1226AH | User Manual - Page 15
8 9 10 English 34 58 9 3 2 4 5 11 5 6 8 9 10 12 # Description 1 Power socket 2 HDMI (MHL) connector 3 HDMI connector 4 DC 5V output (service) 5 PC analog signal/HDTV/component video input connector 6 RS232 connector 7 Kensington™ lock port # Description 8 Composite video input connector - Acer X1226AH | User Manual - Page 16
out connector 12 Kensington™ lock port 13 USB connector (device charge and USB displays and support mouse page up/ down and firmware upgrade functions) 14 5V DC output connector (device charge and support mouse page up/down and firmware upgrade functions) Note: Functions vary depending on model - Acer X1226AH | User Manual - Page 17
previous operation. Changes the active source. Confirm your selection of items. 9 KEYSTONE Adjusts the image to compensate for distortion caused by tilting the projector. 10 MENU MENU Press "MENU" to launch the Onscreen display (OSD) menu or exit the OSD menu. Note: Functions vary depending on - Acer X1226AH | User Manual - Page 18
MC.JMV11.006 19 20 21 22 23 24 25 Model No:J-25050 MC.JMV11.009 # Icon Function Description 1 Infrared transmitter Sends signals to the projector. 2 POWER Refer to the "Turning the - Acer X1226AH | User Manual - Page 19
KEYSTONE Adjusts the image to compensate for distortion caused by tilting the projector. 11 BACK STOP Returns to the previous operation. Press to stop "VGA" to change source to the VGA connector. This 12 VGA connector supports analog RGB, YPbPr (480p/576p/720p/ 1080i), YCbCr (480i/576i) and - Acer X1226AH | User Manual - Page 20
display in. 23 VIDEO To change source to COMPOSITE VIDEO. 24 ZOOM OUT Zooms the projector display out. 25 LAN/WiFi No function. 26 Backlight Remote backlight. 27 Laser pointer Aim the remote at the viewing screen. 28 Laser button Aim - Acer X1226AH | User Manual - Page 21
11 MHL (Mobile High-Definition Link) Control English 1 1 1 2 2 2 4 34 34 3 7 57 7 5 5 8 68 68 6 9 9 9 10 10 10 # Icon Function Description 1 SOURCE Press the "SOURCE" button to toggle between Navigation, Numeric and Multi-Media mode. • Press "MODE" button for one - Acer X1226AH | User Manual - Page 22
English 12 # Icon Function Description • Press "BACK" to go back one menu step. 8 Back/Exit • To exit the file. (only for Navigation mode) Stop Discontinues playback. (only for Multi-Media mode) 9 PgUp/PgDn Use the button to select the next or previous page. (only for Navigation mode) - Acer X1226AH | User Manual - Page 23
English 13 Getting Started Connecting the Projector 2 2 LR HDTV adapter 3 3 10 9 10 3 4 5 7 8 Smart devices 5 RCA 6 Display Video output 2 Speakers 11 Screen 12 13 14 3D IR emitter 1 - Acer X1226AH | User Manual - Page 24
sure the timing of the display mode is compatible with the projector. Note 2: Functions vary depending on model definition Note 3: USB smartphone maker) to enable the MHL function. Note 5: USB DC 5V out connector support 5V power output for power bank charging only when MHL source is not detected. - Acer X1226AH | User Manual - Page 25
1 Ensure that the power cord and signal cable are securely connected. The Power indicator LED will flash red. 2 Turn on the projector by pressing "Power" button on the control panel or remote control, and the Power indicator LED will turn blue. 3 Turn on your source (computer, notebook, - Acer X1226AH | User Manual - Page 26
can press the power button to turn the projector immediately back on anytime during the 2minute shutdown process. (only supported under "Instant Resume" mode) 4 Once your local reseller or service center. Note 2: Functions vary depending on model definition. Attention! The projector will enter a two - Acer X1226AH | User Manual - Page 27
English 17 Adjusting the Projected Image Adjusting the Height of Projected Image The projector is equipped with elevator feet for adjusting the height of image. To raise/lower the image: Use Tilt adjusting wheel to fine-tune the display angle. Tilt adjusting wheel - Acer X1226AH | User Manual - Page 28
the zoom ring. • SVGA/XGA series (X128H/X128/X118H/X118AH/X118/X1126AH/X1226AH/ D616D/D616/D606D/D606B/D606/D506AD/D516AD/EV-X65H/EV-X65/ EV- /DSV1725/DSV1726/DSV1727/DSV1844/DNX1843) To obtain an image size of 60" set the projector at a distance 2.4 m and 2.6 m from the screen. A 60" Desired - Acer X1226AH | User Manual - Page 29
/ V36W/V26AW/AW319/AW600A/DX412/DX425A/BS-312/BS-325A/KW316/ KW320A/DWX1722/DWX1842) To obtain an image size of 60" set the projector at a distance 2.0 m and 2.2 m from the screen. A 60" Desired image size D Height: 91 cm from base to top of image 2.2 m C 2.0 m B Desired Distance Desired Image - Acer X1226AH | User Manual - Page 30
/DX612/BS-512/ KU316/DWU1721/H6521BD/H6521ABD/E155F/HE-802K/GM512/VH-412/ D1P1720) To obtain an image size of 60" set the projector at a distance 1.9 m and 2.1 m from the screen. A 60" Desired image size D Height: 89 cm from base to top of image 2.1 m C 1.9 m B Desired Distance Desired Image - Acer X1226AH | User Manual - Page 31
V50U/AU540/DX620/BS-520/ KU330/DWU1729/H6540BD/E156D/HE-806J/GM532/VH-432/D1P1719) To obtain an image size of 60" set the projector at a distance 2.0 m and 2.7 m from the screen. English A 60" Desired image size D Height: 89 cm from base to top of image 2.7 m C 2.0 m B Desired Distance Desired - Acer X1226AH | User Manual - Page 32
22 • WUXGA series (HV532/D1P1718) To obtain an image size of 60" set the projector at a distance 1.6 m and 2.1 m from the screen. English A 60" Desired image size D Height: 89 cm from base to top of image 2.1 m C 1.6 m B Desired Distance Desired Image Size - Acer X1226AH | User Manual - Page 33
805L/HT-810/ H6512BD+/HV533/V62B/TH-432/GM534/V7500+/VH-434/D1P1839/D1P1718/ D1P1805) To obtain an image size of 60" set the projector at a distance 1.6 m and 2.1 m from the screen. A 60" Desired image size D Height: 87 cm from base to top of image 2.1 m C 1.6 m B Desired Distance Desired Image - Acer X1226AH | User Manual - Page 34
24 • 1080p series (H6522BD/E156F/HE-803K/GM513/VH-413/H6522ABD/ D1P1845) To obtain an image size of 60" set the projector at a distance 2.0 m and 2.2 m from the screen. English A 60" Desired image size D Height: 87 cm from base to top of image 2.2 m C 2.0 m B Desired Distance Desired Image - Acer X1226AH | User Manual - Page 35
/SE212L/SE212/DS-110T/DS-110/DS-112T/DS-112/ S1286GH/DNX1712/DNX1713/DNX1810/DNX1811) To obtain an image size of 60" set the projector at a distance 0.8 m from the screen. A 60" Desired image size C Height: 105 cm from base to top of image 0.8 m B Desired Distance Desired Image Size Diagonal - Acer X1226AH | User Manual - Page 36
SE410L/SE410/SE412L/SE412/DS-310T/ DS-310/DS-312T/DS-312/DWX1711/DWX1734/DWX1809/DWX1737) To obtain an image size of 60" set the projector at a distance 0.7 m from the screen. A 60" Desired image size C Height: 91 cm from base to top of image 0.7 m B Desired Distance Desired Image Size Diagonal - Acer X1226AH | User Manual - Page 37
button on the remote control to launch the OSD for projector installation and maintenance. 3 The background pattern acts as a guide to adjusting the calibration and alignment settings, such as exit the menu and return to the Acer welcome screen. Note: Functions vary depending on model definition. - Acer X1226AH | User Manual - Page 38
will return to the main menu. • To exit OSD, press "BACK" on the remote control or control panel. The OSD menu will close and the projector will automatically save the new settings. Main menu Setting Sub menu Note 1: Some of the following OSD settings may not be available. Please refer to - Acer X1226AH | User Manual - Page 39
29 Color English LumiSense BluelightShield Display Mode Acer LumiSense technology can intelligently optimize the projection images to the most comfortable visual lumens automatically based on display content. The feature greatly enhances dark detail - Acer X1226AH | User Manual - Page 40
English 30 Color Profile Wall color Brightness Contrast Saturation Tint Color Temperature Gamma User can choose all the display mode setting as reference setting of the current "User 1", "User 2" or "User 3" except itself. When User choose the display mode "User 1", "User 2" and "User 3", then OSD - Acer X1226AH | User Manual - Page 41
Day" and "ISF Night" will not be shown in display mode if projector equipped with ISF function has not been calibrated by an ISF certified technician. and guaranteed by ISF certified calibrator, and thereby Acer is not responsible for the calibration service. Low Input Lag Use this function to make - Acer X1226AH | User Manual - Page 42
1", "User 2" or "User 3", then OSD will showup the "color profile" and "rename" 2. Timely saved when user change the name. 3. Only English is supported. When user changes any kind of system languages, show the English characters which user renamed. Note 1: "Saturation" and "Tint" functions are not - Acer X1226AH | User Manual - Page 43
a translucent screen. Rear-Ceiling: When you select this function, the projector reverses and inverts the image at same time. You can project from adjusts vertical image. Manual Keystone Adjust image distortion caused by tilting projection. The Manual Keystone function is unavailable - Acer X1226AH | User Manual - Page 44
image distortion vertically and makes a squarer image. Manually adjusts the shape and size of an image that adjustments. Tracking Synchronizes the signal timing of the projector with the graphics card. If you experience an unstable "Tracking" functions are not supported under HDMI or Video mode. - Acer X1226AH | User Manual - Page 45
35 Note 2: "HDMI Color Range" and "HDMI Scan Info" functions are only supported under HDMI mode. Note 3: Functions vary depending on model definition. English - Acer X1226AH | User Manual - Page 46
Acer projector. • User: Use memorize picture from "Screen Capture" function. Use this function to customize the startup screen. To capture the image that you want to use as the startup screen, follow the instructions input signal or when you restart the projector. Manual by source menu, Auto by Smart - Acer X1226AH | User Manual - Page 47
projector the projector. Please on the projector without password is up, the projector will prompt the projector will request user to enter password when switch on the projector the projector will projector turns on.", the user has to enter the password every time when the projector projector anytime no matter - Acer X1226AH | User Manual - Page 48
Set to "On" to enable wake-on-LAN function to power on projector via LAN under standby status. It is required to download WOL ( for this function. DHCP • On: Projector will obtain an IP address automatically from your network. • Off: Assign an IP address manually. 1. Only available when DHCP - Acer X1226AH | User Manual - Page 49
the allocated time. (default is 15 minutes) Choose the OSD menu display time. (Default is 15 seconds). Select "Manual" to turn off main menu/one direct-key menu manually by user. AC Power On Choose "On" to power on projector while AC power plug in. HDMI Power On Choose "On" to power on - Acer X1226AH | User Manual - Page 50
40 Information Display the projector information for Model Name, Input Source, Signal Type, Display Mode, Serial No., Software Version and QR code on the screen. Scan QR code linking to Acer projector portal via mobile. English Note: Functions vary depending on model definition. - Acer X1226AH | User Manual - Page 51
Off Volume Select this function to adjust the notification volume when turning the projector on/off. Note: Functions vary depending on model definition. 3D 3D 3D players, such as Stereoscopic Player and DDD TriDef Media Player can support 3D format files. You can download these three players on - Acer X1226AH | User Manual - Page 52
has reminder screen if 3D still enable when power on projector. Please adjust setting depended on your purpose. Note 5: , Aspect Ratio / HDMI Scan Info will be gray out, also HIDE will be not supported. Language Language Choose the multilingual OSD menu. Use the key to select your preferred menu - Acer X1226AH | User Manual - Page 53
43 Appendices English Troubleshooting If you experience a problem with your Acer projector, refer to the following troubleshooting guide. If the problem persists, please contact your local reseller or service center. Image Problems and Solutions # Problem Solution 1 No image appears • - Acer X1226AH | User Manual - Page 54
Each has a different way to be reactivated. Refer to your computer's manual for detailed information. • If you are using an Apple® Mac® OS If you play a 4:3 format DVD title, please change the format to 4:3 in the projector OSD. • If the image is still stretched, you will also need to adjust the - Acer X1226AH | User Manual - Page 55
-> Aspect Ratio" and try different settings or press "RATIO" on the remote control to adjust directly. 10 Image has slanted • If possible, reposition the projector so that it is sides centered on the screen. • Press the "Keystone / " button on the remote control until the sides are vertical. 11 - Acer X1226AH | User Manual - Page 56
the lamp - the lamp is about to reach its maximum lifetime. Prepare to replace it soon. Problems with the Projector # Condition Solution 1 The projector stops responding • If possible, turn off the projector, then to all controls unplug the power cord and wait at least 30 seconds before - Acer X1226AH | User Manual - Page 57
47 LED & Alarm Definition Listing LED Messages English Message Input power plug Standby Power button ON Lamp retry Lamp_LED Red Flash ON to OFF 100ms ---- Power off (Cooling state) -- Power button OFF -- (cooling completed; standby mode) Error (thermal failure) -- Error (fan lock) -- - Acer X1226AH | User Manual - Page 58
of its useful life in full power operation. Replacement suggested!" When you see this message, change the lamp as soon as possible. Make sure the projector has been cooling down for at least 30 minutes before changing the lamp. Warning: The lamp compartment is hot! Allow it to cool down before - Acer X1226AH | User Manual - Page 59
English 49 Ceiling Mount Installation If you wish to install the projector using a ceiling mount, please refer to the steps below: 1 Drill four holes into a solid, structural ceiling member, and secure the ceiling mount base to the - Acer X1226AH | User Manual - Page 60
2 and Type 3: Alternatively, for the larger size, use the sliding extensions for more supports. Type 1: Type 2: Type 3: Note: It is recommended that you keep a reasonable space between the bracket and the projector to allow for proper heat distribution. 4 Connect the main body connector to the - Acer X1226AH | User Manual - Page 61
51 5 Adjust the angle and positioning as necessary. 360° English Screw Type B Diameter (mm) Length (mm) 4 25 Large V Washer Type Small V 55.00mm 55.00mm SCREW SPEC. M4 x 25 mm 113.68mm 100.18mm 48.19mm 82.30mm 169.80mm 254.10mm 255.25mm 107.00mm 8.00mm 313.50mm - Acer X1226AH | User Manual - Page 62
without notice. For final specs, please refer to Acer's published marketing specifications. Projection system Resolution Computer DSV1844 series: 800x600 SVGA resolution • X128H/X128/S1286HN/S1286H/S1288HN/S1288H/ X1226AH/D616D/D616/T411DT/T411D/T413DT/ T413D/D516AD/EV-X65H/EV-X65/XS-X31HG - Acer X1226AH | User Manual - Page 63
/ DWX1734/DNX1712/DNX1713/DWX1809/DWX1737/ DNX1810/DNX1811 series: 1.0X • H6522BD/H6521BD/H6522ABD/H6521ABD/X168H/ X138WH/X128H/X128/X118H/X118AH/X118/ X1126AH/X1326AWH/X1226AH/E156F/E155F/ D666D/D626D/D616D/D616/D606D/D606B/D606/ D506AD/D526AD/D516AD/HE-803K/HE-802K/ EV-WU65H/EV-W65H/EV-X65H/EV-X65 - Acer X1226AH | User Manual - Page 64
English 54 Throw ratio • X128H/X128/X118H/X118AH/X118/X1126AH/ X1226AH/D616D/D616/D606D/D606B/D606/ D506AD/D516AD/EV-X65H/EV-X65/EV-S65H/ EV-S65A/EV-S65/EV-S57AH/EV-X57AH/V36X/V36XC/ V36S/V36SB/ - Acer X1226AH | User Manual - Page 65
lens 55 • X128H/X128/X118H/X118AH/X118/X1126AH/ X1226AH/D616D/D616/D606D/D606B/D606/ D506AD/D516AD/EV-X65H /HE-806J/ GM532/VH-432/D1P1719 series: F = 2.37 ~ 2.78, f = 16.91mm ~ 21.60mm, Manual Zoom & Focus • H6522BD/H6521BD/X168H/E156F/E155F/D666D/ HE-803K/HE-802K/EV-WU65H/GM513/GM512/V36U/ VH-413/ - Acer X1226AH | User Manual - Page 66
56 English Projection screen size (diagonal) • X128H/X128/X118H/X118AH/X118/X1126AH/ X1226AH/D616D/D616/D606D/D606B/D606/ D506AD/D516AD/EV-X65H/EV-X65/EV-S65H/ EV-S65A/EV-S65/EV-S57AH/EV-X57AH/V36X/V36XC/ V36S/V36SB/ - Acer X1226AH | User Manual - Page 67
Projection distance Horizontal scan rate Vertical refresh scan rate 57 • X128H/X128/X118H/X118AH/X118/X1126AH/ X1226AH/D616D/D616/D606D/D606B/D606/ D506AD/D516AD/EV-X65H/EV-X65/EV-S65H/ EV-S65A/EV-S65/EV-S57AH/EV-X57AH/V36X/V36XC/ V36S/V36SB/ - Acer X1226AH | User Manual - Page 68
/D1P1720/DWU1729/ DWU1721/D1P1718/D1P1718/DWX1809/DWX1737/ DNX1810/DNX1811/D1P1805 series: 250 W user-replaceable lamp • S1386WHN/S1386WH/S1286HN/S1286H/X1126AH/ X1326AWH/X1226AH/T421DT/T421D/T411DT/ T411D/D506AD/D526AD/D516AD/XS-W31HG/ XS-W31H/XS-X31HG/XS-X31H/EV-S57AH/ EV-W57AH/EV-X57AH/F1386WHN - Acer X1226AH | User Manual - Page 69
Audio 59 • H6545BD/H6522BD/H6521BD/X168H/X138WH/ X128H/X128/X118H/X118AH/X118/X1126AH/ X1326AWH/X1226AH/E146F/E156F/E155F/D666D/ D626D/D616D/D616/D606D/D606B/D606/D506AD/ D526AD/D516AD/HE-805L/HE-803K/HE-802K/ EV-WU65H/EV-W65H/EV-X65H/ - Acer X1226AH | User Manual - Page 70
/D1P1719/D1P1839/DWU1729/ DWX1711/DWX1734/DNX1712/DNX1713/D1P1805/ D1P1718/DWX1809/DWX1737/DNX1810/DNX1811 series: 3.1 Kg (6.83 lbs) • H6522BD/H6521BD/X168H/X1126AH/X1326AWH/ X1226AH/E156F/E155F/D666D/D506AD/D526AD/ D516AD/HE-803K/HE-802K/EV-WU65H/EV-S57AH/ EV-W57AH/EV-X57AH/GM513/GM512/V36U/V26AS - Acer X1226AH | User Manual - Page 71
61 English Dimensions (W x D x H) (with feet) Digital zoom Power supply • X138WH/X128H/X128/X118H/X118AH/X118/ X1126AH/X1326AWH/X1226AH/D626D/D616D/ D616/D606D/D606B/D606/D506AD/D526AD/ D516AD/EV-W65H/EV-X65H/EV-X65/EV-S65H/ EV-S65A/EV-S65/EV-S57AH/EV-W57AH/ - Acer X1226AH | User Manual - Page 72
/HE-805L/H6512BD+/V62B/GM534/ VH-434/D1P1839 Series: Normal mode: 265W ± 10% @ 110VAC ECO mode: 205W ± 10% @ 110VAC Standby mode < 0.5W • X1126AH/X1326AWH/X1226AH/D506AD/D526AD/ D516AD/EV-S57AH/EV-W57AH/EV-X57AH/V26AS/ V26AW/V26AX/AS600A/AW600A/AX600A/DX125A/ DX425A/DX225A/BS-025A/BS-325A/BS-125A - Acer X1226AH | User Manual - Page 73
's guide (Projector) (CD-ROM) x1 • User's guide (Media/Wireless function) (CD-ROM) x1 (option) • Quick start guide (Projector) x1 • Quick start guide (Media /DWX1711/DNX1712/DWX1809/DNX1810 X1126AH/S1386WH/S1286H/S1388WH/X1326AWH/S1288H/X1226AH/ D506AD/T421D/T411D/T423D/D526AD/T413D/D516AD/EV-S57AH/ - Acer X1226AH | User Manual - Page 74
/F1388WHN/ F1288HN/SE410L/SE210L/SE412L/SE212L/DS-310T/ DS-110T/DS-312T/DS-112T/DWX1711/DNX1712/DWX1809/DNX1810 X1126AH/S1386WH/S1286H/S1388WH/X1326AWH/S1288H/X1226AH/ D506AD/T421D/T411D/T423D/D526AD/T413D/D516AD/EV-S57AH/ XS-W31H/XS-X31H/XS-W33H/EV-W57AH/XS-X33H/EV-X57AH/V26AS/ F1386WH/F1286H - Acer X1226AH | User Manual - Page 75
65 English Compatibility modes A. VGA Analog 1 VGA Analog - PC Signal Modes VGA SVGA XGA SXGA QuadVGA SXGA+ UXGA PowerBook G4 PowerBook G4 PowerBook G4 PowerBook G4 PowerBook G4 PowerBook G4 i Mac DV (G3) Resolution 640x480 640x480 640x480 640x480 640x480 800x600 800x600 800x600 800x600 - Acer X1226AH | User Manual - Page 76
English 66 2 VGA Analog - Extended Wide timing Modes WXGA WSXGA+ WUXGA Resolution 1280x768 1280x768 1280x768 1280x720 1280x720 1280x800 1280x800 1920x1200 1440x900 1680x1050 1920x1080 (1080P) 1366x768 1920x1200-RB V.Frequency [Hz] 60 75 85 60 120 60 119.909 60 60 60 60 60 59.94 H.Frequency [ - Acer X1226AH | User Manual - Page 77
67 English 640x480 120 61.9 SVGA 800x600 56 35.1 800x600 60 37.9 800x600 72 48.1 800x600 75 46.9 800x600 85 53.7 800x600 120 77.4 XGA 1024x768 60 48.4 1024x768 70 56.5 1024x768 75 60.0 1024x768 85 68.7 1024x768 120 99.0 SXGA 1152x864 70 63.8 1152x864 75 - Acer X1226AH | User Manual - Page 78
English 68 WSXGA+ WUXGA 1920x1200 1680x1050 1920x1080 (1080P) 1366x768 1920x1200-RB 60 60 60 60 59.94 74 65.3 67.5 47.7 74.04 3 HDMI - Video Signal Modes 480i 576i 480p 576p 720p 720p 1080i 1080i 1080p 1080p 1080p 1080p 4K Resolution 720x480(1440x480) 720x576(1440x576) 720x480 720x576 - Acer X1226AH | User Manual - Page 79
.8 15k-50 kHz 24-60 Hz Digital: 75 MHz Note 1: Functions vary depending on model definition. Note 2: MHL 1080p 3D 24p frame packing is not supported. - Acer X1226AH | User Manual - Page 80
installation. This device generates, uses, and can radiate radio frequency energy and, if not installed and used in accordance with the instructions, may cause harmful interference to radio communications. However, there is no guarantee that interference will not occur in a particular installation - Acer X1226AH | User Manual - Page 81
including interference that may cause undesired operation of the device. b Operation in 2.4 GHz band To prevent radio interference to the licensed service, this device is intended to be operated indoors and installation outdoors is subject to licensing. List of applicable countries This device must - Acer X1226AH | User Manual - Page 82
: DLP Projector Acer D1P1719/D1P1839/D1P1845/D1P1720/DWX1842/DNX1843/DSV1844/DWU1729/ DWU1721/DWX1722/DNX1723/DNX1724/DSV1725/DSV1726/DSV1727/DWX1711/ DWX1734/DNX1712/DNX1713/D1P1805/D1P1718/DWX1809/DWX1737/DNX1810/ DNX1811 Marketing name: H6540BD/H6545BD/H6522BD/H6521BD/H6521ABD/X1326AWH/X1226AH - Acer X1226AH | User Manual - Page 83
A. Tel: 254-298-4000 Fax: 254-298-4147 www.acer.com Federal Communications Commission Declaration of Conformity This device complies with this declaration: Product: DLP Projector Model Number: D1P1719/D1P1839 /H6545BD/H6522BD/H6521BD/H6521ABD/ X1326AWH/X1226AH/X1126AH/X1623H/X168H/ X138WH/X128H/
-
 1
1 -
 2
2 -
 3
3 -
 4
4 -
 5
5 -
 6
6 -
 7
7 -
8
-
9
-
10
-
11
-
12
-
13
-
14
-
15
-
16
-
17
-
18
-
19
-
20
-
21
-
22
-
23
-
24
-
25
-
26
-
27
-
28
-
29
-
30
-
31
-
32
-
33
-
34
-
35
-
36
-
37
-
38
-
39
-
40
-
41
-
42
-
43
-
44
-
45
-
46
-
47
-
48
-
49
-
50
-
51
-
52
-
53
-
54
-
55
-
56
-
57
-
58
-
59
-
60
-
61
-
62
-
63
-
64
-
65
-
66
-
67
-
68
-
69
-
70
-
71
-
72
-
73
-
74
-
75
-
76
-
77
-
78
-
79
-
80
-
81
-
82
-
83
 |
 |

Copyright © 2018. Acer Incorporated.
All Rights Reserved.
Acer Projector User's Guide
Original Issue: 03/2018
Acer Projector
H6540BD/H6545BD/H6522BD/H6521BD/H6521ABD/X1326AWH/
X1226AH/X1126AH/X1623H/X168H/X138WH/X128H/X128HG/X128/
X118H/X118HG/X118AH/X118/S1386WHN/S1386WH/S1286HN/S1286H/
V6520/HV532/S1388WHN/S1388WH/S1288HN/S1288H/
E156D/E146F/E156F/E155F/D526AD/D516AD/D506AD/D860D/
D666D/D626D/D616D/D616/D606D/D606B/D606/T421DT/T421D/T411DT/
T411D/V151/T423DT/T423D/T413DT/T413D/
HE-806J/HE-805L/HE-803K/HE-802K/EV-W57AH/EV-X57AH/EV-S57AH/
EV-WU80H/EV-WU65H/EV-W65H/EV-X65H/EV-X65/EV-S65H/EV-S65A/
EV-S65/
XS-W31HG/XS-W31H/XS-X31HG/XS-X31H/HT-810/XS-W33HG/XS-W33H/
XS-X33HG/XS-X33H/GM532/H6512BD+/GM513/GM512/V26AW/V26AX/
V26AS/
V50U/V36U/V36W/V36X/V36XC/V36S/V36SB/V16S/F1386WHN/F1386WH/
F1286HN/F1286H/HV533/F1388WHN/F1388WH/F1288HN/F1288H/
VH-432/V62B/VH-413/VH-412/AW600A/AX600A/AS600A/AU540/AU319/
AW319/AX319/AX319D/AS319/AS319E/AS309/
SE410L/SE410/SE210L/SE210/TH-432/V7500+/SE412L/SE412/SE212L/SE212/
DX425A/DX225A/DX125A/GM534/H6522ABD/VH-434/
DX620/DX612/DX412/DX212/DX212G/DX112/DX112C/DX112G/DS-310T/
DS-310/DS-110T/DS-110/G550/DS-312T/DS-312/DS-112T/DS-112/
BS-325A/BS-125A/BS-025A/BS-520/BS-512/BS-312/BS-112/BS-112E/BS-012/
BS-012K/BS-12E/
S1286GH/KW320A/KX320A/KS320A/KU330/KU316/KW316/KX316/
KX316B/
KS316/KS316A/KS316B/X1223HG/X1286G/X1123HG/X1186G
D1P1719/D1P1839/D1P1845/D1P1720/DWX1842/DNX1843/DSV1844/
DWU1729/DWU1721/DWX1722/DNX1723/DNX1724/DSV1725/DSV1726/
DSV1727/DWX1711/DWX1734/DNX1712/DNX1713/D1P1805/D1P1718/
DWX1809/DWX1737/DNX1810/DNX1811
User's Guide