Acer X1260 User Manual
Acer X1260 Manual
 |
View all Acer X1260 manuals
Add to My Manuals
Save this manual to your list of manuals |
Acer X1260 manual content summary:
- Acer X1260 | User Manual - Page 1
Acer Projector X1160/Z/ZC/P/PZ/PZC, X1260/Z/ZC/P/PZ/PZC/K/KC Series User's Guide - Acer X1260 | User Manual - Page 2
Rights Reserved. Acer Projector X1160/Z/ZC/P/PZ/PZC, X1260/Z/ZC/P/PZ/PZC/K/KC Series User's Guide Original Issue: manual or supplementary documents and publications. This company makes no representations or warranties, either expressed or implied, with respect to the contents hereof and specifically - Acer X1260 | User Manual - Page 3
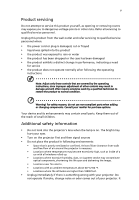
document for future reference. Follow all warnings and instructions marked on the product. Turning the product off power outlet. • Unplug the power cord before removing the power supply unit from the projector. • If the system has multiple sources of power, disconnect power from the system by - Acer X1260 | User Manual - Page 4
surface. • Never use it under sporting, exercising, or any vibrating environment which will probably cause unexpected short current or damage rotor devices, lamp. Using electrical power • This product should be operated from the type of power indicated on the marking label. If you are not sure - Acer X1260 | User Manual - Page 5
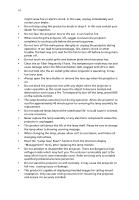
change in performance, indicating a need for service • the product does not operate normally after following the operating instructions Note: Adjust only those controls that are covered by the operating instructions, since improper adjustment of other controls may result in damage and will often - Acer X1260 | User Manual - Page 6
. To temporarily turn off the lamp, press HIDE on the remote control. • The lamp becomes extremely hot during operation. Allow the projector to cool for approximately 45 minutes prior to removing the lamp assembly for replacement. • Do not operate lamps beyond the rated lamp life. It could cause it - Acer X1260 | User Manual - Page 7
external RF energy or if you have any questions. Switch off your device in health care facilities when any regulations posted in these areas instruct you to do so. Hospitals or health care facilities may be using equipment that could be sensitive to external RF transmissions. Pacemakers. Pacemaker - Acer X1260 | User Manual - Page 8
control systems, and air bag systems. For more information, check with the manufacturer, or its representative, of your vehicle or any equipment that has been added. Only qualified personnel should service To protect your hearing, follow these instructions. • Increase the volume gradually until you - Acer X1260 | User Manual - Page 9
and Electronics Equipment (WEEE) regulations, visit http://global.acer.com/about/ sustainability.htm Mercury advisory For projectors or electronic products containing an LCD/CRT monitor or display: "Lamp(s) contain Mercury, Dispose Properly." Lamp(s) inside this product contain mercury and must be - Acer X1260 | User Manual - Page 10
. • Place In direct sunlight. Precautions Follow all warnings, precautions and maintenance as recommended in this user's guide to maximize the life of your unit. Warning: • Do not look into the projector's lens when the lamp is on. The bright light may hurt your eyes. • To reduce the risk of fire or - Acer X1260 | User Manual - Page 11
Features 1 Package Overview 2 Projector Overview 3 Projector Outlook 3 Remote Control and Control Panel Layout 4 Getting Started 6 Connecting the Projector 6 Turning the Projector On/Off 7 Turning on the Projector 7 Turning off the Projector 8 Adjusting the Projected Image - Acer X1260 | User Manual - Page 12
LED & Alarm Definition Listing 28 Replacing the Lamp 29 Ceiling Mount Installation 30 Specifications 33 Compatibility modes 35 Regulations and safety notices 37 - Acer X1260 | User Manual - Page 13
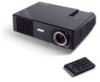
This product is a single-chip DLP® projector. Outstanding features include: • DLP® technology • X1160/Z/ZC/P/PZ/PZC series: Native 800 x 600 SVGA resolution X1260/Z/ZC/P/PZ/PZC/K/KC series : Native 1024 x 768 XGA resolution 4:3 / 16:9 aspect ratio supported • ColorBoost technology comes with - Acer X1260 | User Manual - Page 14
. Contact your dealer immediately if any thing is missing. Projector with lens cap Power cord VGA cable Composite video cable Battery User's guide Remote control Security card Acer Projector Quick Start Guide Quick start guide Carrying case (X1160Z/ZC/PZ/PZC, X1260/Z/ZC/P/PZ/PZC/K/KC) - Acer X1260 | User Manual - Page 15
English 3 Projector Overview Projector Outlook Front / upper side 5 1 6 7 7 2 3 4 # Description # Description 1 Zoom ring (X1160Z/ZC/PZ/PZC, X1260/Z/ 5 Power button and Power Indicator LED ZC/P/PZ/PZC/K/KC series) 2 Focus ring 6 Remote control 3 Zoom lens 7 Remote control receivers 4 - Acer X1260 | User Manual - Page 16
English 4 Remote Control and Control Panel Layout 1 2 9 3 10 4 5 9 6 11 7 12 8 13 14 # Icon Function 1 Infrared transmitter 2 Power/Power LED 3 POWER Description Sends signals to the projector. Power button and Power Indicator LED. Refer to the "Turning the Projector On/Off" - Acer X1260 | User Manual - Page 17
Momentarily turns off the video. Press "HIDE" to hide the image, press again to display the image. Unique Acer functions: eView, eTimer, ePower Management. To pause the screen image. Note: Remote Control Placement Please refer to the illustration to attach the remote control to the projector. - Acer X1260 | User Manual - Page 18
Video Output # Description 1 Power cord 2 VGA cable 3 Composite video cable 4 USB cable # Description 5 S-Video cable 6 Audio cable jack/jack 7 RS232 cable Note: To ensure the projector works well with your computer, please make sure the timing of the display mode is compatible with the - Acer X1260 | User Manual - Page 19
projector is locked onto a specific source type and there is no such type of input signal detected. • If the screen displays "No Signal", please make sure the signal cables are securely connected. • If you connect to multiple sources at the same time, use the "Source" button on the remote control - Acer X1260 | User Manual - Page 20
is about to happen: "Projector Overheated. Lamp will automatically turn off soon." • If the Power indicator quick flashing RED and steady BLUE by returns and the message below is displayed onscreen, please contact your local dealer or service center: "Fan fail. Lamp will automatically turn off soon - Acer X1260 | User Manual - Page 21
English 9 Adjusting the Projected Image Adjusting the Height of Projected Image The projector is equipped with elevator feet for adjusting the height of image. To raise/lower the image: 1 Use Tilt adjusting wheel (Illustration #1) to fine-tune the display angle. 1 Tilt adjusting wheel - Acer X1260 | User Manual - Page 22
is 3 m from the screen, good image quality is possible for 76" image sizes . • X1160Z/ZC/PZ/PZC, X1260/Z/ZC/P/PZ/PZC/K/KC series Example: If the projector is 3 m from the screen, good image quality is possible for image sizes between 69" and 76". Note: Remind as below figure, the space of 133 - Acer X1260 | User Manual - Page 23
11 English X1160Z/ZC/PZ/PZC, X1260/Z/ZC/P/PZ/PZC/K/KC series Screen size Top Screen size Top Desired Distance (m) Diagonal (inch) (Min zoom) W (cm) x H (cm) From base to Diagonal top of - Acer X1260 | User Manual - Page 24
achieve a desired image size by adjusting either the position or the zoom ring. • X1160/P series Example: to obtain an image size of 50" set the projector at 2m distance from the screen. • X1160Z/ZC/PZ/PZC, X1260/Z/ZC/P/PZ/PZC/K/KC series Example: to obtain an image size of 50" set the - Acer X1260 | User Manual - Page 25
13 English X1160Z/ZC/PZ/PZC, X1260/Z/ZC/P/PZ/PZC/K/KC series Desired Image Size Distance (m) Diagonal (inch) 30 40 50 60 70 80 90 100 120 150 180 200 250 300 - Acer X1260 | User Manual - Page 26
on the projector by pressing "Power" button on the control pad. 2 Press the menu button on the control pad to launch the OSD for projector installation and maintenance. 3 The background pattern acts as a guide to 5 Push the menu button anytime to exit the menu and return to the Acer welcome screen. - Acer X1260 | User Manual - Page 27
the reminding function for presentation time control. Please refer to Onscreen Display Menus section for more detail. Acer ePower Management Press " " to launch "Acer ePower Management". "Acer ePower Management" provides user one shortcut to save lamp and projector life. Please refer to Onscreen - Acer X1260 | User Manual - Page 28
in the submenu and adjust as described above. • Press "MENU" on the remote control, the screen will return to the main menu. • To exit OSD, press "MENU" on the remote control again. The OSD menu will close and the projector will automatically save the new settings. Main menu Sub menu Setting - Acer X1260 | User Manual - Page 29
settings. • User 2: Memorize user's settings. Adjust the brightness of the image. • Press to darken image. • Press to lighten the image. "Contrast" controls the difference between the lightest and darkest parts of the picture. Adjusting the contrast changes the amount of black and white in the - Acer X1260 | User Manual - Page 30
red in the image. Note: "Saturation" and "Tint" functions are not supported under computer mode or DVI mode. Image Projection Aspect Ratio Front-Desktop • translucent screen. Rear-Ceiling • When you select this function, the projector reverses and inverts the image at same time. You can project - Acer X1260 | User Manual - Page 31
function to make the necessary adjustments. Synchronizes the signal timing of the projector with the graphics card. If you experience an unstable or flickering image, "V. Position", "Frequency" and "Tracking" functions are not supported under DVI or Video mode. Note: "Sharpness" functions is not - Acer X1260 | User Manual - Page 32
"lock" the current source channel unless you press "Source" button on the remote control for the next channel. Security This projector provides a useful security function for the administrator to manage usage of the projector . Press to change the "Security" setting. If the security function is - Acer X1260 | User Manual - Page 33
: • An unique 6-digit "Universal Password" which is Acer service center. Disable Power button • When "ON" is selected, only the Power Key on the remote control can be used. If "OFF" is selected, then the Power Key on either the remote control or the control panel can be used to control the projector - Acer X1260 | User Manual - Page 34
the projector. The projector will automatically shutdown when there is no signal input after the allocated time. (in minutes) Displays the lamp's elapsed end-of-life. Press the button after choosing "Yes" to turn the lamp hour counter to 0 hours. Audio Volume Mute • Press to decrease the - Acer X1260 | User Manual - Page 35
English 23 Timer Timer Location Timer Start Timer Period Timer Display • Choose the location of the timer on the screen. • Press to start or stop the timer. • Press or to adjust the timer period. • Press or screen. to which timer mode to display on the Language Language Choose the - Acer X1260 | User Manual - Page 36
24 Appendices English Troubleshooting If you experience a problem with your Acer projector, refer to the following troubleshooting guide. If the problem persists, please contact your local reseller or service center. Image Problems and Solutions # Problem Solution 1 No image appears • - Acer X1260 | User Manual - Page 37
notebooks) • Press "RESYNC" on the remote control. • For an incorrectly displayed image: • be reactivated. Refer to your computer's manual for detailed information. • If you are format DVD title, please change the format to 4:3 in the projector OSD. • If the image is still stretched, you will - Acer X1260 | User Manual - Page 38
too small • Adjust the zoom lever on the front of the projector. or too large (X1160Z/ZC/PZ/PZC, X1260/Z/ZC/P/PZ/PZC/K/KC series) • Move the projector closer to or further from the screen. • Press "MENU" on the remote control. Go to "Image --> Aspect Ratio" and try different settings or press - Acer X1260 | User Manual - Page 39
Message Reminder Fan Fail - the system fan is not working. Projector Overheated - the projector has exceeded its recommended operating temperature and must be allowed to cool down before it may be used. Replace the lamp - the lamp is about to reach its maximum lifetime. Prepare to replace it - Acer X1260 | User Manual - Page 40
ON to OFF 100ms -- Standby V -- Power button ON -- V Lamp retry -- Quick Flashing Power off (Cooling state) Quick Flashing -- Power Error (Fan lock) Quick Flashing RED and Steady BLUE by returns Error (Lamp breakdown) Quick Flashing BLUE and Steady RED by returns Error (Color Wheel - Acer X1260 | User Manual - Page 41
Use a screwdriver to remove the screw(s) from the cover, and then pull out the lamp. The projector will detect the lamp life. You will be shown a warning message "Lamp is approaching the end of its useful life in full power operation. Replacement Suggested!" When you see this message, change the - Acer X1260 | User Manual - Page 42
English 30 Ceiling Mount Installation If you wish to install the projector using a ceiling mount, please refer to the steps below: 1 Drill four holes into a solid, structurally sound part of the ceiling, and secure the mount base. - Acer X1260 | User Manual - Page 43
Spacer - For heat dissipation Note: It is recommended that you keep a reasonable space between the bracket and the projector to allow for proper heat distribution. Use two washers for extra support, if deemed necessary. 4 Attach the ceiling bracket to the ceiling rod. Screw Type A 50 mm length 08 - Acer X1260 | User Manual - Page 44
and washer for each model is listed in the table below. 3 mm diameter screws are enclosed in the screw pack. Models X1160/Z/ZC/P/PZ/ PZC, X1260/Z/ZC/P/ PZ/PZC/K/KC Screw Type B Diameter (mm) Length (mm) 3 20 Washer Type Large Small V V SCREW - Acer X1260 | User Manual - Page 45
scan rate Lamp type Keystone correction Audio Weight Dimensions (W x D x H) Digital Zoom Power supply Power consumption Operating temperature DLP® X1160/Z/ZC/P/PZ/PZC: Native: SVGA (800 x 600) , Maximum: SXGA (1280 x 1024), WXGA+ (1440 x 900) X1260/Z/ZC/P/PZ/PZC/K/KC: Native: XGA (1024 x 768 - Acer X1260 | User Manual - Page 46
• Composite video cable x1 • Remote control x1 • Battery x 1 (for remote control) • User's guide (CD-ROM) x 1 • Quick start guide x 1 • Security card x 1 Below item is for X1160Z/ZC/PZ/PZC, X1260/Z/ZC/P/PZ/ PZC/K/KC series only: • Carrying case x 1 * Design and specifications are subject to change - Acer X1260 | User Manual - Page 47
Compatibility modes A. VGA Analog 1 VGA Analog - PC Signal Modes VGA SVGA XGA SXGA QuadVGA SXGA+ Power Mac G4 PowerBook G4 Resolution 640x480 640x480 640x480 640x480 720x400 .5 77.1 64.0 77.0 80.0 60.0 75.2 65.3 34.9 37.9 48.4 68.7 75.0 31.4 34.9 37.9 Note: "*" X1260/Z/ZC/P/PZ/PZC/K/KC series - Acer X1260 | User Manual - Page 48
WXGA Resolution 1280x768 1280x768 *1280x768 1280x720 1280x800 1440x900 V.Frequency [Hz] 60 75 85 60 60 60 H.Frequency [KHz] 47.8 60.3 68.6 44.8 49.6 59.9 Note: "*" X1260/Z/ZC/P/PZ/PZC/K/KC series - Acer X1260 | User Manual - Page 49
has been tested and found to comply with the limits for a Class B digital device pursuant to Part 15 of the FCC rules. These limits are designed energy and, if not installed and used in accordance with the instructions, may cause harmful interference to radio communications. However, there is no - Acer X1260 | User Manual - Page 50
band To prevent radio interference to the licensed service, this device is intended to be operated indoors and installation outdoors is subject to licensing. Declaration of Conformity for EU countries Acer hereby, declares that this projector series is in compliance with the essential requirements - Acer X1260 | User Manual - Page 51
English English 39 European Union (EU) R&TTE Directive 1999/5/EC as attested by conformity with the following harmonized standard: • Article 3.1(a) Health and Safety • EN60950-1:2001 • EN50371:2002 (SAR, general FR device) • Article 3.1(b) EMC • EN301 489-1 V1.4.1 (common technical requirement) • - Acer X1260 | User Manual - Page 52
/ Importer is responsible for this declaration: Product: DLP Projector Model Number: DSV0705/DSV0708/DSV0809/ DNX0810/D7P0715 Machine Type: X1160/Z/ZC/P/PZ/PZC, X1260/Z/ZC/P/PZ/PZC/K/KC series Name of Responsible Party: Acer America Corporation Address of Responsible Party: 333 West San - Acer X1260 | User Manual - Page 53
Tel: 886-2-8691-3089 Fax: 886-2-8691-3120 E-mail: [email protected] Hereby declare that: Product: Trade Name: Model Number: Machine Type: DLP Projector Acer DSV0705/DSV0708/DSV0809/DNX0810/D7P0715 X1160/Z/ZC/P/PZ/PZC, X1260/Z/ZC/P/PZ/PZC/K/KC series Is compliant with the essential requirements
-
 1
1 -
 2
2 -
 3
3 -
 4
4 -
 5
5 -
 6
6 -
 7
7 -
8
-
9
-
10
-
11
-
12
-
13
-
14
-
15
-
16
-
17
-
18
-
19
-
20
-
21
-
22
-
23
-
24
-
25
-
26
-
27
-
28
-
29
-
30
-
31
-
32
-
33
-
34
-
35
-
36
-
37
-
38
-
39
-
40
-
41
-
42
-
43
-
44
-
45
-
46
-
47
-
48
-
49
-
50
-
51
-
52
-
53
 |
 |

Acer Projector
X1160/Z/ZC/P/PZ/PZC,
X1260/Z/ZC/P/PZ/PZC/K/KC Series
User's Guide