Acer X203H User Manual
Acer X203H Manual
 |
View all Acer X203H manuals
Add to My Manuals
Save this manual to your list of manuals |
Acer X203H manual content summary:
- Acer X203H | User Manual - Page 1
Acer LCD Monitor User's Guide - Acer X203H | User Manual - Page 2
. No part of this publication may be reproduced, stored in a retrieval system, or transmitted, in any form or by any means, electronically, mechanically, by photocopy, recording or otherwise, without the prior written permission of Acer Incorporated. Acer LCD Monitor User's Guide Model number - Acer X203H | User Manual - Page 3
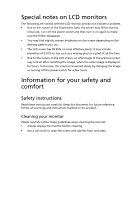
Special notes on LCD monitors The following are normal with the LCD monitor and do not indicate a problem. • Due to the nature of the fluorescent light, the screen may flicker during initial use. Turn off the power switch and then turn it on again to make sure the flicker disappears. • You may find - Acer X203H | User Manual - Page 4
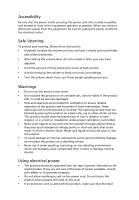
power from the equipment, be sure to unplug the power cord from the electrical outlet. Safe listening To protect your hearing, follow these instructions cabinet slots as they may touch dangerous voltage points or short-out parts that could result in a fire or electric shock. Never spill liquid - Acer X203H | User Manual - Page 5
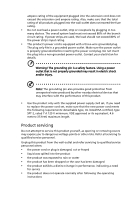
set. If you need to replace the power cord set, make sure that the new power cord meets the following requirements: detachable type, UL listed/CSA certified, type SPT-2, rated 7 A 125 V minimum, VDE approved or its equivalent, 4.6 meters (15 feet) maximum length. Product servicing Do not attempt to - Acer X203H | User Manual - Page 6
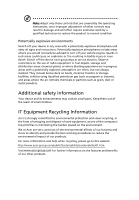
atmosphere and obey all signs and instructions. Potentially explosive atmospheres include areas . Switch off the device near gas pumps at service stations. Observe restrictions on the use of radio equipment parts. Keep them out of the reach of small children. IT Equipment Recycling Information Acer - Acer X203H | User Manual - Page 7
visit http://global.acer.com/about/sustainability.htm Mercury advisory For projectors or electronic products containing an LCD/CRT monitor or display: set by the U.S. Environmental Protection Agency. Acer is committed to offer products and services worldwide that help customers save money, conserve - Acer X203H | User Manual - Page 8
user inactivity. • Wake the computer from Sleep mode by pushing the power button. Tips and information for comfortable use Computer users may complain of eyestrain and headaches after prolonged use. Users zone by adjusting the viewing angle of the monitor, using a footrest, or raising your sitting - Acer X203H | User Manual - Page 9
Give your eyes regular breaks by looking away from the monitor and focusing on a distant point. • Blink frequently to keep your eyes from drying out. Display • an awkward viewing angle. • Avoid looking at bright light sources, such as open windows, for extended periods of time. Developing good work - Acer X203H | User Manual - Page 10
.com.tw Hereby declare that: Product: Trade Name: Model Number: SKU Number: 20"W LCD Monitor Acer or eMachines or Gateway or packard bell XX203H X203H xxx ("x" = 0~9, a ~ z, A ~ Z or Blank) Is compliant with the essential requirements and other relevant provisions of the following EC directives - Acer X203H | User Manual - Page 11
Communications Commission Declaration of Conformity This device complies with Part 15 of the FCC Rules. Operation is subject to Product name: 20"W LCD Monitor Model number: X203H SKU number: X203H xxxx (x can be 0-9, A-Z or blank) Name of responsible party: Acer America Corporation Address - Acer X203H | User Manual - Page 12
- Acer X203H | User Manual - Page 13
Special notes on LCD monitors iii Information for your safety and comfort iii Safety instructions iii Cleaning your monitor iii Connecting/disconnecting the device iii Accessibility iv Safe listening iv Warnings iv Using electrical power iv Product servicing v Additional safety - Acer X203H | User Manual - Page 14
- Acer X203H | User Manual - Page 15
that the following items are present when you unpack the box, and save the packing materials in case you need to ship or transport the monitor in the future. LCD monitor User's guide Quick start guide D-sub cable DVI cable (only dualinput models) AC power cord Audio Cable (Option) - Acer X203H | User Manual - Page 16
Attaching: Align the release button on the bottom of the monitor with the corresponding slots on the bottom of the base. Removing: Press the release button as indicated, then pull in the direction of the arrow to remove the base. Screen position adjustment To optimize the viewing position, you can - Acer X203H | User Manual - Page 17
in which the equipment will be installed. Power saving The monitor will be switched to "power saving" mode by the control signal from the display controller, as indicated by the amber-colored power LED. Mode On Power saving LED light Blue Amber The power saving mode will be kept until a control - Acer X203H | User Manual - Page 18
Connector pin assignment 1 5 6 10 11 15 15-pin color display signal cable PIN No. Description 1 Red 2 Green 3 Blue 4 Monitor ground 5 DDC-return 6 R-ground 7 G-ground 8 B-ground PIN No. Description 9 +5 V 10 Logic ground 11 Monitor ground 12 DDC-serial data 13 H-sync 14 V-sync 15 DDC-serial - Acer X203H | User Manual - Page 19
data 1- 10 TMDS data 1+ 11 TMDS data 1/3 shield 12 NC PIN No. Description 13 NC 14 +5 V power 15 GND (return for +5 V hsync.vsync) 16 Hot-plug detection 17 TMDS data 0- 18 TMDS data 0+ 19 TMDS data 0/5 shield 20 NC 21 NC 22 TMDS clock shield 23 TMDS clock+ 24 DDC TMDS clock- - Acer X203H | User Manual - Page 20
English Standard timing table Mode 1 2 3 4 5 6 7 8 9 10 11 12 13 14 15 16 17 18 19 20 21 22 MAC VESA SVGA SVGA SVGA SVGA MAC XGA XGA XGA MAC VESA VESA SXGA SXGA VESA WXGA WXGA WXGA+ 640 x 480 640 x 480 - Acer X203H | User Manual - Page 21
the power cord to the monitor, then to a properly grounded AC outlet. 3 Turn on the monitor and computer Turn on the monitor first, then the computer. This sequence is very important. 4 If the monitor does not function properly, please refer to the troubleshooting section to diagnose the problem - Acer X203H | User Manual - Page 22
English User controls 7 6 5 4 3 21 Front panel controls 1 Power LED: Lights up to indicate the power is turned on. 2 Power Switch: Turn the power on or off. 3.4 < / > : Press < or > to navigate to the desired function, press Enter to select the function. Press < or > to change the settings - Acer X203H | User Manual - Page 23
a setting 1 Press the Menu button to activate the OSD window. 2 Press < or > to select the desired function. Acer eColor Management: If "Acer eColor Management" is selected, the Acer eColor Management OSD will appear. B. User: If "User" is selected, the standard OSD will appear. I. Only analog-input - Acer X203H | User Manual - Page 24
• Operation instructions 1 Press the Empowering Key to open the Acer eColor Management OSD and access the scenario modes. 2 Press "" to select the mode. 3 Press the Auto-adjust button to confirm the mode and run Auto Adjust. • Features and benefits Main menu icon Sub menu item User mode - Acer X203H | User Manual - Page 25
English User Main Sub menu menu icon icon Sub menu item Contrast Brightness Description only). V. Position Adjusts the vertical position (available in analog mode only). N/A Warm N/A Cool User/red Sets the color temperature to warm white. Sets the color temperature to cool white. Adjusts red - Acer X203H | User Manual - Page 26
- Acer X203H | User Manual - Page 27
your LCD monitor for servicing, please check the troubleshooting list below to see if you can self-diagnose the problem. VGA mode Problem No picture visible LED status Blue Off Remedy Using the OSD, adjust brightness and contrast to maximum or reset to their default settings. Check the power - Acer X203H | User Manual - Page 28
English DVI mode Problem No picture visible LED status Blue Off Remedy Using the OSD, adjust brightness and contrast to maximum or reset to their default settings. Check the power switch. Amber Check if the AC power cord is properly connected to the monitor. Check if the video signal cable is
-
 1
1 -
 2
2 -
 3
3 -
 4
4 -
 5
5 -
 6
6 -
 7
7 -
8
-
9
-
10
-
11
-
12
-
13
-
14
-
15
-
16
-
17
-
18
-
19
-
20
-
21
-
22
-
23
-
24
-
25
-
26
-
27
-
28
 |
 |

Acer LCD Monitor
User's Guide