Acer Aspire 7720ZG Aspire 7720 Series User's Guide EN - Page 103
Acer eRecovery Management, Create backup, Acer eLock Management or Acer eRecovery Management. - drivers windows 7
 |
View all Acer Aspire 7720ZG manuals
Add to My Manuals
Save this manual to your list of manuals |
Page 103 highlights
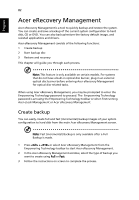
English 82 Acer eRecovery Management Acer eRecovery Management is a tool to quickly backup and restore the system. You can create and save a backup of the current system configuration to hard disk, CD or DVD. You can also backup/restore the factory default image, and reinstall applications and drivers. Acer eRecovery Management consists of the following functions: 1 Create backup 2 Burn backup disc 3 Restore and recovery This chapter will guide you through each process. Note: This feature is only available on certain models. For systems that do not have a built-in optical disc burner, plug in an external optical disc burner before entering Acer eRecovery Management for optical disc-related tasks. When using Acer eRecovery Management, you may be prompted to enter the Empowering Technology password to proceed. The Empowering Technology password is set using the Empowering Technology toolbar or when first running Acer eLock Management or Acer eRecovery Management. Create backup You can easily create full and fast (incremental) backup images of your system configuration to hard disk from the main Acer eRecovery Management screen. Note: Fast (incremental) Backup is only available after a Full Backup is made. 1 Press + or select Acer eRecovery Management from the Empowering Technology toolbar to start Acer eRecovery Management. 2 In the Acer eRecovery Management window, select the type of backup you want to create using Full or Fast. 3 Follow the instructions on screen to complete the process.
-
 1
1 -
2
-
3
-
4
-
5
-
6
-
7
-
8
-
9
-
10
-
11
-
12
-
13
-
14
-
15
-
16
-
17
-
18
-
19
-
20
-
21
-
22
-
23
-
24
-
25
-
26
-
27
-
28
-
29
-
30
-
31
-
32
-
33
-
34
-
35
-
36
-
37
-
38
-
39
-
40
-
41
-
42
-
43
-
44
-
45
-
46
-
47
-
48
-
49
-
50
-
51
-
52
-
53
-
54
-
55
-
56
-
57
-
58
-
59
-
60
-
61
-
62
-
63
-
64
-
65
-
66
-
67
-
68
-
69
-
70
-
71
-
72
-
73
-
74
-
75
-
76
-
77
-
78
-
79
-
80
-
81
-
82
-
83
-
84
-
85
-
86
-
87
-
88
-
89
-
90
-
91
-
92
-
93
-
94
-
95
-
96
-
97
-
 98
98 -
 99
99 -
 100
100 -
 101
101 -
 102
102 -
 103
103 -
 104
104 -
 105
105 -
 106
106 -
 107
107 -
 108
108 -
109
-
110
-
111
-
112
-
113
-
114
-
115
-
116
-
117
-
118
-
119
-
120
 |
 |