Acer P7290 User Manual - Page 46
Cleaning and replacing the dust filters
 |
View all Acer P7290 manuals
Add to My Manuals
Save this manual to your list of manuals |
Page 46 highlights
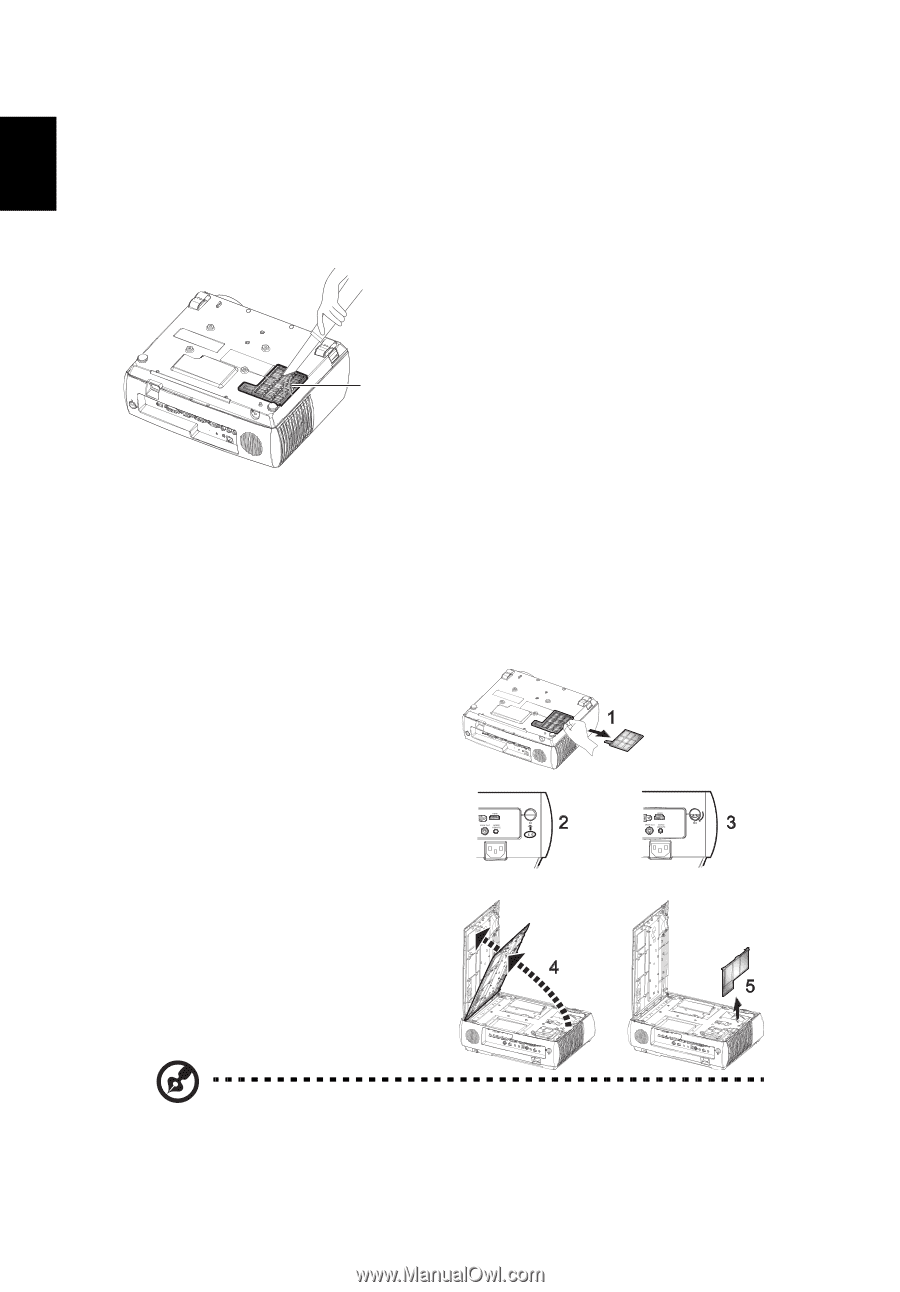
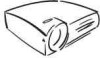
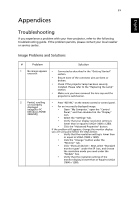
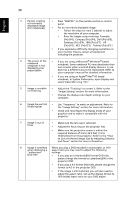
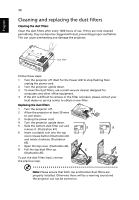
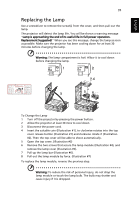
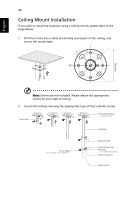
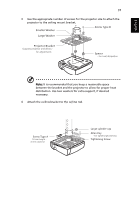
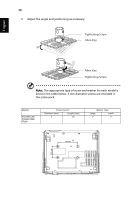
English 34 Cleaning and replacing the dust filters Cleaning the dust filters Clean the dust filters after every 1000 hours of use. If they are note cleaned periodically, they can become clogged with dust, preventing proper ventilation. This can cause overheating and damage the projector. Dust Filter Follow these steps: 1 Turn the projector off. Wait for the Power LED to stop flashing then unplug the power cord. 2 Turn the projector upside down. 3 To clean the dust filters, use a small vacuum cleaner designed for computers and other office equipment. 4 If the dirt is difficult to remove or the filter is broken, please contact your local dealer or service center to obtain a new filter. Replacing the dust filters 1 Turn the projector off. 2 Allow the projector at least 30 mins to cool down. 3 Unplug the power cord. 4 Turn the projector upside down. 5 Slide the bottom dust filter out and remove it. (Illustration #1) 6 Insert a suitable coin into the top cover release button (Illustration #2) and rotate clockwise (Illustration #3). 7 Open the top cover. (Illustration #4) 8 Pull the top dust filter up. (Illustration #5) To put the dust filters back, reverse the previous step. Note: Please ensure that both top and bottom dust filters are properly installed. Otherwise there will be a warning sound and the projector can not be turned on.
-
 1
1 -
2
-
3
-
4
-
5
-
6
-
7
-
8
-
9
-
10
-
11
-
12
-
13
-
14
-
15
-
16
-
17
-
18
-
19
-
20
-
21
-
22
-
23
-
24
-
25
-
26
-
27
-
28
-
29
-
30
-
31
-
32
-
33
-
34
-
35
-
36
-
37
-
38
-
39
-
40
-
 41
41 -
 42
42 -
 43
43 -
 44
44 -
 45
45 -
 46
46 -
 47
47 -
 48
48 -
 49
49 -
 50
50 -
 51
51 -
52
-
53
-
54
-
55
-
56
-
57
-
58
-
59
-
60
-
61
-
62
 |
 |