Acer X1320WH User Manual - Page 37
Image on Auto, Full or L.Box.
 |
View all Acer X1320WH manuals
Add to My Manuals
Save this manual to your list of manuals |
Page 37 highlights
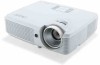
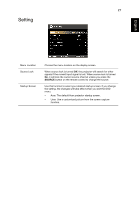
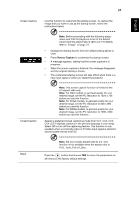
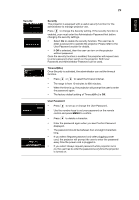
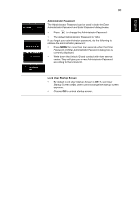
28 English English Screen Capture Use this function to customize the startup screen. To capture the image that you want to use as the startup screen, follow the instructions below. Note: Before proceeding with the following steps, make sure that the Keystone is set to the default value 0 and the aspect ratio is set to 4:3. For details, refer to "Image" on page 24. • Change the Startup Screen from the default setting (Acer) to User. • Press Screen Capture to customize the startup screen. • A message appears, stating that the screen capture is in progress. • When the screen capture is finished, the message disappears and the original display is shown. • The customized startup screen will take effect when there is a new input signal or when you restart the projector. Closed Caption Note: This screen capture function is limited to the 4:3 aspect ratio only. Note: For XGA models, to get best quality for your desired image, set the PC resolution to 1024 x 768 before you use this function. Note: For SVGA models, to get best quality for your desired image, set the PC resolution to 800 x 600 before you use this function. Note: For WXGA models, to get best quality for your desired image, set the PC resolution to 1280 x 800 before you use this function. Selects a preferred closed captioning mode from CC1, CC2, CC3, CC4, (CC1 displays captions in the primary language in your area). Select Off to turn off the captioning feature. This function is only available when a composite video or S-Video input signal is selected and its system format is NTSC. Reset Note: Set your screen aspect ratio to 4:3. This function is not available when the aspect ratio is 16:9, Auto, Full or L.Box. Press the button and choose YES to return the parameters on all menus to the factory default settings.
-
 1
1 -
2
-
3
-
4
-
5
-
6
-
7
-
8
-
9
-
10
-
11
-
12
-
13
-
14
-
15
-
16
-
17
-
18
-
19
-
20
-
21
-
22
-
23
-
24
-
25
-
26
-
27
-
28
-
29
-
30
-
31
-
 32
32 -
 33
33 -
 34
34 -
 35
35 -
 36
36 -
 37
37 -
 38
38 -
 39
39 -
 40
40 -
 41
41 -
 42
42 -
43
-
44
-
45
-
46
-
47
-
48
-
49
-
50
-
51
-
52
-
53
-
54
-
55
-
56
-
57
-
58
-
59
-
60
-
61
-
62
-
63
-
64
-
65
-
66
-
67
 |
 |