Airlink AIC1620POE Quick Installation Guide
Airlink AIC1620POE Manual
 |
UPC - 658729087439
View all Airlink AIC1620POE manuals
Add to My Manuals
Save this manual to your list of manuals |
Airlink AIC1620POE manual content summary:
- Airlink AIC1620POE | Quick Installation Guide - Page 1
Quick Installation Guide SkyIPCam1620 PoE MPEG4 3GPP Network Camera Model # AIC1620POE Ver. 1A - Airlink AIC1620POE | Quick Installation Guide - Page 2
CD • Quick Installation Guide System Requirement Accessing the Camera using Web Browser - Supported Browsers: Microsoft® Internet Explorer Guide only provides basic instructions. For detailed information, including the instructions of the complimentary software, please refer to the User's Manual - Airlink AIC1620POE | Quick Installation Guide - Page 3
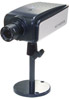
Section 1 Getting to Know Your Camera Front and Top View Screw Hole* is used to attach the camera stand onto the camera by screwing the screw head of the camera stand into the screw hole of the camera. LED Indicators: Power (left, steady amber light) indicates the camera is powered on. Link (right, - Airlink AIC1620POE | Quick Installation Guide - Page 4
power to the camera. Audio I/O Connectors: Audio Out connects an external active speaker. Mic In connects an external microphone. * The camera's Ethernet port supports IEEE 802.3af Power-over-Ethernet (PoE) standard that enables DC power to be supplied to the camera using wires in the connecting - Airlink AIC1620POE | Quick Installation Guide - Page 5
end of a network cable to the IP Camera and connect the other end to one of the LAN ports on your router or switch. Step 2.3 If your router or switch does not support Power over Ethernet function, you will need to provide power to the camera by connecting the supplied power adapter. If - Airlink AIC1620POE | Quick Installation Guide - Page 6
Section 3 Installing SkyIPCam Utility Step 3.1 Insert the provided CD into your computer's CD ROM drive. Step 3.2 Click on Install Utility and Software when the autorun menu pops up on the screen. 5 - Airlink AIC1620POE | Quick Installation Guide - Page 7
Note: If you do not see the autorun menu pops up on the screen, please go to your CD-ROM drive > UltraView folder > run "Setup.exe". Step 3.3 Click Install to install the utility. Step 3.4 Click Finish when installation finishes. 6 - Airlink AIC1620POE | Quick Installation Guide - Page 8
Section 4 Configuring the Camera Step 4.1 Open SkyIPCam Utility by double clicking on its icon on your desktop. Step 4.2 Click on Search to find the camera on your network. Select the Camera you wish to configure and click on Change IP. Note If the Camera you wish to configure does not show up in - Airlink AIC1620POE | Quick Installation Guide - Page 9
4.3 Please configure a unique static IP address for your camera; if you are not sure how to do it, you can select DHCP to let your router dynamically assign an IP to your camera. Enter "admin" for both ID and password, and click Change. Step 4.4 Select the Camera you wish to configure - Airlink AIC1620POE | Quick Installation Guide - Page 10
Step 4.5 When you are prompted for the username and password, enter "admin" for both User name and Password, and click OK. Step 4.6 The camera viewing window will appear. Click on Setup, then click on Smart Wizard. 1 2 9 - Airlink AIC1620POE | Quick Installation Guide - Page 11
Step 4.7 Enter a name for your camera and a location (i.e. RoomA01). Create a password and enter to Admin Password and Confirm Password. This will change the admin password of the camera. It is recommended to modify the admin's password to protect your privacy. Click Next. Step 4.8 If you have - Airlink AIC1620POE | Quick Installation Guide - Page 12
to set up email alerts that you can receive in the future, enter your email information here. You can get this information from your Internet Service Provider. You can also set this up at a later time. Click Next. Step 4.10 Confirm your settings at this page. If everything is correct, click - Airlink AIC1620POE | Quick Installation Guide - Page 13
Section 5 Viewing Image Method A > Access Camera from SkyIPCam Utility Step 5.1A Open Airlink101 SkyIPCam Utility, select the camera you wish to connect to and click on Link button. Go to Step 5.3. Method B > Access Camera from Web Browser Step 5.1B If you assigned a static IP address for your - Airlink AIC1620POE | Quick Installation Guide - Page 14
Step 5.3 Enter username and password, then click OK. The default username and password are both "admin" if you did not make any change to it at Step 4.7. Step 5.4 Internet Explorer User: If this is the first time for your computer to view image from the web configuration page, you will be prompted - Airlink AIC1620POE | Quick Installation Guide - Page 15
Step 5.5 Click on Run, then you will be able to view the image. Note If you are using Mozilla Firefox or Safari and you are not able to view any image, please make sure you have Java and Quick Time add-ons installed. Step 5.6 To get a clear view of images, you can simply rotate the camera's lens - Airlink AIC1620POE | Quick Installation Guide - Page 16
. All products and trademarks are the property of their respective owners. Copyright ©2011 Airlink101® ** Monitoring multiple cameras simultaneously demands high performance computer system. *** AIC1620POE supports most of the 3G devices, but compatibility with every 3G device is not guaranteed. 15
-
 1
1 -
 2
2 -
 3
3 -
 4
4 -
 5
5 -
 6
6 -
 7
7 -
8
-
9
-
10
-
11
-
12
-
13
-
14
-
15
-
16
 |
 |

Quick Installation Guide
SkyIPCam1620
PoE MPEG4 3GPP Network Camera
Model # AIC1620POE
Ver. 1A