Airlink AICN777W User Manual
Airlink AICN777W Manual
 |
UPC - 658729087408
View all Airlink AICN777W manuals
Add to My Manuals
Save this manual to your list of manuals |
Airlink AICN777W manual content summary:
- Airlink AICN777W | User Manual - Page 1
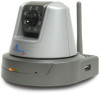
SkyIPCam777W Wireless MPEG4 Night Vision Pan/Tilt Network Camera Model # AICN777W User's Manual Ver. 1.0 - Airlink AICN777W | User Manual - Page 2
7 2.1 Installing the Wall Mount Kit 7 2.2 Connecting the Camera to LAN/WLAN 8 2.3 Applications of the Camera 8 CHAPTER 3 ...9 SOFTWARE INSTALLATION 9 3.1 Installing SkyIPCam Utility ...59 A.1 Specification ...59 A.2 GPIO Terminal Application 60 A.3 Glossary of Terms 61 TECHNICAL SUPPORT 66 -1- - Airlink AICN777W | User Manual - Page 3
Check the items contained in the package carefully. You should have the following items: 5 One SkyIPCam777W Wireless MPEG4 Night Vision Pan/Tilt Network Camera. 5 One Antenna. 5 One AC Power Adapter. 5 One Wall Mount Kit. 5 One GPIO Connector 5 One Ethernet Cable (RJ-45 type). 5 One Installation CD - Airlink AICN777W | User Manual - Page 4
. Front View USB Port* allows you to connect an external USB device. It provides the power distribution up to 500mA. * The camera's USB port also supports WCN (Windows Connect Now) technology, which allows you to use notebook computer to set up and store your wireless networking configuration on - Airlink AICN777W | User Manual - Page 5
connects the network cable, which supports the NWay protocol so that the camera can detect the network speed automatically. External Antenna Connector connects the external antenna. DC Power Connector connects the AC power adapter, in order to supply power to the camera. USB Dismount Button is - Airlink AICN777W | User Manual - Page 6
change the configuration of the camera via Intranet or Internet. In addition, the camera can be upgraded remotely when a new firmware is available. The users are also allowed to monitor the image and take snapshots or record videos via the network. „ Supports Connection to External Devices With - Airlink AICN777W | User Manual - Page 7
1.4 System Requirement „ Networking LAN: 10Base-T Ethernet or 100Base-TX Fast Ethernet. WLAN: IEEE 802.11b/g. „ Accessing the Camera by using Web Browser Platform: CPU: RAM: Resolution: User Interface: Microsoft® Windows® 2000/XP/Vista Intel Pentium III 800MHz or above 512MB 800x600 or above - Airlink AICN777W | User Manual - Page 8
CHAPTER 2 HARDWARE INSTALLATION 2.1 Installing the Wall Mount Kit The camera comes with a Wall Mount Kit, which allows you to place your camera anywhere by mounting the camera through the three screw holes located in the base of the Wall Mount Kit. Screw Wall Mount Kit Screw Screw -7- - Airlink AICN777W | User Manual - Page 9
Cable If you use a wireless network in your application environment, you need to attach the included external antenna to the camera. When the camera is powered on, the camera will automatically search any access point with "default" SSID. Connecting the External Antenna 2.3 Applications of the - Airlink AICN777W | User Manual - Page 10
CHAPTER 3 SOFTWARE INSTALLATION 3.1 Installing SkyIPCam Utility Step 1 Insert the provided CD and wait for the auto-run screen to appear. Step 2 Click on Install SkyIPCam Utility. Note: If the auto-run screen does not appear automatically, go to Start, Run, type: D:\ Utility\Setup.exe (where D is - Airlink AICN777W | User Manual - Page 11
Step 3 Follow the installer instruction by clicking Next on the following screens. Step 4 Click Close to complete the installation. 3.2 Using SkyIPCam Utility Step 1 Go to Start > (All) Programs > AirLink101 > AirLink101 SkyIPCam Utiliy - 10 - - Airlink AICN777W | User Manual - Page 12
address does not show up in the window, make sure the camera is properly connected to the same network as your computer is, and then click on the Search button. Step 3 You may accept the suggested Static IP, or you can manually change the last 3-digit number of the IP Address, in - Airlink AICN777W | User Manual - Page 13
Step 4 Once the changes have been saved, the Utility will return to the original screen. Select your camera from the list and click Link. Step 5 When you are prompted for the username and password, enter "admin" for both User name and Password, and click OK. - 12 - - Airlink AICN777W | User Manual - Page 14
Step 6 The camera viewing window will appear. Click on Setup, and then click on Smart Wizard. Step 7 If desired, you may change the default Camera Name and enter a name for the Location. Then enter "admin" for both Admin Password and Confirm Password. Click Next. - 13 - - Airlink AICN777W | User Manual - Page 15
Step 8 You can change the camera's IP settings in the below window. If you have done this in Step 3, click Next to go to in the future, enter your email information here. You can get this information from your email service provider. You can also set this up at a later time. Click Next. - 14 - - Airlink AICN777W | User Manual - Page 16
Step 10 If you would like to connect the camera wirelessly to the network, enter the wireless information according to your wireless router's (or access point's) and the configuration is completed. You can now disconnect the RJ-45 cable from the camera to access the camera wirelessly. - 15 - - Airlink AICN777W | User Manual - Page 17
3.3 Viewing Images Method 1 --- Access from Web Browser Step 1 If you know the IP address of your network camera, you may open the Web Browser on your computer. Step 2 Type the IP address of your camera (the default IP is 192.168.1.240) in the Address bar, and then press [Enter]. Step 3 Enter "admin - Airlink AICN777W | User Manual - Page 18
Step 4 If it is the first time for your computer to access the Web based viewing page, you may be prompted to install the ActiveX Control. Click on the bar at the top of the screen and click on Install ActiveX Control. Step 5 Click on Install. Once the installation is completed, you may be able to - Airlink AICN777W | User Manual - Page 19
Step 6 For clearer images, you may simply rotate the camera's lens clockwise or counter-clockwise to adjust the focus. Note: If you are not able to find the pictures or video clips saved by "Snapshot' or "Manual Record" under Windows Vista, you may also need to disable Internet Explorer's Protected - Airlink AICN777W | User Manual - Page 20
Method 2 --- Access from SkyIPCam Utility Step 1 Go to Start > (All) Programs > AirLink101 > AirLink101 SkyIPCam Utiliy, and open the Airlink101 SkyIPCam Utility. Step 2 Select your camera from the list and click Link Step 3 Follow Step 3 to Step 6 mentioned in Method 1. - 19 - - Airlink AICN777W | User Manual - Page 21
3.4 Using SkyIPCam View To Install the Program Step 1 Insert the installation CD to the CD ROM. When the auto-run screen pops up, click on Install SkyIPCam View from the auto-run screen. Step 2 Keep clicking Next on the following windows. - 20 - - Airlink AICN777W | User Manual - Page 22
to complete the installation. To Launch the Program This section describes the user interface and operating instructions of SkyIPCam View. To launch the program, click Start > Programs > AirLink101 > AirLink101 SkyIPCam View, and the main screen will appear as below: NOTE: Please set the resolution - Airlink AICN777W | User Manual - Page 23
the media player on the computer (for example, Windows Media Player by default). - LOCK: Click this button to lock the camera controls. Click again to resume controls for the camera. If you have set ID and Password in SETTING > Account, you will be asked to enter the required information to unlock - Airlink AICN777W | User Manual - Page 24
2-way audio function. - LISTEN: Click this button to receive the on-site sound and voice from the camera. This button is available only when the connected camera supports audio function. „ SYSTEM Panel This panel displays the current date and time. „ PAN-TILT CONTROL Panel When you connect a pan - Airlink AICN777W | User Manual - Page 25
- SWING: If you have saved two or more positions for the selected camera, click this button to control the camera swinging from one position to another position. „ Video View Window and Camera List Video View Window Camera List - Video View Window: This window displays the video view of the selected - Airlink AICN777W | User Manual - Page 26
IP address (default: 192.168.1.240) and Port (default: 80), and then click Add Camera. 4. Enter the User name and Password for the camera, and then click OK. The connected camera will be displayed in the Camera List. 5. Click SETTING to return to the Video View Window. The video view of the selected - Airlink AICN777W | User Manual - Page 27
1. Click SETTING in the CONTROLS panel to display the Setting screen. 2. Select a camera from the list and click Delete Camera. To Link to the Web Page of the Camera Click SETTING > Camera List > Camera Configuration and then Link web page to launch the Web browser that displays live view image - Airlink AICN777W | User Manual - Page 28
video clips: one is to click the RECORD/ALL RECORD button to record manually; the second is to record by motion detection; the third is to set Configuration, and then select the Recording option to enable the selected camera to record by motion detection. z Schedule Recording This recording method - Airlink AICN777W | User Manual - Page 29
and time and then click OK to add the recording schedule to the list. Click Apply to save the settings. - Recording Time: First, select the camera from the pull-down list and select Recording time tab. Then, select the week day from the day buttons and then set the time period - Airlink AICN777W | User Manual - Page 30
hard disk drive, you can check the available storage space that is displayed in the HDD Free space field. z Enable Recycle Recording: Click on the camera number to clear the files and continue to record videos when the reserved space of hard disk drive is full. To Playback the Recorded Video - Airlink AICN777W | User Manual - Page 31
video codec from http://www.xvid.org/downloads.15.0.html. To Set up Motion Detection Options When the motion detection function of the selected camera is enabled, you can set the Motion Options by selecting Alarm, Recording, Send e-Mail, and Trigger Out under SETTING > Motion Configuration. - 30 - Airlink AICN777W | User Manual - Page 32
*.mp3 file) in the computer. z Recording: Select this option to enable the camera to record when motion is detected. z Send e-Mail: Select this option so for the notification email. z Trigger Out: If the selected camera supports Trigger Out connector, select this option and interval time to enable the Trigger - Airlink AICN777W | User Manual - Page 33
Account You can set the administrator's ID and Password for the camera here. Other It allows you to set the rotation interval if you are monitoring multiple cameras. - 32 - - Airlink AICN777W | User Manual - Page 34
Information Click SETTING > About to display the information of the software application. - 33 - - Airlink AICN777W | User Manual - Page 35
and the provided software application SkyIPCam View. This chapter describes the Web Configuration, and guides you through the configuration of the camera by using the web browser. To configure the camera, click Setup on the main page of Web Configuration. The Web Configuration will start from - Airlink AICN777W | User Manual - Page 36
- Synchronize with PC: Select this option and the date & time settings of the camera will be synchronized with the connected computer. - Synchronize with NTP Server: Select this option work only when your camera is connected to the Internet.) - Manual: Select this option to set the date and time - Airlink AICN777W | User Manual - Page 37
modify the user's information, select the one you want to modify from UserList and click Add/Modify. - UserList: Display the existing users of the camera. To delete a user, select the one you want to delete and click Delete. „ Guest - User Name: Enter the guest's name you want to add to - Airlink AICN777W | User Manual - Page 38
to select the IP connecting type and set up the related configuration. - DHCP: Select this option when your network uses the DHCP server. When the camera starts up, it will be assigned an IP address from the DHCP server automatically. It is recommended that you NOT use DCHP. You should instead - Airlink AICN777W | User Manual - Page 39
this feature. „ Bonjour The devices with Bonjour will automatically broadcast their own services and listen for services offered by other devices in the same network. So if your Browser supports Bonjour, you can find the camera in your local network without knowing its IP address. The Apple Safari - Airlink AICN777W | User Manual - Page 40
address and End IP address. And then, click Add to save the range setting. You can repeat the action to assign multiple ranges for the camera. For example, when you enter 192.168.0.50 in Start IP Address and 192.168.0.80 in End IP Address, the users whose IP address - Airlink AICN777W | User Manual - Page 41
Setting The camera supports WLAN while you use the wireless network. Select the Enable option to enable this feature. - Network ID (SSID): To connect the camera to a specified access point or router, set a SSID for the camera to correspond with the access point's ESS-ID. To connect the camera to an - Airlink AICN777W | User Manual - Page 42
who do not have access to network authentication servers. The user has to manually enter the starting password in their access point or gateway, as well as WEP option to enable the data encryption feature to secure the camera within the wireless network. Format: Once you enable the Encryption - Airlink AICN777W | User Manual - Page 43
/Tilt Settings The Pan/Tilt menu allows you to configure the pan/tilt functions of the camera. Pan & Tilt >> Pan & Tilt Settings - Pan/Tilt Calibration: Click Calibration to calibrate the position of the camera lens. - Pan Steps: Set the changing range (1~20 degrees) of each click on the Left/Right - Airlink AICN777W | User Manual - Page 44
Frequency: Select the proper frequency according to the camera's location: 50Hz, 60Hz, or Outdoor. (Note: This IP Camera model is designed for indoor use only. Otherwise, the camera might be ruined by severe weather, and the image color problems will be caused.) „ Overlay Setting - Includes Date - Airlink AICN777W | User Manual - Page 45
levels: Lowest, Low, Medium, High, and Highest. - Frame Rate: Select Auto or a proper setting depending on your network status. NOTE: The camera supports both MPEG4 and MJPEG compression. MJPEG capture the images in JPEG format, which require higher bandwidth to view smooth video. The administrator - Airlink AICN777W | User Manual - Page 46
or 3GPP With Audio to transfer the video clips without or with audio. If you use a mobile phone that supports 3GPP, you can also view the real-time streaming image captured by the camera on your phone (with the default player on the phone) by entering the RTSP link: rtsp://(IP address - Airlink AICN777W | User Manual - Page 47
Microphone In Select the Enable option to enable the camera's audio function, so that you can receive the on-site sound and voice from the camera. „ Camera Speaker Out Select the Enable option to enable the camera's external speaker function, so that the connected speaker can play the sound and - Airlink AICN777W | User Manual - Page 48
to find out if the related configuration is correct or not. Once the camera connects to the server successfully, click Apply. Event Server Setting>> FTP „ Select the Enable option to enable passive mode. If you are having trouble, you can enable/disable this mode. - FTP Upload with: Select - Airlink AICN777W | User Manual - Page 49
Event Server Setting >> Email „ Email - SMTP Server Address: Enter the mail server address. For example, mymail.com. - Sender Email Address: Enter the email address of the user who will send the email. For example, [email protected]. - Authentication Mode: Select None or SMTP as authentication mode. - - Airlink AICN777W | User Manual - Page 50
Event Server Setting >> NAS - Samba Server Address: Enter the IP address of the NAS (Network Attached Storage) server. - Share: Assign the folder on the NAS server to share the files to users. - Path: Assign the sub-folders, which are under shared folder, for uploading the files onto the NAS server. - Airlink AICN777W | User Manual - Page 51
Detect The Motion Detect menu contains the commands and options that allow you to enable and set up the motion detection feature for the camera. The camera provides two detecting areas. To enable the detecting area, select Window 1 or 2 from the pull-down list, and then select Enable. When the - Airlink AICN777W | User Manual - Page 52
4.8 Event Configuration The Event Config menu contains five sub-menus that provide the commands to configure event profiles. Event Configuration >> General Setting - Snapshot/Recording Subfolder: You can assign a descriptive name for the subfolder to save the captured image/video files. Otherwise, - Airlink AICN777W | User Manual - Page 53
Event Configuration >> Arrange Schedule Profile This sub-menu displays the scheduled profile(s). To customize the profile, click Add and then enter a descriptive name for the profile in the prompt dialog window. After entering the profile name, click OK and the profile is added to the Schedule - Airlink AICN777W | User Manual - Page 54
Event Configuration >> Motion Detection Trigger Select the Enable option to enable the motion detection trigger function of the camera, so that you can set Trigger Out function or send captured images of the detecting area to FTP server, email receiver, NAS, or the connected - Airlink AICN777W | User Manual - Page 55
Event Configuration >> Schedule Trigger You can separately configure the schedule for trigger function of the camera by Email, FTP, or NAS. Select the Enable option for each desired function, and then select a Schedule Profile from the pulldown list and set up - Airlink AICN777W | User Manual - Page 56
Event Configuration >> GPIO Trigger Select the Enable option to enable the GPIO trigger function of the camera, so that you can set Trigger Out function or send captured images of the detecting area to FTP server, email receiver, NAS server, or the - Airlink AICN777W | User Manual - Page 57
file and then click Restore. „ Update Firmware This item displays the current firmware version. You can upgrade the firmware for your camera once you has obtained a latest version of the firmware. - Select the firmware: Click Browse to locate the new firmware file and then click Update. NOTE: Make - Airlink AICN777W | User Manual - Page 58
USB device, you can press the Dismount button for four seconds on the camera or click Dismount from this page. „ USB Information Display the Total space is full. NOTE: This feature only supports USB storage devices with FAT & FAT32 file system, and it doesn't support the ones with NTFS file system. - Airlink AICN777W | User Manual - Page 59
4.11 Information The Information menu displays the current configuration and events log of the camera. „ Device Info Display the Basic, Video & Audio, and Network settings of the camera. „ System Log The Logs table displays the event logs recorded by the system. - 58 - - Airlink AICN777W | User Manual - Page 60
Antenna Reset USB GPIO LEDs One RJ-45 port One external antenna One Reset button USB 1.1 port, with one dismount button Power distribution: 500mA Max. Support FAT, FAT32 file system 1 in/1 out connectors Input: active high: 9~40V DC; dropout: 0V DC Output: close circuit current 70mA AC or 100mA DC - Airlink AICN777W | User Manual - Page 61
OS Support Browser Windows 2000/XP/Vista Internet Explorer 6.0 or above Apple Safari 2 or variety of external control functions. The GPIO connectors are located on the rear panel of the camera, which provide the interface of connecting the sensor device (IN) and controlled device (OUT). Connector - Airlink AICN777W | User Manual - Page 62
IP address can even change while it is still connected. It also supports a mix of static and dynamic IP addresses. This simplifies the task for a network without the hassle of manually assigning it a unique IP address. DHCP allows the specification for the service provided by a router, gateway, or - Airlink AICN777W | User Manual - Page 63
the basic unit of information on the Internet (the packet) and also details the numerical addressing format used to route the information. Your Internet service provider controls the IP address of any device it connects to the Internet. The IP addresses in your network must conform to IP addressing - Airlink AICN777W | User Manual - Page 64
the addresses may not be valid outside your network. NAT solves the problem. When devices within your network request information from the Internet, the address and waits for a reply. It is primarily used to troubleshoot Internet connections. Point-to-Point Protocol over Ethernet. PPPoE is a - Airlink AICN777W | User Manual - Page 65
R RJ-45 Router RTP RTSP S Server SIP SMTP SNMP Station Subnet mask T (TCP/IP) Transceiver U UDP User Name Utility UTP W Protocols that dictate the format of data for transferors the medium include token-passing and Carrier Sense Multiple Access with Collision Detection (CSMA/CD), implemented as - Airlink AICN777W | User Manual - Page 66
WAN WEP Windows WPA WPA2 Wide-Area Network. A wide-area network consists of groups of interconnected computers that are separated by a wide distance and communicate with each other via common carrier telecommunication techniques. WEP is widely used as the basic security protocol in Wi-Fi networks, - Airlink AICN777W | User Manual - Page 67
1 2 Technical Support E-mail: [email protected] Toll Free: 1-888-746-3238 Web Site: www.airlink101.com *Theoretical maximum wireless signal rate based on IEEE standard 802.11g specifications. Actual data throughput will vary. Network conditions and environmental factors, including volume
-
 1
1 -
 2
2 -
 3
3 -
 4
4 -
 5
5 -
 6
6 -
 7
7 -
8
-
9
-
10
-
11
-
12
-
13
-
14
-
15
-
16
-
17
-
18
-
19
-
20
-
21
-
22
-
23
-
24
-
25
-
26
-
27
-
28
-
29
-
30
-
31
-
32
-
33
-
34
-
35
-
36
-
37
-
38
-
39
-
40
-
41
-
42
-
43
-
44
-
45
-
46
-
47
-
48
-
49
-
50
-
51
-
52
-
53
-
54
-
55
-
56
-
57
-
58
-
59
-
60
-
61
-
62
-
63
-
64
-
65
-
66
-
67
 |
 |

SkyIPCam777W
Wireless MPEG4 Night Vision Pan/Tilt
Network Camera
Model # AICN777W
User’s Manual
Ver. 1.0