Airlink APO1215 Quick Installation Guide
Airlink APO1215 Manual
 |
View all Airlink APO1215 manuals
Add to My Manuals
Save this manual to your list of manuals |
Airlink APO1215 manual content summary:
- Airlink APO1215 | Quick Installation Guide - Page 1
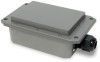
Wireless N/A 5GHz 200mW Outdoor AP With 15dBi Patch Antenna Model: APO1215 Quick Installation Guide V.1.0 - Airlink APO1215 | Quick Installation Guide - Page 2
1. Before You Start Package Contents • APO1215 x 1 • Quick Installation Guide x 1 • CD-ROM (with User Manual and QIG) x 1 • Power Adapter DC24V 0.5A x and OFF indicates power off. 3. WLAN : Green LED FLASH indicates Wireless Transmit. 4. LAN : Green LED ON indicates connection, OFF indicates - Airlink APO1215 | Quick Installation Guide - Page 3
Application in Wireless Network APO1215 is a multiple mode system which can be configured either as a wireless gateway or an access point as desired. It also can be used as a WDS link for Ethernet network expansion. This section depicts different applications on Router AP Mode, AP Mode, WDS Mode, - Airlink APO1215 | Quick Installation Guide - Page 4
the DATA IN port on the Power over Ethernet Injector 4. Connect the opposite end of the RJ-45 cable to a LAN port on your Switch, Router, or Computer. 5. Connect the power cord into the Power over Ethernet Injector. Then connect the power cord to a power outlet. 3 - Airlink APO1215 | Quick Installation Guide - Page 5
be configured, if you connect the AP to your computer directly, you must manually assign a static IP address to your computer's network adapter in the subnet you connect the AP to your Router or Switch, since the AP's default IP address is 192.168.2.254, make sure your Router's IP address is 192.168 - Airlink APO1215 | Quick Installation Guide - Page 6
If you select WPA-PSK or WPA2-PSK, make sure your wireless adapters support WPA or WPA2. If your wireless adapters do not support WPA or WPA2, then select WEP. 8. Select the desired Security For detailed information regarding the APO1215's configuration and advanced settings, please refer to User - Airlink APO1215 | Quick Installation Guide - Page 7
WDS Link Note : 1. The system provides WDS function on Router AP Mode, AP Mode and WDS Mode. 2. WDS Link the APO1215. 5. After you set the APO1215 to WDS Mode, wireless clients will not be able to connect to the APO1215. 6. The examples below are for WDS Mode. Setting Up the Main APO1215 (Main - Airlink APO1215 | Quick Installation Guide - Page 8
or the Overview Page (Status->Overview) and Wireless General Setup Page(Wireless ->General Setup) 2. Repeat steps 2-6 in Setting Up the Main APO1215 for the Remote APO1215. Make sure you change the IP Address of the Remote APO1215 to be different from the Main APO1215. 3. Click Status -> WDS Status - Airlink APO1215 | Quick Installation Guide - Page 9
5. Configuring for Client Bridge Note : 1. This section will walk you through the steps of sharing (bridging) an internet connection in one building, and extending that same internet to another building. 2. The "Main Base Station" provide Access Point with SSID "Main_AP" 3. The Two wire networks(LAN - Airlink APO1215 | Quick Installation Guide - Page 10
Setting Up the Client Bridge (Client Station) 1. Follows steps 1-6 (Select "Client Bridge" mode on step 4) in Section 3 Configuring the Access Point. Make sure you change the IP address of the Client Station to be different. 2. Configure the DHCP Server settings to match your demand and then click - Airlink APO1215 | Quick Installation Guide - Page 11
5. Set Client Bridge associate to ESSID "Main_AP" with corrent Pre-shared key. Then click Next button. 6. Select Disable to deactivate Repeater AP. Then click Finish button. 7. Wait 35 seconds while the Access Point reboots. 8. Click Status->Remote AP, the Connection Information should be display. - Airlink APO1215 | Quick Installation Guide - Page 12
To protect your network from any unauthorized access it is recommended to enable wireless encryption. 2. The examples below are for WEP. If you select WPA-PSK or WPA2-PSK, make sure your wireless adapters support WPA or WPA2. If your wireless adapters do not support WPA or WPA2, then select WEP. 11 - Airlink APO1215 | Quick Installation Guide - Page 13
be display. Note : 1. The Channel of Repeat AP should be the same with Main Base Station. 2. To verify wireless clients can associate ESSID "Repeater_Main_AP" with WEP key. 3. To verify wireless clients can use ping command to "192.168.2.254". 4. If you can not access Main Base Station, verify the - Airlink APO1215 | Quick Installation Guide - Page 14
7. How to configure TCP/IP settings on your PC Windows XP/2000 1. Go into the Control Panel, double-click the Network Connections icon and then right-click the Local Area Connection icon and then click Properties. 2. Click Internet Protocol (TCP/IP) and then click Properties. Then click on Use the - Airlink APO1215 | Quick Installation Guide - Page 15
Technical Support E-mail: [email protected] Toll Free: 1-888-746-3238 Web Site: www.airlink101.com *Theoretical maximum wireless signal rate derived from IEEE standard 802.11 specifications. Actual data throughput will vary. Network conditions and environmental factors, including volume of
-
 1
1 -
 2
2 -
 3
3 -
 4
4 -
 5
5 -
 6
6 -
 7
7 -
8
-
9
-
10
-
11
-
12
-
13
-
14
-
15
 |
 |

Wireless N/A 5GHz 200mW Outdoor AP
With 15dBi Patch Antenna
Model: APO1215
Quick Installation Guide
V.1.0