Airlink AWLL017 Quick installation guide
Airlink AWLL017 Manual
 |
View all Airlink AWLL017 manuals
Add to My Manuals
Save this manual to your list of manuals |
Airlink AWLL017 manual content summary:
- Airlink AWLL017 | Quick installation guide - Page 1
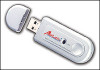
Ver. 5A Note: Screen shots are for Windows XP Quick Installation Guide Model # AWLL017 Package Content: • 802.11b USB Adapter • USB Extension Cable • Driver & Utility CD • Quick Installation Guide Section 1 1 Install Driver & Utility Software Step 1 Before installing the utility software, DO NOT - Airlink AWLL017 | Quick installation guide - Page 2
. See Fig. 2.1 Fig 2.1 Step 2 At the Found New Hardware Wizard, do one of the following: For Windows 98, select Search for the best driver for your device and click Next. For Windows 2000/XP, select Install the software automatically and click Next. Note: Windows should automatically install the - Airlink AWLL017 | Quick installation guide - Page 3
Note to Windows XP Users Only Windows XP provides a built-in Wireless Zero Configuration Utility for configuring and monitoring wireless devices on your computer. When it is enabled, it will override the Wireless Configuration Utility. To disable the Windows XP Wireless Zero Configuration Utility - Airlink AWLL017 | Quick installation guide - Page 4
and/or access points in your wireless network. For more advanced features and additional details, please refer to the User's Manual on the provided CD-ROM. Section 4 Technical Support Step 4 Select the WEP key that you want to use for encryption. Step 5 Select the Authentication Type: Open System
-
 1
1 -
 2
2 -
 3
3 -
 4
4
 |
 |

Ver. 5A
Quick Installation Guide
Package Content:
•
802.11b USB Adapter
•
USB Extension Cable
•
Driver & Utility CD
•
Quick Installation Guide
1
Model # AWLL017
Step 1
Before installing the utility software,
DO NOT
insert the USB
adapter into your computer. If the adapter is inserted already, Windows
will detect the adapter and request for a driver. Click
Cancel
to quit the
wizard and remove the USB adapter from your computer.
Step 3
Click
Next
at the InstallShield Wizard screen.
See Fig 1.2
.
Section 1
Install Driver & Utility Software
Fig 1.1
Fig 1.2
Step 4
Click
Next
to accept the default destination folder or click
Browse
to select a destination location.
Step 2
Close all programs that are currently running. Insert the provided
Driver & Utility CD into your CD-ROM drive and click
Install Software
from
the setup menu.
See Fig. 1.1
.
Note
: If the setup menu does not automatically appear, go to
Start
,
Run
, and type
D:\Autorun.exe
(where
D
is the letter of your CD-
ROM drive) and click
OK
.
Note
: Screen shots are for Windows XP