Airlink WLC010 Quick installation guide
Airlink WLC010 Manual
 |
View all Airlink WLC010 manuals
Add to My Manuals
Save this manual to your list of manuals |
Airlink WLC010 manual content summary:
- Airlink WLC010 | Quick installation guide - Page 1
Wireless LAN PC Card Quick Installation Guide WLC010 This Quick Installation Guide only provides you with the basic instructions. For more detailed information, please refer to the Manual Click Finish to complete the driver installation. For Windows Me For Windows XP 1. When the wizard appears, - Airlink WLC010 | Quick installation guide - Page 2
1. Close all Windows programs that are running. 2. Run Setup.exe from the D:\Utility folder of the Wireless LAN Card Installation CD-ROM where D is the CD-ROM drive letter, and click Next. 3. Click Yes to accept the Software Licensing Agreement. 4. In the SSID box, enter the Service Set ID name
-
 1
1 -
 2
2
 |
 |

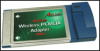
11Mbps Wireless LAN PC Card
Quick Installation Guide
WLC010
This
Quick Installation
Guide
only provides you with the basic instructions.
For more detailed information, please refer to the
Manual
file on the provided CD.
All other product names and trademarks in this document are trademarks of their respective companies.
A. Hardware Installation
System Requirements
.
Windows 98(SE)/Me/2000/XP
.
16 MB of RAM, additional memory recommended
.
Available (Type II) PC card slot
Installing the Hardware
1. The Wireless LAN Card can be inserted into your computer's
PCMCIA slot when the computer power is either turned on or off.
2. When the Wireless LAN Card is inserted into the PCMCIA slot
and the computer is turned on, a red LED will light up.
3. After installing the hardware, install the device driver and
then
install the Wireless LAN Card software.
B. Driver Installation
After installing the hardware, the Windows will detect the new device
and displays the wizard. Follow the steps below to install the driver.
For Windows 98(SE)
1. When the wizard appears, click
Next
. Then select
Search for
the best driver.
and click
Next
.
2. Insert the Installation CD into your CD-ROM drive. Check
Specify a location
and click
Browse
to specify the path to
D:\Driver\Win9x
where D is the CD-ROM drive letter
and click
Next
.
3. When the driver is found, click
Next
to continue.
NOTE:
If prompted, insert your Windows 98 installation CD
and then click
OK
.
4. Click
Finish
to complete the driver installation.
5. When prompted to restart your computer, click
No
and continue
to the next task.
For Windows Me
1. When the wizard appears, select
Specify the location.
And click
Next
.
2. Insert the Installation CD into your CD-ROM drive Select the
check boxes for both
Search for the best driver
and
Specify a location
. Click
Browse
to specify the path to
D:\Driver\WinME
where D is the CD-ROM drive letter
and click
Next
.
3. When the driver is found, click
Next
to continue.
4. Click
Finish
to complete the driver installation.
For Windows 2000
1. When the wizard appears, click
Next.
2. Insert the Installation CD into your CD-ROM drive.
Select
Search for a suitable driver.
and click
Next
.
3. Check
Specify a location
and click
Next
.
4. Click
Browse
to specify the path to
D:\Driver\W2K
where D is the CD-ROM drive letter. and click
Open
. and click
OK
.
5. When the driver is found, click
Next
to continue.
6. When the
Digital Signature Not Found
message appears,
click
Yes
.
7. Click
Finish
to complete the driver installation.
For Windows XP
1. When the wizard appears, select
Install the software automatically (Recommended).
2. Insert the Installation CD into your CD-ROM drive and click
Next
.
3. Click the file under
Location
called
d:\driver\winxp\netcw10.inf
.
(where D is the CD-ROM drive letter) and click
Next
.
4. When the
Hardware Installation
message
appears,
click
Continue Anyway.
5. Click
Finish
to complete the driver installation.