Alpine INA-W900BT Owner's Manual (English) - Page 54
Adjusting the Minimum Level of Backlight, Setting the Function Guide display ON/OFF - set clock
 |
UPC - 793276100276
View all Alpine INA-W900BT manuals
Add to My Manuals
Save this manual to your list of manuals |
Page 54 highlights
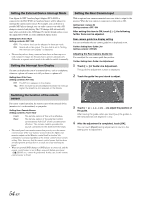
Adjusting the Minimum Level of Backlight You can adjust the brightness of the backlight (LOW). This function could be used, for instance, to change the screen brightness while traveling at night. Setting item: Dimmer Low Level Setting content: -15 to +15 You can adjust the level between Min (-15) and Max (+15). When it reaches the minimum or maximum point, the display shows "Min" or "Max" respectively. Setting the Function Guide display ON/OFF When on is set, the function guide will be hidden automatically after no operation is performed for 5 seconds. Setting item: Function Guide Fade Setting contents: OFF / ON Switching the Font Back Display Color You can choose from 4 different display colors for the font back (source title, shortcut display, etc.). Setting item: Base Color Setting contents: Blue / Red / Green / Amber Adjusting the Touch Panel Adjustment becomes necessary when the display position on the LCD and the touch position on the touch panel do not match. Setting item: Screen Alignment Setting contents: / Reset 1 Touch [ ] of Screen Alignment. The adjustment screen appears. 2 Accurately touch the mark provided in the lower left corner of the screen. The screen changes to the adjustment screen. 3 Accurately touch the mark provided in the upper right corner of the screen. This completes adjustment, and returns to the Display setup mode screen. • If you have touched a location other than the mark, touch [Reset] to restore the adjustment screen to the initial setting. • If you touch [ ] on the adjustment screen, no adjustment is done and the Display setup screen is restored. GENERAL Setup General Setup Operation To display the General mode screen: To watch a video source, your vehicle must be parked with the ignition key in the ACC or ON position. To do this, follow the procedures below. 1 Bring your vehicle to a complete stop at a safe location. Engage the parking brake. 2 Keep pushing the foot brake and release the parking brake once then engage it again. 3 When the parking brake is engaged for the second time, release the foot brake. • For automatic transmission vehicles, place the transmission lever in the Park position. Now, the locking system for the General mode operation has been released. Engaging the parking brake can reactivate the General mode, as long as the car's ignition has not been turned off. It is not necessary to repeat the above procedure (1 through 3) of "To display the General mode screen." Each time the ignition is turned OFF, perform the procedure of "To display the General mode screen." The following steps 1 to 5 are common operations to each "Setting item" of GENERAL Setup. Refer to each section for details. 1 Press SOURCE/ on the unit. The SOURCE selection screen is displayed. 2 Touch [ ] on the main source screen. The SETUP main screen is displayed. 3 Touch [ ] of General Setup. The General Setup screen appears. 4 Touch [ ] or [ ] of the desired item to change its setting. Setting items: Clock / Beep / Auto Scroll / LED Dimmer Level 5 Touch [ ] to return to the previous screen. Touch [Exit] to return to the main source screen that was displayed before the setup operation was started. • Immediately after changing the settings of General Mode (While the system is writing data automatically) do not turn the ignition key (engine key) to OFF. Otherwise, the settings may not be changed. 52-EN
-
 1
1 -
2
-
3
-
4
-
5
-
6
-
7
-
8
-
9
-
10
-
11
-
12
-
13
-
14
-
15
-
16
-
17
-
18
-
19
-
20
-
21
-
22
-
23
-
24
-
25
-
26
-
27
-
28
-
29
-
30
-
31
-
32
-
33
-
34
-
35
-
36
-
37
-
38
-
39
-
40
-
41
-
42
-
43
-
44
-
45
-
46
-
47
-
48
-
 49
49 -
 50
50 -
 51
51 -
 52
52 -
 53
53 -
 54
54 -
 55
55 -
 56
56 -
 57
57 -
 58
58 -
 59
59 -
60
-
61
-
62
-
63
-
64
-
65
-
66
-
67
-
68
-
69
-
70
-
71
-
72
-
73
-
74
-
75
-
76
-
77
-
78
-
79
-
80
-
81
-
82
-
83
-
84
-
85
-
86
-
87
-
88
-
89
-
90
-
91
-
92
-
93
-
94
-
95
-
96
-
97
-
98
-
99
-
100
-
101
 |
 |