Alpine INE-S920HD Owner's Manual (english) - Page 44
Adjusting the Dimmer of Button Lighting at Night, Switching the Display Color - eq settings
 |
View all Alpine INE-S920HD manuals
Add to My Manuals
Save this manual to your list of manuals |
Page 44 highlights
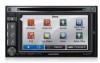
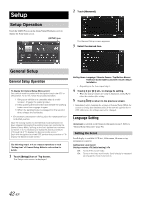
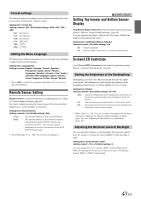
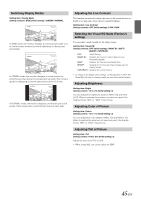
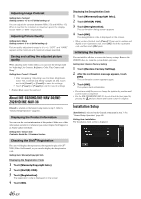
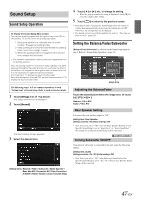
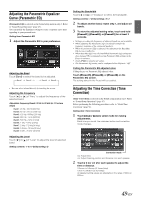
Adjusting the Dimmer of Button Lighting at Night You can adjust the brightness of the button lighting at night with the dimmer. Setting item: Key Illumination Level Setting level: -2 to +2 (Initial setting: 0) Visual Setting [Visual] is selected on the General setup menu in step 3. Refer to "General Setup Operation" (page 42). 1 Touch the desired item. Switching the Display Color You can choose from 5 different display colors. Setting item: Screen Colour Setting contents: Blue (Initial setting) / Red / Green / Amber / Black Adjusting the Touch Panel Adjustment becomes necessary when the display position on the LCD and the touch position on the touch panel do not match. Setting item: Screen Alignment 1 Touch [Screen Alignment] in the Screen/LED Customize screen. The adjustment screen appears. 2 Accurately touch the mark provided in the upper left corner of the screen. 3 Accurately touch the mark provided in the lower right corner of the screen. This completes adjustment, and returns to the previous screen. • If you touch [Cancel] on the adjustment screen, no adjustment is done and returns to the previous screen. Initializing the Touch Panel Corrected Values Initialize the corrected values adjusted by Adjusting the Touch Panel. 1 Touch [Screen Alignment Reset] in the Screen/ LED Customize screen. 2 After the confirmation message appears, touch [OK]. The corrected values are initialized. • "Video" can be selected while a video is playing. 2 Touch the desired item. Settable items differ depending on the application. [Video] (Video media): Display Mode*1 / Live Contrast / Visual EQ / Bright / Colour / Tint / Contrast / Sharp [Direct Camera]*2: Live Contrast / Bright / Colour / Contrast [AUX Camera]*2: Live Contrast / Bright / Colour / Contrast [Navigation]: Bright / Contrast *1 When media is set to AUX, the settings cannot be changed in the situations below. • When "AUX In" is set to "DVB-T" is "On." *2 The camera names set under the "Direct Camera/AUX Camera" settings are displayed. The camera names are not displayed when "Off" is set (pages 61, 62). 3 Touch [ ] or [ ] to change its setting. 4 Touch [ ] to return to the previous screen. • Immediately after changing the settings of Display Setup (While the system is writing data automatically) do not turn the ignition key to OFF. Otherwise, the settings may not be changed. 44-EN
-
 1
1 -
2
-
3
-
4
-
5
-
6
-
7
-
8
-
9
-
10
-
11
-
12
-
13
-
14
-
15
-
16
-
17
-
18
-
19
-
20
-
21
-
22
-
23
-
24
-
25
-
26
-
27
-
28
-
29
-
30
-
31
-
32
-
33
-
34
-
35
-
36
-
37
-
38
-
 39
39 -
 40
40 -
 41
41 -
 42
42 -
 43
43 -
 44
44 -
 45
45 -
 46
46 -
 47
47 -
 48
48 -
 49
49 -
50
-
51
-
52
-
53
-
54
-
55
-
56
-
57
-
58
-
59
-
60
-
61
-
62
-
63
-
64
-
65
-
66
-
67
-
68
-
69
-
70
-
71
-
72
-
73
-
74
-
75
-
76
-
77
-
78
-
79
-
80
-
81
-
82
-
83
-
84
-
85
-
86
-
87
-
88
-
89
-
90
-
91
-
92
-
93
-
94
-
95
-
96
-
97
-
98
-
99
-
100
-
101
-
102
-
103
-
104
-
105
-
106
-
107
-
108
-
109
-
110
-
111
-
112
-
113
-
114
-
115
-
116
 |
 |