Alpine INE-S920HD Owner's Manual (english) - Page 62
AUX Camera Setting, Setting the Camera Input
 |
View all Alpine INE-S920HD manuals
Add to My Manuals
Save this manual to your list of manuals |
Page 62 highlights
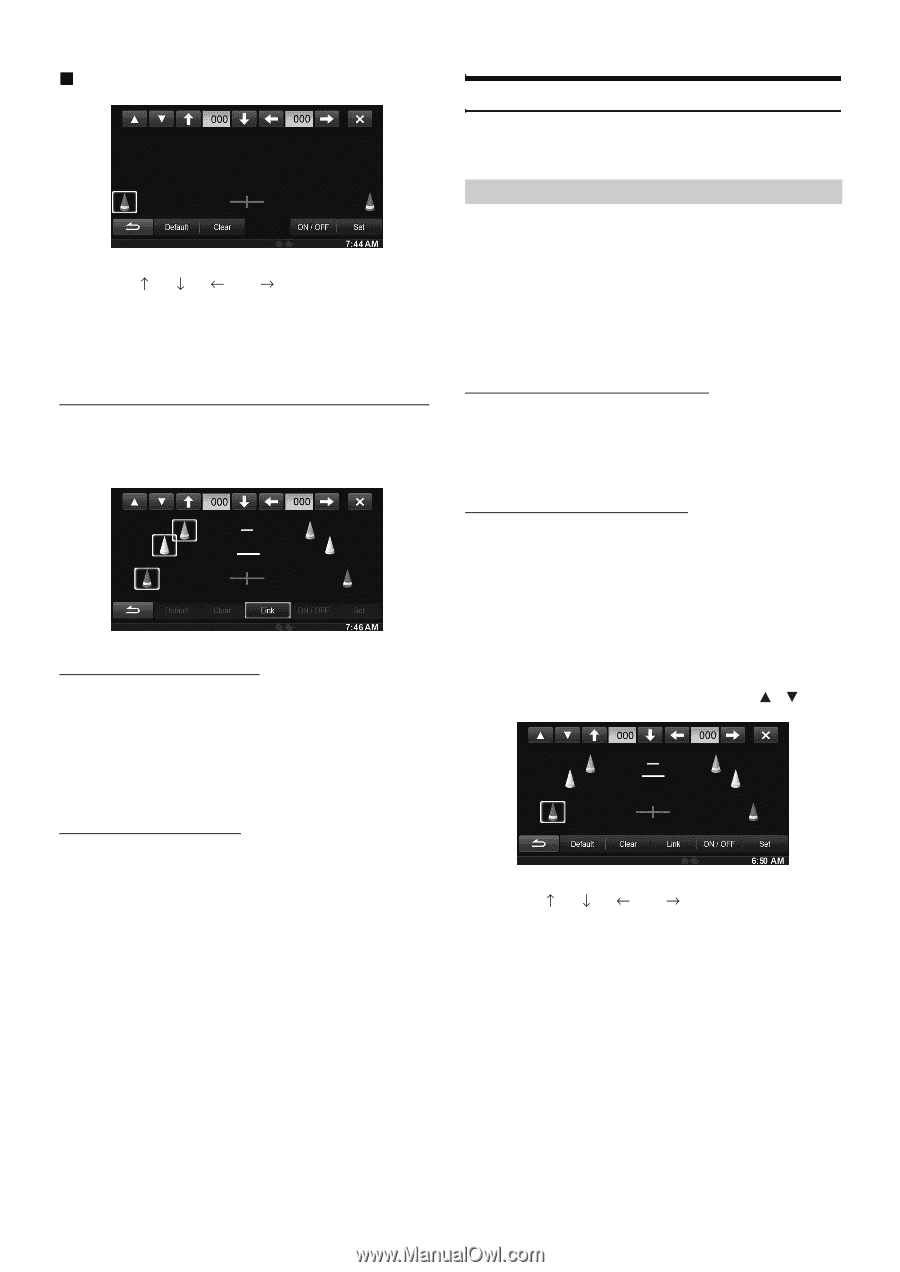
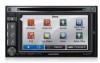
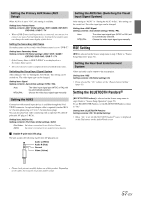
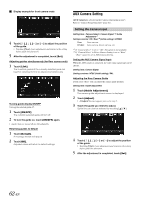
Display example for front camera mode 4 Touch or [ ] to adjust the position of the guide. • Touching [Clear] clears adjustments and returns to the setting before guide line alteration. 5 After the adjustment is completed, touch [Set]. Adjusting guides simultaneously (for Rear camera only) 1 Touch [Link]. The 3 vertical guides of the currently-selected guide link together, allowing them to be adjusted simultaneously. Turning guide display ON/OFF Turning the selected guide off. 1 Touch [ON/OFF]. The currently selected guide will turn off. 2 To turn the guide on, touch [ON/OFF] again. • Guides that are turned off are still adjustable. Returning guides to default 1 Touch [Default]. A message window will appear. 2 Touch [OK]. Adjusted values will return to default settings. AUX Camera Setting [AUX Camera] is selected on the Camera setup menu in step 3. Refer to "Camera Setup Operation" (page 61). Setting the Camera Input Setting item: Camera Select / Camera Signal*1/ Guide Adjustment*1 Setting contents: Off / Rear*2 (Initial setting) / OTHER Rear: Rear camera OTHER: Side camera, Room camera, etc. *1 If "Camera Select" is set to "Off", this option is not available. *2 If "Camera Select" in Direct Camera Setting is set to "Rear," "Rear" cannot be set in AUX Camera Setting. Setting the AUX Camera Signal Input When the AUX camera is connected, the video input signal type can be chosen. Setting item: Camera Signal Setting contents: NTSC (Initial setting) / PAL Adjusting the Rear Camera Guide If you select "Rear" you can adjust the camera guide position. Setting item: Guide Adjustment 1 Touch [Guide Adjustment]. The camera guide adjustment screen is displayed. 2 Touch [Adjust]. • If [Adjust] does not appear, proceed to step 3. 3 Touch the guide you intend to adjust. Guide line can also be selected by touching [ ] [ ]. 4 Touch or [ ] to adjust the position of the guide. • Touching [Clear] clears adjustments and returns to the setting before guide line alteration. 5 After the adjustment is completed, touch [Set]. 62-EN
-
 1
1 -
2
-
3
-
4
-
5
-
6
-
7
-
8
-
9
-
10
-
11
-
12
-
13
-
14
-
15
-
16
-
17
-
18
-
19
-
20
-
21
-
22
-
23
-
24
-
25
-
26
-
27
-
28
-
29
-
30
-
31
-
32
-
33
-
34
-
35
-
36
-
37
-
38
-
39
-
40
-
41
-
42
-
43
-
44
-
45
-
46
-
47
-
48
-
49
-
50
-
51
-
52
-
53
-
54
-
55
-
56
-
 57
57 -
 58
58 -
 59
59 -
 60
60 -
 61
61 -
 62
62 -
 63
63 -
 64
64 -
 65
65 -
 66
66 -
 67
67 -
68
-
69
-
70
-
71
-
72
-
73
-
74
-
75
-
76
-
77
-
78
-
79
-
80
-
81
-
82
-
83
-
84
-
85
-
86
-
87
-
88
-
89
-
90
-
91
-
92
-
93
-
94
-
95
-
96
-
97
-
98
-
99
-
100
-
101
-
102
-
103
-
104
-
105
-
106
-
107
-
108
-
109
-
110
-
111
-
112
-
113
-
114
-
115
-
116
 |
 |