Alpine IVA W205 Owners Manual - Page 29
Switching Display Modes, Switching the Visual Source Only, Simultaneous Function, Blackout Mode - remote control
 |
UPC - 093276200588
View all Alpine IVA W205 manuals
Add to My Manuals
Save this manual to your list of manuals |
Page 29 highlights
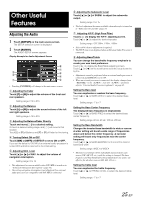
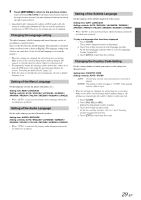
Switching Display Modes After carrying out the steps 1 to 3 of "To display the DVD mode screen" explained on page 28, perform the operation described below. While your vehicle is parked, touch [WIDE] on the visual source screen. Each touch changes the display modes as follows: MODE 1 (WIDE) MODE 2 MODE 3 MODE 1 (CINEMA) (NORMAL) (WIDE) In Mode 1 (Wide), the monitor displays a normal picture wider to fit in a wide-screen monitor by evenly stretching out the picture horizontally. Cancelling the Simultaneous Function 1 Touch the visual screen to display the main control. 2 Touch [CONTROL]. 3 Touch [VISUAL] within 5 seconds. The VISUAL selection screen appears. 4 Touch [NORMAL]. The simultaneous function is canceled. • To make the setting, set to "Setting the VISUAL Soft Button" (page 37). • If a DVD player is connected, you can receive the DVD picture/ sound. DVD changer (DHA-S680) is connected: Press and hold V.OUT on the remote control supplied with the DVD player or DVD changer for more than 2 seconds. The picture and sound of the DVD will be output. The DVA-5210 is connected: Press V.OUT on the remote control (included with the DVA-5210) to output DVD picture/sound. • The simultaneous function cannot be used when the Audio source is in the navigation mode. When NAV. is set in "Setting the VISUAL Soft Button" (page 37), only the navigation screen can be recalled. In Mode 2 (Cinema), the monitor displays a normal picture by stretching out the picture horizontally and vertically. This mode is good for displaying a cinema type picture at the 16:9 ratio. In Mode 3 (Normal), the monitor displays a normal picture at the center of the screen with a vertical black band at each side. Switching the Visual Source Only (Simultaneous Function) You can watch the video portion of another source while listening to the current source. • After carrying out the steps 1 to 3 of "To display the DVD mode screen" explained on page 28, perform the operation described below. 1 Touch [VISUAL] on the audio source screen. The VISUAL selection screen appears. 2 Touch a desired visual source. The visual source is switched to the selected one. Blackout Mode On and Off When Blackout mode is turned on, the monitor display will turn off to reduce power consumption. This additional power enhances the sound quality. 1 Touch [VISUAL] on the main source screen. The VISUAL selection screen is displayed. 2 Touch [OFF]. The backlit-display portion goes out. 3 Touch [OFF] again to cancel the display backlight. • To make the setting, set to "Setting the VISUAL Soft Button" (page 37). • If any button on the unit is pressed during Blackout mode, the function will be displayed for 5 seconds to show the operation before returning to Blackout mode. 27-EN
-
 1
1 -
2
-
3
-
4
-
5
-
6
-
7
-
8
-
9
-
10
-
11
-
12
-
13
-
14
-
15
-
16
-
17
-
18
-
19
-
20
-
21
-
22
-
23
-
 24
24 -
 25
25 -
 26
26 -
 27
27 -
 28
28 -
 29
29 -
 30
30 -
 31
31 -
 32
32 -
 33
33 -
 34
34 -
35
-
36
-
37
-
38
-
39
-
40
-
41
-
42
-
43
-
44
-
45
-
46
-
47
-
48
-
49
-
50
-
51
-
52
-
53
-
54
-
55
-
56
-
57
-
58
-
59
-
60
-
61
-
62
-
63
-
64
-
65
-
66
-
67
-
68
-
69
-
70
-
71
-
72
-
73
-
74
-
75
-
76
-
77
-
78
-
79
-
80
-
81
-
82
-
83
-
84
-
85
-
86
-
87
-
88
-
89
-
90
-
91
-
92
-
93
-
94
-
95
-
96
-
97
-
98
-
99
-
100
-
101
-
102
-
103
-
104
-
105
-
106
-
107
-
108
-
109
-
110
-
111
-
112
-
113
-
114
-
115
-
116
-
117
-
118
-
119
-
120
-
121
-
122
-
123
-
124
-
125
-
126
-
127
-
128
-
129
-
130
-
131
-
132
-
133
-
134
-
135
-
136
-
137
-
138
-
139
-
140
-
141
-
142
-
143
-
144
-
145
-
146
-
147
-
148
-
149
-
150
-
151
-
152
-
153
-
154
-
155
-
156
-
157
-
158
-
159
-
160
-
161
-
162
-
163
-
164
-
165
-
166
-
167
-
168
-
169
-
170
-
171
-
172
-
173
-
174
-
175
-
176
-
177
-
178
-
179
-
180
-
181
-
182
-
183
-
184
-
185
-
186
-
187
-
188
-
189
-
190
-
191
-
192
-
193
-
194
-
195
-
196
-
197
-
198
-
199
-
200
-
201
-
202
-
203
-
204
-
205
-
206
-
207
-
208
-
209
-
210
-
211
-
212
-
213
-
214
-
215
-
216
-
217
-
218
-
219
-
220
-
221
-
222
-
223
-
224
-
225
-
226
-
227
-
228
-
229
-
230
-
231
-
232
-
233
-
234
-
235
-
236
-
237
-
238
 |
 |
