Alpine X009-FD1 Owner's Manual (english)
Alpine X009-FD1 Manual
 |
View all Alpine X009-FD1 manuals
Add to My Manuals
Save this manual to your list of manuals |
Alpine X009-FD1 manual content summary:
- Alpine X009-FD1 | Owner's Manual (english) - Page 1
NAVI STATION X009 EN FR This HD Radio receiver enables: ES • OWNER'S MANUAL Please read before using this equipment. • MODE D'EMPLOI Veuillez lire avant d'utiliser cet appareil. • MANUAL DE OPERACIÓN Léalo antes de utilizar este equipo. Thank you for purchasing this Alpine product. Please - Alpine X009-FD1 | Owner's Manual (english) - Page 2
PTY. LTD. 161-165 Princes Highway, Hallam Victoria 3803, Australia Phone 03-8787-1200 ALPINE ELECTRONICS GmbH Wilhelm-Wagenfeld-Str. 1-3, 80807 München, Germany Phone 089-32 42 640 ALPINE ELECTRONICS OF U.K. LTD. Alpine House Fletchamstead Highway, Coventry CV4 9TW, U.K. Phone 0870-33 33 763 - Alpine X009-FD1 | Owner's Manual (english) - Page 3
Operating Instructions PRECAUTIONS the Volume 20 Lowering Volume Quickly 20 Common Operations Using My Favorites 20 User Registration 21 Setting My HD RadioTM/ RBDS Listening to the Radio 31 Presetting Stations Manually 31 Presetting Stations Automatically 32 Tuning to Preset Stations 32 - Alpine X009-FD1 | Owner's Manual (english) - Page 4
47 Adjusting Picture Quality 47 Saving and calling the adjusted picture quality 47 About X009 47 Displaying the Product Information 47 Checking the DivX® Registration 47 Initializing the System 47 Installation Setup 48 Setting the External Audio Processor On/Off 48 Setting the Digital Output - Alpine X009-FD1 | Owner's Manual (english) - Page 5
64 AUX Camera Setting 65 Setting the Camera Input 65 Camera Interrupt Setting (Power OFF Mode 66 Reverse Mute Setting 66 Bluetooth Operation Setup Before Using 67 About Bluetooth 67 About the Hands-Free Phone 67 Before - Alpine X009-FD1 | Owner's Manual (english) - Page 6
reverse 77 Displaying the rear view video manually .... 77 Switching the Image Pattern for the Rear Camera 77 Guide Display ON/OFF Setting 77 Adjusting the Radio ID Number .... 82 Storing Channel Presets 82 Tuning Channels using Presets 82 Tune Start Function 82 Tune Scan Function 82 Search - Alpine X009-FD1 | Owner's Manual (english) - Page 7
of Difficulty 100 If this Message Appears 101 Specifications 104 END USER LICENSE AGREEMENT (Microsoft 105 END USER LICENSE AGREEMENT (NAVTEQ 107 Installation and Connections Warning 108 Caution 108 Precautions 108 Installation 109 Connections 111 System Example 114 LIMITED WARRANTY 7-EN - Alpine X009-FD1 | Owner's Manual (english) - Page 8
protection against harmful interference in a residential installation, and are more stringent than " instructions on how to use this product in a safe and effective manner. Alpine cannot be responsible for problems resulting from failure to observe the instructions in this manual. • This manual uses - Alpine X009-FD1 | Owner's Manual (english) - Page 9
means important instructions. Failure to heed them can result in injury or material property damage. HALT USE IMMEDIATELY IF A PROBLEM APPEARS. Failure to do so may cause personal injury or damage to the product. Return it to your authorized Alpine dealer or the nearest Alpine Service Center for - Alpine X009-FD1 | Owner's Manual (english) - Page 10
problems, do not attempt to repair the unit yourself. Return it to your Alpine dealer or the nearest Alpine Service Station for servicing is ejected immediately after initial loading, use your finger to feel around the inside Bumps) Installation Location Make sure the X009 will not be installed in a - Alpine X009-FD1 | Owner's Manual (english) - Page 11
Using such accessories can cause operational problems. We recommend not using these accessories on discs played in Alpine Manual to be valid. The warning "If you are driving, Please pull over before using . Turn the SPST switch back ON before using the X009. For connecting the SPST switch, refer to - Alpine X009-FD1 | Owner's Manual (english) - Page 12
attempt playback again. Tips for making your own discs The X009 plays DVD Video, DivX®, Audio CD and has a built use standard ISO naming Level 1 (8.3 DOS standard), Level 2 (32 characters) or Joliet (Windows or Macintosh long filenames) file naming conventions*. * Please consult the Owner's manual - Alpine X009-FD1 | Owner's Manual (english) - Page 13
, special characters may not be correctly displayed. CAUTION Alpine accepts no responsibility for lost data, etc., even if data, etc., is lost while using this product. On Handling Flash memory • This unit can control a memory storage device that supports the USB Mass Storage Class (MSC) protocol - Alpine X009-FD1 | Owner's Manual (english) - Page 14
license. • The Bluetooth® word mark and logos are registered trademarks owned by the Bluetooth SIG, Inc. and any use of such marks by Alpine Electronics, Inc. is under license. • The terms HDMI and HDMI High-Definition Multimedia Interface, and the HDMI Logo are trademarks or registered trademarks - Alpine X009-FD1 | Owner's Manual (english) - Page 15
Features Auto user setting change With the X009, you can register up to two users. Each • If USER2 is recognized while USER1 is using the system, a confirmation message is displayed. • If no Bluetooth device has been registered or if you want to switch users manually, touch the user tab key on the - Alpine X009-FD1 | Owner's Manual (english) - Page 16
Easy sound setting by car type (i-Personalize) This function lets you set the best audio environment for your car. On the unit, select and set the car category/steering wheel position/speaker type and size/seat material. For details of how to configure the settings, refer to "Car Specific Sound - Alpine X009-FD1 | Owner's Manual (english) - Page 17
Dual Screen Display Position You can switch the Audio/Visual and Navigation screens using drag & drop. To switch the screens, touch the middle of the Audio/Visual screen and drag it to the navigation screen. The screens will switch - Alpine X009-FD1 | Owner's Manual (english) - Page 18
Remote Control This unit can be controlled with an optional Alpine remote control. For details, consult your Alpine dealer. Point the optional remote control transmitter at the remote control sensor. About the button descriptions used in this Owner's Manual The buttons found on the face of the unit - Alpine X009-FD1 | Owner's Manual (english) - Page 19
The X009 is a precision device. Careful handling of the unit should provide you with years of trouble-free operation. Turning the System On With the Alpine disc. * The SD memory card does not support Music/Video playback. For details on how to use SD memory cards, refer to "Navigation system OM - Alpine X009-FD1 | Owner's Manual (english) - Page 20
warm under normal operating conditions. This is not a malfunction, but care should be taken to avoid prolonged contact with it. Common Operations Using My Favorites Display example of My Favorites screen Adjusting the Screen Viewing Angle Adjust the screen's angle for better visibility. 1 Press - Alpine X009-FD1 | Owner's Manual (english) - Page 21
4 Touch [Link], then touch [OK]. The Bluetooth Device List is displayed. • The Bluetooth devices registered here are used to automatically identify the user. Also, a cellular phone can be used as a hands-free phone. For details, see "Bluetooth Setting" (page 62). • Touching [Do not Link] exits user - Alpine X009-FD1 | Owner's Manual (english) - Page 22
Setting My Favorites Configure the My Favorites settings. Press the (My Favorites) button. My Favorites screen for USER1 is displayed. • You cannot access My Favorites screen while driving. • [ ] and [ ] are not available while driving. • To configure My Favorites settings for USER2, touch [USER2]. - Alpine X009-FD1 | Owner's Manual (english) - Page 23
Name screen (Keypad) is displayed. 2 Input the name and touch [OK]. The user name is changed. • For details of how to input characters using the keypad, refer to "How to Input Characters and Numbers (Keypad)" (page 27). Changing a Bluetooth device You can change the Bluetooth devices associated with - Alpine X009-FD1 | Owner's Manual (english) - Page 24
6 Select the installation position of the rear speaker. If you select are disabled. Downloaded Sound Settings Using a Flash memory device, the sound settings downloaded from the ALPINE website can be used to configure Time Correction, X-Over Adjust each audio effect setting separately and manually. - Alpine X009-FD1 | Owner's Manual (english) - Page 25
Using the TuneIt App, customized parameters can also be uploaded for others to share and rate. Through this unit, it is also possible to receive and respond to information from Alpine's Social Network Service (SNS) available through the connected Smartphone. The installed settings on X009 will be - Alpine X009-FD1 | Owner's Manual (english) - Page 26
Display example for Notification incoming screen Poster's picture: Display poster's picture. (Provided from TuneIt App on Smartphone, displayed with a default image when invalid.) Touch here to switch to Facebook screen. Poster's name: Display poster's name. (Provided from TuneIt App on Smartphone, - Alpine X009-FD1 | Owner's Manual (english) - Page 27
Switching the Image Pattern for the Front Camera*2 Guide Display ON/OFF Setting 80 77, 80 Adjusting , are indicated by " " in this manual. Example: How to Input Characters and Numbers and procedures may vary slightly depending on the function used, but the basic input method is the same. - Alpine X009-FD1 | Owner's Manual (english) - Page 28
", this option is not available. (Page 60) *5 When AUX 3 Source Select is set to "iPod Video", this option is not available. (Page 60) Switching Sources Using the Top banner Touch the source button for the Top banner at the top of the Audio/ Visual Playback screen and select the desired source - Alpine X009-FD1 | Owner's Manual (english) - Page 29
set the rear source the same as the X009's playing visual source. • When iPhone Pandora® source is selected on X009, you cannot select iPod Video or enjoy iPod same time. Full Screen Touch operation You can operate the system by using the touch panel on the screen. • Be sure to touch the onscreen - Alpine X009-FD1 | Owner's Manual (english) - Page 30
connected Bluetooth device. Indicates the signal strength level of the connected Bluetooth compatible device. Displayed when Bluetooth setting is ON. 0 1 2 3 No Service The clock display You can switch between the 12 hour display and 24 hour display options. For details of the clock display - Alpine X009-FD1 | Owner's Manual (english) - Page 31
X009 can receive HD Radio signals based on digital radio broadcast standards in addition to analog radio broadcasts using RBDS. HD Radio signals are broadcast in the service tuning mode. DX Seek Local Seek D.DX Seek D.Local Seek MANUAL PTY*1 *1 Displays only when the PTY tuning mode is selected. - Alpine X009-FD1 | Owner's Manual (english) - Page 32
will return the tuner preset to the previous setting. Tuning to Preset Stations You can tune in the preset stations in memory on either band using its preset number. 1 Touch [Band] of Bottom banner repeatedly until the desired band is displayed. 2 Touch any one of the preset buttons that has - Alpine X009-FD1 | Owner's Manual (english) - Page 33
an iPod/iPhone supporting the tag function use the iTunes Tagging function. For details, refer to the Owner's Manual Service Data: Contributes to the superior user experience of HD Radio Technology. Presents song name, artist, station IDs, HD2/HD3 Channel Guide content for later review and purchase - Alpine X009-FD1 | Owner's Manual (english) - Page 34
of the screen to start playback. • The X009 can play back MP3/WMA/AAC files saved to CD or DVD. Use a format compliant with this unit. For further information or storing MP3/WMA/AAC files, refer to pages 35 and 36 before using the unit. • Any file protected by DRM (Digital Rights Management) copy - Alpine X009-FD1 | Owner's Manual (english) - Page 35
using software with MP3/WMA/AAC codecs. For details on creating MP3/WMA/AAC files, refer to the user's manual for that software. MP3/WMA/AAC files that are playable on this device have the file extensions. MP3: "mp3" WMA: "wma" (ver. 7.x, 8.x, 9.x are supported) AAC: "m4a" WMA is not supported - Alpine X009-FD1 | Owner's Manual (english) - Page 36
RWs, DVD+Rs, DVD+RWs and Flash memory. Corresponding File Systems This device supports discs formatted with ISO9660 Level 1 or Level 2, UDF1.02 and UDF1.02( many times per second the data is sampled (recorded). For example, music CDs use a sampling rate of 44.1 kHz, so the sound is sampled (recorded) - Alpine X009-FD1 | Owner's Manual (english) - Page 37
injured. Caution • Not all functions will operate for every DVD. See the individual DVD's instructions for details on the features supported. • Fingerprints on a disc may adversely affect playback. If a problem occurs, remove the disc and check for fingerprints on the playback side. Clean the disc - Alpine X009-FD1 | Owner's Manual (english) - Page 38
in damage. • Refer also to "Disc Setting" (page 56). • While reading a DivX® file, the fast-forwarding/fast-reversing and repeat functions, etc. cannot be used. • A DivX® file that exceeds 4GB cannot be played back. If a Menu Screen Appears On DVD mode, menu screens may appear automatically. If this - Alpine X009-FD1 | Owner's Manual (english) - Page 39
Displaying the Top Menu Screen When a DVD contains two or more titles, the top menu screen appears. Touch [TOP MENU] of Bottom banner. The top menu screen appears. • To perform necessary operations, refer to "If a Menu Screen Appears" (page 38). Displaying the Menu Screen With a DVD having two or - Alpine X009-FD1 | Owner's Manual (english) - Page 40
to select the ] to play from the first file of the previous folder. ] to play from the first file of the next folder. Repeat Playback Use this function to play the disc's titles, chapters or tracks, etc., repeatedly. Touch [ ] of Bottom banner. The repeat mode switches every time the button is - Alpine X009-FD1 | Owner's Manual (english) - Page 41
start from the number selected. 4 Touch [ ]. • This function cannot be used on discs on which no title numbers are recorded. • Some disc may not accept any operation. Searching Directly by Chapter Number Use this function to easily move to the beginnings of the chapters on - Alpine X009-FD1 | Owner's Manual (english) - Page 42
a codec (software) to compress moving images while maintaining image quality using a highly advanced compression ratio and operating speed. • Official DivX® vod.divx.com for more information on how to complete your registration. Media supported The unit can play back CD-R/CD-RW/DVD-R/DVD-RW/DVD+R/ - Alpine X009-FD1 | Owner's Manual (english) - Page 43
. Setting items: iDataLink Setup / Text Display / Remote Sensor *1 / Top/Bottom Banner Fade Out / Screen/ LED Customize / Visual / About / Installation / External Audio Processor / Optical *2 *1 Displayed only when Rear Seat Entertainment (RSE) is On (page 60). *2 Available only when External Audio - Alpine X009-FD1 | Owner's Manual (english) - Page 44
the Auto scroll mode. Scroll display is repeated as long as the mode is turned on. 44-EN Format settings The character code to be used for tag text information displayed on the screen can be selected from 7 character codes. Setting item: Format Setting contents: Latin-1 / Latin-9 (Initial setting - Alpine X009-FD1 | Owner's Manual (english) - Page 45
Level of Backlight" (page 45). Adjusting the Minimum Level of Backlight You can adjust the brightness of the backlight. This function could be used, for instance, to change the screen brightness while traveling at night. Setting item: Screen Dimmer Level Setting content: -15 to +15 (Initial setting - Alpine X009-FD1 | Owner's Manual (english) - Page 46
2 Touch [ ] of the desired item. Settable items differ depending on the application. [Video] (Video media): Display Mode / Live Contrast / Visual EQ / Brightness / Color / Tint / Contrast / Sharp [Direct Camera]*: Live Contrast / Brightness / Color / Contrast [AUX Camera]*: Live Contrast / - Alpine X009-FD1 | Owner's Manual (english) - Page 47
[Preset2] to call the saved settings. • Display Mode cannot be registered. About X009 Touch [About] on the General setup menu in step 3. Refer to "General information and refer to it whenever you contact Alpine Tech Support or an Alpine-authorized dealer. Setting item: Version Information Contents - Alpine X009-FD1 | Owner's Manual (english) - Page 48
" (page 43). Setting item: Installation The Installation check screen is displayed. Setting the not recognized by X009. On: The connected audio processor is recognized by X009. • Some Setup Operation" (page 43). To connect an audio processor using optical digital output, set to "On" by the - Alpine X009-FD1 | Owner's Manual (english) - Page 49
to the unit, make the following setting. Setting item: SubW. Setting contents: On / Off (Initial setting) • Note that if you select "Off" when Subwoofer Installed in Car Specific Sound Setup is set to "Yes", the setting in Car Specific Sound Setup will be canceled. Adjusting the Subwoofer Level You - Alpine X009-FD1 | Owner's Manual (english) - Page 50
a large quantity of data. This data is used to reproduce the sound cleanly by making use of the data quantity. MX Compressed Media This Presets Setting contents: FLAT (Initial setting) / POP / ROCK / NEWS / JAZZ / ELECTRONIC / HIP HOP / EASY LISTENING / COUNTRY / CLASSICAL • Only one type can be - Alpine X009-FD1 | Owner's Manual (english) - Page 51
Adjusting the Frequency Touch [ ] or [ ] of "Freq." to adjust the frequency of the selected band. Adjustable frequency bands: 20 Hz to 20 kHz (in 1/3 octave steps) Band1: 20 Hz~100 Hz (63 Hz) Band2: 63 Hz~315 Hz (125 Hz) Band3: 125 Hz~500 Hz (250 Hz) Band4: 250 Hz~1 kHz (500 Hz) Band5: 500 Hz~2 kHz - Alpine X009-FD1 | Owner's Manual (english) - Page 52
Adjusting the Crossover Settings (X-Over) [X-Over] is selected on the Sound setup menu in step 3. Refer to "Sound Setup Operation" (page 48). Before performing the following procedures, refer to "About the Crossover" (page 54). Setting item: X-Over 1 Touch [Channel] to select the channel. Each time - Alpine X009-FD1 | Owner's Manual (english) - Page 53
About Time Correction The distance between the listener and the speakers in a car vary widely due to the complex speaker placement. This difference in the distances from the speakers to the listener creates a shift in the sounds image and frequency characteristics. This is caused by the time delay - Alpine X009-FD1 | Owner's Manual (english) - Page 54
be necessary. If you are unsure about this point, please consult your authorized Alpine dealer. • HPF (high pass filter): Cuts the lower frequencies and allows the Alpine speakers, refer to the respective Owner's Manual. We are not responsible for damage or malfunction of speakers caused by using - Alpine X009-FD1 | Owner's Manual (english) - Page 55
Source Setup Source Setup Operation Source Layout Setting [Source Layout] is selected on the Source setup menu in step 3. Refer to "Source Setup Operation" (page 55). To display the Source Setup Menu screen: Your vehicle must be parked with the ignition key in the ACC or ON position. To do this, - Alpine X009-FD1 | Owner's Manual (english) - Page 56
of the current disc, either do so from the DVD menu or by using the operation described in the section "Switching the Audio Tracks" (page 42). • If you want to play back a disc with parental lock, and its use is currently restricted, change the rating level and the country number in order to - Alpine X009-FD1 | Owner's Manual (english) - Page 57
the procedure described below to modify the output screen according to the type of TV monitor (rear monitor) being used. If the rear monitor is not connected, the screen setting is 16:9. Setting item: TV Screen Setting contents: 4:3LB / 4:3PS / 16:9 (Initial setting) • For some - Alpine X009-FD1 | Owner's Manual (english) - Page 58
your favorite teams. Once selected, you will be alerted when games that those teams are playing in can be heard on a SiriusXM channel. A "Team Saved X Used/Y Empty" pop up screen is displayed. X is the total number of Artist/Song/Game alert items stored in memory, and Y is the total number of - Alpine X009-FD1 | Owner's Manual (english) - Page 59
the previous screen. Changing the Lock Passcode 4 Touch [Edit Code]. The numeric keypad screen is displayed. 5 Use the keypad to enter the current (old) 4-digit passcode. (The initial passcode is set to 0000). SiriusXM antenna may not be properly installed or may have become damaged. 59-EN - Alpine X009-FD1 | Owner's Manual (english) - Page 60
Audio R (Red) Ground Video (Yellow) • Please check pin-out carefully before use of this product. Depending on the cable, there may be no picture and/or sound PAL) will be automatically selected. Choose the video input signal type manually. • When the current source is AUX 3, this setting cannot be - Alpine X009-FD1 | Owner's Manual (english) - Page 61
step3. Refer to "Source Setup Operation" (page 55). To use Bluetooth Pandora, set the Bluetooth Pandora setting to "On." Setting installed on your Smartphone before connection. Consult your Alpine dealer or the Alpine website for details. • Only the iPhone and certain Android Smartphones support - Alpine X009-FD1 | Owner's Manual (english) - Page 62
the iDataLink module via this unit. If this option is selected, you cannot pair the Bluetooth compatible phone with this unit. When using the X009's built-in Bluetooth function. • This setting is linked with "Setting the Hands-free Connection" (page 44). Bluetooth Setting [Bluetooth] is selected - Alpine X009-FD1 | Owner's Manual (english) - Page 63
selected on the Bluetooth setup menu in step 3. Refer to "Bluetooth Setup Operation" (page 61). You can select the character code that is used when transferring the phone book or history from a mobile phone. If unreadable characters appear in the transferred data, select the correct character code - Alpine X009-FD1 | Owner's Manual (english) - Page 64
explanation of video patterns, see the camera Owner's Manual. Adjusting the Rear/Front Camera Guide If you select "Rear" or "Front", you can adjust the camera guide position. Setting item: Guide Adjustment 1 Touch [Guide Adjustment]. The camera guide adjustment screen is displayed. • If the video - Alpine X009-FD1 | Owner's Manual (english) - Page 65
setup menu in step 3. Refer to "Camera Setup Operation" (page 64). Setting the Camera Input Setting item: Camera Select / Camera Signal*1 / Guide Adjustment*1 Setting contents: Off / Rear*2 (Initial setting) / Other Rear: Other: Rear camera Side camera, Room camera, etc. *1 If "Camera Select - Alpine X009-FD1 | Owner's Manual (english) - Page 66
display ON/OFF Turning the selected guide off. 1 Touch [ON/OFF]. The currently selected guide will turn off. 2 To turn the guide on, touch [ON/OFF] again. • Guides that are turned off are still adjustable. Returning guides to default. 1 Touch [Default]. A message window will appear. 2 Touch [OK - Alpine X009-FD1 | Owner's Manual (english) - Page 67
service provider's network. Additionally, certain features may not be activated by your service ALPINE NAVI" and the initial number of the passcode is "0000". Also refer to the Owner's Manual of the connected device(s). • Before using a Bluetooth device in X009 enables automatic connection. If - Alpine X009-FD1 | Owner's Manual (english) - Page 68
editing operation is deletion. • If a name has been registered, the name is displayed on the shortcut button. Dialing a Number In Call History You can use 3 types of history to make a phone call. Call History saves up to 60 phone numbers. If the limit is exceeded, the oldest phone number is - Alpine X009-FD1 | Owner's Manual (english) - Page 69
receive data. Please ensure that cellular data and/or Wifi is turned on in the smartphone to enjoy these features. • Extensive use of Siri or other streaming services may increase your phone's data usage. Please check with your phone company to ensure you have an appropriate Data plan. 1 Press - Alpine X009-FD1 | Owner's Manual (english) - Page 70
Voice Dial Function You can make a telephone call by using voice operation. • Connect your smartphone to the unit via Bluetooth, the function being available on the smartphone. For details, refer to the owner's manual of the smartphone. • Depending on the smartphone, the Voice Dial operation may - Alpine X009-FD1 | Owner's Manual (english) - Page 71
Phone Book Function Display example for Phone Book screen An icon is displayed to indicate that multiple phone numbers are registered under an entry. Synchronizing the Phone Book You can synchronize the system's phone book with the mobile phone's phone book. 1 Press the (PHONE) button. The - Alpine X009-FD1 | Owner's Manual (english) - Page 72
Assigning as a Short Cut Dialing Number Assigning from Call History 1 Press the (PHONE) button. The Phone menu screen is displayed. 2 Touch [Dialed], [Received] or [Missed]. The last four histories are displayed. 3 Touch the person name you intend to assign as the Short Cut dialing number. - Alpine X009-FD1 | Owner's Manual (english) - Page 73
] (Bluetooth Audio) of Top banner. The iDataLink-Bluetooth Audio source icon is marked with icon. • For detailed operation, refer to Owner's Manual of iDataLink module. • Depending on the connected iDataLink module, display screen and function keys may differ. M.I.X. (Random Play) Available for - Alpine X009-FD1 | Owner's Manual (english) - Page 74
The driver may be distracted from looking ahead and an accident could occur. Install the X009 correctly so that the driver cannot watch TV/video unless the vehicle is stopped and operate, refer to the Owner's Manual of the connected DVD player. External DVD player display example Touch [] 74-EN - Alpine X009-FD1 | Owner's Manual (english) - Page 75
changer playback screen is displayed, you can touch the screen to display the operation screen. For details on how to operate, refer to the Owner's Manual of the connected DVD changer. • The DVD-CHG operation mode screen and the Menu operation mode screen are the same as the external DVD player - Alpine X009-FD1 | Owner's Manual (english) - Page 76
displayed. For details on how to operate, refer to the Owner's Manual of the connected Digital TV Receiver (DVB-T). Menu operation mode screen display the Channel mode and the Favorite channel mode. [EPG] Call up the Electronic Program Guide (EPG). [MENU] Call up the menu screen. [Menu Control] Call - Alpine X009-FD1 | Owner's Manual (english) - Page 77
on the camera when backing up. Always turn and look and only use the camera for additional assistance. • This function is effective when the View • For detailed information about image patterns, see the camera Owner's Manual. Guide Display ON/OFF Setting 1 Touch the screen when the image from - Alpine X009-FD1 | Owner's Manual (english) - Page 78
B and C> about 1 m 1 Car width extension marks (red, yellow and green in order of distance) If properly calibrated, the marks indicate the car's width. This helps guide the car's path when backing up in a straight line. The marks represent the distance from the rear of the car (from the rear end of - Alpine X009-FD1 | Owner's Manual (english) - Page 79
road surface. (The illustrations represent a case when the camera is installed in the standard position.) When there is a steep upward slope Error Error In the case of a downward slope behind the car, the distance guides are displayed farther from the rear bumper than the actual distance. If there is - Alpine X009-FD1 | Owner's Manual (english) - Page 80
• For detailed information about image patterns, see the camera Owner's Manual. Other Camera Operation Set "Other" for "AUX Camera Setting" (page rear camera, the front camera guide display ON/OFF setting and Caution display location can be adjusted. Refer to "Guide Display ON/OFF Setting" (page - Alpine X009-FD1 | Owner's Manual (english) - Page 81
. • Refer to the SiriusXM Tuner User Guide for details on how to install the SiriusXM Tuner. • Before using the SiriusXM, make sure "SiriusXM" is www.siriusxm.com/activatenow, or call 1-866-635-2349. To activate SiriusXM Canada service, go www.xmradio.ca and click on "ACTIVATE RADIO" in the top - Alpine X009-FD1 | Owner's Manual (english) - Page 82
Checking the SiriusXM Radio ID Number To subscribe to the SiriusXM Satellite Radio service, it is necessary to locate and identify the Radio ID of your procedure to store up to 5 other channels onto the same band. To use this procedure for other bands, simply select the desired band and repeat the - Alpine X009-FD1 | Owner's Manual (english) - Page 83
mode screen. The Memory type selection screen is displayed. 2 Touch the Save Song or Save Artist to select the store type. A "Song (Artist) Saved X Used/Y Empty" pop up screen is displayed. X is the total number of song titles, artist names or sports team stored in memory, and Y is the total - Alpine X009-FD1 | Owner's Manual (english) - Page 84
a special channel that you can jump to with the press of a dedicated button and then jump back to the previous channel. This channel is often used to select your favorite SiriusXM traffic and weather report channel. 1 To store the Jump channel in memory, touch and hold [JUMP] for at least 2 seconds - Alpine X009-FD1 | Owner's Manual (english) - Page 85
heard on SiriusXM channels. Using this unit in conjunction with your tagged songs. For details, refer to the Owner's Manual of the Tagging compatible iPod/iPhone. The TAG icon will tag information on the unit, when an iPod/iPhone supporting the tag function is connected, the stored tag information - Alpine X009-FD1 | Owner's Manual (english) - Page 86
Flash Memory (Optional) About operations during library creation • "Tag Search" (page 88) does not work properly while a library is being created. • The order in which songs are played during library creation may differ from the order in the Flash Memory device. You can play back music files (MP3/ - Alpine X009-FD1 | Owner's Manual (english) - Page 87
the Repeat Play mode will be canceled. • If you select a track by using the search mode, the M.I.X. play mode will be canceled. Random Play (M.I.X. back again until all songs have been played back. Searching for a Desired Song X009 can carry out 2 kinds of searches. File/Folder Name Search 1 Touch - Alpine X009-FD1 | Owner's Manual (english) - Page 88
example explains how an ARTISTS search is performed. Another search mode can be used for the same operation, although the hierarchy differs. Searching by artist name 1 icon. • For detailed operation, refer to Owner's Manual of iDataLink module. • Depending on the connected iDataLink module, display screen - Alpine X009-FD1 | Owner's Manual (english) - Page 89
's own document "Identifying iPod models" at http://support.apple.com/kb/HT1353. WARNING It is dangerous for the driver to watch video while driving the vehicle. The driver may be distracted from looking ahead and an accident could occur. Install the X009 correctly so that the driver cannot watch - Alpine X009-FD1 | Owner's Manual (english) - Page 90
too many characters, songs may not be played back when connected to the X009. Therefore, a maximum of 64 characters is recommended. The maximum number of how an ARTISTS search is performed. Another search mode can be used for the same operation, although the hierarchy differs. Searching by artist - Alpine X009-FD1 | Owner's Manual (english) - Page 91
refer to "Selecting an Item in a List" (page 29). Alphabet Skip Function The unit is provided with a alphabet skip function for effective searching. When you use this function in the search mode, you can quickly search an artist or a song, etc. Direct Up/Down Function If you touch [ ] of the album - Alpine X009-FD1 | Owner's Manual (english) - Page 92
Songs HDMI Device (Optional) The device can connect with electronic device supporting HDMI output by HDMI interface and fulfill the play of 92). Lightning Digital AV Adapter (Type: A1438) HDMI connector in X009 Alpine special HDMI connection cable (sold separately) • Not all devices with - Alpine X009-FD1 | Owner's Manual (english) - Page 93
X009 enables you to interact with your Pandora® account by connecting an iPhone and smartphone that has the latest version of the Pandora® application installed Pandora® When using Bluetooth Pandora®, service. If you attempt to skip songs beyond the limit, "No skips remaining." is displayed. • X009 - Alpine X009-FD1 | Owner's Manual (english) - Page 94
station is saved to your station list. • You can also create stations using the Pandora Application on your iPhone or on the web at www.pandora. on the Pandora Compatible Application for iPhone when it is not connected to the X009. 1 Touch [ (Search)] of Bottom banner to activate the Search mode. 2 - Alpine X009-FD1 | Owner's Manual (english) - Page 95
be updated through a Flash Memory device. Download the software from the Alpine website and update the product using the Flash Memory device. Updating this product Check the Alpine website for details on updating. http://www.alpine-usa.com Artwork display 2 Touch [Track] or [Artist]. The current - Alpine X009-FD1 | Owner's Manual (english) - Page 96
You can select different story lines to view various versions of the same movie. Operation differs from disc to disc. Story line selection screens including instructions appear during the movie. Just follow the instructions. * These functions differ from disc to disc. For details, refer to the disc - Alpine X009-FD1 | Owner's Manual (english) - Page 97
List of Language Codes (For details, see page 56.) Abbreviation AA AB AF AM AR AS AY AZ BA BE BG BH BI BN BO BR CA CO CS CY DA DE DZ EL EN EO ES ET EU FA FI FJ FO FR FY GA GD GL GN GU HA HI HR HU HY IA Code 6565 6566 6570 6577 6582 6583 6589 6590 6665 6669 6671 6672 6673 6678 6679 6682 6765 6779 - Alpine X009-FD1 | Owner's Manual (english) - Page 98
List of Country Codes (For details, see page 56.) Abbreviation AD AE AF AG AI AL AM AN AO AQ AR AS AT AU AW AZ BA BB BD BE BF BG BH BI BJ BM BN BO BR BS BT BV BW BY BZ CA CC CD CF CG CH CI CK CL CM CN CO CR CU CV CX CY CZ DE DJ DK Code 6568 6569 6570 6571 6573 6576 6577 6578 6579 6581 6582 6583 - Alpine X009-FD1 | Owner's Manual (english) - Page 99
Abbreviation PE PF PG PH PK PL PM PN PR PT PW PY QA RE RO RU RW SA SB SC SD SE SG SH SI Code 8069 8070 8071 8072 8075 8076 8077 8078 8082 8084 8087 8089 8165 8269 8279 8285 8287 8365 8366 8367 8368 8369 8371 8372 8373 Country Abbreviation Peru SJ French Polynesia SK Papua New Guinea SL - Alpine X009-FD1 | Owner's Manual (english) - Page 100
guide will help you isolate the problem if the unit is at fault. Otherwise, make sure the rest of your system is properly connected, or then consult your authorized Alpine dealer. Basic No function or display. • Vehicle's ignition is off. - If connected according to the instructions it; using a - Alpine X009-FD1 | Owner's Manual (english) - Page 101
abovementioned solution does not solve the problem, consult your nearest Alpine dealer. MP3/WMA/AAC is not instructions in the solution column. System If you are driving, please pull over before using service center. • An access error to DVD drive occurred for some reasons. - Please ask Service - Alpine X009-FD1 | Owner's Manual (english) - Page 102
by the unit is used. - Use a sampling rate/bit rate supported by the unit. Bluetooth Please check Bluetooth audio device. • The Bluetooth audio device was not connected correctly. - Check the settings for X009 and the Bluetooth audio device and reconnect. Please check mobile device. • The mobile - Alpine X009-FD1 | Owner's Manual (english) - Page 103
of the next file will automatically be played back. This DivX rental has used XX out of YY views. Continue? • If the total number of viewings DivX® file with a supported resolution. SiriusXM Check Tuner • The SiriusXM Tuner is disconnected or the unit is having trouble communicating with the Tuner. - Alpine X009-FD1 | Owner's Manual (english) - Page 104
mm 23 mm • Due to continuous product improvement, specifications and design are subject to change without notice. • The LCD panel is manufactured using an extremely high precision manufacturing technology. Its effective pixel ratio is over 99.99%. This means that there is a possibility that 0.01 - Alpine X009-FD1 | Owner's Manual (english) - Page 105
(Microsoft) You have acquired a device ("DEVICE") that includes software licensed by Alpine Electronics, Inc. (collectively "ALPINE") from an affiliate of Microsoft Corporation (collectively "MS"). Those installed software products of MS origin, as well as associated media, printed materials, and - Alpine X009-FD1 | Owner's Manual (english) - Page 106
, you may print one copy of such electronic documentation. TRADEMARKS. This EULA does not grant you any rights in connection with any trademarks or service marks of ALPINE, MS, Microsoft Corporation, their affiliates or suppliers. PRODUCT SUPPORT. Product support for the SOFTWARE is not provided by - Alpine X009-FD1 | Owner's Manual (english) - Page 107
END USER LICENSE AGREEMENT (NAVTEQ) In using this Navigation System (hereinafter referred to as "System"), which includes Alpine Electronics, Inc. ("Alpine") Specifications, Space Machine, Inc. ("Space Machine") Software and NAVTEQ North America, LLC. ("NAVTEQ") Database, you are bound by the terms - Alpine X009-FD1 | Owner's Manual (english) - Page 108
wiring and cables in compliance with the manual to prevent obstructions when driving. Cables or vehicle. When in doubt, consult your Alpine dealer. • The X009 uses female RCA-type jacks for connection to the casing when installing. If it is not, problems may occur. • When installing in automobiles, - Alpine X009-FD1 | Owner's Manual (english) - Page 109
Installation To install the X009, refer to the manual in the separately purchased installation kit. 3 Mounting the GPS Antenna inside type glass may interrupt high frequency waves. If reception is poor with the antenna installed inside the car, try to mount the antenna outside the car. • Make sure - Alpine X009-FD1 | Owner's Manual (english) - Page 110
X009 is used individually. • If the switched power (ignition) lead of the X009 is connected directly to the positive (+) post of the vehicle's battery, the X009 as possible. Your Alpine dealer carries various noise suppressors, contact them for further information. • Your Alpine dealer knows best - Alpine X009-FD1 | Owner's Manual (english) - Page 111
Front/Rear camera To Rear/Other camera To iPod/iPhone or AUX output device To steering remote control interface box To guide control input terminal To Guide Input terminal To iDataLink module data I/O To Video output terminal To Audio output terminals (R, L) To Video Input terminal To Audio Input - Alpine X009-FD1 | Owner's Manual (english) - Page 112
We strongly recommend that the installation be performed by a trained, authorized Alpine dealer. Direct CAMERA Input Connector Use when the optional direct camera is When connecting an Audio processor, connect this lead to the Guide Input terminal with an optional RCA Extension cable. iDataLink data - Alpine X009-FD1 | Owner's Manual (english) - Page 113
Black) Connect this lead to a good chassis ground on the vehicle. Make sure the connection is made to bare metal and is securely fastened using the sheet metal screw provided. Left Rear (+) Speaker Output Lead (Green) Left Rear (-) Speaker Output Lead (Green/Black) Left Front (+) Speaker Output Lead - Alpine X009-FD1 | Owner's Manual (english) - Page 114
VIDEO AV extension cable* (sold separately) (KCU-461iV) USB extension cable (Included) Connection kit KCU-461iV (sold separately) * If iPod VIDEO is supported, use the iPod VIDEO extension cable. • To connect an iPod/iPhone, an optional connection kit KCU-461iV is required. • Do not leave a iPod - Alpine X009-FD1 | Owner's Manual (english) - Page 115
control. MIX Control Lead (Green/White) Use when an optional External Audio Processor with guide control input terminal is connected. • When is stopped and an external amplifier should be used to drive speakers. For details, refer to the owner's manual of the compatible external audio processor. • - Alpine X009-FD1 | Owner's Manual (english) - Page 116
Connection of a Mobile Digital TV Receiver and DVD Changer CAMERA/W.REMOTE Connector AUX/PRE OUT Connector To Video Output terminal To Video Input Terminal To Video Output terminal (Yellow) (Red) (White) Mobile Digital TV Receiver (sold separately) DVD Changer (sold separately) REMOTE OUT ( - Alpine X009-FD1 | Owner's Manual (english) - Page 117
Connection of an External Amplifier AUX/PRE OUT Connector Power Supply Connector (Red) (White) (Red) (White) (Red) (White) REMOTE TURN-ON (Blue/White) 1 Front Output RCA Connectors RED is right and WHITE is left. 2 Rear Output RCA Connectors RED is right and WHITE is left. Amplifier 4 ch (sold - Alpine X009-FD1 | Owner's Manual (english) - Page 118
Connection of cameras (Direct camera and AUX camera) CAMERA/W.REMOTE Connector CAMERA 1 CAMERA 2 Direct rearview camera (sold separately) HCE-C117D, etc. To Video Output terminal Camera with RCA video output (sold separately) 1 Direct CAMERA Input Connector 2 Camera extension cable (Included with - Alpine X009-FD1 | Owner's Manual (english) - Page 119
Connection of cameras (HCE-C212F + HCE-C210RD or HCE-C200F + HCE-C200R) CAMERA/W.REMOTE Connector CAMERA 2 To Video Output Terminal Control Unit REVERSE (Orange/White) Camera Control Lead (Orange/Black) To plus side of the back lamp signal lead of the car. 1 CAMERA Input RCA Connector 2 RCA - Alpine X009-FD1 | Owner's Manual (english) - Page 120
to follow instructions contained in the Owner's manual. Damage Alpine, Alpine will pay the return shipping charges. You should provide a detailed description of the problem(s) for which service is required. HOW WE LIMIT IMPLIED WARRANTIES: ANY IMPLIED WARRANTIES INCLUDING FITNESS FOR USE - Alpine X009-FD1 | Owner's Manual (english) - Page 121
exposure evaluation (MPE). But it is desirable that it should be installed and operated keeping the radiator at least 20cm or more away from person achat en enregistrant votre produit dès maintenant à l'adresse suivante : www.alpine-usa.com/registration. Recuerde que con solo unos pocos pasos podrá
-
 1
1 -
 2
2 -
 3
3 -
 4
4 -
 5
5 -
 6
6 -
 7
7 -
8
-
9
-
10
-
11
-
12
-
13
-
14
-
15
-
16
-
17
-
18
-
19
-
20
-
21
-
22
-
23
-
24
-
25
-
26
-
27
-
28
-
29
-
30
-
31
-
32
-
33
-
34
-
35
-
36
-
37
-
38
-
39
-
40
-
41
-
42
-
43
-
44
-
45
-
46
-
47
-
48
-
49
-
50
-
51
-
52
-
53
-
54
-
55
-
56
-
57
-
58
-
59
-
60
-
61
-
62
-
63
-
64
-
65
-
66
-
67
-
68
-
69
-
70
-
71
-
72
-
73
-
74
-
75
-
76
-
77
-
78
-
79
-
80
-
81
-
82
-
83
-
84
-
85
-
86
-
87
-
88
-
89
-
90
-
91
-
92
-
93
-
94
-
95
-
96
-
97
-
98
-
99
-
100
-
101
-
102
-
103
-
104
-
105
-
106
-
107
-
108
-
109
-
110
-
111
-
112
-
113
-
114
-
115
-
116
-
117
-
118
-
119
-
120
-
121
 |
 |
R
Designed by ALPINE Japan
68-24567Z68-A
•
OWNER’S MANUAL
Please read before using this equipment.
•
MODE D’EMPLOI
Veuillez lire avant d’utiliser cet appareil.
•
MANUAL DE OPERACIÓN
Léalo antes de utilizar este equipo.
ALPINE ELECTRONICS OF AMERICA, INC.
19145 Gramercy Place, Torrance,
California 90501, U.S.A.
Phone 1-800-ALPINE-1 (1-800-257-4631)
EN
FR
ES
Thank you for purchasing this Alpine product. Please take a moment to protect your purchase by
registering your product now at the following address: www.alpine-usa.com/registration
.
You will be informed of product and software updates (if applicable), special promotions, news
about Alpine, and entered for a chance to win prizes.
Merci d’avoir acheté ce produit Alpine. Nous vous invitons à consacrer un moment à la protection
de votre achat en enregistrant votre produit dès maintenant à l’adresse suivante :
www.alpine-usa.com/registration
.
Vous serez tenu informé des mises à jour des produits et des logiciels (le cas échéant), des
promotions spéciales, de l’actualité d’Alpine, et vous aurez une chance de remporter des prix.
Gracias por adquirir este producto Alpine. Con solo unos pocos pasos podrá proteger su producto,
registrándolo a través de la siguiente dirección: www.alpine-usa.com/registration
.
Recibirá información sobre nuevos productos y software, promociones especiales, novedades sobre
Alpine y participará en el sorteo de premios.
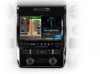
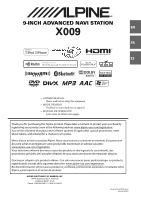
9-INCH ADVANCED NAVI STATION
X009
This HD Radio receiver enables: