Apple M9677B Getting Started - Page 72
Check the outside edges and around the battery bay. Check the alignment of the eight screw
 |
UPC - 718908818619
View all Apple M9677B manuals
Add to My Manuals
Save this manual to your list of manuals |
Page 72 highlights
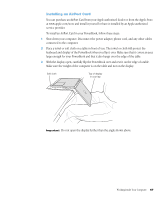
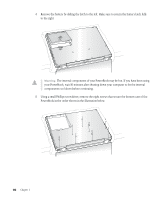
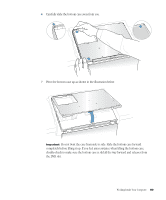
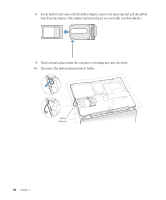
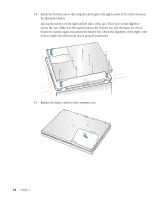
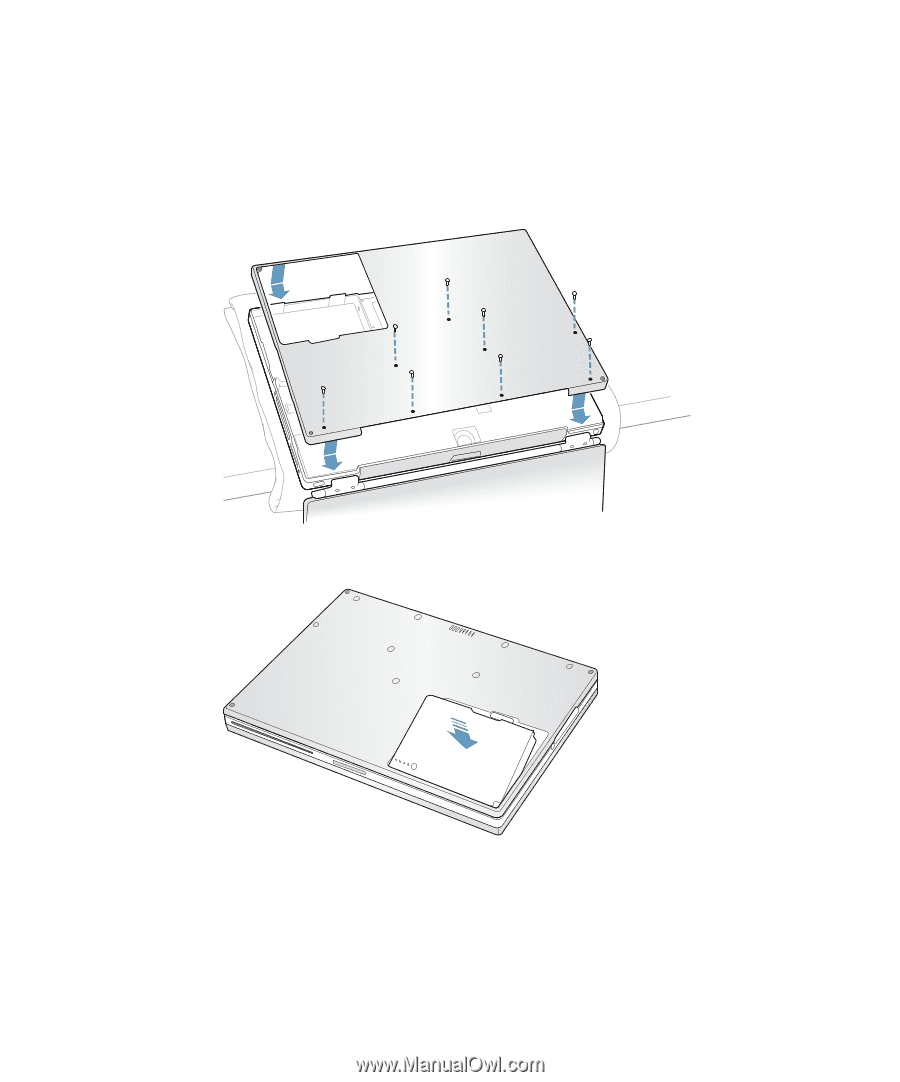
14 Attach the bottom case to the computer and replace the eight screws in the order shown in the illustration below. Line up the notches on the right and left sides of the case. Then press down slightly to secure the case. Make sure the seams between the bottom case and the frame are closed. Check the outside edges and around the battery bay. Check the alignment of the eight screw holes to make sure the bottom case is properly positioned. 8 5 6 7 4 1 2 3 15 Replace the battery and turn the computer over. 72 Chapter 4
-
 1
1 -
2
-
3
-
4
-
5
-
6
-
7
-
8
-
9
-
10
-
11
-
12
-
13
-
14
-
15
-
16
-
17
-
18
-
19
-
20
-
21
-
22
-
23
-
24
-
25
-
26
-
27
-
28
-
29
-
30
-
31
-
32
-
33
-
34
-
35
-
36
-
37
-
38
-
39
-
40
-
41
-
42
-
43
-
44
-
45
-
46
-
47
-
48
-
49
-
50
-
51
-
52
-
53
-
54
-
55
-
56
-
57
-
58
-
59
-
60
-
61
-
62
-
63
-
64
-
65
-
66
-
 67
67 -
 68
68 -
 69
69 -
 70
70 -
 71
71 -
 72
72 -
 73
73 -
 74
74 -
 75
75 -
 76
76 -
 77
77 -
78
-
79
-
80
-
81
-
82
-
83
-
84
-
85
-
86
-
87
-
88
 |
 |
72
Chapter
4
14
Attach the bottom case to the computer and replace the eight screws in the order shown in
the illustration below.
Line up the notches on the right and left sides of the case. Then press down slightly to
secure the case. Make sure the seams between the bottom case and the frame are closed.
Check the outside edges and around the battery bay. Check the alignment of the eight screw
holes to make sure the bottom case is properly positioned.
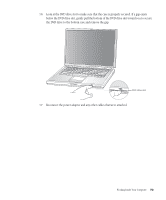
15
Replace the battery and turn the computer over.
2
1
7
6
4
5
8
3