Apple MB952LL Manual
Apple MB952LL - iMac - 4 GB RAM Manual
 |
UPC - 885909367627
View all Apple MB952LL manuals
Add to My Manuals
Save this manual to your list of manuals |
Apple MB952LL manual content summary:
- Apple MB952LL | Manual - Page 1
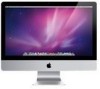
Congratulations, you and your iMac were made for each other. - Apple MB952LL | Manual - Page 2
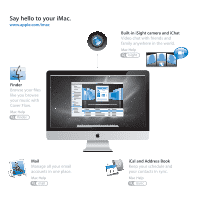
hello to your iMac. www.apple.com/imac Finder Browse your files like you browse your music with Cover Flow. Mac Help finder Mail Manage all your email accounts in one place. Mac Help mail Built-in iSight camera and iChat Video chat with friends and family anywhere in the world. Mac Help isight iCal - Apple MB952LL | Manual - Page 3
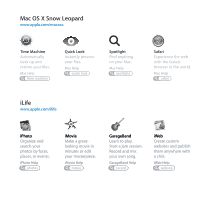
time machine Quick Look Instantly preview your files. Mac Help quick look Spotlight Find anything on your Mac. Mac Help spotlight Safari Experience the web with the fastest browser in the world. Mac Help safari iLife www.apple.com/ilife iPhoto Organize and search your photos by faces, places - Apple MB952LL | Manual - Page 4
- Apple MB952LL | Manual - Page 5
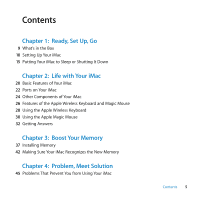
Wireless Keyboard and Magic Mouse 28 Using the Apple Wireless Keyboard 30 Using the Apple Magic Mouse 32 Getting Answers Chapter 3: Boost Your Memory 37 Installing Memory 42 Making Sure Your iMac Recognizes the New Memory Chapter 4: Problem, Meet Solution 45 Problems That Prevent You from Using Your - Apple MB952LL | Manual - Page 6
That Came with Your iMac 56 Other Problems 57 Learning More, Service, and Support 60 Locating Your Product Serial Number Chapter 5: Last, but Not Least 62 Important Safety Information 66 Important Handling Information 67 Cleaning Your iMac 68 Understanding Ergonomics 70 Apple and the Environment 71 - Apple MB952LL | Manual - Page 7
1 Ready, Set Up, Go 1 www.apple.com/imac Mac Help Migration Assistant - Apple MB952LL | Manual - Page 8
so that you can easily set it up and start using it right away. If you've never used an iMac or are new to Mac computers, read this chapter for instructions about getting started. Important: Read all the installation instructions and the safety information starting on page 62 before you plug your - Apple MB952LL | Manual - Page 9
What's in the Box Your iMac comes with an Apple Wireless Keyboard, a wireless Apple Magic Mouse, and an AC power cord. Apple Wireless Keyboard Apple Magic Mouse AC power cord Chapter 1 Ready, Set Up, Go 9 - Apple MB952LL | Manual - Page 10
Setting Up Your iMac Follow these steps to set up your iMac. Wait until Step 4 to turn on your iMac. Step 1: Pass the power cord through the hole in the stand, plug it into the power port on the back of your iMac, and then plug it into a power outlet. 10 Chapter 1 Ready, Set Up, Go - Apple MB952LL | Manual - Page 11
for wireless networking. For information about setting up a wireless connection, choose Help > Mac Help, and search for "AirPort." To use a dial-up connection, you need an external USB modem. Plug the modem into a USB port on your iMac, and then use a phone cord to connect the modem to a phone jack - Apple MB952LL | Manual - Page 12
wireless keyboard and mouse. Press the power button on the right side of your Apple Wireless Keyboard, and slide the switch on the bottom of your Apple Magic Mouse to turn them on and use them with your iMac. Your wireless keyboard and mouse come with AA batteries installed, and they're already - Apple MB952LL | Manual - Page 13
(®) button on the back to turn on your iMac. You hear a tone when you turn on your iMac. Click your mouse to connect it with your iMac. ® ® ® Important: If your keyboard and mouse aren't paired, follow the onscreen instructions to pair them with your iMac. You may have to click the mouse once to - Apple MB952LL | Manual - Page 14
the menu bar and follow the onscreen instructions. Step 6: Customize your desktop and set your preferences. You can easily make your desktop look the way you want using System Preferences, your command center for most settings on your iMac. Choose Apple () > System Preferences from the menu bar, or - Apple MB952LL | Manual - Page 15
iMac is in sleep, its screen is dark. You can quickly wake your iMac and bypass the startup process. To put your iMac to sleep, do one of the following: Â Choose Apple iMac. Â Press any button on the optional Apple Remote. When your iMac wakes from sleep, your applications, documents, and computer - Apple MB952LL | Manual - Page 16
more than a few days, shut it down. Choose Apple () > Shut Down. To turn your iMac on again, press the power (®) button. NOTICE: Shut down your iMac before moving it. Moving your iMac while the hard disk is spinning can damage the hard disk, causing loss of data or an inability to start up from - Apple MB952LL | Manual - Page 17
2 Life with Your iMac 2 www.apple.com/macosx Mac Help iLife - Apple MB952LL | Manual - Page 18
- Apple MB952LL | Manual - Page 19
ports of your iMac. The Apple website at www.apple.com links you to the latest Apple news, free downloads, and online catalogs of software and hardware for your iMac. You can also find the manuals for many Apple products and technical support for all Apple products on the Apple Support website at - Apple MB952LL | Manual - Page 20
Basic Features of Your iMac Built-in microphone Camera indicator light Built-in iSight camera Slot-loading SuperDrive SD card slot Built-in strereo speakers Built-in infrared receiver 20 Chapter 2 Life with Your iMac - Apple MB952LL | Manual - Page 21
on your iMac or talk card slot Easily transfer photos, videos, and data to and from your iMac with an SD card. Built-in stereo speakers Listen to music, receiver Use an optional Apple Remote (available separately) with the IR receiver to control Front Row and Keynote on your iMac from up to 30 feet - Apple MB952LL | Manual - Page 22
Ports on Your iMac G Ethernet port (10/100/1000 Base-T) £ Mini DisplayPort d USB 2.0 ports (4) , Audio in/optical digital audio in port f Headphone out/ optical digital ® audio out port H FireWire 800 port 22 Chapter 2 Life with Your iMac - Apple MB952LL | Manual - Page 23
another computer and transfer files. The Ethernet port automatically detects other Ethernet devices. £ Mini DisplayPort Output port with support for DVI, VGA, and dual-link DVI. The 27-inch model also supports devices. The port provides up to 7 watts of power. Chapter 2 Life with Your iMac 23 - Apple MB952LL | Manual - Page 24
Other Components of Your iMac Power port Security slot ® Power button ® Memory access (underneath) 24 Chapter 2 Life with Your iMac - Apple MB952LL | Manual - Page 25
button Press to turn on your iMac or put it to sleep. Hold down to restart your iMac during troubleshooting. Memory access Your iMac comes with at least 4 GB (inside) Connect wireless devices, such as the Apple Wireless Keyboard and Apple Magic Mouse, Bluetooth mobile phones, PDAs, and - Apple MB952LL | Manual - Page 26
Features of the Apple Wireless Keyboard and Magic Mouse - Volume keys Media keys Brightness keys Exposé Dashboard C Media Eject key Apple Wireless Keyboard Apple Magic Mouse 26 Chapter 2 Life with Your iMac - Apple MB952LL | Manual - Page 27
that uses Multi-Touch technology to support multiple buttons, 360˚ scrolling, screen zoom, and swipe control of your iMac. Use Mouse preferences to adjust tracking, clicking, and scrolling speed, or to add secondary button support (see page 31). Apple Wireless Keyboard Combine wireless freedom with - Apple MB952LL | Manual - Page 28
Using the Apple Wireless Keyboard Your wireless keyboard comes with two AA batteries installed and is paired with your iMac. Pairing means your keyboard and iMac are connected wirelessly and can communicate with each other. About the Indicator Light The LED on your wireless keyboard functions as a - Apple MB952LL | Manual - Page 29
wireless keyboard. 2 Choose Apple () > System Preferences, and then click Keyboard. 3 Click "Set Up Bluetooth Keyboard ..." in the lower-right corner. 4 Select your wireless keyboard, and then follow the onscreen instructions. If you don't pair your keyboard with your iMac within 3 minutes, the - Apple MB952LL | Manual - Page 30
with two AA batteries installed, is already paired with your iMac. Pairing means your Apple Magic Mouse and iMac are connected wirelessly and can communicate with each other. About the Indicator Light When you first turn on your Apple Magic Mouse, the light glows steadily for 5 seconds, indicating - Apple MB952LL | Manual - Page 31
to turn it on. 2 Choose Apple () > System Preferences, and then click Mouse. 3 Click "Set Up Bluetooth Mouse ..." in the lower-right corner. 4 Select your wireless mouse, and then follow the onscreen instructions. If you don't pair your mouse with your iMac within 3 minutes, the indicator light - Apple MB952LL | Manual - Page 32
Information For more information about using your iMac, see the following: To learn about Installing memory Troubleshooting your iMac if you have a problem Finding service and support for your iMac Using Mac OS X Moving from a PC to a Mac Using iLife applications Changing System Preferences See - Apple MB952LL | Manual - Page 33
menu bar and then clicking More Info. Apple news, free downloads, and online catalogs of software and hardware The Apple website at www.apple.com. Instructions, technical support, The Apple Support website at www.apple.com/support. and manuals for Apple products Chapter 2 Life with Your iMac 33 - Apple MB952LL | Manual - Page 34
- Apple MB952LL | Manual - Page 35
3 Boost Your Memory 3 www.apple.com/store Mac Help RAM - Apple MB952LL | Manual - Page 36
as DDR3 1066) Â Unbuffered and unregistered WARNING: Apple recommends that you have an Apple-certified technician install memory. Consult the service and support information that came with your iMac for information about how to contact Apple for service. If you attempt to install memory and damage - Apple MB952LL | Manual - Page 37
in. To install memory: 1 Turn your iMac off by choosing Apple () > Shut Down. 2 Disconnect all cables and the power cord from your iMac. 3 Place a soft, clean towel or cloth on your work surface. Hold the sides of your iMac and lay it down so that the screen rests on the surface and the bottom - Apple MB952LL | Manual - Page 38
4 Raise the stand and use a Phillips #2 screwdriver to loosen the three captive screws on the memory access door. Turn them counterclockwise. Raise stand Memory access door ® Phillips screwdriver 5 Remove the memory access door and set it aside. 38 Chapter 3 Boost Your Memory - Apple MB952LL | Manual - Page 39
6 Untuck the tabs in the memory compartment. 7 To replace memory modules, pull the tab to eject the installed memory modules. Remove the memory modules you want to replace. Untuck the tabs ® Pull the tab Chapter 3 Boost Your Memory 39 - Apple MB952LL | Manual - Page 40
8 Insert the new memory modules in the slots with the notches facing right, as shown in the illustration. Â If you install additional memory modules, insert them in the open slots. Â If you replace the installed memory modules, insert a new memory module in each of the front slots closest to the - Apple MB952LL | Manual - Page 41
memory access door and tighten the three captive screws with a Phillips #2 screwdriver. WARNING: Remember to replace the memory access door after you install memory. Your iMac won't function properly without the memory access door. Raise stand Memory access door ® Phillips screwdriver 12 Hold your - Apple MB952LL | Manual - Page 42
After installing memory, make sure the computer recognizes the new memory. To check the memory installed in your iMac: 1 Start up your iMac. 2 When you see the Mac OS desktop, choose Apple () > About This Mac. You'll see the total amount of memory installed in your iMac. For a detailed view of the - Apple MB952LL | Manual - Page 43
4 Problem, Meet Solution 4 www.apple.com/support Mac Help help - Apple MB952LL | Manual - Page 44
working with your iMac. Read on for troubleshooting tips to try when you have a problem. You can also find more troubleshooting information in Mac Help or on the iMac Service & Support website at www.apple.com/support/imac. If you experience a problem working with your iMac, there's usually a simple - Apple MB952LL | Manual - Page 45
your iMac to turn it on. If the problem reoccurs when you use a particular application, check with the application's manufacturer to see if the application is compatible with your computer. For support and contact information about the software that came with your computer, go to www.apple.com/guide - Apple MB952LL | Manual - Page 46
(®) button again to start up your computer. Keep holding down the Option key until your iMac starts up, then click the arrow iMac. Â If you still can't start up your iMac, see "Learning More, Service, and Support" on page 57 for information about contacting Apple for service. 46 Chapter 4 Problem - Apple MB952LL | Manual - Page 47
Replacing the Batteries Your Apple Wireless Keyboard and Apple Magic Mouse each come with two AA batteries installed. You can replace them with alkaline, to turn off your keyboard. 2 Use a coin to remove the battery compartment cover. Battery compartment cover Chapter 4 Problem, Meet Solution 47 - Apple MB952LL | Manual - Page 48
the batteries. You can check the battery level in Keyboard Preferences. Choose Apple () > System Preferences and click Keyboard. The battery level is in the lower- left corner. To replace the batteries in the Apple Magic Mouse: 1 Slide the On/off (®) switch on the bottom of your - Apple MB952LL | Manual - Page 49
and click Mouse. The battery level is in the lower-left corner. Using Apple Hardware Test If you suspect a problem with your iMac hardware, use the Apple Hardware Test application to help determine if there's a problem with one of the computer's components, such as the memory or processor. To use - Apple MB952LL | Manual - Page 50
Diagnostics: 1 Choose Apple () > System Preferences. 2 Click Network and then click "Assist me." 3 Click Diagnostics to open Network Diagnostics. 4 Follow the onscreen instructions. If Network Diagnostics can't resolve the problem, there may be a problem with the Internet service provider (ISP) you - Apple MB952LL | Manual - Page 51
to the computer, and the and on. Important: Instructions that refer to modems Apple () > System Preferences. 2 Click Network. 3 Click Add (+) at the bottom of the network connection services list, and choose PPPoE from the Interface pop-up menu. 4 Choose an interface for the PPPoE service - Apple MB952LL | Manual - Page 52
Mac Help or visit the AirPort Extreme website at www.apple.com/support/airport. If you can't resolve the issue using these steps, contact your ISP or network administrator. Problems with AirPort Wireless Communication If you have trouble using AirPort wireless communication: Â Make sure the computer - Apple MB952LL | Manual - Page 53
software: 1 Choose Apple () > System Preferences. 2 Click the Software Update icon and follow the onscreen instructions. Â For more information, search for "Software Update" in Mac Help. Â For the latest information about Mac OS X, go to www.apple.com/macosx. Chapter 4 Problem, Meet Solution 53 - Apple MB952LL | Manual - Page 54
back up your essential files before installing Mac OS X and other applications. Apple is not responsible for any lost data. Installing Mac OS X To install Mac OS X: 1 Back up your important files. 2 Insert the Mac OS X Install DVD that came with your computer. 54 Chapter 4 Problem, Meet Solution - Apple MB952LL | Manual - Page 55
that came with your computer: 1 Back up your important files. 2 Insert the Applications Install DVD that came with your computer. 3 Double-click Install Bundled Software. 4 Follow the onscreen instructions. 5 When the installation is complete, click Close. Chapter 4 Problem, Meet Solution 55 - Apple MB952LL | Manual - Page 56
. You can also check for updates manually. For more information, choose Help > Mac Help and search for "software update." If you have trouble inserting a disc  Using a continuous motion, push the disc into the drive until your fingers touch the edge of your iMac.  Use only a standard-size disc. If - Apple MB952LL | Manual - Page 57
. If you have a problem using your iMac or working with Mac OS X Â If the answer to your question isn't in this manual, look in Mac Help for instructions and troubleshooting information. In the Finder, choose Help > Mac Help. Â Check the Apple Support website at www.apple.com/support for the latest - Apple MB952LL | Manual - Page 58
well as instructions and troubleshooting information, in Mac Help. Choose Help > Mac Help. System Profiler To get information about your iMac, use Apple () > About This Mac from the menu bar and then click More Info. AppleCare Service and Support Your iMac comes with 90 days of technical support - Apple MB952LL | Manual - Page 59
/ca/fr/support www.apple.com/ie/support www.apple.com/nz/support www.apple.com/uk/support Telephone numbers are subject to change, and local and national telephone rates may apply. A complete list is available on the web: www.apple.com/contact/phone_contacts.html Chapter 4 Problem, Meet Solution - Apple MB952LL | Manual - Page 60
Number Use any of these methods to find the serial number of your iMac: Â Choose Apple () from the menu bar and then choose About This Mac. Click the version number beneath the words "Mac OS X" to cycle through the Mac OS X version number, the build version, and the serial number. Â Click the - Apple MB952LL | Manual - Page 61
5 Last, but Not Least 5 www.apple.com/environment Mac Help ergonomics - Apple MB952LL | Manual - Page 62
that of your equipment, follow these rules for handling and cleaning your iMac and for working more comfortably. Keep these instructions handy for reference by you and others. NOTICE: Incorrect storage or use of your computer may void the manufacturer's warranty. Important Safety Information WARNING - Apple MB952LL | Manual - Page 63
becomes frayed or otherwise damaged  You spill something into the case  Your iMac is exposed to rain or excess moisture  Your iMac has been dropped or the case has been damaged  You suspect that your iMac needs service or repair  You want to clean the case (use only the recommended procedure - Apple MB952LL | Manual - Page 64
the volume to block out noisy surroundings. Â Turn the volume down if you can't hear people speaking near you. High-risk activities This computer system is not intended for use in the operation of nuclear facilities, aircraft navigation or communications systems, air traffic control systems, or for - Apple MB952LL | Manual - Page 65
37). Do not attempt to open your iMac. If your iMac needs service, consult the service and support information that came with your computer for instructions about how to contact an Apple Authorized Service Provider or Apple for service. If you open your iMac or install items other than memory, you - Apple MB952LL | Manual - Page 66
these handling instructions could result in damage to your iMac or other property. Operating environment Operating your iMac outside these Operating the computer when parts are missing may be dangerous and may damage your computer. Carrying your iMac Before you lift or reposition your iMac, shut it - Apple MB952LL | Manual - Page 67
Using the optical drive The SuperDrive in your iMac supports standard 12 cm (4.7 inch) discs. Irregularly shaped discs or discs smaller than 12 cm (4.7 inches) are not supported. Storing your iMac If you are going to store your iMac for an extended period of time, keep it in a cool location (ideally - Apple MB952LL | Manual - Page 68
sprays, solvents, or abrasives. If you ordered an Apple USB mouse with your iMac, hold the mouse upside-down and roll the scroll ball vigorously with a straight line. Change hand positions often to avoid fatigue. Some computer users might develop discomfort in their hands, wrists, or arms after intensive - Apple MB952LL | Manual - Page 69
screen is up to you, although most people seem to prefer 18 to 28 inches (45 to 70 cm). Position the display to minimize glare and reflections on the screen straight line Forearms level or tilted slightly Lower back supported Screen positioned to avoid reflected glare Clearance under work surface - Apple MB952LL | Manual - Page 70
the chair should support your lower back (lumbar region). Follow the manufacturer's instructions for adjusting the backrest the floor and your feet. Or you can lower the desktop to eliminate the need for a footrest. Another option is www.apple.com/about/ergonomics Apple and the Environment Apple Inc - Apple MB952LL | Manual - Page 71
undesired operation. See instructions if interference to computer and the television or radio are on circuits controlled by different circuit breakers or fuses.) If necessary, consult an Apple Authorized Service Provider or Apple. See the service and support information that came with your Apple - Apple MB952LL | Manual - Page 72
Responsible party (contact for FCC matters only): Apple Inc. Corporate Compliance 1 Infinite Loop, MS 26-A Cupertino, CA the R&TTE Directive. Europe-EU Declaration of Conformity See www.apple.com/euro/compliance. Korea Warning Statements Singapore Wireless Certification Taiwan Wireless Statements - Apple MB952LL | Manual - Page 73
by an Apple Authorized Service Provider. A Class 1 laser is safe under reasonably foreseeable conditions per the requirements in IEC 60825-1 AND 21 CFR 1040. However, it is recommended that you do not direct the laser beam at anyone's eyes. External USB Modem Information When connecting your iMac to - Apple MB952LL | Manual - Page 74
locais- veja informaçoes sobre pontos de coleta na documentação do produto. Para informações sobre o programa de reciclagem da Apple, visite: www.apple.com/br/environment Battery Disposal Information Dispose of batteries according to your local environmental laws and guidelines. California: The coin - Apple MB952LL | Manual - Page 75
Nederlands: Gebruikte batterijen kunnen worden ingeleverd bij de chemokar of in een speciale batterijcontainer voor klein chemisch afval (kca) worden gedeponeerd. Taiwan: European Union-Disposal Information: The symbol above means that according to local laws and regulations your product should be - Apple MB952LL | Manual - Page 76
- Apple MB952LL | Manual - Page 77
Looking for Something? - Apple MB952LL | Manual - Page 78
keys 27 built-in iSight camera 21 microphone 21 speakers 21 button, power 13 C cable modem 11 camera indicator light 21 iSight 21 carrying your computer 66 chair 70 changing the desktop 14 System Preferences 14 cleaning the display 67 the mouse 68 your iMac 67 computer. See iMac computer disposal - Apple MB952LL | Manual - Page 79
28 mouse 30 infrared receiver 21 installation instructions 8 installing applications 54, 55, 56 Mac OS X 54 Internet connecting 11 connection problems 50 IP address sharing 52 masquerading 52 iSight 21 iTunes, deauthorizing 14 iTunes Store 14 K keyboard about 27 ergonomics 68 features 26 indicator - Apple MB952LL | Manual - Page 80
64 PPPoE connections 51 problems See troubleshooting product serial number 60 screen brightness, setting 27 SD card slot 21 SDRAM. See memory security slot 25 serial number 60 service and support 57 setting up your iMac 10 Setup Assistant 14, 50 shutting down before installing memory 37 the computer - Apple MB952LL | Manual - Page 81
SuperDrive about 21 supported disc sizes 67 support and service 57, 58 System Preferences customizing the desktop 14 Energy Saver 15 Software Update 53, 56 Startup Disk 46 System Profiler 58 T transferring information 14 troubleshooting 43 AirPort connection 52 AppleCare 58 computer freezes during - Apple MB952LL | Manual - Page 82
apple.com Apple, the Apple logo, AirPort, AirPort Extreme, Cover Flow, Exposé, FireWire, GarageBand, iCal, iChat, iLife, iMac, iMovie, iPhone, iPhoto, iPod, iTunes, Keynote, Mac, Mac are trademarks of Apple Inc. AppleCare, Apple Store, and iTunes Store are service marks of Apple Inc., registered in - Apple MB952LL | Manual - Page 83
- Apple MB952LL | Manual - Page 84
-
 1
1 -
 2
2 -
 3
3 -
 4
4 -
 5
5 -
 6
6 -
 7
7 -
8
-
9
-
10
-
11
-
12
-
13
-
14
-
15
-
16
-
17
-
18
-
19
-
20
-
21
-
22
-
23
-
24
-
25
-
26
-
27
-
28
-
29
-
30
-
31
-
32
-
33
-
34
-
35
-
36
-
37
-
38
-
39
-
40
-
41
-
42
-
43
-
44
-
45
-
46
-
47
-
48
-
49
-
50
-
51
-
52
-
53
-
54
-
55
-
56
-
57
-
58
-
59
-
60
-
61
-
62
-
63
-
64
-
65
-
66
-
67
-
68
-
69
-
70
-
71
-
72
-
73
-
74
-
75
-
76
-
77
-
78
-
79
-
80
-
81
-
82
-
83
-
84
 |
 |

Congratulations, you and your iMac
were made for each other.