Asus 1005PE-MU17-WT User Manual
Asus 1005PE-MU17-WT Manual
 |
View all Asus 1005PE-MU17-WT manuals
Add to My Manuals
Save this manual to your list of manuals |
Asus 1005PE-MU17-WT manual content summary:
- Asus 1005PE-MU17-WT | User Manual - Page 1
E5255 Eee PC User Manual Windows® 7 Edition Eee PC 1005/1001 Series 15G06Q206001 - Asus 1005PE-MU17-WT | User Manual - Page 2
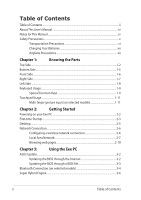
About This User's Manual...iv Notes for This Manual...iv Safety Precautions...v Transportation Precautions vi Charging Your Batteries vii Airplane Precautions Local Area Network 2-7 Browsing web pages 2-10 Chapter 3: Using the Eee PC ASUS Update...3-2 Updating the BIOS through the Internet - Asus 1005PE-MU17-WT | User Manual - Page 3
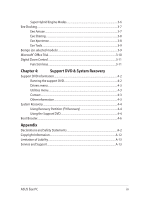
...4-3 Other information 4-3 System Recovery...4-4 Using Recovery Partition (F9 Recovery 4-4 Using the Support DVD 4-4 Boot Booster...4-6 Appendix Declarations and Safety Statements A-2 Copyright Information...A-12 Limitation of Liability...A-13 Service and Support...A-13 ASUS Eee PC iii - Asus 1005PE-MU17-WT | User Manual - Page 4
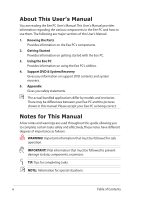
major sections of this User's Manual: 1. Knowing the Parts Provides information on the Eee PC's components. 2. Getting Started Provides information on getting started with the Eee PC. 3. Using the Eee PC Provides information on using the Eee PC's utilities. 4. Support DVD & System Recovery Gives you - Asus 1005PE-MU17-WT | User Manual - Page 5
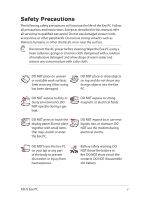
Safety Precautions The following safety precautions will increase the life of the Eee PC. Follow all precautions and instructions. Except as described in this manual, refer all servicing to qualified personnel. Do not use damaged power cords, accessories, or other peripherals. Do not use strong - Asus 1005PE-MU17-WT | User Manual - Page 6
is powered ON with any materials that will reduce air circulation such as a carrying bag. Incorrect installation of battery may cause explosion and damage the Eee PC. DO NOT throw the Eee PC in municipal waste. This product has been designed to enable proper reuse of parts and recycling.The symbol - Asus 1005PE-MU17-WT | User Manual - Page 7
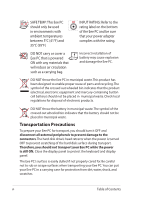
. Be aware that it takes much longer to charge the battery pack when the Eee PC is in use. Remember to fully charge the battery (8 hours or more) before first use and whenever it is depleted to prolong battery life.The battery reaches its maximmum capacity after a few full charging and discharging - Asus 1005PE-MU17-WT | User Manual - Page 8
viii Table of Contents - Asus 1005PE-MU17-WT | User Manual - Page 9
Top Side Bottom Side Front Side Right Side Left Side Keyboard Usage Touchpad Usage 1 Chapter 1: Knowing the Parts - Asus 1005PE-MU17-WT | User Manual - Page 10
Top Side Refer to the illustration below to identify the components on this side of the Eee PC. The top side may vary in appearance depending on models. 1 2 3 4 5 6 7 8 The keyboard differs for each territory. 1-2 Chapter 1: Knowing the Parts - Asus 1005PE-MU17-WT | User Manual - Page 11
OS. Applications that require higher resolution support may not function normally. 4 Express Gate Button / Super Hybrid Power button (on selected models) When the Eee PC is turned off, pressing this button will launch Express Gate. Express Gate is an ASUS exclusive OS that provides you with - Asus 1005PE-MU17-WT | User Manual - Page 12
is OFF when the Eee PC is turned OFF. Battery Charge Indicator The battery charge indicator (LED) shows the battery charging status as follows: Powered ON With Adapter High battery power (95%-100%) Green ON Medium battery power (11%-94%) Orange ON Low battery power (0%-10%) Orange Blinking - Asus 1005PE-MU17-WT | User Manual - Page 13
normal during charging or operation. DO NOT use on soft surfaces such as beds or sofas, which may block the vents. DO NOT PUT THE Eee PC ON YOUR LAP OR OTHER PARTS OF THE BODY TO AVOID INJURY FROM THE HEAT. ASUS Eee PC 1-5 - Asus 1005PE-MU17-WT | User Manual - Page 14
or remove the battery pack. Move the manual lock to the locked position after inserting the battery pack. 4 Memory Compartment The memory module is secured in a dedicated compartment. Front Side Refer to the illustration below to identify the components on this side of the Eee PC. 1 1 Audio - Asus 1005PE-MU17-WT | User Manual - Page 15
and 480Mbits/sec (USB 2.0). Also, the USB supports hot-swapping function. 5 LAN Port The eight-pin RJ-45 LAN port (10/100M bit) supports a standard Ethernet cable for connection to a local network. The built-in connector allows convenient use without additional adapters. ASUS Eee PC 1-7 - Asus 1005PE-MU17-WT | User Manual - Page 16
damage to the Eee PC and battery pack, always use the supplied power adapter. THE ADAPTER MAY BECOME WARM TO HOT WHEN IN USE. BE SURE NOT TO COVER THE ADAPTER AND KEEP IT AWAY FROM YOUR BODY. 2 Display (Monitor) Output The 15-pin D-sub monitor port supports a standard VGAcompatible device - Asus 1005PE-MU17-WT | User Manual - Page 17
support may not function normally. Sun Down Icon (F5): Decreases the display brightness. Sun Up Icon (F6): Increases the display brightness. Crossed Screen Icon (F7): Turns off the display backlight. LCD/Monitor Icons (F8): Toggles between the Eee PC's LCD display and an external monitor. ASUS - Asus 1005PE-MU17-WT | User Manual - Page 18
icon: Displays the start menu. Menu with pointer icon : Activates the properties menu and is equivalent to right-clicking the touchpad/mouse on an object. 1-10 Chapter 1: Knowing the Parts - Asus 1005PE-MU17-WT | User Manual - Page 19
arc with the other to rotate the photo or the document you are viewing. You can make a clockwise or counterclockwise rotation based on your needs. ASUS Eee PC 1-11 - Asus 1005PE-MU17-WT | User Manual - Page 20
Two-finger scrolling up/down or left/right- Use two fingertips to slide up/down or left/right on the touchpad to scroll a window up/down or left/ right. If your display window includes several sub-windows, move the pointer on that pane before scrolling. Three-finger page up/down- Use three fingers - Asus 1005PE-MU17-WT | User Manual - Page 21
Powering on your Eee PC First-time Startup Desktop Network Connection 2 Chapter 2: Getting Started - Asus 1005PE-MU17-WT | User Manual - Page 22
on your Eee PC These are only quick instructions for using your Eee PC. 1. Install the battery pack 2. Connect the AC power adapter 3 1 2 2 1 3 110V-220V 3. Turn ON the Eee PC Damage may occur if you use a different adapter to power the Eee PC. You may damage both your battery pack(s) and - Asus 1005PE-MU17-WT | User Manual - Page 23
time you start your Eee PC, the Windows wizard will launch automatically and lead you through setting up your preferences and some basic information. Follow the wizard instructions to finish the initialization: if you want. Click then click Next to continue. Next to continue. ASUS Eee PC 2-3 - Asus 1005PE-MU17-WT | User Manual - Page 24
5. Read the end user license agreement and check the two boxs before I accept the license terms. Click Next to continue. 6. Click Use recommended settings to get the latest important updates. 7. Specify the time zone you are in and the local date and time. Click Next to continue. 8. Connect to a - Asus 1005PE-MU17-WT | User Manual - Page 25
9. Select the network's location. 10. The initialization is finished. Click Next to continue. Desktop There are several shortcuts on the desktop. Double-click would form minimized icons in the Notification area. The actual Desktop screen may vary according to different models. ASUS Eee PC 2-5 - Asus 1005PE-MU17-WT | User Manual - Page 26
Network Connection Configuring a wireless network connection 1. Click the wireless network icon with an orange star Windows® Notification area. in the If the wireless connection icon does not show in the Notification area, activate the wireless LAN function by pressing + ( + ) before - Asus 1005PE-MU17-WT | User Manual - Page 27
Local Area Network To establish a wired network, follow the instructions below: Using a dynamic IP / PPPoE network connection: 1. Click the network icon with a yellow warning Change adapter settings in the left blue pane. 3. Right-click Local Area Connection and select Properties. ASUS Eee PC 2-7 - Asus 1005PE-MU17-WT | User Manual - Page 28
4. Click Internet Protocol Version 4(TCP/IPv4) and click Properties. 5. Click Obtain an IP address automatically and click OK. (Continue the following steps if using PPPoE) 6. Return to the Network and Sharing Center and then click Set up a new connection or network. 2-8 Chapter 2: Getting - Asus 1005PE-MU17-WT | User Manual - Page 29
your User name and, Password, and Connection name. Click Connect. 10. Click Close to finish the configuration. 11. Click the network icon in the taskbar and click the connection you just created. 12. Enter your user name and password. Click Connect to connect to the Internet. ASUS Eee PC 2-9 - Asus 1005PE-MU17-WT | User Manual - Page 30
connection. Contact your Internet Service Provider (ISP) if you have problems connecting to the network. Browsing web pages After you finish the network setup, click Internet Explorer on the desktop and start enjoying net surfing. Visit our Eee PC homepage (http://eeepc.asus.com) to obtain the - Asus 1005PE-MU17-WT | User Manual - Page 31
ASUS Update Bluetooth Connection Super Hybrid Engine Eee Docking Boingo Microsoft® Office Trial 3 Chapter 3: Using the Eee PC - Asus 1005PE-MU17-WT | User Manual - Page 32
the BIOS version information. This utility is pre-loaded in your Eee PC and is also available in the support DVD that comes with the Eee PC package. ASUS Update requires an Internet connection either through a network or an Internet Service Provider (ISP). Updating the BIOS through the Internet To - Asus 1005PE-MU17-WT | User Manual - Page 33
> ASUS > ASUSUpdate for EeePC> ASUSUpdate. The ASUS Update main window appears. 2. Select Update BIOS from file from the drop‑down menu, then click Next. 3. Locate the BIOS file from the Open window, then click Open. 4. Follow the screen instructions to complete the update process. ASUS Eee PC 3-3 - Asus 1005PE-MU17-WT | User Manual - Page 34
for cables for connecting Bluetooth-enabled devices. Examples of Bluetooth-enabled devices may be Notebook PCs, Desktop PCs, mobile phones, and PDAs. To connect to a Bluetooth-enabled device: 1. Press < Network Connection and select View Bluetooth Network Devices. 3-4 Chapter 3: Using the Eee PC - Asus 1005PE-MU17-WT | User Manual - Page 35
4. Click Add a device to look for 5. Select a Bluetooth-enabled new devices. device from the list and click Next. 6. Enter the Bluetooth security code into your device and start pairing. 7. The paired relationship is successfully built. Click Close to finish the setting. ASUS Eee PC 3-5 - Asus 1005PE-MU17-WT | User Manual - Page 36
power modes. The assigned instant key toggles power savings between various power saving modes. The power saving modes control many aspects of your Eee PC to maximize performance versus battery time. Applying or removing the power adapter will automatically switch the system between AC mode and - Asus 1005PE-MU17-WT | User Manual - Page 37
online entertainment contents including Radio, Live TV and Games, etc. The ASUS @Vibe service contents differ for each territory. Game Park Game Park includes multiple interesting games. ASUS AP Bank ASUS AP Bank offers various software applications and multimedia enjoyment online. ASUS Eee PC 3-7 - Asus 1005PE-MU17-WT | User Manual - Page 38
and share any files whenever you want and wherever you are. The ASUS WebStorage help file is accessible only when your Eee PC connects to the Internet. Eee Xperience Eee Splendid Eee Splendid helps improve your Eee PC display in terms of the contrast, brightness, skin tone, and color saturation - Asus 1005PE-MU17-WT | User Manual - Page 39
position of the Eee Docking tool bar. Boingo (on selected models) Boingo gives you easy access to global Wi-Fi services with a special price via the Boingo utility. Use one account at more than 100,000 hotspots around the world, including airports, hotels, cafes and restaurants. ASUS Eee PC 3-9 - Asus 1005PE-MU17-WT | User Manual - Page 40
key and follow the onscreen instructions to finish the activation process before starting the free trial. If you want to use other applications in the Microsoft Office Suite, click start and point to All Programs > Microsoft Office to select a desired application. 3-10 Chapter 3: Using the Eee PC - Asus 1005PE-MU17-WT | User Manual - Page 41
call or having a video chat. Press + to zoom in and + to zoom out. Press + to pan left and + to pan right. ASUS Eee PC 3-11 - Asus 1005PE-MU17-WT | User Manual - Page 42
the Digital Zoom Control icon from the Notification area and directly move the sliders for the zooming, panning, and tilting functions. 3-12 Chapter 3: Using the Eee PC - Asus 1005PE-MU17-WT | User Manual - Page 43
Support DVD information System Recovery Boot Booster 4 Chapter 4: Support DVD & System Recovery - Asus 1005PE-MU17-WT | User Manual - Page 44
the Drivers menu if Autorun is enabled in your computer. Click an icon to display support DVD/ Eee PC information Click an item to install If Autorun is NOT enabled in your computer, browse the contents of the support DVD to locate the file ASSETUP.EXE from the BIN folder. Double-click the ASSETUP - Asus 1005PE-MU17-WT | User Manual - Page 45
ASUS contact information. Other information The icons on the top right corner of the screen provide additional information on the Eee PC and the contents of the support DVD. Click an icon to display the specified information. System information DVD content Technical support File list ASUS Eee PC - Asus 1005PE-MU17-WT | User Manual - Page 46
drive and make note of any customized configuration settings (such as network settings). If you use the Support DVD to do the system recovery, the restored drivers and utilities may be different from the ones installed on your Eee PC at the factory. 4-4 Chapter 4: Support DVD & System Recovery - Asus 1005PE-MU17-WT | User Manual - Page 47
use the F9 recovery to restore the system. 4. Follow the onscreen instructions to complete the recovery process. You will lose all your data during ® OS. This support DVD is for Eee PC only. DO NOT use it on other computers. Visit the ASUS website at www.asus.com for any updates. ASUS Eee PC 4-5 - Asus 1005PE-MU17-WT | User Manual - Page 48
change any Eee PC components or perform system recovery (from USB flash disk, external optical drive or hidden partition). Follow the instructions below to and restart Eee PC. Remember to enable Boot Booster after you complete hardware change or system recovery. 4-6 Chapter 4: Support DVD & - Asus 1005PE-MU17-WT | User Manual - Page 49
Declarations and Safety Statements Copyright Information Limitation of Liability Service and Support A Appendix - Asus 1005PE-MU17-WT | User Manual - Page 50
installation.This equipment generates, uses, and can radiate radio frequency energy and, if not installed and used in accordance with the instructions, may cause harmful interference to radio communications. However, there is no guarantee that interference will not occur in a particular installation - Asus 1005PE-MU17-WT | User Manual - Page 51
instructions for satisfying RF exposure compliance. Eee PC 1005/1001 Series Max. SAR Measurement (1g) AR5B95(AW-NE785H)/AW-GE112H 802. 11b: 0.056 W/kg 802. 11g: 0.061 W/kg 802. 11n (20M): 0.06 W/kg 802. 11n (40M): 0.048 W/kg RT3090(AW-NE762H) Max. SAR Measurement (1g) 0.073 W/kg ASUS Eee PC - Asus 1005PE-MU17-WT | User Manual - Page 52
antenna during transmitting. End users must follow the specific operating instructions for satisfying RF exposure compliance. Operation is subject to operation of the device. To prevent radio interference to the licensed service (i.e. co-channel Mobile Satellite systems) this device is intended to - Asus 1005PE-MU17-WT | User Manual - Page 53
Eee PC 1005/1001 Series Max. SAR Measurement (1g) AR5B95(AW-NE785H)/AW-GE112H 802. 11b: 0.056 W/kg 802. 11g: 0.061 W/kg 802. 11n (20M): 0. Class [B] digital apparatus complies with Canadian ICES-003. Cet appareil numérique de la classe [B] est conforme à la norme NMB-003 du Canada ASUS Eee PC A-5 - Asus 1005PE-MU17-WT | User Manual - Page 54
CE Mark Warning This is a Class B product, in a domestic environment, this product may cause radio interference, in which case the user may be required to take adequate measures. CE marking for devices without wireless LAN/Bluetooth The shipped version of this device complies with the requirements - Asus 1005PE-MU17-WT | User Manual - Page 55
entire 2.4 GHz band (2400 MHz-2483.5 MHz) • 100mW for frequencies between 2446.5 MHz and 2483.5 MHz Channels 10 through 13 inclusive operate in the band 2446.6 MHz to 2483.5 MHz. There are few possibilities for outdoor use: Nord 61 Orne 63 Puy du Dôme 66 Pyrénées Orientales ASUS Eee PC A-7 - Asus 1005PE-MU17-WT | User Manual - Page 56
safety precautions should always be followed to reduce the risk of fire, electric shock, and injury to persons, including the following: • DO NOT use the Eee PC near water, for example, near a bath tub, wash bowl, kitchen sink or laundry tub, in a wet basement or near a swimming pool. • DO NOT use - Asus 1005PE-MU17-WT | User Manual - Page 57
• Do not dispose the Eee PC battery pack in a fire, as they may explode. Check with local codes for possible special disposal instructions to reduce the risk of injury the chemical substances in our products at ASUS REACH website at http:// green.asus.com/english/REACH.htm. ASUS Eee PC A-9 - Asus 1005PE-MU17-WT | User Manual - Page 58
of used batteries according to the manufacturer's instructions. (English) batterie nell'ambiente. (Italian) VORSICHT! Explosionsgefahr bei unsachgemäßen Austausch der Batterie med batteri af samme fabrikat og type. Levér det brugte batteri Kassera använt batteri enligt fabrikantens instruktion - Asus 1005PE-MU17-WT | User Manual - Page 59
aux instructions du fabricant. (French) ADVARSEL! Eksplosjonsfare ved feilaktig skifte av batteri. Benytt samme batteritype eller en tilsvarende type anbefalt av apparatfabrikanten. Brukte batterier kasseres i henhold til fabrikantens instruksjoner. (Norwegian) (Japanese) Russian) ASUS Eee PC - Asus 1005PE-MU17-WT | User Manual - Page 60
in any form or by any means, except documentation kept by the purchaser for backup purposes, without the express written permission of ASUSTeK COMPUTER INC. ("ASUS"). ASUS PROVIDES THIS MANUAL "AS IS"WITHOUT WARRANTY OF ANY KIND, EITHER EXPRESS OR IMPLIED, INCLUDING BUT NOT LIMITED TO THE IMPLIED - Asus 1005PE-MU17-WT | User Manual - Page 61
performing legal duties under this Warranty Statement, up to the listed contract price of each product. ASUS will only be responsible for ASUS, ITS SUPPLIERS OR YOUR RESELLER IS INFORMED OF THEIR POSSIBILITY. Service and Support Visit our multi-language web site at http://www.asus.com ASUS Eee PC - Asus 1005PE-MU17-WT | User Manual - Page 62
Manufacturer Address, City Country Authorized Representative in Europe Address, City Country ASUSTek COMPUTER INC. No. 150, LI-TE RD., PEITOU, TAIPEI 112, TAIWAN R.O.C TAIWAN ASUS COMPUTER GmbH HARKORT STR. 21-23, 40880 RATINGEN GERMANY A-14 Appendix
-
 1
1 -
 2
2 -
 3
3 -
 4
4 -
 5
5 -
 6
6 -
 7
7 -
8
-
9
-
10
-
11
-
12
-
13
-
14
-
15
-
16
-
17
-
18
-
19
-
20
-
21
-
22
-
23
-
24
-
25
-
26
-
27
-
28
-
29
-
30
-
31
-
32
-
33
-
34
-
35
-
36
-
37
-
38
-
39
-
40
-
41
-
42
-
43
-
44
-
45
-
46
-
47
-
48
-
49
-
50
-
51
-
52
-
53
-
54
-
55
-
56
-
57
-
58
-
59
-
60
-
61
-
62
 |
 |
Eee PC
User Manual
Windows
®
7 Edition
Eee PC 1005/1001 Series
E5255
15G06Q206001