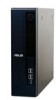
Asus BP5220 User Manual
Asus BP5220 Manual
 |
View all Asus BP5220 manuals
Add to My Manuals
Save this manual to your list of manuals |
Asus BP5220 manual content summary:
- Asus BP5220 | User Manual - Page 1
BP5220/AS-D592 ASUS Desktop PC User Manual SD MMC MS SMC CF MD - Asus BP5220 | User Manual - Page 2
, without the express written permission of ASUSTeK Computer Inc. ("ASUS"). Product warranty or service will not be extended if: (1) the AS A COMMITMENT BY ASUS. ASUS ASSUMES NO RESPONSIBILITY OR LIABILITY FOR ANY ERRORS OR INACCURACIES THAT MAY APPEAR IN THIS MANUAL, INCLUDING THE PRODUCTS AND - Asus BP5220 | User Manual - Page 3
CA 94539, USA Telephone +1-510-739-3777 Fax +1-510-608-4555 Web site usa.asus.com Technical Support Telephone Support fax Online support +1-812-282-2787 +1-812-284-0883 support.asus.com ASUS Computer GmbH (Germany and Austria) Address Harkort Str. 21-23, D-40880 Ratingen, Germany - Asus BP5220 | User Manual - Page 4
Safety information viii General precautions ix About this guide x System package contents xii Chapter 1: Support DVD information 2-3 2.3.1 Running the Support DVD 2-3 2.3.2 Drivers menu 2-4 2.3.3 Utilities menu 2-5 2.3.4 ASUS contact information 2-6 2.3.5 Other information 2-7 2.4 ASUS - Asus BP5220 | User Manual - Page 5
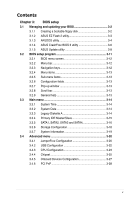
BIOS setup 3.1 Managing and updating your BIOS 3-2 3.1.1 Creating a bootable floppy disk 3-2 3.1.2 ASUS EZ Flash 2 utility 3-3 3.1.3 AFUDOS utility 3-4 3.1.4 ASUS CrashFree BIOS 3 utility 3-6 3.1.5 ASUS Update utility 3-8 3.2 BIOS setup program 3-11 3.2.1 BIOS menu screen 3-12 3.2.2 Menu bar - Asus BP5220 | User Manual - Page 6
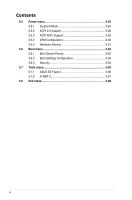
Mode 3-29 3.5.2 ACPI 2.0 Support 3-29 3.5.3 ACPI APIC Support 3-29 3.5.4 APM Configuration 3-30 3.5.5 Hardware Monitor 3-31 3.6 Boot menu 3-32 3.6.1 Boot Device Priority 3-32 3.6.2 Boot Settings Configuration 3-33 3.6.3 Security 3-34 3.7 Tools menu 3-36 3.7.1 ASUS EZ Flash 2 3-36 3.7.2 AI - Asus BP5220 | User Manual - Page 7
. This equipment generates, uses and can radiate radio frequency energy and, if not installed and used in accordance with manufacturer's instructions, may cause harmful interference to radio communications. However, there is no guarantee that interference will not occur in a particular installation - Asus BP5220 | User Manual - Page 8
that you use this product in environments with an ambient temperature below 35ºC. • If you encounter technical problems with this product, contact a qualified service technician or your retailer. Lithium-Ion Battery Warning CAUTION: Danger of explosion if battery is incorrectly replaced. Replace - Asus BP5220 | User Manual - Page 9
the ASUS BP5220/AS-D592 Desktop PC, carefully fix it by yourself. Contact a qualified service technician or your retailer. • Do not service this product yourself. • Though the system • Use this product only with the correct voltage as instructed by the manufacturer. • To prevent fire or electric - Asus BP5220 | User Manual - Page 10
information about ASUS BP5220/AS-D592 Desktop PC and instructions on how to use the Support DVD that comes with the system package. How this guide is organized This guide contains the following parts: 1. Chapter 1: System introduction This chapter gives a general description of ASUS BP5220/AS-D592 - Asus BP5220 | User Manual - Page 11
note of the following symbols used throughout this guide. WARNING: Information to prevent injury to yourself when trying to complete a task. CAUTION: Information to prevent damage to the components when trying to complete a task. IMPORTANT: Instructions that you MUST follow to complete a task. NOTE - Asus BP5220 | User Manual - Page 12
items 1. ASUS BP5220/AS-D592 Desktop PC with • ASUS Desktop x1 • Mouse x1 • Keyboard x1 2. Cables • AC power cable x1 3. Accessories • Mouse pad x1 4. DVD • Support DVD x1 • Recovery DVD x1 5. Documentation • User Manual x1 • Warranty - Asus BP5220 | User Manual - Page 13
Chapter 1 This chapter gives a general description of the desktop PC. The chapter lists the system features including introduction on the front and rear panels. System introduction SD MMC MS SMC CF MD - Asus BP5220 | User Manual - Page 14
1.1 Front panel The ASUS BP5220/AS-D592 Desktop PC includes an ASUS motherboard, a power supply unit, a front panel, and a rear panel. All of these components are integrated in a system casing elaborately designed by ASUS. The illustration below shows the front panel and the components on it. 1 x - Asus BP5220 | User Manual - Page 15
Description OFF No link OFF 10Mbps connection ORANGE Linked ORANGE 100Mbps connection BLINKING Data activity GREEN 1Gbps connection ACT/LINK SPEED LED LED LAN port ASUS BP5220/AS-D592 1-3 - Asus BP5220 | User Manual - Page 16
Voltage selector The system's power supply unit has a 115V / 230V voltage selector located below the power connector. Use this switch to select the appropriate system input voltage according to the voltage supply in your area. If the voltage supply in your area is 100-127V, set the switch to 115V. - Asus BP5220 | User Manual - Page 17
front panel. Connect the USB mouse to a USB port either at the rear panel or front panel. 1.4 Connecting to other peripheral devices The ASUS BP5220/AS-D592 Desktop PC is equipped with a number of ports at the rear and front panels where you can connect peripheral devices to the system. Refer to the - Asus BP5220 | User Manual - Page 18
1-6 Chapter 1: System introduction - Asus BP5220 | User Manual - Page 19
Chapter 2 This chapter helps you to power up the system and install drivers and utilities from the Support DVD. Getting started SD MMC MS SMC CF MD - Asus BP5220 | User Manual - Page 20
appears asking if you want to restart the system. Install drivers according to the instructions in the following sections. • To ensure that the OS works properly, install the drivers included in the Support DVD. • Motherboard settings and hardware options vary. Use the setup procedures presented - Asus BP5220 | User Manual - Page 21
on your computer. Click an icon to display Support DVD/motherboard information Click an item to install If Autorun is NOT enabled on your computer, browse the contents of the Support DVD to locate the file ASSETUP.EXE from the BIN folder. Double-click ASSETUP.EXE to run the DVD. ASUS BP5220/AS-D592 - Asus BP5220 | User Manual - Page 22
if the system detects installed devices. Install the necessary drivers to activate the devices. ASUS InstAll - Installation Wizard for Drivers Installs drivers for this desktop PC using the installation wizard. Intel Chipset Inf Update Program Installs the Intel® chipset Inf update program. Intel - Asus BP5220 | User Manual - Page 23
ASUS screensaver. Adobe Reader 8 Installs the Adobe Acrobat Reader that allows you to open, view, and print documents in Portable Document Format (PDF). Microsoft DirectX 9.0c Installs the Microsoft® DirectX 9.0c driver. The Microsoft DirectX® 9.0c is a multimedia technology that enhances computer - Asus BP5220 | User Manual - Page 24
2.3.4 ASUS contact information Click the Contact tab to display the ASUS contact information. 2-6 Chapter 2: Getting started - Asus BP5220 | User Manual - Page 25
information on the motherboard and the contents of the Support DVD. Click an icon to display the specified information. Motherboard Info Displays the general specifications of the motherboard. Browse this DVD Displays the Support DVD contents in graphical format. ASUS BP5220/AS-D592 2-7 - Asus BP5220 | User Manual - Page 26
Technical support Form Displays the ASUS Technical Support Request Form that you have to fill out when requesting technical support. Filelist Displays the contents of the Support DVD and a brief description of each in text format. 2-8 Chapter 2: Getting started - Asus BP5220 | User Manual - Page 27
on your computer. If Autorun is NOT enabled on your computer, browse the contents of the Support DVD to locate the file ASSETUP.EXE from the BIN folder. Double-click ASSETUP.EXE to run the DVD. 2. Click the Utilities tab, then click ASUS AI Manager. 3. Follow the onscreen instructions to complete - Asus BP5220 | User Manual - Page 28
Click to switch between a full-screen AI Manager window and the Quick bar. Click to keep AI Manager in the taskbar. Click to close AI Manager. 2.4.4 Main Launch AI Disk, AI Security, AI Gear, and AI Probe from the Main menu. Click the small triangle to open or close the Main menu. Click to open/ - Asus BP5220 | User Manual - Page 29
, key in a password that consists of no more than 20 letters, numbers, or symbols. 2 Confirm your password. 3. Key in your password hint (optional). 4. Click OK. ASUS BP5220/AS-D592 2-11 - Asus BP5220 | User Manual - Page 30
the device you locked, then click Apply. 2. Key in your password, then click OK. To change your password, click Change Password and follow the onscreen instructions. 2-12 Chapter 2: Getting started - Asus BP5220 | User Manual - Page 31
the system noise and power consumption. Select the system performance profile that meets your computing needs. AI Probe AI Probe automatically detects the motherboard and CPU temperatures, CPU fan speed, and CPU voltage. It also allows you to adjust these values manually. ASUS BP5220/AS-D592 2-13 - Asus BP5220 | User Manual - Page 32
2.4.5 My favorites Add your favorite applications to the My Favorites menu. To add an application: 1. Click Add and then select from the succeeding screen the application you want to add to the My Favorites menu. 2. Click Open. The application you selected is added and its icon appears. Right-click - Asus BP5220 | User Manual - Page 33
international website, online technical support website, online download support website, and contact information website. 2.4.7 Information The Information menu displays the general information of your system, motherboard, CPU, BIOS, memory, and other devices installed. ASUS BP5220/AS-D592 2-15 - Asus BP5220 | User Manual - Page 34
the Support DVD when prompted, then click OK. The system restarts. 8 . After the system reboots, the s XP will begin system configurations. Follow the onscreen instructions to complete the process, then restarts the system. Adjust the screen to a suitable display resolution. The ASUS PC Recovery - Asus BP5220 | User Manual - Page 35
appears, click OK and the system restarts. After it restarts, follow the onscreen instructions to complete the system configurations. The ASUS PC Recovery DVD is for ASUS Desktop PC only. DO NOT use it on other systems. Visit the ASUS website at www.asus.com for updates. ASUS BP5220/AS-D592 2-17 - Asus BP5220 | User Manual - Page 36
2-18 Chapter 2: Getting started - Asus BP5220 | User Manual - Page 37
Chapter 3 This chapter tells how to change the system settings through the BIOS setup menus. Detailed descriptions of the BIOS parameters are also provided. BIOS setup SD MMC MS SMC CF MD - Asus BP5220 | User Manual - Page 38
disk, USB flash disk, or the motherboard support DVD when the BIOS file fails or gets corrupted. 4. ASUS Update: Updates the BIOS in Windows® the floppy disk drive. b. Click from the Windows® desktop, then select Computer. c. Right-click Floppy Disk Drive then click Format to display the Format - Asus BP5220 | User Manual - Page 39
BIOS file for this motherboard from the ASUS website at www.asus.com. 2. Save the supports devices such as USB flash disks and floppy disks with FAT 32/16 format and single partition only. • DO NOT shut down or reset the system while updating the BIOS to prevent system boot failure! ASUS BP5220 - Asus BP5220 | User Manual - Page 40
the same as shown. 1. Copy the AFUDOS utility (afudos.exe) from the motherboard Support DVD to a bootable floppy disk. 2. Boot the system in DOS mode, then disk. A:\>afudos /oOLDBIOS1.rom AMI Firmware Update Utility - Version 1.19(ASUS V2.07(03.11.24BB)) Copyright (C) 2002 American Megatrends, Inc. - Asus BP5220 | User Manual - Page 41
off power during flash BIOS Reading file ....... done Reading flash ...... done Advance Check ...... Erasing flash ...... done Writing flash ...... done Verifying flash .... done Please restart your computer A:\> ASUS BP5220/AS-D592 3-5 - Asus BP5220 | User Manual - Page 42
CrashFree BIOS 3 utility The ASUS CrashFree BIOS 3 is an auto recovery tool that allows you to restore the BIOS file when it fails or gets corrupted during the updating process. You can update a corrupted BIOS file using the motherboard Support DVD , a floppy disk, or a USB flash disk that contains - Asus BP5220 | User Manual - Page 43
the latest BIOS version for this motherboard. Visit the ASUS website at www.asus.com to download the latest supports ASUS CrashFree BIOS 3. The device size should be smaller than 8GB. • DO NOT shut down or reset the system while updating the BIOS! Doing so can cause system boot failure! ASUS BP5220 - Asus BP5220 | User Manual - Page 44
DVD that comes with the motherboard package. ASUS Update requires an Internet connection either through a network or an Internet Service Provider (ISP). Installing ASUS Update To install ASUS Update: 1. Place the Support DVD into the optical drive. The Drivers menu appears. 2. Click the Utilities - Asus BP5220 | User Manual - Page 45
> Programs > ASUS > ASUSUpdate > ASUSUpdate. The ASUS Update main window appears. 2. Select Update BIOS from 3. Select the ASUS FTP site nearest the Internet option from the you to avoid network traffic, or drop‑down menu, then click Next. click Auto Select. Click Next. ASUS BP5220/AS-D592 - Asus BP5220 | User Manual - Page 46
4. From the FTP site, select the BIOS version that you wish to download. Click Next. 5. Follow the onscreen instructions to complete the updating process. The ASUS Update utility is capable of updating itself through the Internet. Always update the utility to avail all its features. Updating the - Asus BP5220 | User Manual - Page 47
RAM of the SPI chip. The firmware chip on the motherboard stores the Setup utility. When you start up the computer, the system provides you with the opportunity to run this . • Visit the ASUS website at www.asus.com to download the latest BIOS file for this motherboard. ASUS BP5220/AS-D592 3-11 - Asus BP5220 | User Manual - Page 48
3.2.1 BIOS menu screen Menu items Menu bar Configuration fields General help System Time System Date Legacy Diskette A Primary IDE Master Primary IDE Slave SATA1 SATA2 SATA3 SATA4 Storage Configuration System Information [00: 38 : 56] [Mon 05/12/2008] [1.44M,3.5in.] : [Not Detected] : [Not - Asus BP5220 | User Manual - Page 49
ESC Exit 3.2.9 General help At the top right corner of the menu screen is a brief description of the selected item. Pop-up window Scroll bar ASUS BP5220/AS-D592 3-13 - Asus BP5220 | User Manual - Page 50
3.3 Main menu When you enter the BIOS Setup program, the Main menu screen appears, giving you an overview of the basic system information. Refer to section "3.2.1 BIOS menu screen" for information on the menu screen items and how to navigate through them. System Time System Date Legacy Diskette A - Asus BP5220 | User Manual - Page 51
to Auto, the data transfer from and to the device occurs multiple sectors at a time if the device supports multi-sector transfer feature. When set to [Disabled], the data transfer from and to the device occurs one sector at a time. Configuration options: [Disabled] [Auto] ASUS BP5220/AS-D592 3-15 - Asus BP5220 | User Manual - Page 52
Data Transfer [Auto] [Auto] [Auto] [Auto] [Auto] [Enabled] Disable: Disables LBA Mode. Auto: Enables LBA Mode if the device supports it and the device supports is not already formatted with LBA Mode disabled. The BIOS automatically detects the values opposite the dimmed items (Device, Vendor - Asus BP5220 | User Manual - Page 53
the data transfer from and to the device occurs multiple sectors at a time if the device supports multi-sector transfer feature. When set to [Disabled], the data transfer from and to the ] Enables or disables 32-bit data transfer. Configuration options: [Disabled] [Enabled] ASUS BP5220/AS-D592 3-17 - Asus BP5220 | User Manual - Page 54
devices to be used simultaneously: two PATA devices and two SATA mode. [Enhanced] - Sets all SATA devices to operate in SATA mode. Enhanced Mode Support On [S-ATA] Sets Serial ATA, Parallel ATA or both as native mode. Configuration options: [S-ATA] [S-ATA+P-ATA] [P-ATA] IDE Detect Time Out (Sec) [35 - Asus BP5220 | User Manual - Page 55
Size: 1015MB AMI BIOS Displays the auto-detected BIOS information. Processor Displays the auto-detected CPU specification. System Memory Displays the auto-detected system memory. ASUS BP5220/AS-D592 3-19 - Asus BP5220 | User Manual - Page 56
of CPU overclocking options to achieve desired CPU internal frequency. Select either one of the preset overclocking configuration options: Manual - allows you to individually set overclocking parameters. Auto - loads the optimal settings for the system. Overclock Profile - loads overclocking - Asus BP5220 | User Manual - Page 57
[Auto] Manually set memory voltage or set to Auto for safe mode. Configuration options: [Auto] [1.85000] [1.85625] [1.86250] ...[2.24375] 1.25V Over Voltage [Auto] Manually set MCH Chipset Voltage or set to Auto for safe mode. Configuration options: [Auto] [1.25V] [1.40V] ASUS BP5220/AS-D592 - Asus BP5220 | User Manual - Page 58
. Configuration options: [Auto] [1.5V] [1.6V] Vcore Over Voltage [Auto] Manually set Vcore Voltage or set to Auto for safe mode. Configuration options: [Auto mode is enabled. If no USB device is detected, the legacy USB support is disabled. Configuration options: [Disabled] [Enabled] [Auto] USB 2.0 - Asus BP5220 | User Manual - Page 59
functions. Configuration options: [Disabled] [Enabled] Vanderpool Technology [Enabled] Enable this item when the processor supports Vanderpool technology. Users need to reset the computer to change the configuration of this item. Configuration options: [Disabled] [Enabled] ASUS BP5220/AS-D592 3-23 - Asus BP5220 | User Manual - Page 60
. Configuration options: [Disabled] [Enabled] The following item appears only when you installed an Intel® Pentium® 4 or later CPU that supports the Enhanced Intel SpeedStep® Technology (EIST). Intel® SpeedStep Technology [Enabled] Allows you to use the Enhanced Intel® SpeedStep® Technology. When - Asus BP5220 | User Manual - Page 61
: [Disabled] [Enabled, 1MB] [Enabled, 8MB] PEG Port Configuration PEG Force x1 [Disabled] Allows you to enable or disable the PEG Forec x 1. Configuration options: [Enabled] [Disabled] ASUS BP5220/AS-D592 3-25 - Asus BP5220 | User Manual - Page 62
/FIXED Memory. Configuration options: [128MB] [256MB] [Maximum DVMT] South Bridge Configuration South Bridge chipset Configuration Audio Controller Front Panel Support Type [Azalia] [HD Audio] OptOipotnisons Azalia All Disabled Audio Controller [Azalia] Allows you to set the audio controller - Asus BP5220 | User Manual - Page 63
the Parallel Port ECP DMA. Configuration options: [DMA0] [DMA1] [DMA3] Parallel Port IRQ [IRQ7] Allows you to select parallel port IRQ. Configuration options: [IRQ5] [IRQ7] ASUS BP5220/AS-D592 3-27 - Asus BP5220 | User Manual - Page 64
3.4.6 PCI PnP The PCI PnP menu items allow you to change the advanced settings for PCI/PnP devices. The menu includes setting IRQ and DMA channel resources for either PCI/PnP or legacy ISA devices, and setting the memory size block for legacy ISA devices. Take caution when changing the settings of - Asus BP5220 | User Manual - Page 65
you to enable or disable the Advanced Configuration and Power Interface (ACPI) support in the Application-Specific Integrated Circuit (ASIC). When set to Enabled, the ACPI APIC table pointer is included in the RSDT pointer list. Configuration options: [Disabled] [Enabled] ASUS BP5220/AS-D592 3-29 - Asus BP5220 | User Manual - Page 66
and applications are fully running. Thus, connection cannot be made on the first try. Turning an external modem off and then back on while the computer is off causes an initialization string that turns the system power on. Power On By External Modems [Disabled] Disable/Enable RI to generate a wake - Asus BP5220 | User Manual - Page 67
CPU fan speed in rotations per minute (RPM). If the fan is not connected to the motherboard, the field shows N/A. Select Ignored if you do not wish to display the detected speed. CPU monitor automatically detects the voltage output through the onboard voltage regulators. ASUS BP5220/AS-D592 3-31 - Asus BP5220 | User Manual - Page 68
3.6 Boot menu The Boot menu items allow you to change the system boot options. Select an item then press to display the sub-menu. Main Advanced Boot Settings Power Boot Device Priority BIOS SETUP UTILITY Boot Tools Exit Boot Settings Configuration Security Specifies the Boot Device - Asus BP5220 | User Manual - Page 69
] Allows you to enable or disable support for PS/2 mouse. Configuration options: [Disabled] [Enabled] [Auto] Wait for 'F1' If Error [Enabled] When set to Enabled, the system waits for the F1 key to be pressed when error occurs. Configuration options: [Disabled] [Enabled] ASUS BP5220/AS-D592 3-33 - Asus BP5220 | User Manual - Page 70
Hit 'DEL' Message Display [Enabled] When set to Enabled, the system displays the message "Press DEL to run Setup" during POST. Configuration options: [Disabled] [Enabled] Interrupt 19 Capture [Disabled] When set to [Enabled], this function allows the option ROMs to trap Interrupt 19. Configuration - Asus BP5220 | User Manual - Page 71
accessing the Setup utility. When set to [Always], BIOS checks for user password both when accessing Setup and booting the system. Configuration options: [Setup] [Always] ASUS BP5220/AS-D592 3-35 - Asus BP5220 | User Manual - Page 72
to display the sub-menu. Main Advanced BIOS SETUP UTILITY Power Boot Tools Exit ASUS EZ Flash 2 AI NET2 Press ENTER to run the utility to select and update BIOS. This utility doesn't support : 1.NTFS format 3.7.1 Select Screen Select Item +- Change Field Enter Go to Sub Screen F1 - Asus BP5220 | User Manual - Page 73
Check Realtek LAN cable [Disabled] Enables or disables checking of the Realtek LAN cable during the Power-On Self‑Test (POST). Configuration options: [Disabled] [Enabled] ASUS BP5220/AS-D592 3-37 - Asus BP5220 | User Manual - Page 74
the values you selected are saved to the CMOS RAM. An onboard backup battery sustains the CMOS RAM so it stays on even when the PC is turned off. When you select this option, a confirmation window appears. Select OK to save changes and exit. If you attempt to exit the Setup
-
 1
1 -
 2
2 -
 3
3 -
 4
4 -
 5
5 -
 6
6 -
 7
7 -
8
-
9
-
10
-
11
-
12
-
13
-
14
-
15
-
16
-
17
-
18
-
19
-
20
-
21
-
22
-
23
-
24
-
25
-
26
-
27
-
28
-
29
-
30
-
31
-
32
-
33
-
34
-
35
-
36
-
37
-
38
-
39
-
40
-
41
-
42
-
43
-
44
-
45
-
46
-
47
-
48
-
49
-
50
-
51
-
52
-
53
-
54
-
55
-
56
-
57
-
58
-
59
-
60
-
61
-
62
-
63
-
64
-
65
-
66
-
67
-
68
-
69
-
70
-
71
-
72
-
73
-
74
 |
 |

BP5220/AS-D592
ASUS Desktop PC
User Manual