Asus EB1007P User's Manual for English Edition
Asus EB1007P Manual
 |
View all Asus EB1007P manuals
Add to My Manuals
Save this manual to your list of manuals |
Asus EB1007P manual content summary:
- Asus EB1007P | User's Manual for English Edition - Page 1
English EBox1007P User Manual - Asus EB1007P | User's Manual for English Edition - Page 2
, except documentation kept by the purchaser for backup purposes, without the express written permission of ASUSTeK COMPUTER, INC. ("ASUS"). Products and corporate names mentioned in this manual may or may not be registered trademarks or copyrights of their respective companies, and are used for - Asus EB1007P | User's Manual for English Edition - Page 3
ASUS Recycling/Takeback Services 11 ENERGY STAR complied product 12 Notes for this manual 12 Welcome 13 Package contents 13 Knowing your PC on the system 24 Using your PC 25 Configuring wireless connection 25 Configuring wired connection 26 ASUS Easy Update 30 Recovering your system 31 - Asus EB1007P | User's Manual for English Edition - Page 4
radiate radio frequency energy and, if not installed and used in accordance with manufacturer's instructions, may cause harmful interference to radio communications. However, there is no guarantee that interference of this device could void the user's authority to operate the equipment. 4 EB1007P - Asus EB1007P | User's Manual for English Edition - Page 5
or transmitter. End-users and installers must be provide with antenna installation instructions and transmitter operating conditions for satisfying RF exposure compliance. Declaration of Conformity the radio spectrum as in [Article 3.2] • Radio test suites according to [EN 300 328-2] EB1007P 5 - Asus EB1007P | User's Manual for English Edition - Page 6
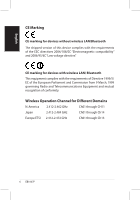
for Different Domains N. America 2.412-2.462 GHz Ch01 through CH11 Japan 2.412-2.484 GHz Ch01 through Ch14 Europe ETSI 2.412-2.472 GHz Ch01 through Ch13 6 EB1007P - Asus EB1007P | User's Manual for English Edition - Page 7
Vaucluse 90 Territoire de Belfort 68 Haut Rhin 71 Saône et Loire 82 Tarn et Garonne 88 Vosges 89 Yonne 94 Val de Marne EB1007P 7 - Asus EB1007P | User's Manual for English Edition - Page 8
transmitting antenna during transmitting. End users must follow the specific operating instructions for satisfying RF exposure compliance. Operation is subject to the , we publish the chemical substances in our products at ASUS REACH website at http://csr.asus.com/english/REACH.htm. 8 EB1007P - Asus EB1007P | User's Manual for English Edition - Page 9
, and network cables from the power outlets before cleaning the system. • If you encounter the following technical problems with the product, unplug the power cord and contact a qualified service technician or your retailer. • The power cord or plug is damaged. • Liquid has been spilled into the - Asus EB1007P | User's Manual for English Edition - Page 10
you follow the operating instructions. • The system according to the manufacturer's instructions. LASER PRODUCT WARNING CLASS been disassembled by users DO NOT throw the PC in municipal waste. This product has been municipal waste. Check local technical support services for product recycling. DO NOT - Asus EB1007P | User's Manual for English Edition - Page 11
the product life cycle of ASUS product is in line with global environmental regulations. In addition, ASUS disclose the relevant information based on Material Declarations EU REACH SVHC Swiss Energy Laws ASUS Recycling/Takeback Services ASUS recycling and takeback programs come from our commitment - Asus EB1007P | User's Manual for English Edition - Page 12
ASUS computer are automatically set to sleep after 15 and 30 minutes of user inactivity. To wake your computer supported on FreeDOS-based products or without OS. Notes for this manual manual. WARNING: Vital information that you MUST follow to prevent injury to yourself. IMPORTANT: Instructions - Asus EB1007P | User's Manual for English Edition - Page 13
AC adapter Power cord Quick Start Guide Warranty card Quick start guide If the device or its components fail or malfunction during normal and proper use within the warranty period, bring the warranty card to the ASUS Service Center for replacement of the defective components. EB1007P 13 - Asus EB1007P | User's Manual for English Edition - Page 14
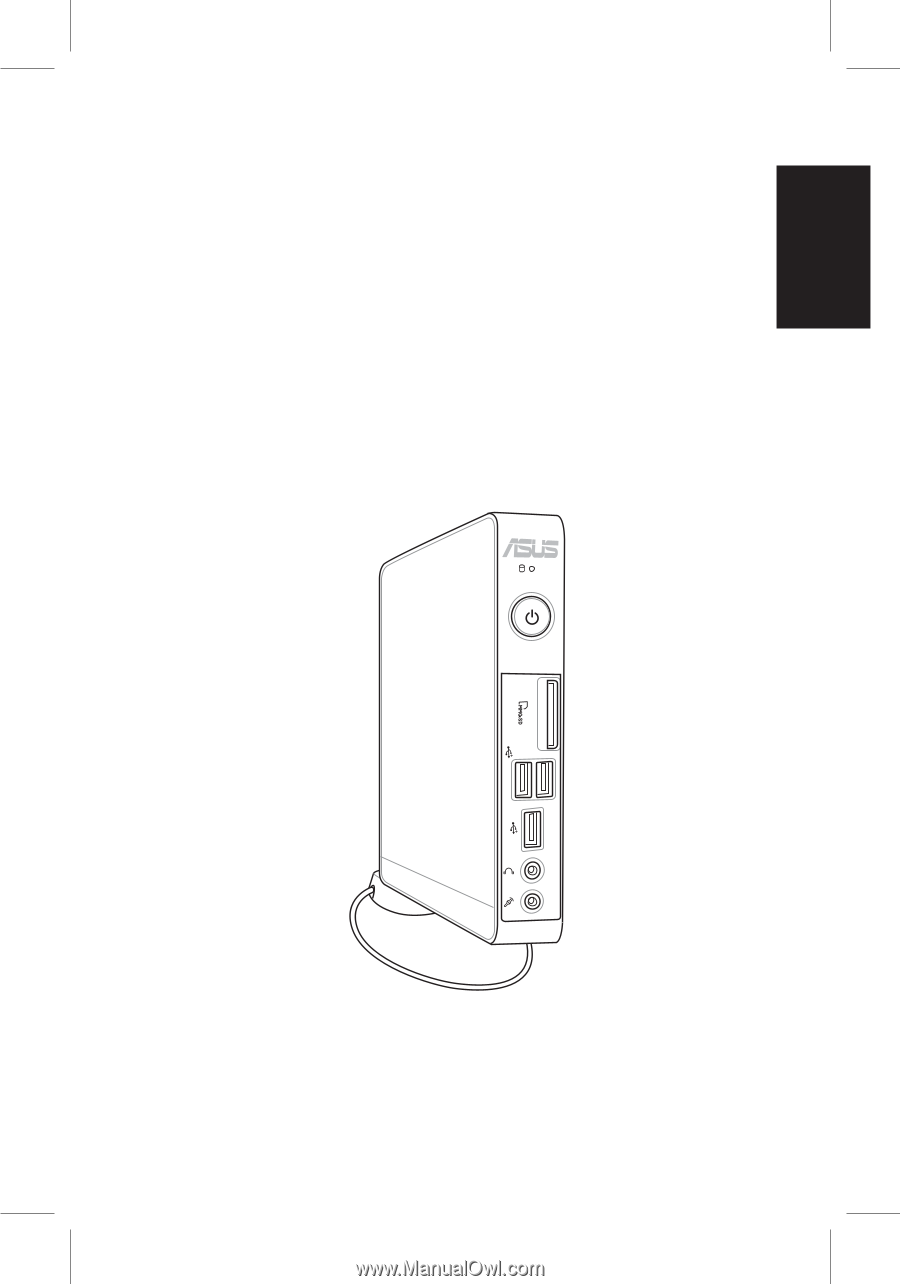
English Knowing your PC Front view Refer to the diagram below to identify the components on this side of the system. 1 2 3 4 5 6 1 Hard disk LED The hard being written into or read from the hard disk drive. 2 Power switch The power switch allows powering ON and OFF the system. 14 EB1007P - Asus EB1007P | User's Manual for English Edition - Page 15
card slot The built-in memory card reader reads MMC/SD/SDHC cards and hard disk drives. USB allows many devices to run simultaneously on a single computer, with some peripheral acting as additional plug-in sites or hubs. 5 Headphone/Audio narrations, or simple audio recordings. EB1007P 15 - Asus EB1007P | User's Manual for English Edition - Page 16
used to connect the supplied wireless antenna to enhance wireless signal reception. The antenna is installable/ removable according to need. Fasten the antenna onto the PC for better signal reception when Wi-Fi is in use. 16 - Asus EB1007P | User's Manual for English Edition - Page 17
jack supplies power to the PC. To prevent damage to the PC, always use the supplied power computer, with some peripheral acting as additional plug-in sites or hubs. 4 LAN port The eight-pin RJ-45 LAN port supports The 15-pin D-sub monitor port supports a standard VGA-compatible device such as - Asus EB1007P | User's Manual for English Edition - Page 18
or eSATA allows external connection of Serial-ATA devices originally designed for use inside the computer. It is up to six times faster than existing USB 2.0, & 1394 for external devices to run simultaneously on a single computer, with some peripheral acting as additional plug-in sites or hubs. 18 - Asus EB1007P | User's Manual for English Edition - Page 19
view Refer to the diagram below to identify the components on this side of the system. 1 1 Kensington® Lock Port The Kensington® lock port allows the PC to be secured using Kensington® compatible security products. These security products usually include a metal cable and lock that prevent the - Asus EB1007P | User's Manual for English Edition - Page 20
Positioning your PC Installing the stand (optional) Erect your PC with the optional stand. To do so: 1. Locate the screw hole on the bottom of the PC. 2. Align the stand screw to the PC screw hole, and then secure the stand to the PC with a coin. PC bottom view 1 Screw hole Stand screw 2 20 EB1007P - Asus EB1007P | User's Manual for English Edition - Page 21
mount to your monitor with four screws (HNM/M4 x 8). To fasten the VESA mount, your monitor must comply with VESA75 or VESA100 standard. 2. Place your PC on the VESA mount noting the correct alignment, and then secure the PC to the VESA mount with a coin. PC bottom view EB1007P 21 - Asus EB1007P | User's Manual for English Edition - Page 22
need to connect peripherals before using your PC. Connecting to a display Connect one end of the VGA cable to an LCD monitor ( 1 ) and the other end to the Display ( like wired/wireless keyboards (varying with areas), mouse devices, and printers to the USB ports on the system rear panel. 22 EB1007P - Asus EB1007P | User's Manual for English Edition - Page 23
wireless antenna The wireless antenna is provided for enhancing wireless signal reception. The antenna is installable/ removable according to need. Fasten the antenna onto the PC for better signal reception when Wi-Fi is in use - Asus EB1007P | User's Manual for English Edition - Page 24
the power switch on the front panel to turn on the system. 3 4 2 1 • When your PC is not in use, unplug the power adapter or switch off the AC outlet to save on power Window® Control Panel. This is to ensure that your PC is set to a low power consumption mode and is fully operational at the same time. To - Asus EB1007P | User's Manual for English Edition - Page 25
Visit the ASUS website at www.asus.com for the latest information. This PC is not supported under Windows® 8. Configuring wireless connection To connect to a wireless network, follow the instructions below: the list. 5. You can see the wireless network icon in the Notification area. EB1007P 25 - Asus EB1007P | User's Manual for English Edition - Page 26
English Configuring wired connection To establish a wired network, follow the instructions below: Using a dynamic IP / PPPoE network connection: 1. Click the network icon with a yellow warning settings in the left blue pane. 3. Right-click Local Area Connection and select Properties. 26 EB1007P - Asus EB1007P | User's Manual for English Edition - Page 27
English 4. Click Internet Protocol Version 4(TCP/IPv4) and click Properties. 5. Click Obtain an IP address automatically and click OK. (Continue the following steps if using PPPoE) 6. Return to the Network and Sharing Center and then click Set up a new connection or network. EB1007P 27 - Asus EB1007P | User's Manual for English Edition - Page 28
in the taskbar and click the connection you just created. 12. Enter your user name and password. Click Connect to connect to the Internet. 28 EB1007P - Asus EB1007P | User's Manual for English Edition - Page 29
to start the static IP network configuration. 2 Click Use the following IP address. 3. Enter the IP address, Subnet mask and Gateway from your service provider. 4. If needed, enter the preferred DNS Server address and alternative address. 5. After entering all the related values, click OK to build - Asus EB1007P | User's Manual for English Edition - Page 30
Update is a software tool that automatically detects and downloads the latest BIOS, drivers, and applications for your PC. 1. From the Windows® notification area, right-click the ASUS Easy Update icon. 2. Select Schedule to set how often you want to update your system. 3. Select Update to activate - Asus EB1007P | User's Manual for English Edition - Page 31
Using the recovery partition The Recovery Partition includes an image of the operating system, drivers, and utilities installed on your system at the factory.The recovery partition provides a data beforehand. 7. When recovery is successfully completed, click Reboot to restart the system. EB1007P 31 - Asus EB1007P | User's Manual for English Edition - Page 32
the Factory Environment to a USB Drive and click Next. 3. Connect a USB storage device to your PC to start the Factory Default Environment backup. The required size of the connected USB storage device should be environment is successfully completed, click Reboot to restart the system. 32 EB1007P - Asus EB1007P | User's Manual for English Edition - Page 33
displayed. Click Next again. Restore the Whole Hard Disk Select this option if you want to restore your PC to the factory default state. This option deletes all data from your hard disk and creates a new system 7. When restore is successfully completed, click Reboot to restart the system. EB1007P 33 - Asus EB1007P | User's Manual for English Edition - Page 34
-0883 support.asus.com ASUS COMPUTER GmbH (Germany and Austria) Address Harkort Str. 21-23, D-40880 Ratingen, Germany Fax +49-2102-959911 Web site www.asus.de Online contact www.asus.de/sales Technical Support Component Telephone System/Notebook/Eee/ LCD Telephone Support Fax Online
-
 1
1 -
 2
2 -
 3
3 -
 4
4 -
 5
5 -
 6
6 -
 7
7 -
8
-
9
-
10
-
11
-
12
-
13
-
14
-
15
-
16
-
17
-
18
-
19
-
20
-
21
-
22
-
23
-
24
-
25
-
26
-
27
-
28
-
29
-
30
-
31
-
32
-
33
-
34
 |
 |
English
EBox1007P
User Manual