Asus ET2301INTH User's Manual for English Edition
Asus ET2301INTH Manual
 |
View all Asus ET2301INTH manuals
Add to My Manuals
Save this manual to your list of manuals |
Asus ET2301INTH manual content summary:
- Asus ET2301INTH | User's Manual for English Edition - Page 1
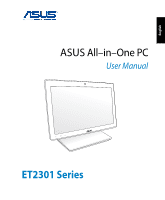
English ASUS User Manual ET2301 Series - Asus ET2301INTH | User's Manual for English Edition - Page 2
express written permission of ASUSTeK COMPUTER INC. ("ASUS"). ASUS PROVIDES THIS MANUAL "AS IS"WITHOUT WARRANTY up to the listed contract price of each product. ASUS will only be responsible for IF ASUS, ITS SUPPLIERS OR YOUR RESELLER IS INFORMED OF THEIR POSSIBILITY. SERVICE AND SUPPORT Visit our - Asus ET2301INTH | User's Manual for English Edition - Page 3
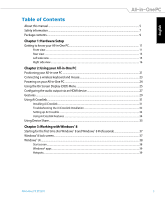
keyboard and mouse 23 Powering on your All-in-One PC...24 Using the On Screen Display (OSD) Menu...25 Configuring the audio output via an HDMI device 27 Gestures...29 Using Ai Crosslink...31 Installing Ai Crosslink...31 Troubleshooting the Ai Crosslink Installation 32 Setting up Ai Crosslink - Asus ET2301INTH | User's Manual for English Edition - Page 4
apps...42 Customizing apps...42 Accessing All Apps...43 Charm bar...44 Snap feature...46 Other keyboard shortcuts...47 Turning your All-in-One PC off...48 Chapter 4: Connecting to the Internet Setting up a Wi-Fi connection in Windows® 8 49 Setting up a Wired connection in Windows® 8 50 Configuring - Asus ET2301INTH | User's Manual for English Edition - Page 5
English About this manual This manual provides information about the hardware and software features of your All-in-One PC. Chapter 1: Hardware Setup This chapter details the hardware components of your All-in-One PC. Chapter 2: Using your All-in-One PC This chapter provides you with information on - Asus ET2301INTH | User's Manual for English Edition - Page 6
manual To highlight key information in this manual prevent damage to your All-in-One PC's data and components. Icons The icons below tasks or procedures on your All-in-One PC. Use the touchscreen. Use the keyboard. Typography in this manual. All illustrations and screenshots in this manual are for - Asus ET2301INTH | User's Manual for English Edition - Page 7
PC ET2301 is designed and tested to meet the latest standards of safety for information technology equipment. However, to ensure your safety, it is important that you read the following safety instructions problems with the product, unplug the power cord and contact a qualified service technician - Asus ET2301INTH | User's Manual for English Edition - Page 8
: 180W (19.5V, 9.23A) Rating output voltage: 19.5Vdc 2. It is recommended that the power socket is in close proximity to the All-in-One PC. DC Fan Warning Please note that the DC fan is a moving part and can cause harm when used improperly. Keep away from the fan when - Asus ET2301INTH | User's Manual for English Edition - Page 9
Package contents English All-in-one PC ET2301 AC adapter Wireless Keyboard and Mouse USB receiver dongle ASUS Link Cable Wireless Keyboard Power cord Wireless Mouse Quick Guide Quick Start Guide ABC DEF 123 GHI JKL MNO 456 PQRS TUV WXYZ 789 *0 # CLEAR ENTER RGY B T Subwoofer ( - Asus ET2301INTH | User's Manual for English Edition - Page 10
English 10 All-in-One PC ET2301 - Asus ET2301INTH | User's Manual for English Edition - Page 11
English Chapter 1: Hardware Setup Getting to know your All-in-One PC Front view All-in-One PC ET2301 11 - Asus ET2301INTH | User's Manual for English Edition - Page 12
enter/select the highlighted option. Menu Up button Press this button to move up the options when the Menu is displayed. 12 All-in-One PC ET2301 - Asus ET2301INTH | User's Manual for English Edition - Page 13
mode, use the HDMI Input port for receiving video/audio signals from another source such as a set-top-box or DVD player. All-in-One PC ET2301 13 - Asus ET2301INTH | User's Manual for English Edition - Page 14
an LCD monitor or projector. LAN port This eight-pin RJ-45 LAN port supports a standard Ethernet cable for connection to a local network. Subwoofer jack This jack is used to connect to an ASUS All-in-One PC subwoofer for producing powerful bass (low frequency sounds) when playing multimedia. Power - Asus ET2301INTH | User's Manual for English Edition - Page 15
compatible devices. To enable the AI Charger II on your All-in-One PC, go to Desktop>AI Suite II>AI Charger II then select Enable. Headphone output and S/PDIF output combo jack This combo jack supports speakers, headphones, and S/PDIF audio devices. Microphone jack The microphone jack is designed - Asus ET2301INTH | User's Manual for English Edition - Page 16
Right side view ET2301INTH English 6-in-1 Memory card reader This All-in-One PC has a single built-in memory card reader slot that supports MS, MS-Pro, MMC ® Thunderbolt™ technology. IMPORTANT! * The Thunderbolt ports support external displays that are Thunderboltcertified for Windows®. For the - Asus ET2301INTH | User's Manual for English Edition - Page 17
port supports Device Share. Use this port for connecting the ASUS Link cable to another device such as a notebook PC or Android tablet. NOTE: For instructions on button to eject the optical drive tray. Optical disc drive manual eject hole The manual eject hole is used to eject the drive tray in case - Asus ET2301INTH | User's Manual for English Edition - Page 18
up to 5Gbit/s and is backward compatible with USB2.0. This USB 3.0 port supports Device Share. Use this port for connecting the ASUS Link cable to another device such as a notebook PC or Android tablet. NOTE: For instructions on setting up Device Share, please refer to Using Device Share. 18 All - Asus ET2301INTH | User's Manual for English Edition - Page 19
This USB 3.0 port supports Ai Crosslink. Use this port for connecting the ASUS Link cable to another Windows 8 PC. NOTE: For instructions on setting up Ai button to eject the optical drive tray. Optical disc drive manual eject hole The manual eject hole is used to eject the drive tray in case - Asus ET2301INTH | User's Manual for English Edition - Page 20
English 20 All-in-One PC ET2301 - Asus ET2301INTH | User's Manual for English Edition - Page 21
. IMPORTANT! Avoid adjusting the display to an angle beyond the recommended values or you may risk damaging the All-in-One PC. 177O 3. To adjust the angle of the display, hold the upper-right corner with your right hand while supporting the lower-left corner with your left hand. All-in-One - Asus ET2301INTH | User's Manual for English Edition - Page 22
4. Carefully tilt the display using both hands until it is at a comfortable angle. English 22 All-in-One PC ET2301 - Asus ET2301INTH | User's Manual for English Edition - Page 23
wireless keyboard and mouse. 2. Connect the wireless dongle for keyboard and mouse to a USB port. NOTE: ASUS recommends that you connect the wireless dongle to the USB 2.0 port. 3. You can begin using the wireless and specifications of the wireless keyboard and mouse vary. All-in-One PC ET2301 23 - Asus ET2301INTH | User's Manual for English Edition - Page 24
rear panel ( ) and then press the Power button on the right panel ( ) of the All-in-One PC to power on the system. WARNING! DO NOT connect the AC power cord to an AC outlet prior to DC adapter. NOTE: For details on turning off your All-in-One PC, refer to the section Turning off your All-in-One - Asus ET2301INTH | User's Manual for English Edition - Page 25
again. NOTE: Refer to the section Getting to know your All-in-One PC for the location of the front panel buttons. Panel Off Press this button "OverScan". This setting is available only when you use the All-in-One PC as a standard desktop LCD monitor. • Auto Adjust: Adjusts the horizontal position - Asus ET2301INTH | User's Manual for English Edition - Page 26
input source and press the Menu button to activate the option. Refer to Input Select in the previous section for details. 26 All-in-One PC ET2301 - Asus ET2301INTH | User's Manual for English Edition - Page 27
you want to use a high-definition TV as an audio output device, connect it to the All-in-One PC and follow the steps below to configure the audio settings. To configure the audio output via an HDMI device: (HDMI). 4. Click Configure and the Speaker Setup window pops up. All-in-One PC ET2301 27 - Asus ET2301INTH | User's Manual for English Edition - Page 28
English 5. Select Stereo and click Next. 6. Select the Front left and right option, and click Next. 7. Click Finish to exit the speaker setup. 28 All-in-One PC ET2301 - Asus ET2301INTH | User's Manual for English Edition - Page 29
English Gestures Gestures allow you to launch programs and access the settings of your All-in-One PC. Functions can be activated by using the hand gestures to your All-in-One PC's display panel. Using gestures Left edge swipe Right edge swipe Swipe from the left edge of the screen to shuffle - Asus ET2301INTH | User's Manual for English Edition - Page 30
the screen to close it. • Tap an app to launch it. • On Desktop mode, double-tap an item to launch it. 30 All-in-One PC ET2301 - Asus ET2301INTH | User's Manual for English Edition - Page 31
, and multimedia between the All-in-One PC and another Windows® PC. Installing Ai Crosslink To install Ai Crosslink: 1. Connect one end of the provided ASUS Link cable to the designated USB port that supports Ai Crosslink. NOTES: • Use only the provided ASUS Link cable when setting up Ai Crosslink - Asus ET2301INTH | User's Manual for English Edition - Page 32
the ASUS Ai Crosslink window appears, setup is complete. Troubleshooting the Ai Crosslink Installation 1. If the popup for the Ai Crosslink Setup CD does not appear on the Windows® 8 device, check if the ASUS Link cable is connected properly. 2. Launch File Manager. Click the ASUS - Asus ET2301INTH | User's Manual for English Edition - Page 33
.exe to install Ai Crosslink. Setting up Ai Crosslink 1. Click the ASUS Ai Crosslink icon on the System Tray. 2. On the context menu, click The Position of Other PC and select the location of the other PC. 3. Click Preferences for additional options such as sharing of Clipboard items, notifications - Asus ET2301INTH | User's Manual for English Edition - Page 34
move the mouse pointer across the desktop displays of the two PCs. • Use the keyboard on one PC to input text on the other PC. • Copy and paste text or images between the two PCs. • Drag and drop files or folders between the two PCs. Windows® 8 Mouse pointer Keyboard use Clipboard text/images File - Asus ET2301INTH | User's Manual for English Edition - Page 35
end of the ASUS Link cable to a USB port on a notebook PC, desktop PC, or Android tablet. 4. To share the display, connect one end of a male-to-male HDMI cable to the HDMI port of the All-in-One PC. Connect the other end of the HDMI cable to the desktop PC, laptop PC or Android tablet. All-in-One - Asus ET2301INTH | User's Manual for English Edition - Page 36
enabled. • When switching the display input source to HDMI (where the All-in-One PC is used as a desktop LCD monitor), the touch screen, webcam, and rear USB ports will be controlled by the external notebook/desktop PC if Device Share is enabled. • Device Share can be enabled even if the All-in - Asus ET2301INTH | User's Manual for English Edition - Page 37
Windows® 8 Professional) When you start your computer for the first time, a series of screens appear to guide you in configuring the basic settings of your Follow the onscreen instructions to configure the following basic items: • Personalize • Wireless • Settings • Sign in to your PC 5. Once you - Asus ET2301INTH | User's Manual for English Edition - Page 38
Interface (UI) is the tile-based display used in Windows® 8. It includes the following features you can use while working on your All-in-One PC. Start screen The Start screen appears after successfully signing in to your user account. It helps organize all the programs and applications you need in - Asus ET2301INTH | User's Manual for English Edition - Page 39
signing in to your Microsoft account before they are fully launched. Hotspots Onscreen hotspots allow you to launch programs and access the settings of your PC. The functions in these hotspots can be activated using your mouse. Hotspots on a running app All-in-One - Asus ET2301INTH | User's Manual for English Edition - Page 40
English Hotspots on the Start screen NOTE: Refer to the next page for the Hotspots' functions. 40 All-in-One PC ET2301 - Asus ET2301INTH | User's Manual for English Edition - Page 41
to Snap feature under Working with Windows® apps. upper and lower right corner Hover your mouse pointer to launch the Charm bar. All-in-One PC ET2301 41 - Asus ET2301INTH | User's Manual for English Edition - Page 42
English Working with Windows® apps Use your All-in-One PC's touchscreen or keyboard to launch and customize your apps. Launching apps Tap an app to launch it. 1. Press 2. Press twice then Swipe down the app tile to select and launch its settings bar. Tap an app. to unpin 42 All-in-One PC ET2301 - Asus ET2301INTH | User's Manual for English Edition - Page 43
's screen, press . Accessing All Apps Aside from the apps already pinned on your Start screen, you can also open other applications like the exclusive ASUS Software apps bundled with your All-in-One PC through the Apps screen. Launching the Apps screen Launch the Apps screen using your All-in-One - Asus ET2301INTH | User's Manual for English Edition - Page 44
screen. It consists of several tools that allow you to share applications and provide quick access for customizing the settings of your All-in-One PC. Charm Bar Launching the Charm bar NOTE: When called out, the Charm bar initially appears as a set of white icons. The image above shows how - Asus ET2301INTH | User's Manual for English Edition - Page 45
English Inside the Charm bar Search This tool allows you to look for files, applications, or programs in your All-in-One PC. Share This tool allows you to share applications via social networking sites or email. Start This tool reverts the display back to the Start screen. - Asus ET2301INTH | User's Manual for English Edition - Page 46
work or switch between apps. IMPORTANT! Ensure that your All-in-One PC's screen resolution is set to 1366 x 768 pixels or higher before using bar Using Snap Perform the following steps to activate Snap using your All-in-One PC's touchscreen or keyboard. 1. Launch the app you wish to snap. 2. Hover - Asus ET2301INTH | User's Manual for English Edition - Page 47
navigate Windows®8. \ Switches between the current and the last running app Launches the desktop Launches the Computer window on Desktop mode Opens the File search pane Opens the Share pane Opens the Settings pane pane Opens the Apps search pane Opens the Run window All-in-One PC ET2301 47 - Asus ET2301INTH | User's Manual for English Edition - Page 48
screen Zooms out your screen Opens the Narrator Settings Enables the print screen function Turning your All-in-One PC off Do either of the following to shut down your All-in-One PC: • Tap on the Charm bar then tap shutdown. > Shut down to do a normal • From the log-in screen - Asus ET2301INTH | User's Manual for English Edition - Page 49
English Chapter 4: Connecting to the Internet Access emails, surf the Internet, and share applications via social networking sites on or from your PC using wireless/Wi-Fi or wired connection. Setting up a Wi-Fi connection in Windows® 8 1. Launch the Charm bar from the Start screen or from any - Asus ET2301INTH | User's Manual for English Edition - Page 50
a Wired connection in Windows® 8 1. Use a network (RJ-45) cable to connect your All-in-One PC to a DSL/cable modem or a local area network (LAN). 2. Turn on your computer. 3. Configure the necessary Internet connection settings. NOTES: • For more details, refer to the sections Configuring a dynamic - Asus ET2301INTH | User's Manual for English Edition - Page 51
Properties. 6. Click Obtain an IP address automatically and click OK. NOTE: Continue to the next steps if you are using PPPoE connection. All-in-One PC ET2301 51 - Asus ET2301INTH | User's Manual for English Edition - Page 52
English 7. Return to the Network and Sharing Center and then click Set up a new connection or network. 8. Select Connect to the Internet and click Next. 9. Select Broadband (PPPoE) and click Next. 52 All-in-One PC ET2301 - Asus ET2301INTH | User's Manual for English Edition - Page 53
the previous section Configuring a dynamic IP/PPPoE network connection. 2 Click Use the following IP address. 3. Enter the IP address, Subnet mask and Gateway from your service provider. 4. If needed, enter the preferred DNS Server address and alternative address. 5. When done, click OK. All-in-One - Asus ET2301INTH | User's Manual for English Edition - Page 54
technology eliminates the need for cables for connecting to Bluetooth-enabled devices. Examples of Bluetooth-enabled devices include Notebook PCs, Desktop PCs, and mobile phones. NOTE: If your All-in-One PC did not come with built-in Bluetooth, you need to connect a USB Bluetooth module in order to - Asus ET2301INTH | User's Manual for English Edition - Page 55
English 2. Click the Bluetooth logo on the System Tray and select Add a Device from the context menu . 3. In the PC settings window, click Add a device to look for available Bluetooth devices. All-in-One PC ET2301 55 - Asus ET2301INTH | User's Manual for English Edition - Page 56
English 4. Select a Bluetooth device from the list. 5. Windows will display a Bluetooth passcode. Select Yes to confirm and pair the All-inOne PC with the Bluetooth device. 6. Bluetooth pairing has been successfully set up. 56 All-in-One PC ET2301 - Asus ET2301INTH | User's Manual for English Edition - Page 57
recommend that you change the BIOS settings only with the help of trained service personnel. Quickly enter the BIOS Windows® 8 boot time is quite fast, three ways for you to quickly access the BIOS: • When your All-in-One PC is off, press the power button for at least four (4) seconds to access the - Asus ET2301INTH | User's Manual for English Edition - Page 58
down to Advanced startup and tap or tap or click Restart now. 2. Press during bootup. 3. From the screen, tap or click Troubleshoot. 4. Select Reset your PC. 5. Tap or click Next. 6. Select Only the drive where the Windows is installed. 7. Select Just remove my files. 8. Tap or click Reset - Asus ET2301INTH | User's Manual for English Edition - Page 59
the Control Panel's System and Security, click Find and fix problems. 3. Tap or click Recovery > Create a recovery drive. 4. Tap or drivers and apps will be installed in the recovery device. 5. Select the USB storage device where you want to copy the recovery files. 6. Click Next. All-in-One PC - Asus ET2301INTH | User's Manual for English Edition - Page 60
® 8 Restoring your PC to its original factory settings can be done using the Remove everything and reinstall option in PC Settings. Refer to while to complete. 1. Launch the Charm bar. 2. Click Settings > Change PC Settings > General. 3. Scroll down to view the Remove everything and reinstall Windows - Asus ET2301INTH | User's Manual for English Edition - Page 61
ASUS REACH website at http://csr.asus.com/english/REACH.htm ASUS Recycling/Takeback Services ASUS to http://csr.asus.com/english/Takeback. and operated in accordance with provided instructions and the antenna(s) used for this instructions and transmitter operating conditions for satisfying RF exposure compliance - Asus ET2301INTH | User's Manual for English Edition - Page 62
radiate radio frequency energy and, if not installed and used in accordance with manufacturer's instructions, may cause harmful interference to radio communications. However, there is no guarantee that interference class B digital apparatus complies with Canadian ICES-003. 62 All-in-One PC ET2301 - Asus ET2301INTH | User's Manual for English Edition - Page 63
transmitting. End users must follow the specific operating instructions for satisfying RF exposure compliance. Operation is subject the device. To prevent radio interference to the licensed service (i.e. co-channel Mobile Satellite systems) this device is intended measures. All-in-One PC ET2301 63 - Asus ET2301INTH | User's Manual for English Edition - Page 64
is incorrectly replaced. Replace only with the same or equivalent type recommended by the manufacturer. Dispose of used batteries according to the manufacturer's instructions. No Exposure to Liquids DO NOT expose to or use near liquids, rain, or moisture. This product is not waterproof or oil-proof - Asus ET2301INTH | User's Manual for English Edition - Page 65
and Declaration ASUS follows the ASUS product is in line with global environmental regulations. In addition, ASUS . All ASUS products with computer are automatically set to sleep after 15 and 30 minutes of user inactivity. To wake your computer supported on Freedos and Linux-based products. All-in-One - Asus ET2301INTH | User's Manual for English Edition - Page 66
English Manufacturer Authorised representative in Europe ASUSTeK Computer Inc. Tel: +886-2-2894-3447 Address: 4F, No. 150, LI-TE RD., PEITOU, TAIPEI 112, TAIWAN ASUSTeK Computer GmbH Address: HARKORT STR. 21-23, 40880 RATINGEN, GERMANY 66 All-in-One PC ET2301
-
 1
1 -
 2
2 -
 3
3 -
 4
4 -
 5
5 -
 6
6 -
 7
7 -
8
-
9
-
10
-
11
-
12
-
13
-
14
-
15
-
16
-
17
-
18
-
19
-
20
-
21
-
22
-
23
-
24
-
25
-
26
-
27
-
28
-
29
-
30
-
31
-
32
-
33
-
34
-
35
-
36
-
37
-
38
-
39
-
40
-
41
-
42
-
43
-
44
-
45
-
46
-
47
-
48
-
49
-
50
-
51
-
52
-
53
-
54
-
55
-
56
-
57
-
58
-
59
-
60
-
61
-
62
-
63
-
64
-
65
-
66
 |
 |

English
User Manual
ET2301 Series
ASUS