Asus ET2410IUTS-B019C User Manual - Page 24
Mounting to the wall
 |
View all Asus ET2410IUTS-B019C manuals
Add to My Manuals
Save this manual to your list of manuals |
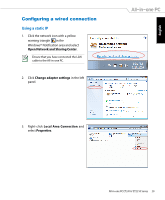
Page 24 highlights
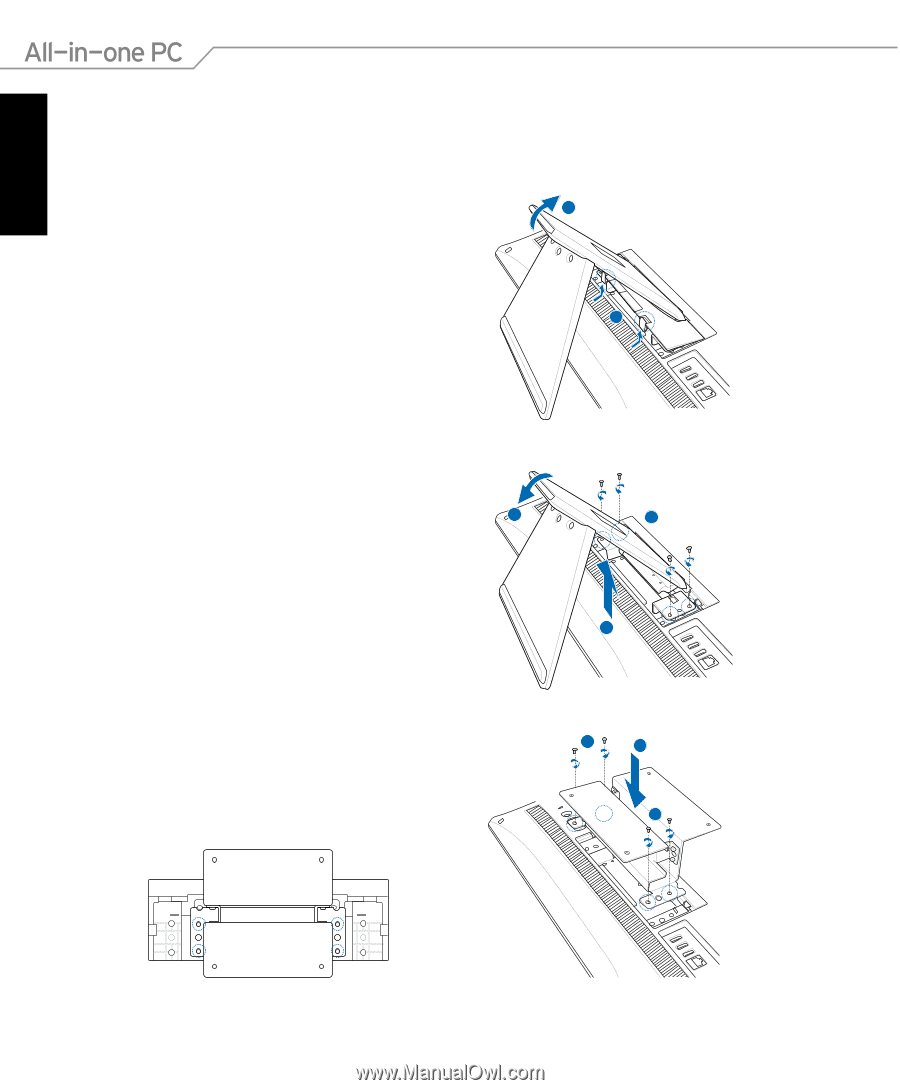
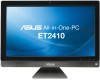
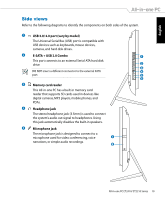
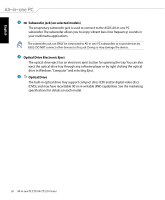
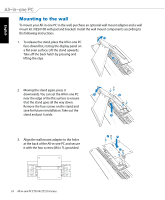
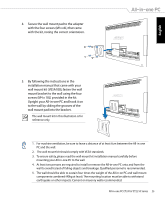
English Mounting to the wall To mount your All-in-one PC to the wall, purchase an optional wall mount adapter and a wall mount kit (VESA100 with pad and bracket). Install the wall mount components according to the following instructions. 1. To release the stand, place the All-in-one PC face-down first, resting the display panel on a flat even surface. Lift the stand upwards. Take off the back hatch by pressing and lifting the clips. 1 2 2. Moving the stand again, press it downwards. You can set the All-in-one PC 1 near the edge of the flat surface to ensure that the stand goes all the way down. Remove the four screws on the stand and save for future reinstallation. Take out the stand and put it aside. 2 3 3. Align the wall mount adapter to the holes at the back of the All-in-one PC and secure it with the four screws (M4 x 7L) provided. 2 1 2 24 All-in-one PC ET2410/ ET2210 Series
-
 1
1 -
2
-
3
-
4
-
5
-
6
-
7
-
8
-
9
-
10
-
11
-
12
-
13
-
14
-
15
-
16
-
17
-
18
-
 19
19 -
 20
20 -
 21
21 -
 22
22 -
 23
23 -
 24
24 -
 25
25 -
 26
26 -
 27
27 -
 28
28 -
 29
29 -
30
-
31
-
32
-
33
-
34
-
35
-
36
-
37
-
38
 |
 |