Asus N75SL-DS71 User Manual - Page 30
Powering ON the Notebook PC, The Power-On Self Test (POST)
 |
View all Asus N75SL-DS71 manuals
Add to My Manuals
Save this manual to your list of manuals |
Page 30 highlights
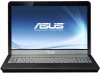
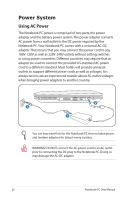
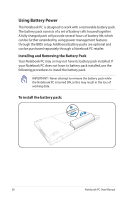
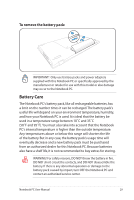
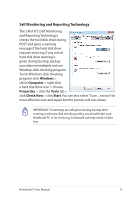
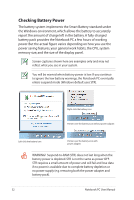
Powering ON the Notebook PC The Notebook PC's power-ON message appears on the screen when you turn it ON. If necessary, you may adjust the brightness by using the hot keys. If you need to run the BIOS Setup to set or modify the system configuration, press [F2] upon bootup to enter the BIOS Setup. If you press [Tab] during the splash screen, standard boot information such as the BIOS version can be seen. Press [ESC] and you will be presented with a boot menu with selections to boot from your available drives. Before bootup, the display panel flashes when the power is turned ON.This is part of the Notebook PC's test routine and is not a problem with the display. IMPORTANT! To protect the hard disk drive, always wait at least 5 seconds after turning OFF your Notebook PC before turning it back ON. WARNING! DO NOT carry or cover a Notebook PC that is powered ON with any materials that will reduce air circulation such as a carrying bag. The Power-On Self Test (POST) When you turn ON the Notebook PC, it will first run through a series of software-controlled diagnostic tests called the Power-On Self Test (POST).The software that controls the POST is installed as a permanent part of the Notebook PC's architecture.The POST includes a record of the Notebook PC's hardware configuration, which is used to make a diagnostic check of the system. This record is created by using the BIOS Setup program. If the POST discovers a difference between the record and the existing hardware, it will display a message on the screen prompting you to correct the conflict by running BIOS Setup. In most cases the record should be correct when you receive the Notebook PC. When the test is finished, you may get a message reporting "No operating system found" if the hard disk was not preloaded with an operating system. This indicates that the hard disk is correctly detected and ready for the installation of a new operating system. 30 Notebook PC User Manual
-
 1
1 -
2
-
3
-
4
-
5
-
6
-
7
-
8
-
9
-
10
-
11
-
12
-
13
-
14
-
15
-
16
-
17
-
18
-
19
-
20
-
21
-
22
-
23
-
24
-
 25
25 -
 26
26 -
 27
27 -
 28
28 -
 29
29 -
 30
30 -
 31
31 -
 32
32 -
 33
33 -
 34
34 -
 35
35 -
36
-
37
-
38
-
39
-
40
-
41
-
42
-
43
-
44
-
45
-
46
-
47
-
48
-
49
-
50
-
51
-
52
-
53
-
54
-
55
-
56
-
57
-
58
-
59
-
60
-
61
-
62
-
63
-
64
-
65
-
66
-
67
-
68
-
69
-
70
-
71
-
72
-
73
-
74
-
75
-
76
-
77
-
78
-
79
-
80
-
81
-
82
-
83
-
84
-
85
-
86
-
87
-
88
-
89
-
90
-
91
-
92
-
93
-
94
-
95
-
96
-
97
-
98
-
99
-
100
-
101
-
102
-
103
-
104
-
105
-
106
-
107
-
108
-
109
-
110
-
111
-
112
-
113
-
114
-
115
-
116
-
117
-
118
-
119
-
120
 |
 |