Asus N75SL-DS71 User Manual - Page 94
SATA 2nd HDD Interface, LOCKED, AI Recovery Burner, Start, Creating the Recovery DVD
 |
View all Asus N75SL-DS71 manuals
Add to My Manuals
Save this manual to your list of manuals |
Page 94 highlights
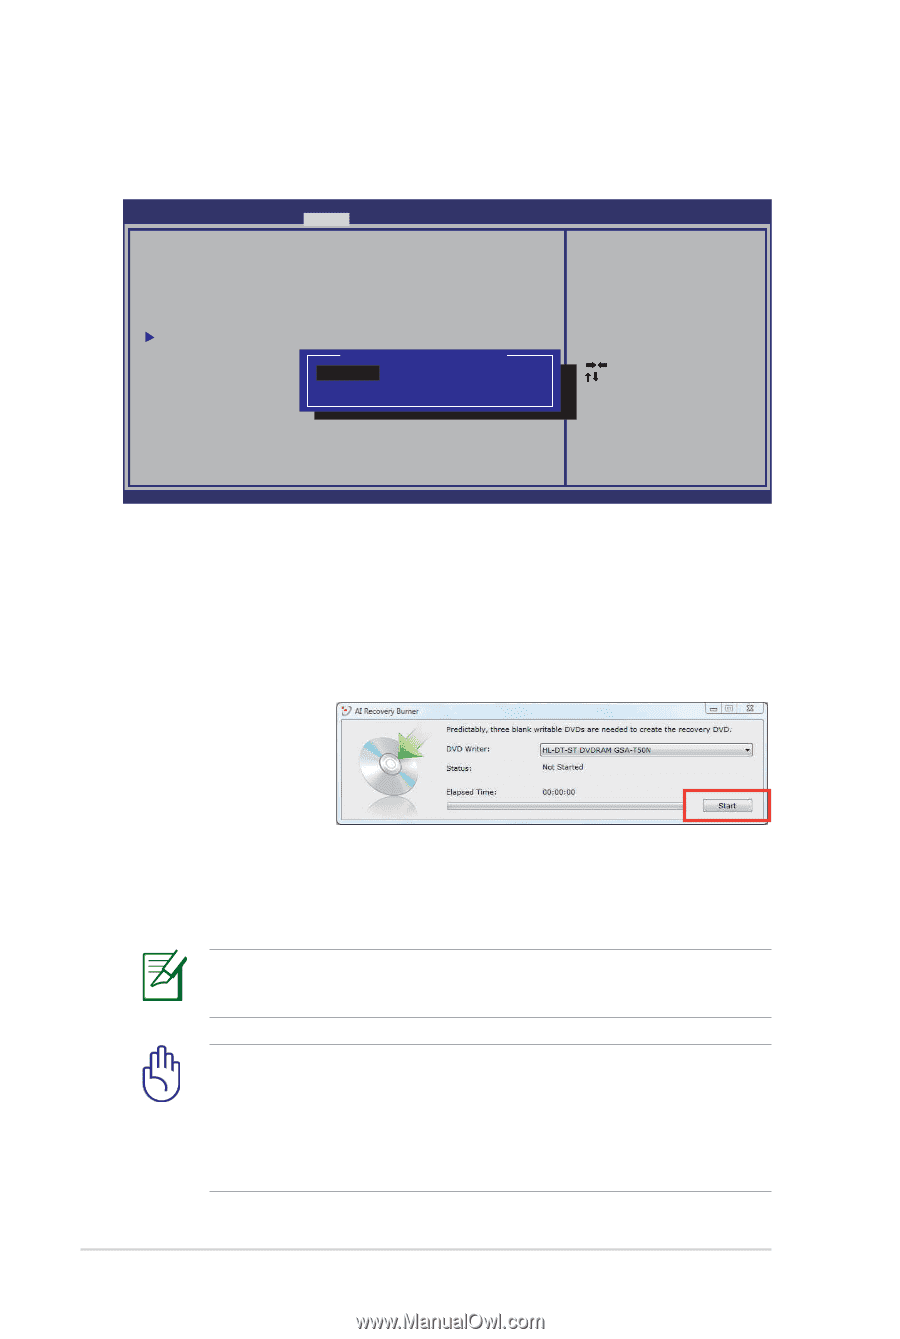
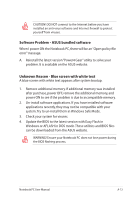
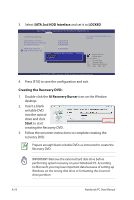
3. Select SATA 2nd HDD Interface and set it to LOCKED. Aptio Setup Utility - Copyright (C) 2010 American Megatrends, Inc. � � � Security I/O Interface Security LAN Network Interface Wireless Network Interface HD AUDIO Interface SATA 2nd HDD Interface SATA ODD Interface USB Interface Security [UNLOCKED] [UNLOCKED] [UNLOCKED] [UNLOCKED] [UNLOCKED] SATA 2nd HDD Interface UNLOCKED LOCKED If Locked, 2nd SATA HDD will be disabled. : Select Screen : Select Item Enter: Select +/-: Change Opt. F1: General Help F9: Optimized Defaults F10: Save ESC: Exit Version 2.01.1208. Copyright (C) 2010 American Megatrends, Inc. 4. Press [F10] to save the configuration and exit. Creating the Recovery DVD: 1. Double-click the AI Recovery Burner icon on the Window desktop. 2. Insert a blank writable DVD into the optical drive and click Start to start creating the Recovery DVD. 3. Follow the onscreen instructions to complete creating the recovery DVD. Prepare enough blank writable DVDs as instructed to create the Recovery DVD. IMPORTANT! Remove the external hard disk drive before performing system recovery on your Notebook PC. According to Microsoft, you may lose important data because of setting up Windows on the wrong disk drive or formatting the incorrect drive partition. A-18 Notebook PC User Manual
-
 1
1 -
2
-
3
-
4
-
5
-
6
-
7
-
8
-
9
-
10
-
11
-
12
-
13
-
14
-
15
-
16
-
17
-
18
-
19
-
20
-
21
-
22
-
23
-
24
-
25
-
26
-
27
-
28
-
29
-
30
-
31
-
32
-
33
-
34
-
35
-
36
-
37
-
38
-
39
-
40
-
41
-
42
-
43
-
44
-
45
-
46
-
47
-
48
-
49
-
50
-
51
-
52
-
53
-
54
-
55
-
56
-
57
-
58
-
59
-
60
-
61
-
62
-
63
-
64
-
65
-
66
-
67
-
68
-
69
-
70
-
71
-
72
-
73
-
74
-
75
-
76
-
77
-
78
-
79
-
80
-
81
-
82
-
83
-
84
-
85
-
86
-
87
-
88
-
 89
89 -
 90
90 -
 91
91 -
 92
92 -
 93
93 -
 94
94 -
 95
95 -
 96
96 -
 97
97 -
 98
98 -
 99
99 -
100
-
101
-
102
-
103
-
104
-
105
-
106
-
107
-
108
-
109
-
110
-
111
-
112
-
113
-
114
-
115
-
116
-
117
-
118
-
119
-
120
 |
 |