Asus P4V533-MX P4V533-MX User Manual
Asus P4V533-MX Manual
 |
View all Asus P4V533-MX manuals
Add to My Manuals
Save this manual to your list of manuals |
Asus P4V533-MX manual content summary:
- Asus P4V533-MX | P4V533-MX User Manual - Page 1
Motherboard P4V533-MX User Guide - Asus P4V533-MX | P4V533-MX User Manual - Page 2
express written permission of ASUSTeK COMPUTER INC. ("ASUS"). Product warranty or service will not be extended if: (1) the ASUS HAS BEEN ADVISED OF THE POSSIBILITY OF SUCH DAMAGES ARISING FROM ANY DEFECT OR ERROR IN THIS MANUAL OR PRODUCT. SPECIFICATIONS AND INFORMATION CONTAINED IN THIS MANUAL - Asus P4V533-MX | P4V533-MX User Manual - Page 3
v Safety information vi About this guide vii ASUS contact information viii P4V533-MX specifications summary ix Chapter 1: Product introduction 1.1 Welcome 1-2 1.2 Package contents 1-2 1.3 Special features 1-3 1.4 Motherboard components 1-4 1.5 Motherboard layout 1-7 1.6 Before you proceed - Asus P4V533-MX | P4V533-MX User Manual - Page 4
2-6 Configuration fields 2-6 Pop-up window 2-6 Scroll bar 2-6 General help CPU Configuration 2-11 2.4.2 Chipset 2-11 2.4.3 Onboard Devices Configuration 2-13 2.4.4 PCI PnP 2-15 2.5 Power menu 2-16 2.5.1 Suspend Mode [Auto 2-16 2.5.2 Repost Video on S3 Resume [No 2-16 2.5.3 ACPI 2.0 Support - Asus P4V533-MX | P4V533-MX User Manual - Page 5
, if not installed and used in accordance with manufacturer's instructions, may cause harmful interference to radio communications. However, there use of shielded cables for connection of the monitor to the graphics card is required to assure compliance with FCC regulations. Changes or modifications - Asus P4V533-MX | P4V533-MX User Manual - Page 6
signal cables from the motherboard, ensure that all service technician or your retailer. Operation safety • Before installing the motherboard and adding devices on it, carefully read all the manuals screws, and staples away from connectors, slots, sockets and circuitry. • Avoid dust, humidity, and - Asus P4V533-MX | P4V533-MX User Manual - Page 7
this guide To make sure that you perform certain tasks properly, take note of the following symbols used throughout this manual. WARNING updates. 1. ASUS Websites The ASUS websites worldwide provide updated information on ASUS hardware and software products. The ASUS websites are listed in the ASUS - Asus P4V533-MX | P4V533-MX User Manual - Page 8
Fax: +1-502-933-8713 General Email: [email protected] Web Site: usa.asus.com Technical Support Support Fax: +1-502-933-8713 General Support: +1-502-995-0883 Notebook Support: +1-510-739-3777 x5110 Support Email: [email protected] ASUS COMPUTER GmbH (Germany and Austria) Address: Harkortstr - Asus P4V533-MX | P4V533-MX User Manual - Page 9
P4V533-MX specifications summary CPU Chipset Front Side Bus (FSB) Memory VGA Expansion slots Storage Audio LAN Rear panel I/O Internal I/O BIOS features Industry standard Manageability Form Factor Support CD contents Socket 478 for Intel® Pentium® 4/Northwood/Willamette CPUs with speeds up to 2.8+ - Asus P4V533-MX | P4V533-MX User Manual - Page 10
x - Asus P4V533-MX | P4V533-MX User Manual - Page 11
Chapter 1 This chapter describes the features of the P4V533-MX motherboard. It includes brief descriptions of the motherboard components, and illustrations of the layout, jumper settings, and connectors. Product introduction - Asus P4V533-MX | P4V533-MX User Manual - Page 12
VIA® VT8235 chipsets to set a new benchmark for an effective desktop platform solution. Supporting up to 2GB of system memory with PC2100/PC1600 DDR SDRAM, high-resolution graphics via integrated VIA ProSavage8 graphics and an AGP 4X slot, USB 2.0, and 6-channel audio features, the P4V533-MX is your - Asus P4V533-MX | P4V533-MX User Manual - Page 13
USB 2.0. See pages 1-6 and 1-20. 6-channel digital audio The Realtek ALC655 AC'97 audio CODEC is onboard to provide 6-channel audio playback for 5.1 surround sound. See page 1-6. BONUS! Free bundled TrendMIcro™ PC-cillin 2002 anti-virus software (OEM version) ASUS P4V533-MX motherboard user guide - Asus P4V533-MX | P4V533-MX User Manual - Page 14
components Before you install the motherboard, learn about its major components and available features to facilitate the installation and future upgrades. Refer to the succeeding pages for the component descriptions. 1 23 4 5 - Asus P4V533-MX | P4V533-MX User Manual - Page 15
interface with 533/400 MHz frequency, support for Intel® Hyper-Threading Technology, system memory interface at 266MHz operation, and 1.5V AGP interface that supports AGP 2.0 specification including 4X Fast Write protocol. 4 DDR DIMM sockets. These two 184-pin DIMM sockets support up to 2GB - Asus P4V533-MX | P4V533-MX User Manual - Page 16
jacks change when you select the 6-channel audio configuration as shown in the following table: Audio 2, 4 or 6-channel configuration Light Blue Center 20 USB 2.0 ports 1 and 2. These two 4-pin Universal Serial Bus (USB) ports are available for connecting USB 2.0 devices. 21 Video Graphics - Asus P4V533-MX | P4V533-MX User Manual - Page 17
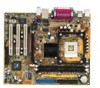
AUDIO1 2Mbit Flash BIOS GAME1 Super I/O CD1 AUX1 Audio Codec CPU_FAN1 VIA VT8751A ® Accelerated Graphics Port (AGP) P4V533-MX PCI Slot 1 LED1 PCI Slot 2 PCI Slot 3 01 23 VIA VT8235 CHA_FAN1 CLRCMOS1 PLED1 USBPWR56 FLOPPY1 USB56 PANEL1 PRI_IDE ASUS P4V533-MX motherboard user guide 1-7 - Asus P4V533-MX | P4V533-MX User Manual - Page 18
before you install motherboard components or change any motherboard settings. 1. Unplug the power cord from the wall socket before touching any cause severe damage to the motherboard, peripherals, and/or components. ® P4V533-MX P4V533-MX Onboard LED LED1 ON Standby Power OFF Powered - Asus P4V533-MX | P4V533-MX User Manual - Page 19
in the image below. 1.7.2 Screw holes Place seven (7) screws into the holes indicated by circles to secure the motherboard to the chassis. Do not overtighten the screws! Doing so may damage the motherboard. Place this side towards the rear of the chassis ASUS P4V533-MX motherboard user guide 1-9 - Asus P4V533-MX | P4V533-MX User Manual - Page 20
the processor Pin 1 that should match a specific corner of the CPU socket. Gold Mark Incorrect installation of the CPU into the socket may bend the pins and severely damage the CPU! Notes on Intel® Hyper-Threading Technology 1. This motherboard supports Intel Pentium 4 CPUs with Hyper-Threading - Asus P4V533-MX | P4V533-MX User Manual - Page 21
to secure the CPU. The lever clicks on the side tab to indicate that it is locked. 6. Install a CPU heatsink and fan following the instructions that came with the heatsink package. 7. Connect the CPU fan cable to the CPU_FAN1 connector on the motherboard. ASUS P4V533-MX motherboard user guide 1-11 - Asus P4V533-MX | P4V533-MX User Manual - Page 22
The motherboard comes with two Double Data Rate (DDR) Dual Inline Memory Module (DIMM) sockets. These sockets support up to 2GB system memory using 184-pin unbuffered non-ECC PC2100/PC1600 DDR DIMMs. The following figure shows the location of the DDR DIMM sockets. ® P4V533-MX P4V533-MX 184-Pin DDR - Asus P4V533-MX | P4V533-MX User Manual - Page 23
slot used Onboard USB controller HC0 - - - - shared - - - Onboard USB controller HC1 - - - - shared - - - Onboard USB controller HC3 - - - - shared - - - EHCI - - - - shared - - - Onboard LAN - - - - - used - - Onboard audio - - - - - - used - ASUS P4V533-MX motherboard user guide 1-13 - Asus P4V533-MX | P4V533-MX User Manual - Page 24
card, USB card, and other cards that comply with PCI specifications. 1.10.4 AGP slot This motherboard has an Accelerated Graphics Port (AGP) slot that supports AGP 4X (3.3V/1.5V) cards. Note the notches on the card golden fingers to ensure that they fit the AGP slot on your motherboard. ® P4V533-MX - Asus P4V533-MX | P4V533-MX User Manual - Page 25
BIOS setup to re-enter data. Except when clearing the RTC RAM, never remove the cap on CLRTC1 jumper default position. Removing the cap will cause system boot failure! ® P4V533-MX CLRCMOS1 12 23 Normal (Default) Clear CMOS P4V533-MX Clear RTC RAM Setting ASUS P4V533-MX motherboard user guide - Asus P4V533-MX | P4V533-MX User Manual - Page 26
(CPU stopped, DRAM refreshed, system running in low power mode) using the connected USB devices. Set to +5VSB to wake up from S3 sleep mode (no power to CPU, whether under normal or in sleep mode. ® P4V533-MX P4V533-MX USB Device Wake Up USBPWR56 2 1 +5V 3 2 +5VSB (Default) 1-16 - Asus P4V533-MX | P4V533-MX User Manual - Page 27
or a game pad for playing games, and MIDI devices for playing or editing audio files. +5V J2B1 J2CX MIDI_OUT J2CY J2B2 MIDI_IN ® P4V533-MX P4V533-MX Smartcard GAME1 The GAME/MIDI module is purchased separately. +5V J1B1 J1CX GND GND J1CY J1B2 +5V ASUS P4V533-MX motherboard user guide 1-17 - Asus P4V533-MX | P4V533-MX User Manual - Page 28
Refer to the hard disk documentation for the jumper settings. BIOS supports specific device bootup. If you have more than two UltraDMA133/100 conductor IDE cable. SEC_IDE PRI_IDE ® P4V533-MX NOTE: Orient the red markings on the IDE ribbon cable to PIN 1 P4V533-MX IDE Connectors PIN 1 PIN 1 - Asus P4V533-MX | P4V533-MX User Manual - Page 29
sufficient air flow within the system may damage the motherboard components. These are not jumpers! DO NOT place jumper caps on the fan connectors! ® P4V533-MX Rotation +12V GND CPU_FAN1 CHA_FAN1 Rotation +12V GND P4V533-MX 12-Volt Cooling Fan Power ASUS P4V533-MX motherboard user guide 1-19 - Asus P4V533-MX | P4V533-MX User Manual - Page 30
Ground Ground Right Audio Channel AUX1(White) P4V533-MX Internal Audio Connectors 7. USB header (10-1 pin USB56) If the USB ports on the rear panel are inadequate, two USB headers are available for additional USB ports. The USB header complies with USB 2.0 specification that supports up to 480 - Asus P4V533-MX | P4V533-MX User Manual - Page 31
This is an interface for the Intel front panel audio cable that allow convenient connection and control of audio devices. ® P4V533-MX AUDIO1 MIC2 MICPWR Line out_R NC Line out_L AGND +5VA BLINE_OUT_R BLINE_OUT_L P4V533-MX Front Panel Audio Connector ASUS P4V533-MX motherboard user guide 1-21 - Asus P4V533-MX | P4V533-MX User Manual - Page 32
P4V533-MX PANEL1 IDE_LED Reset SW * Requires an ATX power supply. P4V533-MX Front Panel Audio and SOFT OFF, depending on the BIOS or OS settings. Pressing the motherboard. The system buzzer allows you to hear system warning beeps when a PC speaker is not available. ® P4V533-MX 1-22 P4V533-MX - Asus P4V533-MX | P4V533-MX User Manual - Page 33
Chapter 2 This chapter tells how to change system settings through the BIOS Setup menus. Detailed descriptions of the BIOS parameters are also provided. BIOS information - Asus P4V533-MX | P4V533-MX User Manual - Page 34
screen instructions to complete the process. 2. Copy the original (or the latest) motherboard BIOS to the bootable floppy disk. 2.1.2 Using AFUDOS to update the BIOS Update the BIOS using the AFUDOS.EXE utility in DOS environment. 1. Visit the ASUS website (www.asus.com) to download the latest BIOS - Asus P4V533-MX | P4V533-MX User Manual - Page 35
Update Utility - Version 1.10 Copyright (C) 2002 American Megatrends, Inc. All rights reserved. Reading file ..... done Erasing flash .... done Writing flash .... 0x0008CC00 (9%) Verifying flash .. done A:\> 5. Reboot the system from the hard disk. ASUS P4V533-MX motherboard user guide 2-3 - Asus P4V533-MX | P4V533-MX User Manual - Page 36
Setup program This motherboard supports a programmable firmware hub (FWH) that you can update using the provided utility described in section "2.1 Managing and updating your BIOS." Use the BIOS Setup program when you are installing a motherboard, reconfiguring your system, or prompted to "Run Setup - Asus P4V533-MX | P4V533-MX User Manual - Page 37
. Use the navigation keys to select items in the menu and change the settings. Some of the navigation keys differ from one screen to another. ASUS P4V533-MX motherboard user guide 2-5 - Asus P4V533-MX | P4V533-MX User Manual - Page 38
the specific items 05/27/2003] [1.44M, 3.5 in] :[ST320413A] :[ASUS CD-S340] :[Not Detected] :[Not Detected] Main menu -up window." 2.2.7 Pop-up window Select a menu item then press Enter to display a pop-up window with ] [Available] NO: Lets the bIOS configure all the devices in the system - Asus P4V533-MX | P4V533-MX User Manual - Page 39
giving you an overview of the basic system information. Refer to section "2.2.1 BIOS menu screen" for information on the menu screen items and how to navigate through [360K, 5.25 in.] [1.2M , 5.25 in.] [720K , 3.5 in.] [1.44M, 3.5 in.] [2.88M, 3.5 in.] ASUS P4V533-MX motherboard user guide 2-7 - Asus P4V533-MX | P4V533-MX User Manual - Page 40
Setup, BIOS auto-detects the presence of IDE devices. There is a separate sub-menu for each IDE device. Select a device item then press Enter to display the IDE device information. Primary IDE Master Device : Hard Disk Vendor : ST320413A Size : 20.0GB LBA Mode : Supported Block Mode - Asus P4V533-MX | P4V533-MX User Manual - Page 41
+- Change Option F1 General Help F10 Save and Exit ESC Exit AMI BIOS This item displays the auto-detected BIOS information. Processor This item displays the auto-detected CPU specification. System Memory This item displays the auto-detected system memory. ASUS P4V533-MX motherboard user guide 2-9 - Asus P4V533-MX | P4V533-MX User Manual - Page 42
Chipset Onboard Devices Configuration PCI PnP Configure CPU. Select Screen Select Item Enter Go to Sub-screen F1 General Help F10 Save and Exit ESC Exit 2.4.1 CPU Configuration The items in this menu show the CPU-related information auto-detected by BIOS. Configure advanced CPU settings - Asus P4V533-MX | P4V533-MX User Manual - Page 43
you to change the advanced chipset settings. Select an item the DRAM SPD (Serial Presence Detect). When disabled, you can manually set the DRAM timing parameters through the DRAM sub-items. Configuration (Tras) [6T] Configuration options: [5T] [6T] ASUS P4V533-MX motherboard user guide 2-11 - Asus P4V533-MX | P4V533-MX User Manual - Page 44
[64MB] Allows you to to select the size of mapped memory for AGP graphic data. Configuration options: [256MB] [128MB] disable or enable and set the integrated AGP operating memory size. Configuration options: [Disabled] [Enabled/8MB] card. Configuration options: [Onboard VGA] [Auto] 2-12 Chapter - Asus P4V533-MX | P4V533-MX User Manual - Page 45
/IRQ4] [Disabled] [Disabled] [Disabled] Configure South Bridge Chipset OnBoard LAN OnBoard LAN Boot ROM OnBoard AC'97 Audio OnBoard MC'97 Modem [Enabled] [Enabled] [Disabled] [ you to select the Parallel Port IRQ. Configuration options: [IRQ5] [IRQ7] ASUS P4V533-MX motherboard user guide 2-13 - Asus P4V533-MX | P4V533-MX User Manual - Page 46
Bridge Chipset OnBoard LAN [Enabled] This item enables or disables the onboard LAN controller. Configuration options: [Disabled] [Enabled] OnBoard LAN Boot ROM [Disabled] This item enables or disables the onboard LAN Boot ROM. Configuration options: [Disabled] [Enabled] OnBoard AC'97 Audio [Enabled - Asus P4V533-MX | P4V533-MX User Manual - Page 47
requested. Configuration options: [Yes] [No] IRQ xx [Available] When set to [Available], the specific IRQ is free for use of PCI/PnP devices. When set to [Reserved], the IRQ is reserved for legacy ISA devices. Configuration options: [Available] [Reserved] ASUS P4V533-MX motherboard user guide 2-15 - Asus P4V533-MX | P4V533-MX User Manual - Page 48
] [S3 Only] [Auto] 2.5.2 Repost Video on S3 Resume [Yes] This item determines whether to invoke the VGA BIOS post on S3/STR resume. Configuration options: [Yes] [No] 2.5.3 ACPI 2.0 Support [No] Allows you to add more tables for ACPI 2.0 specifications. Configuration options: [No] [Yes] 2.5.4 ACPI - Asus P4V533-MX | P4V533-MX User Manual - Page 49
Mode [Suspend] Allows you to select the video power down mode. Configuration options: [Disabled] [Standby] [Suspend] Hard Disk Power Down Mode [Suspend] Allows you to set the hard disk power down mode. Configuration options: [Disabled] [Standby] [Suspend] ASUS P4V533-MX motherboard user guide 2-17 - Asus P4V533-MX | P4V533-MX User Manual - Page 50
LAN or modem card. This feature requires an ATX power supply that provides at least 1A on the +5VSB lead. Configuration options: [Disabled] [Enabled] Power On KBC [Disabled] This parameter allows you to use specific . Configuration options: [Disabled] [Enabled] 2-18 Chapter 2: BIOS information - Asus P4V533-MX | P4V533-MX User Manual - Page 51
monitor automatically detects and displays the CPU and chassis fan speeds in rotations per minute (RPM). If any of the fans is not connected to the motherboard, the specific field shows N/A. VCORE Voltage, +3. "Press F1 to continue or DEL to enter SETUP". ASUS P4V533-MX motherboard user guide 2-19 - Asus P4V533-MX | P4V533-MX User Manual - Page 52
1st Boot Device 2nd Boot Device 3rd Boot Device [1st Floppy Drive] [PM-ST330620A] [SM-ASUS CD-S360] Specifies the boot sequence from the available devices. A device enclosed in parenthesis has been in the system. Configuration options: [xxxxx Drive] [Disabled] 2-20 Chapter 2: BIOS information - Asus P4V533-MX | P4V533-MX User Manual - Page 53
Support Wait for 'F1' If Error Hit 'DEL' Message Display Interrupt 19 Capture [Enabled] [Force BIOS] [On] [Auto] [Enabled] [Enabled]\ [Disabled] Allows BIOS PCI cards that provide a ROM based setup utility. Configuration options: [Disabled] [Enabled] ASUS P4V533-MX motherboard user guide 2-21 - Asus P4V533-MX | P4V533-MX User Manual - Page 54
. The message "Password Uninstalled" appears. After you have set a supervisor password, the other items appear to allow you to change other security settings. 2-22 Chapter 2: BIOS information - Asus P4V533-MX | P4V533-MX User Manual - Page 55
to clear the user password. Boot Sector Virus Protection [Disabled] Allows you to enable or disable the boot sector virus protection. Configuration options: [Disabled] [Enabled] ASUS P4V533-MX motherboard user guide 2-23 - Asus P4V533-MX | P4V533-MX User Manual - Page 56
CMOS RAM is sustained by an onboard backup battery and stays on even when the PC is turned off. When you select this option, a confirmation window appears to fields other than system date, system time, and password, the BIOS asks for a confirmation before exiting. Discard Changes This option allows - Asus P4V533-MX | P4V533-MX User Manual - Page 57
Chapter 3 This chapter describes the contents of the support CD that comes with the motherboard package. Software support - Asus P4V533-MX | P4V533-MX User Manual - Page 58
contains useful software and several utility drivers that enhance the motherboard features. The contents of the support CD are subject to change at any time without notice. Visit the ASUS website for updates. 3.2.1 Running the support CD To begin using the support CD, simply insert the CD into - Asus P4V533-MX | P4V533-MX User Manual - Page 59
software that the motherboard supports. ASUS PC Probe This smart utility monitors the fan speed, CPU temperature, and system voltages, and alerts you on any detected problems. This utility helps you keep your computer at a healthy operating condition. ASUS P4V533-MX motherboard user guide 3-3 - Asus P4V533-MX | P4V533-MX User Manual - Page 60
download the latest version of the BIOS from the ASUS website. Before using the ASUS Update, make sure that you have an Internet connection so you can connect to the ASUS Format (PDF). ASUS Screen Saver This item installs the ASUS screen saver. 3.2.4 ASUS Contact Information Clicking the ASUS Contact
-
 1
1 -
 2
2 -
 3
3 -
 4
4 -
 5
5 -
 6
6 -
 7
7 -
8
-
9
-
10
-
11
-
12
-
13
-
14
-
15
-
16
-
17
-
18
-
19
-
20
-
21
-
22
-
23
-
24
-
25
-
26
-
27
-
28
-
29
-
30
-
31
-
32
-
33
-
34
-
35
-
36
-
37
-
38
-
39
-
40
-
41
-
42
-
43
-
44
-
45
-
46
-
47
-
48
-
49
-
50
-
51
-
52
-
53
-
54
-
55
-
56
-
57
-
58
-
59
-
60
 |
 |

Motherboard
P4V533-MX
User Guide