Asus P4V8X-MX Motherboard DIY Troubleshooting Guide
Asus P4V8X-MX Manual
 |
View all Asus P4V8X-MX manuals
Add to My Manuals
Save this manual to your list of manuals |
Asus P4V8X-MX manual content summary:
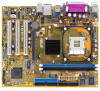
- Asus P4V8X-MX | Motherboard DIY Troubleshooting Guide - Page 1
Motherboard P4V8X-MX User Guide - Asus P4V8X-MX | Motherboard DIY Troubleshooting Guide - Page 2
express written permission of ASUSTeK COMPUTER INC. (" ASUS"). Product warranty or service will not be extended if: (1) the ASUS HAS BEEN ADVISED OF THE POSSIBILITY OF SUCH DAMAGES ARISING FROM ANY DEFECT OR ERROR IN THIS MANUAL OR PRODUCT. SPECIFICATIONS AND INFORMATION CONTAINED IN THIS MANUAL - Asus P4V8X-MX | Motherboard DIY Troubleshooting Guide - Page 3
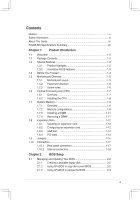
This Guide vii P4V8X-MX Specifications Summary viii Chapter 1: Product Introduction 1.1 Welcome 1-2 1.2 Package Contents 1-2 1.3 Special Features 1-2 1.3.1 Product highlights 1-2 1.3.2 Innovative ASUS features 11.4 Before You Proceed 1-4 1.5 Motherboard Overview 1-5 1.5.1 Motherboard layout - Asus P4V8X-MX | Motherboard DIY Troubleshooting Guide - Page 4
3-2 3.2 Support CD Information 3-2 3.2.1 Running the support CD 3-2 3.2.2 Drivers menu 3-3 3.2.3 Utilities menu 3-3 3.2.4 Manual menu 3-4 3.2.5 Contacts menu 3-5 3.3 VIA RAID configurations 3-6 3.3.1 Installing hard disks 3-6 3.3.2 VIA RAID Configuration 3-7 3.4 Creating a RAID driver disk - Asus P4V8X-MX | Motherboard DIY Troubleshooting Guide - Page 5
if not installed and used in accordance with manufacturerʼ s instructions, may cause harmful interference to radio communications. However, there the receiver is connected. • Consult the dealer or an experienced radio/TV technician for help. The use of shielded cables for connection of the monitor - Asus P4V8X-MX | Motherboard DIY Troubleshooting Guide - Page 6
by yourself. Contact a qualified service technician or your retailer. Operation safety • Before installing the motherboard and adding devices on it, carefully read all the manuals that came with the package. • Before using the product, make sure all cables are correctly connected and the power cables - Asus P4V8X-MX | Motherboard DIY Troubleshooting Guide - Page 7
to change system settings through the BIOS Setup menus. Detailed descriptions of the BIOS parameters are also provided. • Chapter 3: Software Support This chapter describes the contents of the support CD that comes with the motherboard package. Conventions used in this guide To make sure that you - Asus P4V8X-MX | Motherboard DIY Troubleshooting Guide - Page 8
Bus (FSB) Memory Expansion Slots VGA Storage Audio LAN USB 2.0 ASUS Special features Overclock Features Back panel I/O ports Internal I/O connectors Socket 478 for Intel Pentium 4/ Celeron processor Intel Hyper-Threading Technology ready Supports Intel Prescott CPU VIA P4M800 VIA 8237R PLUS 800/533 - Asus P4V8X-MX | Motherboard DIY Troubleshooting Guide - Page 9
P4V8X-MX Specifications Summary BIOS features Industry standard Manageability Support CD Accessary Form factor 4 Mb Flash ROM, AMI BIOS, PnP, DMI2.0, WfM2.0, SM BIOS 2.3, ACPI 2.0a, C.P.R. (CPU Parameter Recall), ASUS CrashFree BIOS2, ASUS EZ Flash, MyLogo2, PXE, RPL PCI 2.2, USB 2.0/1.1 WfM 2.0, - Asus P4V8X-MX | Motherboard DIY Troubleshooting Guide - Page 10
This chapter describes the motherboard features and the new technologies it supports. 1Product Introduction - Asus P4V8X-MX | Motherboard DIY Troubleshooting Guide - Page 11
Application CDs ASUS motherboard support CD Documentation User guide If any of the above items is damaged or missing, contact your retailer. 1.3 Special features 1.3.1 Product highlights Intel Hyper-Threading Technology support Leveraging the VIA P4M800 chipset to support P4 CPU on 800Hz - Asus P4V8X-MX | Motherboard DIY Troubleshooting Guide - Page 12
clear CMOS data. Just simply restart the system, the BIOS would show the previous setting and then users can amend the CPU setting again. ASUS MyLogo 2 You can convert your favorite photo into a 256-color boot logo for a more colorful and vivid image on your screen. ASUS P4V8X-MX Motherboard 1-3 - Asus P4V8X-MX | Motherboard DIY Troubleshooting Guide - Page 13
precautions before you install motherboard components or change any motherboard settings. • Unplug the power cord from the wall socket before touching any plugging in any motherboard component. The illustration below shows the location of the onboard LED. R P4V8X-MX P4V8X-MX Onboard LED SB_PWR - Asus P4V8X-MX | Motherboard DIY Troubleshooting Guide - Page 14
(8.0in) Socket 478 Super I/O 4Mb BIOS PARALLEL PORT VGA USB1 USB56 USB2 CPU_FAN Bottom: Top: USB3 USB4 RJ-45 CHA_FAN VIA P4M800 Top:Line In R Center:Line Out Below:Mic In CR2032 3V Lithium Cell CMOS Power CLRTC FP_AUDIO CD AUX PCI1 P4V8X-MX PCI2 VIA VT8237R PLUS AUDIO SPDIF_OUT - Asus P4V8X-MX | Motherboard DIY Troubleshooting Guide - Page 15
in the image below. 1.5.3 Screw holes Place six screws into the holes indicated by circles to secure the motherboard to the chassis. Do not overtighten the screws! Doing so can damage the motherboard. Place this side towards-the rear of the chassis R P4V8X-MX 1-6 Chapter 1: Product Introduction - Asus P4V8X-MX | Motherboard DIY Troubleshooting Guide - Page 16
speeds of less than 1GHz. R P4V8X-MX P4V8X-MX CPU Socket 478 Gold Arrow Notes on Intel Hyper-Threading Technology 1. This motherboard supports Intel® Pentium® 4 CPUs with Hyper-Threading Technology 2. Hyper-Threading Technology is supported under Windows® XP and Linux 2.4.x (kernel) and later - Asus P4V8X-MX | Motherboard DIY Troubleshooting Guide - Page 17
To use the Hyper-Threading Technology on this motherboard: 1. Buy an Intel Pentium 4 CPU that supports Hyper-Threading Technology, Install the CPU 2. Power up the system and enter BIOS Setup (see Chapter 4). Under the AAdvanced Menu, make sure that the item Hyper-Threading Technology is set to - Asus P4V8X-MX | Motherboard DIY Troubleshooting Guide - Page 18
Pins 80 Pins 1.7 System memory 1.7.1 Overview The motherboard has two Double Data Rate (DDR) DIMM sockets that support up to 2 GB unbuffered non-ECC DDR333/266 DDR SDRAM DIMMs. Each DIMM socket is double-sided. R P4V8X-MX P4V8X-MX 184-Pin DDR DIMM Sockets 1.7.2 Memory configurations You may install - Asus P4V8X-MX | Motherboard DIY Troubleshooting Guide - Page 19
Twinmos DDR333-256 Twinmos SS TMD7608F8E60B 256MB Twinmos M2G9108A-TT Twinmos SS TMD7608F8E501 Note: When you use 400MHz memory module, the default data of this motherboard run the efficieincy of 333MHz. 1-10 Chapter 1: Product Introduction - Asus P4V8X-MX | Motherboard DIY Troubleshooting Guide - Page 20
to remove a DIMM. 1. Simultaneously press the retaining clips outward to unlock the DIMM. Support the DIMM lightly with your fingers when pressing the retaining clips. The DIMM might get damaged when it flips out with extra force. 2. Remove the DIMM from the socket. ASUS P4V8X-MX Motherboard 1-11 - Asus P4V8X-MX | Motherboard DIY Troubleshooting Guide - Page 21
the expansion cards that they support. Make sure to unplug the injury and damage motherboard components. 1.8.1 Installing Remove the system unit cover (if your motherboard is already installed in a chassis). the necessary BIOS settings, if any. See Chapter 2 for information on BIOS setup. 2. - Asus P4V8X-MX | Motherboard DIY Troubleshooting Guide - Page 22
- - used - - - - used When using PCI cards on shared slots, ensure that the drivers support "Share IRQ" or that the cards do not need IRQ assignments; otherwise, conflicts will arise between the two PCI groups, making the system unstable and the card inoperable. ASUS P4V8X-MX Motherboard 1-13 - Asus P4V8X-MX | Motherboard DIY Troubleshooting Guide - Page 23
1.8.3 AGP slot The motherboard has an Accelerated Graphics Port (AGP) slot that supports +1.5 V 8X AGP graphics card. Note the notches on the card golden fingers to ensure that they fit into the AGP slot. R P4V8X-MX Keyed for 1.5v P4V8X-MX Accelerated Graphics Port (AGP) 1.8.4 PCI slots The PCI - Asus P4V8X-MX | Motherboard DIY Troubleshooting Guide - Page 24
when clearing the RTC RAM, never remove the cap on CLRTC jumper default position. Removing the cap will cause system boot failure! Clear CMOS 3 2 R CLRTC P4V8X-MX P4V8X-MX Clear RTC RAM Normal (Default) 2 1 ASUS P4V8X-MX Motherboard 1-15 - Asus P4V8X-MX | Motherboard DIY Troubleshooting Guide - Page 25
mode) using the connected keyboard, mouse or USB devices. Set this jumper to pins 2-3 (+5VSB) to wake up from S3 and S4 sleep modes (no power to CPU, DRAM in slow refresh, power supply in reduced power mode). The versions which are after 1.01 version can support S3. R P4V8X-MX PS2USBPW 12 23 - Asus P4V8X-MX | Motherboard DIY Troubleshooting Guide - Page 26
. 9. Video Graphics Adapter port. This 15-pin port is for a VGA monitor or other VGA-compatible devices. 10. Serial connector. This 9-pin COM1 port is for pointing devices or other serial devices. 11. PS/2 keyboard port (purple). This port is for a PS/2 keyboard. ASUS P4V8X-MX Motherboard 1-17 - Asus P4V8X-MX | Motherboard DIY Troubleshooting Guide - Page 27
covered hole on the Ultra DMA cable connector. This prevents incorrect insertion when you connect the IDE cable. • Use the 80-conductor IDE cable for Ultra DMA 133/100/66 IDE devices. 1-18 R P4V8X-MX P4V8X-MX IDE Connectors PRI_IDE SEC_IDE NOTE: Orient the red markings (usually zigzag) on the - Asus P4V8X-MX | Motherboard DIY Troubleshooting Guide - Page 28
connect the fan cables to the fan connectors. Insufficient air flow inside the system may damage the motherboard components. These are not jumpers! Do not place jumper caps on the fan connectors! R P4V8X-MX CPU_FAN Rotation +12V GND CHA_FAN Rotation +12V GND P4V8X-MX CPU Fan Connectors ASUS P4V8X - Asus P4V8X-MX | Motherboard DIY Troubleshooting Guide - Page 29
USB_P7USB+5V 1 1 Never connect a 1394 cable to the USB connectors. Doing so will damage the motherboard! 6. Internal audio connectors (4-pin CD, AUX) These connectors allow you to receive stereo audio input from sound sources such as a CD-ROM, TV tuner, or MPEG card. R P4V8X-MX CD(Black) Left - Asus P4V8X-MX | Motherboard DIY Troubleshooting Guide - Page 30
panel audio cable. This connector supports the front panel audio I/O ports. AGND +5VA BLINE_OUT_R BLINE_OUT_L R P4V8X-MX FP_AUDIO MIC2 MICPWR Line out_R NC Line out_L P4V8X-MX Front Panel Audio Connector difficulty powering up if the power supply is inadequate. ASUS P4V8X-MX Motherboard 1-21 - Asus P4V8X-MX | Motherboard DIY Troubleshooting Guide - Page 31
from the pins. CHASSIS R P4V8X-MX (Default) P4V8X-MX Chassis Intrusion Connectors 10. Digital audio connector (3- pin SPDIF) This connector is for the S/PDIF audio module that allows digital sound input. • Use 75 ohm impedance matched coaxial cables for your S/PDIF connection. • The S/PDIF module is - Asus P4V8X-MX | Motherboard DIY Troubleshooting Guide - Page 32
system in sleep or soft-off mode depending on the BIOS settings. Pressing the power switch for more than four seconds while the system is ON Connect the HDD Activity LED cable to this connector. The IDE LED lights up or flashes when data is read from or written to the HDD. ASUS P4V8X-MX Motherboard - Asus P4V8X-MX | Motherboard DIY Troubleshooting Guide - Page 33
This chapter tells how to change the system settings through the BIOS Setup menus. Detailed descriptions of the BIOS parameters are also provided. 2 BIOS Setup - Asus P4V8X-MX | Motherboard DIY Troubleshooting Guide - Page 34
update the motherboard Basic Input/Output System (BIOS) setup. 1. AFUDOS (Updates the BIOS in DOS mode using a bootable floppy disk.) 2. ASUS EZ Flash (Updates the BIOS using a floppy disk during POST.) 3. ASUS CrashFree BIOS 2 - Updates the BIOS using a bootable floppy disk or the motherboard support - Asus P4V8X-MX | Motherboard DIY Troubleshooting Guide - Page 35
by the system builder. Write the BIOS filename on a piece of paper. You need to type the exact BIOS file name at the prompt. 2. Copy the AFUDOS.EXE utility from the support CD to the bootable floppy disk that contains the BIOS file. 3. Boot the system from the floppy disk. ASUS P4V8X-MX Motherboard 2-3 - Asus P4V8X-MX | Motherboard DIY Troubleshooting Guide - Page 36
DO NOT shut down or reset the system while updating the BIOS! Doing so can cause system boot failure! When the BIOS update process is complete, the utility returns to the DOS prompt. A:\>afudos /iP4V8X-MX.rom AMI Firmware Update Utility - Version 1.10 Copyright (C) 2002 American Megatrends, Inc. All - Asus P4V8X-MX | Motherboard DIY Troubleshooting Guide - Page 37
pressing + during the Power-On Self Tests (POST). To update the BIOS using ASUS EZ Flash: 1. Visit the system builder website to download the latest BIOS file for your motherboard and rename it to P4V8X-MX.ROM. Save the BIOS file to a floppy disk. 2. Reboot the system. 3. To launch EZ Flash - Asus P4V8X-MX | Motherboard DIY Troubleshooting Guide - Page 38
disk that contains the updated BIOS file. • Prepare the motherboard support CD or the floppy disk containing the updated motherboard BIOS before using this utility. • Make sure that you rename the original or updated BIOS file in the floppy disk to P4V8X-MX.ROM. Recovering the BIOS from a floppy disk To - Asus P4V8X-MX | Motherboard DIY Troubleshooting Guide - Page 39
the BIOS! Doing so can cause system boot failure! 4. Restart the system after the utility completes the updating process. The recovered BIOS may not be the latest BIOS version for this motherboard. Visit the ASUS website (www.asus.com) to download the latest BIOS file. ASUS P4V8X-MX Motherboard 2-7 - Asus P4V8X-MX | Motherboard DIY Troubleshooting Guide - Page 40
you see on your screen. This motherboard supports a programmable Low Pin Count (LPC) chip that you can update using the provided utility described in section "2.1 Managing and updating your BIOS." Use the BIOS Setup program when you are installing a motherboard, reconfiguring your system, or prompted - Asus P4V8X-MX | Motherboard DIY Troubleshooting Guide - Page 41
2.2.1 BIOS menu screen Menu items Menu bar Configuration fields General help System Time System Date Legacy Diskette A Legacy Diskette B Primary IDE keys to select items in the menu and change the settings. Some of the navigation keys differ from one screen to another. ASUS P4V8X-MX Motherboard 2-9 - Asus P4V8X-MX | Motherboard DIY Troubleshooting Guide - Page 42
Enter> to display a list of options. Refer to "2.2.7 Pop-up window". 2.2.7 Pop-up window Select a menu item then press to display a pop-up window with the configuration options for that item. 2.2.8 Scroll bar A is a brief description of the selected item. 2-10 Chapter 2: BIOS Information - Asus P4V8X-MX | Motherboard DIY Troubleshooting Guide - Page 43
screen appears, giving you an overview of the basic system information. Refer to section "2.2.1 BIOS menu screen" for information on the menu screen items and how to navigate through them , 5.25 in.] [1.2M , 5.25 in.] [720K , 3.5 in.] [1.44M, 3.5 in.] [2.88M, 3.5 in.] ASUS P4V8X-MX Motherboard 2-11 - Asus P4V8X-MX | Motherboard DIY Troubleshooting Guide - Page 44
Ultra DMA : Ultra DMA-5 SMART Monitoring: Supported Type LBA/Large Mode Block (Multi-Sector Transfer) M PIO Mode DMA Mode SMART Monitoring 32Bit Data Transfer [Auto] [Auto] [Auto] [Auto] [Auto] [Disabled] [Disabled] Select the type of device connected to the system. ←→ Select Screen ↑↓ Select - Asus P4V8X-MX | Motherboard DIY Troubleshooting Guide - Page 45
IDE Configuration OnBoard IDE Controller SATA Operation Mode [Enabled] [RAID] DISABLED: disables the integrated IDE Controller. PRIMARY: enables only the ] SATA Operation Mode [RAID] Allows you to set SATA Operation Mode. Configuration options: [non-RAID] [RAID] ASUS P4V8X-MX Motherboard 2-13 - Asus P4V8X-MX | Motherboard DIY Troubleshooting Guide - Page 46
: 08.00.12 Build Date : 08/10/05 Processor Type Speed Count : Intel (R) Pentium(R) 4 CPU 2.40GHz : 2400MHz : 1 System Memory Size : 256MB with 64MB shared memory AMI BIOS Displays the auto-detected BIOS information. System Memory Displays the auto-detected system memory. 2-14 Chapter - Asus P4V8X-MX | Motherboard DIY Troubleshooting Guide - Page 47
] This should be enabled in order to boot legacy OSes unable to support CPUs with extended CPUID functions. ←→ Select Screen ↑↓ Select Item +- Change Option F1 General Help F10 Save and Exit ESC Exit v02.58 (C)Copyright 1985-2004, American Megatrends, Inc. ASUS P4V8X-MX Motherboard 2-15 - Asus P4V8X-MX | Motherboard DIY Troubleshooting Guide - Page 48
Thermal Control [Auto] Disables or sets the CPU internal control. Configuration options: [Auto] [Disabled] CPU Host Frequency [Auto] While entering setup, BIOS auto detects the present CPU host frequency of this motherboard. Configuration options: [Auto] [Manual] Spread Spectrum [Auto] Allows you to - Asus P4V8X-MX | Motherboard DIY Troubleshooting Guide - Page 49
the presence of USB devices at startup. If detected, the USB controller legacy mode is enabled. If no USB device is detected, the legacy USB support is disabled. Configuration options: [Disabled] [Enabled] [Auto] ASUS P4V8X-MX Motherboard 2-17 - Asus P4V8X-MX | Motherboard DIY Troubleshooting Guide - Page 50
Allows you to set the DDR operating frequency. If you seclect [Auto], the motherboard will detect the memory module(s) inserted and assigns appropriate frequency automatically. Configuration options: [12T] [13T] [14T] [15T] [16T] [17T] [18T] [19T] [20T] [21T] [22T] 2-18 Chapter 2: BIOS Information - Asus P4V8X-MX | Motherboard DIY Troubleshooting Guide - Page 51
set to [Auto]. Configuration options: [Auto] [4X] AGP Fast Write [Disabled] Allows you to disable or enable the feature of AGP Fast Write protocol support. Configuration options: [Disabled] [Enabled] ASUS P4V8X-MX Motherboard 2-19 - Asus P4V8X-MX | Motherboard DIY Troubleshooting Guide - Page 52
LAN controller. Configuration options: [Disabled] [Enabled] OnBoard ACʼ97 Audio [Auto] Allows you to enable or disable the OnBoard ACʼ97 Audio CODEC. Configuration options: [Auto] [Disabled] [Enabled] Thermal [25.00%] [37.50%] [50.00%] [62.50%] [75.00%] [87.50%] 2-20 Chapter 2: BIOS Information - Asus P4V8X-MX | Motherboard DIY Troubleshooting Guide - Page 53
Port IRQ [Enabled] [3F8/IRQ4] [378] [ECP+EPP] [1.9] [DMA3] [IRQ7] Allows BIOS to Enable or Disable Floppy Controller. ←→ Select Screen ↑↓ Select Item +- Change Option F1 General Help you to select the Parallel Port IRQ. Configuration options: [IRQ5] [IRQ7 ASUS P4V8X-MX Motherboard 2-21 - Asus P4V8X-MX | Motherboard DIY Troubleshooting Guide - Page 54
values in the sections below may cause system to malfunction. Plug And Play OS PCI Latency Timer Allocate IRQ to PCI VGA Palette Snooping [No] [32] [Yes] [Disabled] NO: lets the BIOS configure all the devices in the system. YES: lets the operating system configure Plug and Play (PnP) devices - Asus P4V8X-MX | Motherboard DIY Troubleshooting Guide - Page 55
ACPI 2.0 specifications. Configuration options: [No] [Yes] ACPI APIC Support [Enabled] Enables or disables the ACPI support in the ASIC. When set to Enabled, the ACPI APIC table pointer is included in the RSDT pointer list. Configuration options: [Disabled] [Enabled] ASUS P4V8X-MX Motherboard 2-23 - Asus P4V8X-MX | Motherboard DIY Troubleshooting Guide - Page 56
items RTC Alarm Date, RTC Alarm Hour, RTC Alarm Minute, and RTC Alarm Second appear with set values. Configuration options: [Disabled] [Enabled] 2-24 Chapter 2: BIOS Information - Asus P4V8X-MX | Motherboard DIY Troubleshooting Guide - Page 57
this type of CPU fan, you can not reduce the CPU fan speed even if you set the CPU Q-Fan Mode to [PWM]. VCORE Voltage, 3.3V Voltage, 5V Voltage, 12V Voltage The onboard hardware monitor automatically detects the voltage output through the onboard voltage regulators. ASUS P4V8X-MX Motherboard 2-25 - Asus P4V8X-MX | Motherboard DIY Troubleshooting Guide - Page 58
ESC Select Screen Select Item Go to Sub Screen General Help Save and Exit Exit v02.58 (C)Copyright 1985-2004, American Megatrends, Inc. 2-26 Chapter 2: BIOS Information - Asus P4V8X-MX | Motherboard DIY Troubleshooting Guide - Page 59
[Disabled] [Enabled] VIA SATA Raid Utility [Disabled] Allows you to enable or disable the VIA SATA Raid Utility. Configuration options: [Disabled] [Enabled] Bootup Num-Lock [On] Allows you to select the power-on state for the NumLock. Configuration options: [Off] [On] ASUS P4V8X-MX Motherboard 2-27 - Asus P4V8X-MX | Motherboard DIY Troubleshooting Guide - Page 60
"Password Installed" appears after you successfully set your password. To change the user password, follow the same steps as in setting a user password 2-28 Chapter 2: BIOS Information - Asus P4V8X-MX | Motherboard DIY Troubleshooting Guide - Page 61
than system date, system time, and password, the BIOS asks for a confirmation before exiting. Discard Changes This window appears. Select [Yes] to load the default values. Select Exit & Save Changes or make other changes before saving the values to the non-volatile RAM. ASUS P4V8X-MX Motherboard - Asus P4V8X-MX | Motherboard DIY Troubleshooting Guide - Page 62
This chapter describes the contents Software Sup3port of the support CD that comes with the motherboard package. - Asus P4V8X-MX | Motherboard DIY Troubleshooting Guide - Page 63
without notice. Visit the ASUS website(www.asus.com) for updates. 3.2.1 Running the support CD Place the support CD to the optical drive. The CD automatically displays the Drivers menu if Autorun is enabled in your computer. Click an icon to display support CD/motherboard information Click an item - Asus P4V8X-MX | Motherboard DIY Troubleshooting Guide - Page 64
be the same for different operating system versions. 3.2.3 Utilities menu The Utilities menu shows the applications and other software that the motherboard supports. ASUS PC Probe ASUS PC Probe can monitor Fan Speed, Voltage, and CPU Temperature to keep your PC safe. ASUS P4V8X-MX Motherboard 3-3 - Asus P4V8X-MX | Motherboard DIY Troubleshooting Guide - Page 65
ASUS Update ASUS Update can help user to download and flash BIOS. Please install Network Card and TCP/IP network driver first, otherwise ASUS Update can not work properly. ASUS Screen Saver Bring life to your idle screen by installing the ASUS screen saver. ADOBE Acrobat Reader V7.0 The Adobe Acrobat® - Asus P4V8X-MX | Motherboard DIY Troubleshooting Guide - Page 66
Raid Userʼs Manual Please install first Adobe Acrobat, then open the VIA8237 SATA Quick Setup Guide. 3.2.5 Contacts menu Click the Contact tab to display the ASUS contact information. You can also find this information on the inside front cover of this user guide. ASUS P4V8X-MX Motherboard 3-5 - Asus P4V8X-MX | Motherboard DIY Troubleshooting Guide - Page 67
you use either Windows® XP or Windows® 2000 operating system (OS), copy first the RAID driver from the support CD to a floppy disk before creating RAID configurations. Refer to section "5.5 Creating a RAID driver disk" for details. 3.3.1 Installing hard disks The motherboard supports Ultra DMA 133/100 - Asus P4V8X-MX | Motherboard DIY Troubleshooting Guide - Page 68
supports RAID 0 and RAID 1 with two independent Serial ATA channels. Setting the BIOS RAID items After installing the hard disk drives, make sure to set the necessary RAID items in the BIOS before setting your RAID configuration. To set the BIOS RAID SATA 999.99 XXXXXXX ASUS P4V8X-MX Motherboard 3-7 - Asus P4V8X-MX | Motherboard DIY Troubleshooting Guide - Page 69
supported RAID configurations appear on a pop-up menu. RAID 0 for performance RAID 1 for data protection RAID SPAN for capacity 2. Select RAID the RAID array by selecting Auto Setup for Performance or manually configure the RAID array 16K systems used mainly for audio and video editing, a 32K higher - Asus P4V8X-MX | Motherboard DIY Troubleshooting Guide - Page 70
supported RAID configurations appear on a pop-up menu. RAID 0 for performance RRAAIIDD 11 ffoorr ddaattaa pprrootteeccttiioonn RAID SPAN for capacity 2. Select RAID -configure the RAID array by selecting Auto Setup for Data Security or manually configure the RAID array for ASUS P4V8X-MX Motherboard 3-9 - Asus P4V8X-MX | Motherboard DIY Troubleshooting Guide - Page 71
A floppy disk with the RAID driver is required when installing Windows® 2000/XP operating system on a hard disk drive that is included in a RAID set. You can create a RAID driver disk using your motherboard support CD. To create a RAID driver disk: 1. Insert the motherboard support CD into the CD-ROM
-
 1
1 -
 2
2 -
 3
3 -
 4
4 -
 5
5 -
 6
6 -
 7
7 -
8
-
9
-
10
-
11
-
12
-
13
-
14
-
15
-
16
-
17
-
18
-
19
-
20
-
21
-
22
-
23
-
24
-
25
-
26
-
27
-
28
-
29
-
30
-
31
-
32
-
33
-
34
-
35
-
36
-
37
-
38
-
39
-
40
-
41
-
42
-
43
-
44
-
45
-
46
-
47
-
48
-
49
-
50
-
51
-
52
-
53
-
54
-
55
-
56
-
57
-
58
-
59
-
60
-
61
-
62
-
63
-
64
-
65
-
66
-
67
-
68
-
69
-
70
-
71
 |
 |
Motherboard
P4V8X-MX
User Guide