Asus P5KPL IPC SI User Manual
Asus P5KPL IPC SI Manual
 |
View all Asus P5KPL IPC SI manuals
Add to My Manuals
Save this manual to your list of manuals |
Asus P5KPL IPC SI manual content summary:
- Asus P5KPL IPC SI | User Manual - Page 1
Motherboard P5KPL IPC/SI - Asus P5KPL IPC SI | User Manual - Page 2
Product warranty or service will not be extended if: (1) the product is repaired, modified or altered, unless such repair, modification of alteration is authorized in writing by ASUS; or (2) the serial number of the product is defaced or missing. ASUS PROVIDES THIS MANUAL "AS IS" WITHOUT WARRANTY - Asus P5KPL IPC SI | User Manual - Page 3
vi About this guide vi P5KPL IPC/SI specifications summary viii Chapter 1: Product introduction 1.1 Before you proceed 1-1 1.2 Motherboard overview 1-2 1.2.1 Motherboard layout 1-2 1.2.2 Layout contents 1-3 1.3 Central Processing Unit (CPU 1-3 1.4 System memory 1-4 1.4.1 Overview - Asus P5KPL IPC SI | User Manual - Page 4
2-6 2.4 Advanced menu 2-6 2.4.1 USB Configuration 2-6 2.4.2 CPU Configuration 2-7 2.4.3 Chipset 2-8 2.4.4 Onboard Devices Configuration 2-9 2.4.5 PCI PnP 2-9 2.5 Power menu 2-10 2.5.1 Suspend Mode 2-10 2.5.2 ACPI 2.0 Support 2-10 2.5.3 ACPI APIC Support 2-10 2.5.4 APM Configuration 2-11 - Asus P5KPL IPC SI | User Manual - Page 5
and used in accordance with manufacturer's instructions, may cause harmful interference to radio FCC regulations. Changes or modifications to this unit not expressly approved by the party responsible substances in our products at ASUS REACH website at http://green.asus.com/english/REACH.htm. - Asus P5KPL IPC SI | User Manual - Page 6
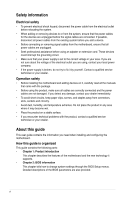
qualified service technician or your retailer. Operation safety • Before installing the motherboard and adding devices on it, carefully read all the manuals technical problems with the product, contact a qualified service technician or your retailer. About this guide This user guide contains the - Asus P5KPL IPC SI | User Manual - Page 7
1. ASUS websites The ASUS website provides updated information on ASUS hardware and software products. Refer to the ASUS contact Conventions used in this guide To make sure that you perform certain tasks properly, take note of the following symbols used throughout this manual. DANGER/WARNING: - Asus P5KPL IPC SI | User Manual - Page 8
P5KPL IPC/SI specifications summary CPU Chipset Front Side Bus Memory Expansion slots Storage LAN Audio USB ASUS special features LGA775 socket for Intel® Core™2 Quad / Core™2 Extreme / Core™2 Duo / Pentium® Extreme processors Supports Intel® 45nm multi-core CPU Intel® Hyper-Threading Technology - Asus P5KPL IPC SI | User Manual - Page 9
P5KPL IPC/SI specifications summary Back panel I/O ports Internal I/O Connectors BIOS features Support panel connector 1 x CPU fan connector 1 x Drivers ASUS PC Probe II ASUS LiveUpdate Utility Anti-virus software (OEM version) 1 x Serial ATA cable 1 x UltraDMA 100/66 cable 1 x I/O shield User Manual - Asus P5KPL IPC SI | User Manual - Page 10
Chapter 1 Product introduction Thank you for buying an ASUS® P5KPL IPC/SI motherboard! Before you start installing the motherboard, and hardware devices on it, check the items plugging in any motherboard component. The illustration below shows the location of the onboard LED. ASUS P5KPL IPC/SI 1-1 - Asus P5KPL IPC SI | User Manual - Page 11
correct orientation. The edge with external ports goes to the rear part of the chassis. Place this side towards the rear of the chassis. Place six screws into the holes indicated by circles to secure the motherboard to the chassis. DO NOT overtighten the screws! Doing so can damage the motherboard - Asus P5KPL IPC SI | User Manual - Page 12
1.3 Central Processing Unit (CPU) The motherboard comes CPU installation/removal, or misplacement/loss/incorrect removal of the PnP cap. The motherboard supports Intel® LGA775 processors with the Intel® Enhanced Intel SpeedStep® Technology (EIST) and Hyper-Threading Technology. ASUS P5KPL IPC/SI - Asus P5KPL IPC SI | User Manual - Page 13
® OS when you want to install 4GB or more memory on the motherboard. • This motherboard does not support DIMMs made up of 256 megabits (Mb) chips or less. This motherboard supports up to 4GB on Windows® XP Professional x64 and Windows® Vista x64 editions. 1-4 Chapter 1: Product introduction - Asus P5KPL IPC SI | User Manual - Page 14
Heat-Sink Package SN:8151030036559 Heat-Sink Package Heat-Sink Package Heat-Sink Package KKEA88B4LAUG-29DX KKEA88B4LAUG-29DX D6408TR7CGL25U DIMM socket Chip Brand support ( T2D648PT-6 TEAM ·· U2S12D30YP-6E UMAX ·· U2S24D30TP-6E UMAX ·· (continued on the next page) ASUS P5KPL IPC/SI 1-5 - Asus P5KPL IPC SI | User Manual - Page 15
Sink Package 5 Heat-Sink Package 5 Heat-Sink Package 5 Heat-Sink Package 4-4-4-12 Heat-Sink Package 4-4-4-12 Heat-Sink Package 4-4-4-12 Heat-Sink Package 5-5-5-15 Heat-Sink Package SN:8151030036642 4 Heat-Sink Package 5 Heat-Sink Package 4 Heat-Sink PSC DIMM socket support (Optional - Asus P5KPL IPC SI | User Manual - Page 16
HY5PS1G831C FP-S6 DS N/A Heat-Sink Package DS 5-5-5-15 Heat-Sink Package SS 5 18D 51280D-2. Supports four modules inserted into both the yellow and black slots as two pairs of Dual-channel memory configuration. Visit the ASUS website at www.asus.com for the latest QVL. ASUS P5KPL IPC/SI - Asus P5KPL IPC SI | User Manual - Page 17
make the necessary hardware settings for the card. 2. Remove the system unit cover (if your motherboard is already installed in a chassis). 3. card. 3. Install the software drivers for the expansion card. When using PCI cards on shared slots, ensure that the drivers support "Share IRQ" or that the - Asus P5KPL IPC SI | User Manual - Page 18
not help, remove the onboard battery and move the jumper again to clear the CMOS RTC RAM data. After clearing the CMOS, reinstall the battery. ASUS P5KPL IPC/SI 1-9 - Asus P5KPL IPC SI | User Manual - Page 19
in the BIOS. 3. USB device wake-up (3-pin USBPW1-4, 3-pin USBPW5-8) Set these jumpers to +5V to wake up the computer from S1 sleep mode (CPU stopped, DRAM refreshed, system running in low power mode) using the connected USB devices. Set to +5VSB to wake up from S3 and S4 sleep - Asus P5KPL IPC SI | User Manual - Page 20
-compatible devices. 9. COM port. This port is for pointing devices or other serial devices. 10. PS/2 keyboard port (purple). This port is for a PS/2 keyboard. ASUS P5KPL IPC/SI 1-11 - Asus P5KPL IPC SI | User Manual - Page 21
system may damage the motherboard components. These are not jumpers! DO NOT place jumper caps on the fan connectors. Only the CPU fan and chassis fan support the ASUS Q-Fan 2 feature. 2. USB connectors (10-1 pin USB56, USB78) These connectors are for USB 2.0 ports. Connect the USB module cable to - Asus P5KPL IPC SI | User Manual - Page 22
to the connector, then install the module to a slot opening at the back of the system chassis. The serial port bracket (COM2) is purchased separately. ASUS P5KPL IPC/SI 1-13 - Asus P5KPL IPC SI | User Manual - Page 23
proper orientation and push down firmly until the connectors completely fit. • For a fully configured system, we recommend that you use a power supply unit (PSU) that complies with ATX 12 V Specification 2.0 (or later version) and provides a minimum power of 400 W. • Do not forget to connect the - Asus P5KPL IPC SI | User Manual - Page 24
If you want to connect a high-definition front panel audio module to this connector, set the Front Panel Support Type item in the BIOS setup to [HD Audio]. If you want to connect an AC'97 front panel SATA devices are detected and will not affect the use of the SATA devices. ASUS P5KPL IPC/SI 1-15 - Asus P5KPL IPC SI | User Manual - Page 25
9. System panel connector (10-1 pin F_PANEL) This connector supports several chassis-mounted functions. • System power LED (2-pin PLED) This 2-pin connector is for the system power LED. Connect the chassis power LED cable to - Asus P5KPL IPC SI | User Manual - Page 26
only. Click an icon to display Support CD/motherboard information Click an item to install If Autorun is NOT enabled in your computer, browse the contents of the Support CD to locate the file ASSETUP.EXE from the BIN folder. Double-click the ASSETUP.EXE to run the CD. ASUS P5KPL IPC/SI 1-17 - Asus P5KPL IPC SI | User Manual - Page 27
from the Internet a. Select Update BIOS from the Internet, then click Next. b. Select the ASUS FTP site nearest you to avoid network traffic, or click Auto Select then click Next. c. From the FTP site, select the BIOS version that you wish to download then click Next. ASUS P5KPL IPC/SI 2-1 - Asus P5KPL IPC SI | User Manual - Page 28
Open. 3. Follow the onscreen instructions to complete the updating process. 2.1.2 ASUS EZ Flash 2 utility The ASUS EZ Flash 2 feature allows you 2 BIOS ROM Utility V3.36 FLASH TYPE: EON 25P/F80 Current ROM BOARD: P5KPL-IPC VER: 0212 (H:00 B:04) DATE: 04/20/2009 Update ROM BOARD: Unknown VER - Asus P5KPL IPC SI | User Manual - Page 29
P5KPLIPC.ROM". Completed. Start Erasing...\ 4. Restart the system after the utility completes the updating process. • Only a USB flash disk with FAT 32/16 format and single partition can support ASUS . Download the latest BIOS file from the ASUS website at www.asus.com. ASUS P5KPL IPC/SI 2-3 - Asus P5KPL IPC SI | User Manual - Page 30
setup screens shown in this section are for reference purposes only, and may not exactly match what you see on your screen. • Visit the ASUS website at www.asus.com to download the latest BIOS file for this motherboard. 2.3 Main menu When you enter the BIOS Setup program, the Main menu screen - Asus P5KPL IPC SI | User Manual - Page 31
the data transfer from and to the device occurs multiple sectors at a time if the device supports multi-sector transfer feature. When set to [Disabled], the data transfer from and to the ] Enables or disables 32-bit data transfer. Configuration options: [Disabled] [Enabled] ASUS P5KPL IPC/SI 2-5 - Asus P5KPL IPC SI | User Manual - Page 32
can cause the system to malfunction. Main Advanced Power BIOS SETUP UTILITY Boot Tools Exit USB Configuration CPU Configuration Chipset Onboard Devices Configuration PCIPnP Configure the USB support. 2.4.1 USB Configuration The items in this menu allows you to change the USB-related features - Asus P5KPL IPC SI | User Manual - Page 33
or disable C1E Support. Configuration options: [Disabled] [Enabled] Max CPUID Value Limit [Disabled] Setting this item to [Enabled] allows legacy operating systems to boot even without support for CPUs with extended CPUID functions. Configuration options: [Disabled] [Enabled] ASUS P5KPL IPC/SI 2-7 - Asus P5KPL IPC SI | User Manual - Page 34
Technology. Setting this item to [Disabled] forces the XD feature flag to always return to zero (0). Configuration options: [Disabled] [Enabled] The following item appears only when you installed an Intel® CPU that supports the Enhanced Intel® SpeedStep® Technology (EIST). Intel(R) SpeedStep(TM - Asus P5KPL IPC SI | User Manual - Page 35
the audio controller. Configuration options: [Azalia] [Disabled] Front Panel Support Type [HD Audio] Allows you to select the front panel support type. If High Definition Audio Front Panel used, set this item items. Incorrect field values can cause the system to malfunction. ASUS P5KPL IPC/SI 2-9 - Asus P5KPL IPC SI | User Manual - Page 36
options: [No] [Yes] PCI Latency Timer [64] Allows you to select the value in units of PCI clocks for the PCI device latency timer register. Configuration options: [32] [64] S1 (POS) Only] [S3 Only] [Auto] 2.5.2 ACPI 2.0 Support [Disabled] Allows you to add more tables for Advanced Configuration and - Asus P5KPL IPC SI | User Manual - Page 37
the fan is not connected to the motherboard, the field shows N/A. Select Ignored if you do not wish to display the detected speed. CPU/Chassis Q-Fan Control [Disabled] Allows you to enable or disable the CPU/chassis Q-Fan control. Configuration options: [Disabled] [Enabled] ASUS P5KPL IPC/SI 2-11 - Asus P5KPL IPC SI | User Manual - Page 38
you to enable or disable the full screen logo display feature. Configuration options: [Disabled] [Enabled] Set this item to [Enabled] to use the ASUS MyLogo2™ feature. AddOn ROM Display Mode [Force BIOS] Sets the display mode for option ROM. Configuration options: [Force BIOS] [Keep Current] Bootup - Asus P5KPL IPC SI | User Manual - Page 39
password containing up to six letters or numbers, six letters or numbers, or both. 3. Confirm the password when prompted. The message Password Installed appears after you set your password successfully. To change the user password, follow the same steps in setting a user password. ASUS P5KPL IPC/SI - Asus P5KPL IPC SI | User Manual - Page 40
2 AI NET 2 Press ENTER to run the utility to select and update BIOS. This utility supports 1.FAT 12/16/32 (r/w) 2.NTFS (read only) 3.CD-DISC (read only) 2.7.1 ASUS EZ Flash 2 Allows you to run ASUS EZ Flash 2. When you press , a confirmation message appears. Use the left/right arrow key
-
 1
1 -
 2
2 -
 3
3 -
 4
4 -
 5
5 -
 6
6 -
 7
7 -
8
-
9
-
10
-
11
-
12
-
13
-
14
-
15
-
16
-
17
-
18
-
19
-
20
-
21
-
22
-
23
-
24
-
25
-
26
-
27
-
28
-
29
-
30
-
31
-
32
-
33
-
34
-
35
-
36
-
37
-
38
-
39
-
40
 |
 |

Motherboard
P5KPL IPC/SI