Asus P5PEVM Motherboard Installation Guide - Page 53
Menu items, 2.5 Sub, menu items, 2.6 Configuration fields, 2.7 Pop-up window, 2.8 Scroll bar, 2. - windows 7 64
 |
View all Asus P5PEVM manuals
Add to My Manuals
Save this manual to your list of manuals |
Page 53 highlights
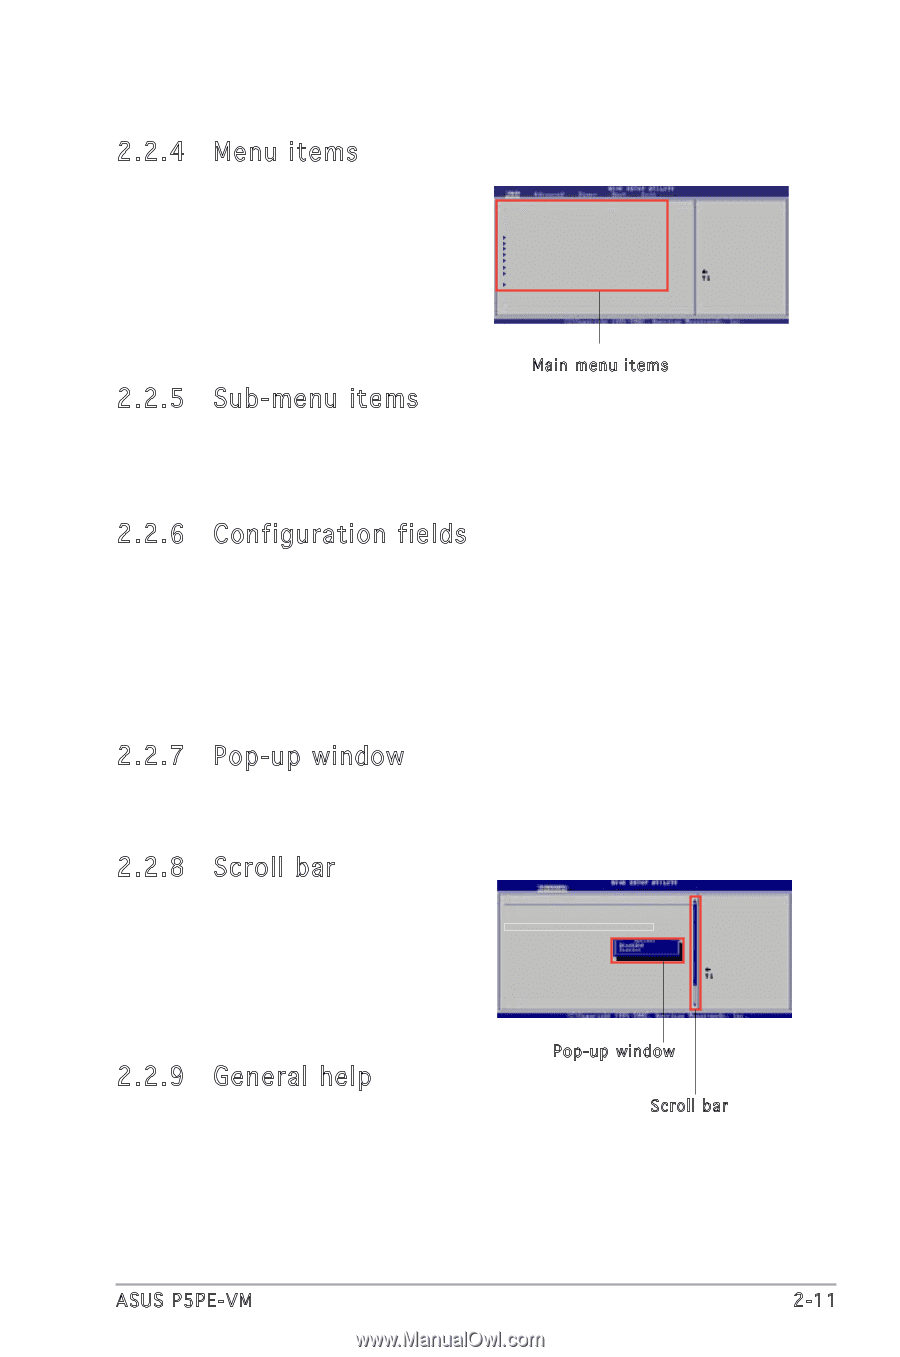
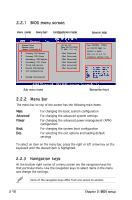
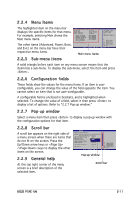
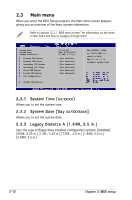
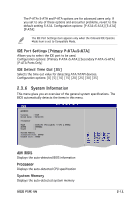
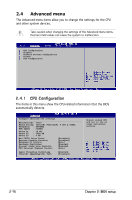
2.2.4 Menu items The highlighted item on the menu bar displays the specific items for that menu. For example, selecting Main shows the Main menu items. The other items (Advanced, Power, Boot, and Exit) on the menu bar have their respective menu items. System Time System Date Legacy Diskette A Legacy Diskette B Primary IDE Master Primary IDE Slave Secondary IDE Master Secondary IDE Slave Third IDE Master Fourth IDE Master IDE Configuration System Information [11:10:19] [Thu 03/27/2003] [1.44M, 3.5 in] [Disabled] :[Not Detected] :[Not Detected] :[Not Detected] :[Not Detected] :[Not Detected] :[Not Detected] Main menu items 2.2.5 Sub-menu items Use [ENTER], [TAB] or [SHIFT-TAB] to select a field. Use [+] or [-] to configure system time. Select Screen Select Item +- Change Field Tab Select Field F1 General Help F10 Save and Exit ESC Exit A solid triangle before each item on any menu screen means that the iteam has a sub-menu. To display the sub-menu, select the item and press . 2.2.6 Configuration fields These fields show the values for the menu items. If an item is userconfigurable, you can change the value of the field opposite the item. You cannot select an item that is not user-configurable. A configurable field is enclosed in brackets, and is highlighted when selected. To change the value of a field, select it then press to display a list of options. Refer to "2.2.7 Pop-up window." 2.2.7 Pop-up window Select a menu item then press to display a pop-up window with the configuration options for that item. 2.2.8 Scroll bar A scroll bar appears on the right side of a menu screen when there are items that do not fit on the screen. Press the Up/Down arrow keys or / keys to display the other items on the screen. 2.2.9 General help At the top right corner of the menu screen is a brief description of the selected item. Advanced Chipset settings WARNING: Setting wrong values in the sections below may cause system to malfunction. Configure DRAM Timing by SPD Memory Acceleration Mode DRAM Idle Timer DRAm Refresh Rate [Enabled] [Auto] [Auto] [Auto] Graphic Adapter Priority Graphics Aperture Size Spread Spectrum [AGP/PCI] [ 64 MB] [Enabled] ICH Delayed Transaction [Enabled] MPS Revision [1.4] Select Screen Select Item +- Change Option F1 General Help F10 Save and Exit ESC Exit Pop-up window Scroll bar ASUS P5PE-VM 2-11
-
 1
1 -
2
-
3
-
4
-
5
-
6
-
7
-
8
-
9
-
10
-
11
-
12
-
13
-
14
-
15
-
16
-
17
-
18
-
19
-
20
-
21
-
22
-
23
-
24
-
25
-
26
-
27
-
28
-
29
-
30
-
31
-
32
-
33
-
34
-
35
-
36
-
37
-
38
-
39
-
40
-
41
-
42
-
43
-
44
-
45
-
46
-
47
-
 48
48 -
 49
49 -
 50
50 -
 51
51 -
 52
52 -
 53
53 -
 54
54 -
 55
55 -
 56
56 -
 57
57 -
 58
58 -
59
-
60
-
61
-
62
-
63
-
64
-
65
-
66
-
67
-
68
-
69
-
70
-
71
-
72
-
73
-
74
-
75
-
76
-
77
-
78
-
79
-
80
 |
 |