Asus Pundit-PH3 Pundit-PH3 User''s Manual for English
Asus Pundit-PH3 Manual
 |
View all Asus Pundit-PH3 manuals
Add to My Manuals
Save this manual to your list of manuals |
Asus Pundit-PH3 manual content summary:
- Asus Pundit-PH3 | Pundit-PH3 User''s Manual for English - Page 1
Pundit Barebone System Model PH3 - Asus Pundit-PH3 | Pundit-PH3 User''s Manual for English - Page 2
of ASUSTeK COMPUTER INC. ("ASUS"). Product warranty or service will not ASUS. ASUS ASSUMES NO RESPONSIBILITY OR LIABILITY FOR ANY ERRORS OR INACCURACIES THAT MAY APPEAR IN THIS MANUAL, INCLUDING THE PRODUCTS AND SOFTWARE DESCRIBED IN IT. Products and corporate names appearing in this manual - Asus Pundit-PH3 | Pundit-PH3 User''s Manual for English - Page 3
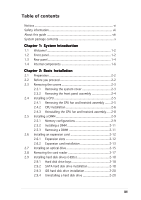
Table of contents Notices vi Safety information vii About this guide viii System package contents x Chapter 1: System Introduction 1.1 Welcome 1-2 fan and heatsink assembly ..... 2-8 2.5 Installing a DIMM 2-9 2.5.1 Memory configurations 2-9 2.5.2 Installing a DIMM 2-11 2.5.3 Removing a DIMM - Asus Pundit-PH3 | Pundit-PH3 User''s Manual for English - Page 4
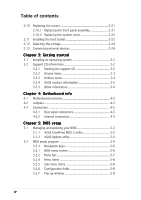
an operating system 3-2 3.2 Support CD information 3-2 3.2.1 Running the support CD 3-2 3.2.2 Drivers menu 3-3 3.2.3 Utilities menu 3-4 3.2.4 ASUS contact information 3-5 3.2.5 Other information 3-6 Chapter 4: Motherboard info 4.1 Motherboard overview 4-2 4.2 Jumpers 4-3 4.3 Connectors - Asus Pundit-PH3 | Pundit-PH3 User''s Manual for English - Page 5
17 2.4.5 PCI PnP 5-19 5.5 Power menu 5-20 5.5.1 Suspend Mode 5-20 5.5.2 Repost Video on S3 Resume 5-20 5.5.3 ACPI 2.0 Support 5-20 5.5.4 ACPI APIC Support 5-21 5.5.5 APM Configuration 5-21 5.5.6 Hardware Monitor 5-22 5.6 Boot menu 5-24 5.6.1 Boot Device Priority 5-24 5.6.2 Removable Drives - Asus Pundit-PH3 | Pundit-PH3 User''s Manual for English - Page 6
and, if not installed and used in accordance with manufacturer's instructions, may cause harmful interference to radio communications. However, there is reception, which can be determined by turning the equipment off and on, the user is encouraged to try to correct the interference by one or more of - Asus Pundit-PH3 | Pundit-PH3 User''s Manual for English - Page 7
connected. • If the power supply is broken, do not try to fix it by yourself. Contact a qualified service technician or your retailer on a stable surface. • If you encounter technical problems with the product, contact a qualified service technician or your retailer. Lithium-Ion Battery Warning C - Asus Pundit-PH3 | Pundit-PH3 User''s Manual for English - Page 8
About this guide Audience This guide provides general information and installation instructions about the ASUS Pundit-PH3 barebone system. This guide is intended for experienced users and integrators with hardware knowledge of personal computers. How this guide is organized This guide contains the - Asus Pundit-PH3 | Pundit-PH3 User''s Manual for English - Page 9
Conventions used in this guide W A R N I N G : Information to prevent injury to yourself when trying to complete a task. C A U T I O N : Information to prevent damage to the components when trying to complete a task. I M P O R T A N T : Instructions that you MUST follow to complete a task. N O T E : - Asus Pundit-PH3 | Pundit-PH3 User''s Manual for English - Page 10
your retailer immediately. 1 . ASUS Pundit-PH3 barebone system with • ASUS motherboard • 275 W PFC power supply unit • CPU fan and heatsink • Rubber washer (x 8) 3. Cables • AC power cable • Serial ATA signal cable (x 2) 4. Support CD 5. User guide 6. Optional component • Optical drive (CD-ROM/CD - Asus Pundit-PH3 | Pundit-PH3 User''s Manual for English - Page 11
System introduction Chapter 1 This chapter gives a general description of the barebone system. The chapter lists the system features including introduction on the front and rear panel, and internal components. ASUS Pundit-PH3 - Asus Pundit-PH3 | Pundit-PH3 User''s Manual for English - Page 12
-PH3! The ASUS Pundit-PH3 is an all-in-one barebone system with powerful and flexible features. The system comes in a stylish mini-tower casing, and powered by the ASUS motherboard that supports the Intel® Pentium® 4 processor in the 775-land package with 800 MHz FSB and up to 4 GB system memory - Asus Pundit-PH3 | Pundit-PH3 User''s Manual for English - Page 13
for IEEE 1394a-compliant audio/video devices, storage peripherals, and other PC devices. 1 3 . U S B 2 . 0 p o r t s . These Universal Serial Bus 2.0 (USB 2.0) ports are available for connecting USB 2.0 devices such as a mouse, printer, scanner, camera, PDA, and others. ASUS Pundit-PH3 1-3 - Asus Pundit-PH3 | Pundit-PH3 User''s Manual for English - Page 14
, storage peripherals, and other consumer electronic devices. 6 . L A N ( R J - 4 5 ) p o r t . This port allows Fast Ethernet connection to a Local Area Network (LAN) through a network hub. 7 . L i n e I n p o r t . This Line In (light blue) port connects a tape player or other audio sources. In - Asus Pundit-PH3 | Pundit-PH3 User''s Manual for English - Page 15
(USB 2.0) ports are available for connecting USB 2.0 devices such as a mouse, printer, scanner, camera, PDA, and others. 1 5 . L i n e O u t p o r t . This Line Out (lime) port connects PCI slots. 1 8 . P o w e r f a n v e n t s . Provide ventilation for the power supply unit. ASUS Pundit-PH3 1-5 - Asus Pundit-PH3 | Pundit-PH3 User''s Manual for English - Page 16
cover and the chassis support bracket. The installed components are labeled for your reference. Proceed to Chapter 2 for instructions on installing additional system disk drive lock 6. Power supply unit 7. PCI Express x1 slot 8. PCI slots 9. PCI Express x16 slot 10. ASUS motherboard 11. Metal bracket - Asus Pundit-PH3 | Pundit-PH3 User''s Manual for English - Page 17
Basic installation Chapter 2 This chapter provides step-by-step instructions on how to install components in the system. ASUS Pundit-PH3 - Asus Pundit-PH3 | Pundit-PH3 User''s Manual for English - Page 18
Inline Memory Module (DIMM) 3. Expansion card(s) 4. Hard disk drive 5. Optical drive 2.2 Before you proceed Take note of the following precautions before you install components into the system. • Use a grounded wrist strap or touch a safely grounded object or a metal object, such as the power supply - Asus Pundit-PH3 | Pundit-PH3 User''s Manual for English - Page 19
Removing the system cover To remove the cover and metal chassis support: 1. On the rear panel, locate the two thumb screws that to a 90º-100º angle. 6. Lift the chassis support bracket to a 45º angle, then carefully pull to release. Set the chassis support bracket aside. ASUS Pundit-PH3 2-3 - Asus Pundit-PH3 | Pundit-PH3 User''s Manual for English - Page 20
2.3.2 Removing the front panel assembly To remove the front panel assembly: 1. Place the system vertically. 2. Locate the front panel assembly hooks. 3. Pull the hooks outward to release the front panel assembly. 4. Swing the left edge of the front panel assembly outward. 5. Unhook the hinge- - Asus Pundit-PH3 | Pundit-PH3 User''s Manual for English - Page 21
3. Pull up two fasteners at a time in a diagonal sequence to disengage the heatsink and fan assembly from the motherboard. 4. Carefully remove the heatsink and fan assembly from the motherboard. 5. Rotate each fastener clockwise to ensure correct orientation when reinstalling. ASUS Pundit-PH3 2-5 - Asus Pundit-PH3 | Pundit-PH3 User''s Manual for English - Page 22
. If the instructions in this section do not match the CPU documentation, follow the latter. • Check your motherboard to make sure that the socket contacts are not bent. Contact your retailer immediately if you see any damage to the socket contacts/motherboard components. ASUS will shoulder the - Asus Pundit-PH3 | Pundit-PH3 User''s Manual for English - Page 23
the retention tab. The motherboard supports Intel® Pentium® 4 LGA775 processors with the Intel® Enhanced Memory 64 Technology (EM64T), Enhanced Intel SpeedStep® Technology (EIST), and Hyper-Threading Technology. Refer to the Appendix for more information on these CPU features. ASUS Pundit-PH3 2-7 - Asus Pundit-PH3 | Pundit-PH3 User''s Manual for English - Page 24
making sure that the four fasteners match the holes on the motherboard. Orient the heatsink and fan assembly such that the CPU fan cable is closest to the CPU fan connector. Fastener Motherboard hole Narrow end of the groove Make sure to orient each fastener - Asus Pundit-PH3 | Pundit-PH3 User''s Manual for English - Page 25
memory modules from the same vendor. • Due to chipset resource allocation, the system may detect less than 4 GB system memory when you installed four 1 GB DDR memory. • This motherboard does not support memory modules made up of 128 Mb chips or double-sided x16 memory modules. ASUS Pundit-PH3 - Asus Pundit-PH3 | Pundit-PH3 User''s Manual for English - Page 26
slots or the black slots as one pair of Dual-channel memory configuration. C - supports four modules inserted into the blue and black slots as two pairs of Dual-channel memory configuration. Visit the ASUS website (www.asus.com) for the latest DDR Qualified Vendors List. 2-10 Chapter 2: Basic - Asus Pundit-PH3 | Pundit-PH3 User''s Manual for English - Page 27
steps to remove a DIMM. 1. Simultaneously press the retaining clips outward to unlock the DIMM. Support the DIMM lightly with your fingers when pressing the retaining clips. The DIMM might get damaged when it flips out with extra force. 2. Remove the DIMM from the socket. ASUS Pundit-PH3 2-11 - Asus Pundit-PH3 | Pundit-PH3 User''s Manual for English - Page 28
. Ask your retailer for details. 2.6.1 Expansion slots PCI slots The PCI slots support cards such as a LAN card, SCSI card, USB card, and other cards that comply with PCI specifications. PCI Express x16 slot This motherboard supports PCI Express x16 graphic cards that comply with the PCI Express - Asus Pundit-PH3 | Pundit-PH3 User''s Manual for English - Page 29
on the slot. PCI Express x16 slot 5. If you have already installed a hard disk drive, replace the chassis support bracket; otherwise, install other components before replacing the chassis support bracket. 6. Replace the expansion card lock to secure the card to the chassis. ASUS Pundit-PH3 2-13 - Asus Pundit-PH3 | Pundit-PH3 User''s Manual for English - Page 30
for PCI Steering 11* IRQ Holder for PCI Steering 12* PS/2 Compatible Mouse Port 13 Numeric Data Processor 14* Primary IDE Channel * These IRQs are usually available for ISA or PCI devices. IRQ assignments for the system motherboard PCI slot 1 PCI slot 2 PCI Express x16 slot PCI Express x1 - Asus Pundit-PH3 | Pundit-PH3 User''s Manual for English - Page 31
To install an optical drive: 1. Remove the front panel assembly following the instructions in section "2.3.2 Removing the front panel assembly". 2. Drive a screw on the motherboard. If you disconnected these plugs, refer to page 4-5 and 4-7 for their respective locations. ASUS Pundit-PH3 2-15 - Asus Pundit-PH3 | Pundit-PH3 User''s Manual for English - Page 32
a 4-pin power plug from the power supply unit to the power connector at the back of the drive. Uninstalling the optical drive In the future, you may have to upgrade or replace a defective optical drive. To uninstall the optical drive: 1. Remove the front panel assembly following the instructions in - Asus Pundit-PH3 | Pundit-PH3 User''s Manual for English - Page 33
card reader: 1. Remove the front panel assembly following the instructions in "2.3.2 Removing the front panel assembly". 2. Locate the USB cable and plug is exposed. A B 4. Disconnect the USB cable and plug from the card reader assembly, then set the card reader assembly aside. ASUS Pundit-PH3 - Asus Pundit-PH3 | Pundit-PH3 User''s Manual for English - Page 34
2.9 Installing hard disk drives (HDDs) The Pundit-PH3 system comes with two 3.5-inch drive bays (labeled 1 and 2) for installation of two Serial ATA hard disk drives or one IDE HDD (if you have - Asus Pundit-PH3 | Pundit-PH3 User''s Manual for English - Page 35
other end to a SATA connector on the motherboard. See page 4-6 for the location of the SATA connectors. 4. Connect the 15-pin SATA power plug from the power supply unit to the power connector at the back of the drive. indicate that the drive is properly in place. ASUS Pundit-PH3 HDD screw lock 2-19 - Asus Pundit-PH3 | Pundit-PH3 User''s Manual for English - Page 36
stripe on the cable with Pin 1 on the IDE interface. 3. Connect a power cable from the power supply unit to the power connector at the back of the drive. 4. Follow steps 5 to 6 of the drive. 3. Install a new HDD following the instructions in the previous section. 2-20 Chapter 2: Basic installation - Asus Pundit-PH3 | Pundit-PH3 User''s Manual for English - Page 37
Replacing the covers After you install all the necessary components on the Pundit-PH3 system, replace the covers following the instructions in this section: 2.10.1 Replacing the front panel assembly If -like tabs to the holes on the right side of the chassis. ASUS Pundit-PH3 Hinge-like tabs 2-21 - Asus Pundit-PH3 | Pundit-PH3 User''s Manual for English - Page 38
Do not use too much force when replacing the front panel assembly. 2.10.2 Replacing the system cover To replace the metal chassis support: 1. Reinstall the metal chassis support and the expansion card lock. 2. Match and insert the hooks of the cover to the elongated holes on the side of the chassis - Asus Pundit-PH3 | Pundit-PH3 User''s Manual for English - Page 39
foot stands You need to install the foot stands to place the system vertically on your desktop. To install the foot stands: 1. Lay the system on its side on a flat, the second foot stand. The photo on the right shows the Pundit-PH3 system in a vertical desktop placement. ASUS Pundit-PH3 2-23 - Asus Pundit-PH3 | Pundit-PH3 User''s Manual for English - Page 40
2.12 Selecting the voltage The system's power supply unit has a 115 V/230 V voltage selector switch located beside the power connector. Use this switch to select the appropriate system input voltage according to the voltage supply in your area. If the voltage supply in your area is 100-127 V, set - Asus Pundit-PH3 | Pundit-PH3 User''s Manual for English - Page 41
To the rear panel Po w e r o u t l e t Recorder Hub or router Camera Printer Line Out Mic Card reader VGA monitor Serial mouse P S/2 Mouse P S / 2 K B ASUS Pundit-PH3 2-25 - Asus Pundit-PH3 | Pundit-PH3 User''s Manual for English - Page 42
2-26 Chapter 2: Basic installation - Asus Pundit-PH3 | Pundit-PH3 User''s Manual for English - Page 43
Getting started Chapter 3 This chapter helps you power up the system and install drivers and utilities from the support CD. ASUS Pundit-PH3 - Asus Pundit-PH3 | Pundit-PH3 User''s Manual for English - Page 44
detailed information. • Make sure that you install Windows® 2000 Service Pack 4 or the Windows® XP Service Pack 1 or later versions before installing the drivers for better compatibility and system stability. 3.2 Support CD information The support CD that came with the system package contains the - Asus Pundit-PH3 | Pundit-PH3 User''s Manual for English - Page 45
Audio Driver Executes the wizard to install the Realtek® ALC655 audio driver and application. Intel(R) PRO/100 and PRO/1000 Adapters Driver Installs the Intel® PRO/100 and 10/100 Adapters Driver. Intel(R) Graphics Accelerator Driver Installs the Intel® Graphics Accelerator Driver. ASUS Pundit-PH3 - Asus Pundit-PH3 | Pundit-PH3 User''s Manual for English - Page 46
detected problems. This utility helps you keep your computer in healthy operating condition. ASUS Update The ASUS Update utility allows you to update the motherboard BIOS in a Windows® environment. This utility requires an Internet connection either through a network or an Internet Service Provider - Asus Pundit-PH3 | Pundit-PH3 User''s Manual for English - Page 47
screen display and utilities option may not be the same for different operating system versions. 3.2.4 ASUS contact information Click the C o n t a c t tab to display the ASUS contact information. You can also find this information on the inside front cover of this user guide. ASUS Pundit-PH3 3-5 - Asus Pundit-PH3 | Pundit-PH3 User''s Manual for English - Page 48
screen give additional information on the motherboard and the contents of the support CD. Click an icon to display the specified information. Motherboard Info Displays the general specifications of the motherboard. Browse this CD Displays the support CD contents in graphical format. 3-6 Chapter - Asus Pundit-PH3 | Pundit-PH3 User''s Manual for English - Page 49
Technical support form Displays the ASUS Technical Support Request Form that you have to fill out when requesting technical support. Filelist Displays the contents of the support CD and a brief description of each in text format. ASUS Pundit-PH3 3-7 - Asus Pundit-PH3 | Pundit-PH3 User''s Manual for English - Page 50
- Asus Pundit-PH3 | Pundit-PH3 User''s Manual for English - Page 51
Motherboard info Chapter 4 This chapter gives information about the motherboard that comes with the system. This chapter includes the motherboard layout, jumper settings, and connector locations. ASUS Pundit-PH3 - Asus Pundit-PH3 | Pundit-PH3 User''s Manual for English - Page 52
4.1 Motherboard overview Motherboard layout PS/2KBMS T: Mouse B: Keyboard COM1 KBPWR1 ATX12V1 LGA775 CHA_FAN1 CPU_FAN1 Super I/O DDR DIMM_B2 (64 bit,240-pin module) DDR DIMM_B1 (64 bit,240-pin module) DDR DIMM_A1 (64 bit,240-pin module) DDR DIMM_A2 (64 bit,240-pin module) PARALLEL PORT - Asus Pundit-PH3 | Pundit-PH3 User''s Manual for English - Page 53
the key during the boot process and enter BIOS setup to re-enter data. Except when clearing the RTC RAM, never remove the cap on CLRTC jumper default position. Removing the cap will cause system boot failure! ® Clear RTC RAM CLRTC1 12 23 Normal (Default) Clear CMOS ASUS Pundit-PH3 4-3 - Asus Pundit-PH3 | Pundit-PH3 User''s Manual for English - Page 54
not want to wake up the computer when you press a key on the keyboard. This feature requires an ATX power supply that can supply at least 1A on the +5VSB lead, and a corresponding setting in the BIOS. KBPWR1 12 23 +5V +5VSB (Default) ® Keyboard power setting 4-4 Chapter 4: Motherboard info - Asus Pundit-PH3 | Pundit-PH3 User''s Manual for English - Page 55
ports. 4.3.2 Internal connectors 1 . Primary IDE connector (40-1 pin PRI_IDE1) This connector is for an Ultra DMA 100/66 signal cable. The Ultra DMA 100/66 signal cable has three connectors: a blue connector for the primary IDE connector on the motherboard cable to PIN 1. PIN 1 ASUS Pundit-PH3 4-5 - Asus Pundit-PH3 | Pundit-PH3 User''s Manual for English - Page 56
Chassis fan connectors (4-pin CPU_FAN1, 3-pin CHA_FAN1) The fan connectors support cooling fans of 350 mA~740 mA (8.88 W max.) or a total of 1 A~2.22 A (26.64 W max.) at +12V. Connect the fan cables to the fan connectors on the motherboard, making sure that the black wire of each cable matches the - Asus Pundit-PH3 | Pundit-PH3 User''s Manual for English - Page 57
USB 2.0 ports. Connect the USB/GAME module cable to any of these connectors, then install the module to a slot opening at the back of the system chassis. These USB connectors comply with USB 2.0 specification that supports the USB connectors. Doing so will damage the motherboard! ASUS Pundit-PH3 4-7 - Asus Pundit-PH3 | Pundit-PH3 User''s Manual for English - Page 58
; otherwise, the system will not boot up. • The system comes with a proprietary ATX 12 V Specification 2.0 power supply unit (PSU) with a minimum 275 W power rating. 7 . Front panel audio connector (10-1 pin AAFP1) This connector supports the front panel audio I/O ports with the legacy AC'97 audio - Asus Pundit-PH3 | Pundit-PH3 User''s Manual for English - Page 59
pin IE1394_2 [orange]) This connector supports the 4-pin IEEE 1394 port in the system front panel. +12V TPB2+ GND TPA2+ ® IEEE 1394 connector 1 IE1394_2 GND +12V TPB2GND TPA2- Never connect a U S B c a b l e to the IEEE 1394 connector. Doing so will damage the motherboard! ASUS Pundit-PH3 4-9 - Asus Pundit-PH3 | Pundit-PH3 User''s Manual for English - Page 60
This connector supports several power button. Pressing the power button turns the system on or puts the system in sleep or soft-off mode depending on the BIOS settings. Pressing the power switch for more than four seconds while the system is ON turns the system OFF. 4-10 Chapter 4: Motherboard - Asus Pundit-PH3 | Pundit-PH3 User''s Manual for English - Page 61
Chapter 5 This chapter tells how to change system settings through the BIOS Setup menus and describes the BIOS parameters. ASUS Pundit-PH3 BIOS setup - Asus Pundit-PH3 | Pundit-PH3 User''s Manual for English - Page 62
of the original motherboard BIOS file from the support CD to a USB floppy disk or flash disk in case you need to restore the BIOS in the future. You can copy the original motherboard BIOS using the ASUS Update or AFUDOS utilities. 5.1.1 ASUS CrashFree BIOS 2 utility The ASUS CrashFree BIOS 2 is an - Asus Pundit-PH3 | Pundit-PH3 User''s Manual for English - Page 63
, and • View the BIOS version information. This utility is available in the support CD that comes with the motherboard package. ASUS Update requires an Internet connection either through a network or an Internet Service Provider (ISP). Installing ASUS Update To install ASUS Update: 1. Place the - Asus Pundit-PH3 | Pundit-PH3 User''s Manual for English - Page 64
the Windows® desktop by clicking S t a r t > P r o g r a m s > A S U S > A S U S U p d a t e > A S U S U p d a t e. The ASUS Update main window appears. 2. Select U p d a t e B I O S f r o m 3. Select the ASUS FTP site t h e I n t e r n e t option from the nearest you to avoid network drop-down - Asus Pundit-PH3 | Pundit-PH3 User''s Manual for English - Page 65
t e. The ASUS Update main window appears. 2. Select U p d a t e B I O S f r o m a f i l e option from the drop-down menu, then click N e x t. 3. Locate the BIOS file from the O p e n window, then click S a v e. 4. Follow the screen instructions to complete the update process. ASUS Pundit-PH3 5-5 - Asus Pundit-PH3 | Pundit-PH3 User''s Manual for English - Page 66
password feature or change the power management settings. This requires you to reconfigure your system using the BIOS Setup program so that the computer can recognize these changes and record them in the CMOS RAM of the firmware hub. The firmware hub on the motherboard stores the Setup utility. When - Asus Pundit-PH3 | Pundit-PH3 User''s Manual for English - Page 67
5.2.1 BIOS menu screen Menu items Menu bar the advanced system settings For changing the advanced power management (APM) configuration For changing the system boot configuration For selecting the exit options and loading default keys differ from one screen to another. ASUS Pundit-PH3 5-7 - Asus Pundit-PH3 | Pundit-PH3 User''s Manual for English - Page 68
the Main menu items. The other items (Advanced, Power, Boot, and Exit) on the menu bar have their respective You cannot select an item that is not user-configurable. A configurable field is enclosed in VGA Palette Snooping PCI IDE BusMaster [No] [64] [Yes] [Disabled] [Enabled] 5.2.9 General - Asus Pundit-PH3 | Pundit-PH3 User''s Manual for English - Page 69
screen appears, giving you an overview of the basic system information. Refer to section "5.2.1 BIOS menu screen" for information on the menu screen items and how to navigate through them ] [360K, 5.25 in.] [1.2M , 5.25 in.] [720K , 3.5 in.] [1.44M, 3.5 in.] [2.88M, 3.5 in.] ASUS Pundit-PH3 5-9 - Asus Pundit-PH3 | Pundit-PH3 User''s Manual for English - Page 70
BIOS automatically detects the values opposite the dimmed items (Device, Vendor, Size, LBA Mode, Block Mode, PIO Mode, Async DMA, Ultra DMA, and SMART monitoring). These values are not user Setting to Auto enables the LBA mode if the device supports this mode, and if the device was not previously - Asus Pundit-PH3 | Pundit-PH3 User''s Manual for English - Page 71
[Auto] [Disabled] [Enabled] 32Bit Data Transfer [Disabled] Enables or disables 32-bit data transfer. Configuration options: [Disabled] [Enabled] 5.3.5 IDE Configuration The items in , such as Windows® 2000/XP. Configuration options: [Disabled] [Compatible Mode] [Enhanced Mode] ASUS Pundit-PH3 5-11 - Asus Pundit-PH3 | Pundit-PH3 User''s Manual for English - Page 72
setting for better OS compatibility. In this setting, you may use legacy OS on the Parallel ATA ports o n l y i f you did not install any Serial ATA device. The P-ATA+S-ATA and P-ATA options are for advanced users only. If you set to any of these options and encounter problems, revert to the default - Asus Pundit-PH3 | Pundit-PH3 User''s Manual for English - Page 73
] Enables USB host controllers. The Module Version and USB Devices Enabled items show the auto-detected values. If no USB device is detected, the item shows None. USB Function [Enabled] Allows you to enable or disable the USB function. Configuration options: [Disabled] [Enabled] ASUS Pundit-PH3 - Asus Pundit-PH3 | Pundit-PH3 User''s Manual for English - Page 74
USB devices at startup. If detected, the USB controller legacy mode is enabled. If no USB device is detected, the legacy USB support is disabled. Configuration options: [Disabled] [Enabled] [Auto] USB frequency. The default value of this item is auto-detected by BIOS. Use the < + > or < - > keys to - Asus Pundit-PH3 | Pundit-PH3 User''s Manual for English - Page 75
Enable this item to boot legacy operating systems that cannot support CPUs with extended CPUID Technology. When set to [Automatic], you can adjust the system power settings in the operating system to use the EIST feature. motherboard comes with a BIOS file that supports EIST. ASUS Pundit-PH3 5-15 - Asus Pundit-PH3 | Pundit-PH3 User''s Manual for English - Page 76
to display the sub-menu. Advanced Chipset Settings Configure DRAM Timing by SPD Enabled] Booting Graphic Adapter Priority Internal Graphics Mode Select Fixed Graphic Memory Size DVMT Graphic Memory Size [PCI Express/Int-VGA] [Enabled, 8M] [32MB] [32MB] Enable or disable DRAM timing - Asus Pundit-PH3 | Pundit-PH3 User''s Manual for English - Page 77
] [IRQ7] Enable or disable AC97 controller. AC97 Controller [Enabled] Enables or disables the AC97 audio controller. Configuration options: [Enabled] [Disabled] OnBoard LAN [Enabled] Enables or disables the onboard LAN controller. Configuration options: [Disabled] [Enabled] ASUS Pundit-PH3 5-17 - Asus Pundit-PH3 | Pundit-PH3 User''s Manual for English - Page 78
[Disabled] Allows you to enable or disable the LAN Boot ROM in the onboard LAN controller. This item appears only when the Onboard LAN item is set to Enabled. Configuration options: [Disabled] [Enabled] Serial Port1 Address [3F8/IRQ4] Allows you to select the Serial Port1 base address. Configuration - Asus Pundit-PH3 | Pundit-PH3 User''s Manual for English - Page 79
or legacy ISA devices, and setting the memory size block for legacy ISA devices. Take Plug and Play O/S [No] When set to [No], BIOS configures all the devices in the system. When set to not required for boot. Configuration options: [No] [Yes] PCI Latency Timer [64] Allows you ASUS Pundit-PH3 5-19 - Asus Pundit-PH3 | Pundit-PH3 User''s Manual for English - Page 80
Video on S3 Resume [No] Determines whether to invoke VGA BIOS post on S3/STR resume. Configuration options: [No] [Yes] 5.5.3 ACPI 2.0 Support [No] Allows you to add more tables for Advanced Configuration and Power Interface (ACPI) 2.0 specifications. Configuration options: [No] [Yes] 5-20 Chapter - Asus Pundit-PH3 | Pundit-PH3 User''s Manual for English - Page 81
computer cannot receive or transmit data until the computer and applications are fully running. Thus, connection cannot be made on the first try. Turning an external modem off and then back on while the computer is off causes an initialization string that turns the system power on. ASUS Pundit-PH3 - Asus Pundit-PH3 | Pundit-PH3 User''s Manual for English - Page 82
LAN or modem card. This feature requires an ATX power supply that provides at least 1A on the +5VSB lead. Configuration options: [Disabled] [Enabled] Power This feature requires an ATX power supply that provides at least automatically detects and displays the motherboard and CPU temperatures. Select - Asus Pundit-PH3 | Pundit-PH3 User''s Manual for English - Page 83
RPM). If the fan is not connected to the motherboard, the field shows N/A. CPU Q-Fan Control [Disabled] Allows you to enable or disable the ASUS Q-Fan feature that smartly adjusts the fan speeds automatically detects the voltage output through the onboard voltage regulators. ASUS Pundit-PH3 5-23 - Asus Pundit-PH3 | Pundit-PH3 User''s Manual for English - Page 84
3rd Boot Device [1st Floppy Drive] These items specify the boot device priority sequence from the available devices. The number of device items that appears on the screen depends on the number of devices installed in the system. Configuration options: [xxxxx Drive] [Disabled] 5-24 Chapter 5: BIOS - Asus Pundit-PH3 | Pundit-PH3 User''s Manual for English - Page 85
BIOS performs all the POST items. Configuration options: [Disabled] [Enabled] Full Screen Logo [Enabled] This allows you to enable or disable the full screen logo display feature. Configuration options: [Disabled] [Enabled] Set this item to [Enabled] to use the ASUS MyLogo™ feature. ASUS Pundit-PH3 - Asus Pundit-PH3 | Pundit-PH3 User''s Manual for English - Page 86
BIOS] [Keep Current] Bootup Num-Lock [On] Allows you to select the power-on state for the NumLock. Configuration options: [Off] [On] PS/2 Mouse Support [Auto] Allows you to enable or disable support Settings Supervisor Password : Not Installed User Password : Not Installed Change Supervisor - Asus Pundit-PH3 | Pundit-PH3 User''s Manual for English - Page 87
s prevents user access to the Setup utility. V i e w O n l y allows access but does not allow change to any field. L i m i t e d allows changes only to selected fields, such as Date and Time. F u l l A c c e s s allows viewing and changing all the fields in the Setup utility. ASUS Pundit-PH3 5-27 - Asus Pundit-PH3 | Pundit-PH3 User''s Manual for English - Page 88
Select this item to clear the user password. Password Check [Setup] When set to [Setup], BIOS checks for user password when accessing the Setup utility. When set to [Always], BIOS checks for user password both when accessing Setup and booting the system. Configuration options: [Setup] [Always - Asus Pundit-PH3 | Pundit-PH3 User''s Manual for English - Page 89
the values you selected are saved to the CMOS RAM. An onboard backup battery sustains the CMOS RAM so it stays on even when the PC is fields other than System Date, System Time, and Password, the BIOS asks for a confirmation before exiting. Discard Changes This option values. ASUS Pundit-PH3 5-29 - Asus Pundit-PH3 | Pundit-PH3 User''s Manual for English - Page 90
if you press , a confirmation window appears. Select Y e s to load default values. Select E x i t & S a v e C h a n g e s or make other changes before saving the values to the non-volatile RAM. 5-30 Chapter 5: BIOS setup - Asus Pundit-PH3 | Pundit-PH3 User''s Manual for English - Page 91
CPU features Appendix The Appendix describes the CPU features and technologies that the system supports. ASUS Pundit-PH3 - Asus Pundit-PH3 | Pundit-PH3 User''s Manual for English - Page 92
related website, to verify if the card/device supports a 64-bit system. A.2 Enhanced Intel SpeedStep® Technology (EIST) • The motherboard comes with a BIOS file that supports EIST. You can download the latest BIOS file from the ASUS website (www.asus.com/support/download/) if you need to update the - Asus Pundit-PH3 | Pundit-PH3 User''s Manual for English - Page 93
and exit the BIOS setup. 5. After the computer restarts, right click on a blank space on the desktop, then select power scheme, the CPU internal frequency slightly decreases when the CPU loading is low. The screen displays and procedures may vary depending on the operating system. ASUS Pundit-PH3 - Asus Pundit-PH3 | Pundit-PH3 User''s Manual for English - Page 94
• The motherboard supports Intel® Pentium® 4 LGA775 processors with Hyper-Threading Technology. • Hyper-Threading Technology is supported under Windows® Service Pack 1 or later version is recommended. • Make sure to enable the Hyper-Threading Technology item in BIOS before installing a supported
-
 1
1 -
 2
2 -
 3
3 -
 4
4 -
 5
5 -
 6
6 -
 7
7 -
8
-
9
-
10
-
11
-
12
-
13
-
14
-
15
-
16
-
17
-
18
-
19
-
20
-
21
-
22
-
23
-
24
-
25
-
26
-
27
-
28
-
29
-
30
-
31
-
32
-
33
-
34
-
35
-
36
-
37
-
38
-
39
-
40
-
41
-
42
-
43
-
44
-
45
-
46
-
47
-
48
-
49
-
50
-
51
-
52
-
53
-
54
-
55
-
56
-
57
-
58
-
59
-
60
-
61
-
62
-
63
-
64
-
65
-
66
-
67
-
68
-
69
-
70
-
71
-
72
-
73
-
74
-
75
-
76
-
77
-
78
-
79
-
80
-
81
-
82
-
83
-
84
-
85
-
86
-
87
-
88
-
89
-
90
-
91
-
92
-
93
-
94
 |
 |
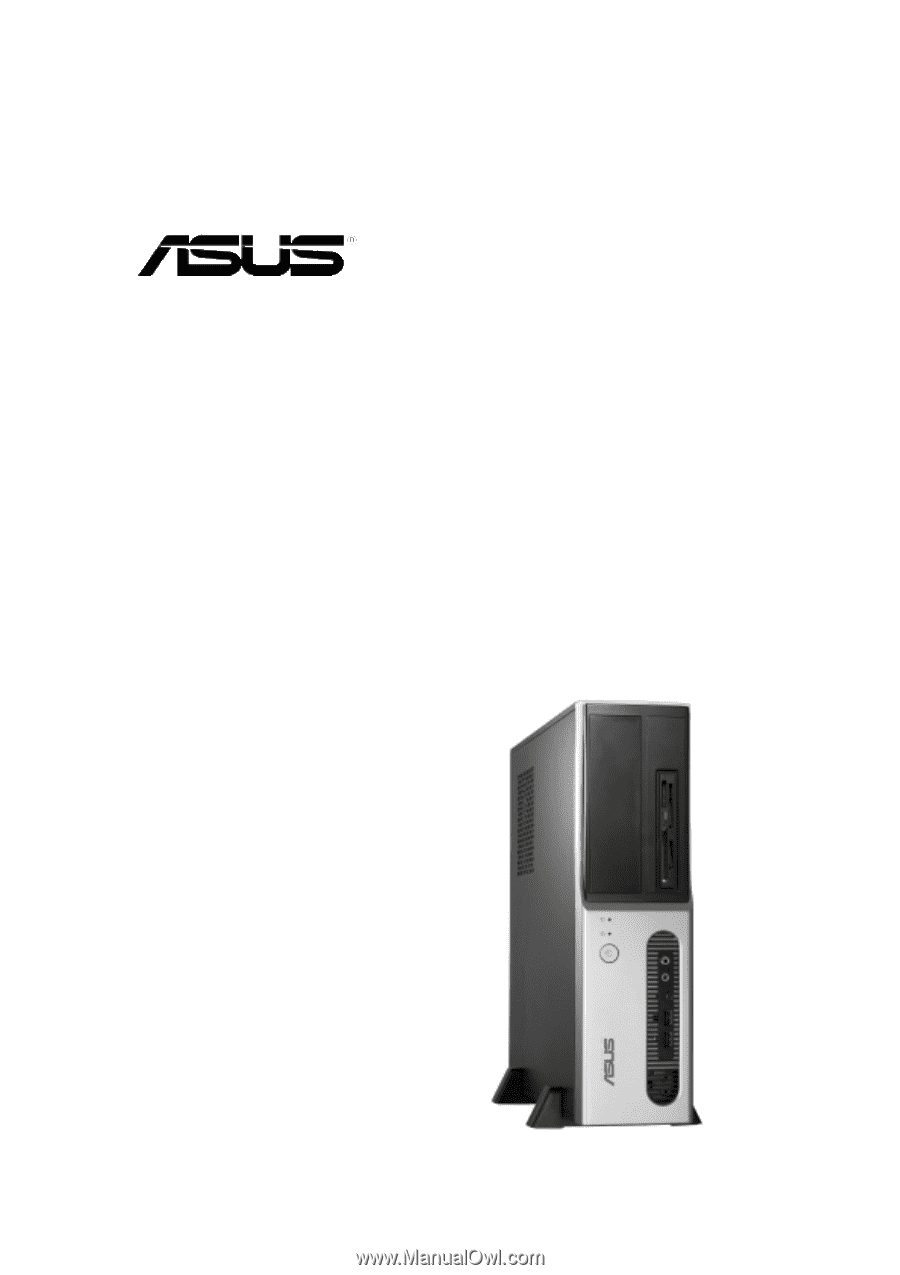
Pundit
Barebone System
Model PH3