Asus RT-N16 User Manual - Page 10
Mounting options
 |
UPC - 610839056583
View all Asus RT-N16 manuals
Add to My Manuals
Save this manual to your list of manuals |
Page 10 highlights
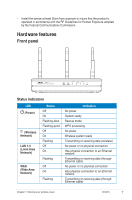
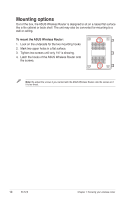
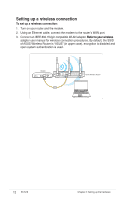
Mounting options Out of the box, the ASUS Wireless Router is designed to sit on a raised flat surface like a file cabinet or book shelf. The unit may also be converted for mounting to a wall or ceiling. To mount the ASUS Wireless Router: 1. Look on the underside for the two mounting hooks. 2. Mark two upper holes in a flat surface. 3. Tighten two screws until only 1/4'' is showing. 4. Latch the hooks of the ASUS Wireless Router onto the screws. Note: Re-adjust the screws if you cannot latch the ASUS Wireless Router onto the screws or if it is too loose. 10 RT-N16 Chapter 1: Knowing your wireless router
-
 1
1 -
2
-
3
-
4
-
 5
5 -
 6
6 -
 7
7 -
 8
8 -
 9
9 -
 10
10 -
 11
11 -
 12
12 -
 13
13 -
 14
14 -
 15
15 -
16
-
17
-
18
-
19
-
20
-
21
-
22
-
23
-
24
-
25
-
26
-
27
-
28
-
29
-
30
-
31
-
32
-
33
-
34
-
35
-
36
-
37
-
38
-
39
-
40
-
41
-
42
-
43
-
44
-
45
-
46
-
47
-
48
-
49
-
50
-
51
-
52
-
53
-
54
-
55
-
56
-
57
-
58
-
59
-
60
-
61
-
62
-
63
-
64
-
65
-
66
 |
 |
10
RT-N1³
Chapter 1: Knowing your wireless router
Mounting options
Out of the box, the ASUS Wireless Router is designed to sit on a raised flat surface
like a file cabinet or book shelf. The unit may also be converted for mounting to a
wall or ceiling.
To mount the ASUS Wireless Router:
1.
Look on the underside for the two mounting hooks.
2.
Mark two upper holes in a flat surface.
².
Tighten two screws until only 1/4'' is showing.
4.
Latch the hooks of the ASUS Wireless Router onto
the screws.
Note:
Re-adjust the screws if you cannot latch the ASUS Wireless Router onto the screws or if
it is too loose.