Asus SBC-06D2X-U SBC-06D2XU & SBW-06D2XU QIG Quick Installation Guide
Asus SBC-06D2X-U Manual
 |
View all Asus SBC-06D2X-U manuals
Add to My Manuals
Save this manual to your list of manuals |
Asus SBC-06D2X-U manual content summary:
- Asus SBC-06D2X-U | SBC-06D2XU & SBW-06D2XU QIG Quick Installation Guide - Page 1
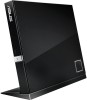
SBC-06D2X-U • SBW-06D2X-U External Slim Blu-Ray Drive Quick Installation Guide In 35 Languages English Česky Bahasa Indonesia Român Fran Norsk ไทย Polski Magyar Português Tiếng Việt Қазақ Model SBC-06D2X-U • SBW-06D2X-U v 6.4 Published December 2014 Copyright © 2014 ASUSTeK Computer INC. - Asus SBC-06D2X-U | SBC-06D2XU & SBW-06D2XU QIG Quick Installation Guide - Page 2
- Asus SBC-06D2X-U | SBC-06D2XU & SBW-06D2XU QIG Quick Installation Guide - Page 3
or procedures other than those specified in this manual may result to hazardous radiation exposure. • Do not attempt to disassemble the drive. • Do not move the device from a , we published the chemical substances in our products at ASUS REACH website at http://csr.asus.com/english/REACH.htm. - Asus SBC-06D2X-U | SBC-06D2XU & SBW-06D2XU QIG Quick Installation Guide - Page 4
Australian Consumer Law. For the latest product warranty details please visit http:// support.asus.com. Our goods come with guarantees that cannot be excluded under the failure. If you require assistance please call ASUS Customer Service 1300 2787 88 or visit us at http:// support.asus.com. - Asus SBC-06D2X-U | SBC-06D2XU & SBW-06D2XU QIG Quick Installation Guide - Page 5
Package contents Optical drive 光碟機 Stand 腳座 USB Y cable Y 型 USB 線 Software Quick install guide 軟體光碟 安裝指南 部件名称 有害物质 铅 (Pb) 汞 (Hg) 镉 (Cd (Cr(VI)) (PBB) 醚 (PDBE) ○ ○ ○ ○ ○ 外壳 × ○ ○ ○ ○ ○ ○ ○ ○ ○ ○ 头及线材 SJ/T 11364 GB/T 26572 规定的 GB/T 26572 - Asus SBC-06D2X-U | SBC-06D2XU & SBW-06D2XU QIG Quick Installation Guide - Page 6
Place the optical drive on a stable surface Step 1 - Asus SBC-06D2X-U | SBC-06D2XU & SBW-06D2XU QIG Quick Installation Guide - Page 7
with stand only): B A. Place the vertical stand on a stable surface. A B. Insert the stand to the groove at the back of the optical drive. To uninstall the optical drive from the stand (model with stand only): Hold the stand firmly with one hand and with the other hand, carefully pull the - Asus SBC-06D2X-U | SBC-06D2XU & SBW-06D2XU QIG Quick Installation Guide - Page 8
A B A B Dansk Česky Nederlands Umístěte optickou jednotku na stabilní povrch. POZNÁMKA:Můžete umístit optickou jednotku vodorovně na stabilní povrch nebo ji můžete použít s dodaným stojánkem. Pokyny pro vložení optické jednotky do svislého stojánku: A. Umístěte svisl - Asus SBC-06D2X-U | SBC-06D2XU & SBW-06D2XU QIG Quick Installation Guide - Page 9
vertikal pada permukaan datar. B. Luruskan alur pada bagian belakang optical drive ke braket penyangga. Melepaskan optical drive dari penyangga: Tahan penyangga dengan satu tangan kuat-kuat, dan tariklah optical drive secara hati-hati dengan tangan lainnya hingga terlepas dari penyangga. Lietuvi - Asus SBC-06D2X-U | SBC-06D2XU & SBW-06D2XU QIG Quick Installation Guide - Page 10
ţi suportul vertical pe o suprafaţă stabilă. B. Aliniaţi canalul de la spatele drive-ului optic pe braţul suportului. Pentru dezinstalarea drive-ului de pe suport: Ţineţi suportul ferm cu o mână, şi cu atenţie trageţi drive-ul optic cu cealaltă mână până când se separă de suport. Optickú mechaniku - Asus SBC-06D2X-U | SBC-06D2XU & SBW-06D2XU QIG Quick Installation Guide - Page 11
Tiếng Việt 簡体中文 A B Đặt ổ đĩa quang trên bề mặt cố định. LƯU Ý: Bạn có thể đặt ổ đĩa quang nằm ngang trên bề mặt cố định hoặc sử dụng nó bằng giá đỡ bọc lại. Để lắp ổ đĩa quang vào giá đỡ thẳng đứng: A. Đặt giá đỡ thẳng đứng trên bề mặt cố định. B. Canh thẳng rãnh ở mặt sau ổ đĩa quang - Asus SBC-06D2X-U | SBC-06D2XU & SBW-06D2XU QIG Quick Installation Guide - Page 12
Connect the optical drive to your computer Step 2 - Asus SBC-06D2X-U | SBC-06D2XU & SBW-06D2XU QIG Quick Installation Guide - Page 13
is purchased separately. • We DO NOT guarantee the performance of the optical drive connected using a USB hub. ON OFF A1 A2 OFF ON USB Extension of the bundled USB Y cable to the mini-USB port of the optical drive (see B). Deutsch Connectez le lecteur optique à votre ordinateur. A. Connectez le - Asus SBC-06D2X-U | SBC-06D2XU & SBW-06D2XU QIG Quick Installation Guide - Page 14
Suomi Nederlands Česky A USB Y USB Y USB USB USB USB Y A1 USB A2). • USB ASUS USB хаб. B USB USB Y USB B). Připojte optickou jednotku k počítači. A. Připojte dodaný kabel USB Y k počítači. POZNÁMKY: • Dodaný kabel USB Y je opatřen dvě - Asus SBC-06D2X-U | SBC-06D2XU & SBW-06D2XU QIG Quick Installation Guide - Page 15
-USB dostarczonego kabla USB Y do portu mini-USB pionowego napędu (patrz B). Português Norsk Lietuvių Bahasa Indonesia Menyambungkan optical drive pada komputer. A. Sambungkan kabel USB Y yang disertakan pada komputer. PERHATIAN: • Kabel USB Y yang disertakan, dilengkapi dengan dua konektor USB - Asus SBC-06D2X-U | SBC-06D2XU & SBW-06D2XU QIG Quick Installation Guide - Page 16
asigura suficient curent, aţi putea avea nevoie de un cablu prelungitor (vezi A2). • Cablul prelungitor este achiziţionat separat. • NU garantăm performanţa în funcţionarea drive-lui optic conectat folosind un hub USB. B. Conectaţi conectorul mini-USB a legăturii cablului USB Y la portul mini-USB - Asus SBC-06D2X-U | SBC-06D2XU & SBW-06D2XU QIG Quick Installation Guide - Page 17
Tiếng Việt 簡体中文 A USB Y USB Y USB mini-USB USB USB A1 A2)。 • USB USB hub B. 将附赠 USB Y mini-USB mini-USB B)。 A USB Y USB Y USB USB USB 1 2 USB B USB Y USB USB Қазақ 日本語 A. 付属の USB Y 注意: USB Y USB USB USB USB ポート A A 2参照) USB - Asus SBC-06D2X-U | SBC-06D2XU & SBW-06D2XU QIG Quick Installation Guide - Page 18
Ensure that your system detects the external optical drive Step 3 - Asus SBC-06D2X-U | SBC-06D2XU & SBW-06D2XU QIG Quick Installation Guide - Page 19
03 Ensure that your system detects the external optical drive. To check if the optical drive is detected using Device Manager: • Windows® XP SP3 Right-click My Computer, then click Properties > Hardware > Device Manager. • Windows® Click Start, then right-click My Vista / 7 SP1 Computer. Click - Asus SBC-06D2X-U | SBC-06D2XU & SBW-06D2XU QIG Quick Installation Guide - Page 20
identificerer det eksterne drev uden problemer, vil navnet på drevet komme op på listen. Česky Nederlands Controleer of uw systeem het externe optische station kan detecteren. Controleren of het optische station is gedetecteerd via Device Manager (Apparaatbeheer): Windows® XP SP3 Klik met de - Asus SBC-06D2X-U | SBC-06D2XU & SBW-06D2XU QIG Quick Installation Guide - Page 21
X 8 στο Device Manager DVD/CD-ROM Memastikan sistem mendeteksi external optical drive (penggerak optik eksternal). Untuk memeriksa jika drive optik dideteksi menggunakan Device Manager (Manajer Perangkat) Windows® XP SP3 Klik kanan My Computer (Komputer Saya), lalu klik Properties - Asus SBC-06D2X-U | SBC-06D2XU & SBW-06D2XU QIG Quick Installation Guide - Page 22
nome da unidade na lista. Polski Română Asiguraţi-vă că sistemul dvs detectează drive-ul optic extern. Pentru a verifica dacă unitatea optică este detectată utilizând utilitarul Device Manager (Manager dispozitive): Windows® XP SP3 Faceţi clic dreapta pe My Computer (Computerul meu), apoi face - Asus SBC-06D2X-U | SBC-06D2XU & SBW-06D2XU QIG Quick Installation Guide - Page 23
miške kliknite na My Computer (Moj računalnik), nato kliknite Properties (Lastnosti) > Hardware (Strojna oprema) > Device Manager (Upravitelj naprav) Windows Kliknite Start (Zagon), in nato z desnim Vista / 7 SP1 gumbom miške kliknite na My Computer (Moj računalnik). Kliknite Properties (Lastnosti - Asus SBC-06D2X-U | SBC-06D2XU & SBW-06D2XU QIG Quick Installation Guide - Page 24
Tiếng Việt Đảm bảo hệ thống của bạn nhận dạng được ổ đĩa quang ngoại vi. Để kiểm tra xem ổ đĩa quang có được phát hiện qua Device Manager hay không: Windows® XP SP3 Nhấp phải My Computer (Máy tính của tôi) rồi nhấp Properties (Thuộc tính) > Hardware (Phần cứng) > Device Manager (Quản lý thi - Asus SBC-06D2X-U | SBC-06D2XU & SBW-06D2XU QIG Quick Installation Guide - Page 25
Safely remove the external optical drive Step 4 - Asus SBC-06D2X-U | SBC-06D2XU & SBW-06D2XU QIG Quick Installation Guide - Page 26
the USB Y cable when the system is booting up or the activity LED of the external optical drive is blinking. Deutsch Français Retirer le lecteur optique en toute sécurité. Le lecteur optique externe supporte la norme Plug & Play. Suivez les étapes ci-dessous pour retirer le lecteur en toute - Asus SBC-06D2X-U | SBC-06D2XU & SBW-06D2XU QIG Quick Installation Guide - Page 27
de computer los te maken. OPMERKING: Koppel de USB-Y-kabel NIET los terwijl het systeem wordt opgestart of terwijl de LED van het externe optische station knippert. Eesti Dansk Plug & Play A B Safely remove USB Mass Storage Device USB C The device can now be safely removed from the - Asus SBC-06D2X-U | SBC-06D2XU & SBW-06D2XU QIG Quick Installation Guide - Page 28
ávolítása érdekében kövesse a következő utasításokat. A. A számítógép Windows tálcáján kattintson a hardver biztonságos eltávolítása ikonra ( ). B. Kattintson az Y ketika sistem sedang dinyalakan atau indikator LED external optical drive berkedipkedip. Magyar Lietuvių Latviski Droša ārējā optisk - Asus SBC-06D2X-U | SBC-06D2XU & SBW-06D2XU QIG Quick Installation Guide - Page 29
a arrancar ou quando o indicador LED da unidade óptica externa estiver a piscar. Polski Slovensky Română Îndepărtarea în siguranţă a drive-ului optic extern. Drive-ul optic extern suportă aplicaţia Plug & Play (Conectează & Redă). Urmaţi paşii de mai jos pentru a îndepărta în siguranţă driveul - Asus SBC-06D2X-U | SBC-06D2XU & SBW-06D2XU QIG Quick Installation Guide - Page 30
Svenska Slovenščina Pazljivo odstranite zunanji optični gonilnik. Zunanji optični gonilnik podpira Plug & Play sistem. Pri odstranitvi gonilnika, upoštevajte spodaj opisana navodila. A. A. Od opravilne vrstice na vašem računalniku kliknite ikono Varno odstranite napravo ( ). B. Na pojavnem sporoč - Asus SBC-06D2X-U | SBC-06D2XU & SBW-06D2XU QIG Quick Installation Guide - Page 31
Tiếng Việt 簡体中文 A B USB Mass Storage Device"。 C USB LED USB Y Tháo an toàn ổ đĩa quang ngoại vi. Ổ đĩa quang ngoại vi hỗ trợ chuẩn Plug & Play (Cắm & Phát). Để tháo an toàn ổ đĩa. A. Từ thanh tác vụ trên máy tính, click vào biểu tượng Safely Remove Hardware (Tháo phần cứng an to - Asus SBC-06D2X-U | SBC-06D2XU & SBW-06D2XU QIG Quick Installation Guide - Page 32
If your computer cannot detect the external optical drive, follow the steps Troubleshooting - Asus SBC-06D2X-U | SBC-06D2XU & SBW-06D2XU QIG Quick Installation Guide - Page 33
the optical drive to your computer for details. 3. Turn on your computer. NOTE: For more technical service, contact your retailer or the ASUS Technical Support. Deutsch Dépannage Si votre ordinateur ne parviens pas à détecter le lecteur optique externe, suivez les instructions suivantes : 1. Arr - Asus SBC-06D2X-U | SBC-06D2XU & SBW-06D2XU QIG Quick Installation Guide - Page 34
Tænd for computeren. BEMÆRK: For yderligere teknisk service, kontakt din forhandler eller ASUS Teknisk Hjælp. Tõrkeotsing Kui arvuti ei suuda välist ühendust ASUS'e tehnilise toega. 1 2 USB Y 2 3 ASUS. Pemecahan Masalah Jika komputer tidak mendeteksi external optical drive, ikuti langkah - Asus SBC-06D2X-U | SBC-06D2XU & SBW-06D2XU QIG Quick Installation Guide - Page 35
extern, urmaţi paşii de mai jos: 1. Închideţi computerul. 2. Verificaţi dacă este corespunzător conectat cablul USB Y. Vezi Pasul 2 Conectează drive-ul optic la computer pentru detalii. 3. Porniţi computerul. NOTĂ: Pentru detalii service mai tehnice, contactaţi vânzătorul sau Asistenţa Tehnică ASUS - Asus SBC-06D2X-U | SBC-06D2XU & SBW-06D2XU QIG Quick Installation Guide - Page 36
den optiska enheten till din dator för detaljer. 3. Slå på datorn. NOTERA: För mer teknisk service kontakta din återförsäljare eller ASUS tekniska support. Türkçe ไทย 1 2 Y USB 2 3 ASUS Sorun Giderme Bilgisayarınız harici optik sürücüyü algılamıyorsa, aşağıdaki adımları takip - Asus SBC-06D2X-U | SBC-06D2XU & SBW-06D2XU QIG Quick Installation Guide - Page 37
quang ngoại vi, hãy thực hiện các bước dưới đây: 1. Tắt máy tính. 2. Kiểm tra xem cáp USB Y c kết nối đúng cách hay chưa. Xem Bước 2 Connect the optical drive to your computer (Kết nối ổ đĩa quang với máy tính) để biết thêm chi tiết. 3. Bật máy tính. LƯU c hỗ trợ thêm về dịch vụ kỹ thuật, hãy li - Asus SBC-06D2X-U | SBC-06D2XU & SBW-06D2XU QIG Quick Installation Guide - Page 38
requirements for playing Blu-Ray discs (for BluRay drive only) • Operating system: Windows® 8 / 7 / Vista / XP with Service Pack 3 installed MAC OS X 10.6 or above Specifications are subject to change without notice. Takeback Services ASUS recycling and takeback programs come from our commitment to - Asus SBC-06D2X-U | SBC-06D2XU & SBW-06D2XU QIG Quick Installation Guide - Page 39
- Asus SBC-06D2X-U | SBC-06D2XU & SBW-06D2XU QIG Quick Installation Guide - Page 40
SBC-06D2X-U • SBW-06D2X-U For a superior burning experience
-
 1
1 -
 2
2 -
 3
3 -
 4
4 -
 5
5 -
 6
6 -
 7
7 -
8
-
9
-
10
-
11
-
12
-
13
-
14
-
15
-
16
-
17
-
18
-
19
-
20
-
21
-
22
-
23
-
24
-
25
-
26
-
27
-
28
-
29
-
30
-
31
-
32
-
33
-
34
-
35
-
36
-
37
-
38
-
39
-
40
 |
 |

Ελληνικά
Polski
български
Magyar
Português
Tiếng Việt
Қазақ
uick Installation Guide
English
Česky
Bahasa Indonesia
Română
Українська
Français
Dansk
Latviski
Türkçe
(Kurulum Kılavuzu)
v 6.4
Published December 2014
Copyright © 2014 ASUSTeK Computer INC. All Rights Reserved.
15060-34210200
In 35 Languages
Slovensky
繁體中文
Deutsch
Nederlands
Lietuvių
Slovenščina
簡体中文
Italiano
Eesti
Bahasa
Malaysia
Svenska
日本語
Español
Suomi
Norsk
ไทย
Русский
Q
Model / нормативная модель : SBC-06D2X-U • SBW-06D2X-U
External Slim Blu-Ray Drive
SBC-06D2X-U
•
SBW-06D2X-U