Asus SDRW-08D2S-U SDRW-08D2S-U Quick Installation Guide 36 languages
Asus SDRW-08D2S-U Manual
 |
View all Asus SDRW-08D2S-U manuals
Add to My Manuals
Save this manual to your list of manuals |
Asus SDRW-08D2S-U manual content summary:
- Asus SDRW-08D2S-U | SDRW-08D2S-U Quick Installation Guide 36 languages - Page 1
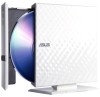
Q9066 External Slim Optical Drive Quick Installation Guide In 36 Languages English Français Deutsch Italiano Español esky Dansk Nederlands Eesti Suomi Magyar Bahasa Indonesia Latviski Lietuvių Bahasa Malaysia Norsk Polski Português - Asus SDRW-08D2S-U | SDRW-08D2S-U Quick Installation Guide 36 languages - Page 2
other than those specified in this manual may result to hazardous radiation exposure. • Do not attempt to disassemble the drive. • Do not move the ASUS REACH website at http://csr.asus.com/english/REACH.htm. Package contents Optical drive Stand (optional) USB Y cable Software Quick install guide - Asus SDRW-08D2S-U | SDRW-08D2S-U Quick Installation Guide 36 languages - Page 3
部件名称 有害物质 铅(Pb) 汞(Hg) 镉(Cd) 六价铬 (Cr(VI)) × ○ ○ ○ 外壳 × ○ ○ ○ × ○ ○ ○ PBB) ○ ○ ○ PBDE) ○ ○ ○ SJ/T 11364 GB/T 26572规定的 X GB/T 26572 2011/65/EU B B AEEE Yönetmeliğine Uygundur. - Asus SDRW-08D2S-U | SDRW-08D2S-U Quick Installation Guide 36 languages - Page 4
, and Restriction of Chemicals) erfüllend, veröffentlichen wir die chemischen Substanzen in unseren Produkten auf unserer ASUS REACH webseite unter http://csr.asus.com/english/REACH.htm. ASUS COMPUTER GmbH HARKORT STR. 21-23, 40880 RATINGEN, GERMANY ASUSTeK COMPUTER INC. 4F. No. 150, Li-Te - Asus SDRW-08D2S-U | SDRW-08D2S-U Quick Installation Guide 36 languages - Page 5
. B. Align the groove on the back of the optical drive to the bracket of the stand. C. Carefully push down the optical drive until it the stand. C To uninstall the optical drive from the stand (model with stand only): Hold the stand with one hand, and carefully pull upward the optical - Asus SDRW-08D2S-U | SDRW-08D2S-U Quick Installation Guide 36 languages - Page 6
penyangga vertikal pada permukaan datar. B. Luruskan alur pada bagian belakang optical drive ke braket penyangga. C. Tekan optical drive ke bawah hingga terpasang dengan kuat pada penyangga. Melepaskan optical drive dari penyangga: Tahan penyangga dengan satu tangan kuat-kuat, dan tariklah optical - Asus SDRW-08D2S-U | SDRW-08D2S-U Quick Installation Guide 36 languages - Page 7
Aşezaţi suportul vertical pe o suprafaţă stabilă. B. Aliniaţi canalul de la spatele drive-ului optic pe braţul suportului. C. Cu atenţie împingeţi drive-ul optic ferm până când se potriveşte pe suport. Pentru dezinstalarea drive-ului de pe suport: Ţineţi suportul ferm cu o mână, şi cu atenţie trage - Asus SDRW-08D2S-U | SDRW-08D2S-U Quick Installation Guide 36 languages - Page 8
Slovenščina Položite optični gonilnik na trdno površino. OPOMBA: Optični gonilnik lahko položite na ravno in trdno podlago ali pa ga uporabite z stojalom. Da namestite optični gonilnik na navpično stojalo: A. Položite navpično stojalo na trdno površino. B. Naravnajte utor hrbtne strani optičnega - Asus SDRW-08D2S-U | SDRW-08D2S-U Quick Installation Guide 36 languages - Page 9
A B 맞춘다. C A B Tiếng Việt Đặt ổ đĩa quang trên bề mặt cố định. LƯU Ý: Bạn có thể đặt ổ đĩa quang nằm ngang trên bề mặt cố định hoặc sử dụng nó bằng giá đỡ bọc lại. Để lắp ổ đĩa quang vào giá đỡ thẳng đứng: A. Đặt giá đỡ thẳng đứng trên bề mặt cố định. B. Canh thẳng rãnh - Asus SDRW-08D2S-U | SDRW-08D2S-U Quick Installation Guide 36 languages - Page 10
cable is purchased separately. • We DO NOT guarantee the performance of the optical drive connected using a USB hub. B. Connect the mini-USB connector of the or Y USBY USB USB USB USB Y A1). USB A2). • USB ASUS USB хаб. B USB USB Y мини-USB B). Deutsch Verbinden des - Asus SDRW-08D2S-U | SDRW-08D2S-U Quick Installation Guide 36 languages - Page 11
memberikan daya yang cukup, mungkin memerlukan kabel perpanjangan (lihat A2). • Kabel perpanjangan ini dibeli secara terpisah. • Kami TIDAK menjamin kinerja optical drive yang tersambung menggunakan hub USB. B. Sambungkan konektor mini-USB dari kabel USB Y yang disertakan pada port mini-USB optical - Asus SDRW-08D2S-U | SDRW-08D2S-U Quick Installation Guide 36 languages - Page 12
podłączonego z wykorzystaniem huba USB. B. Podłacz złącze mini-USB dostarczonego kabla USB Y do portu mini-USB pionowego napędu (patrz B). Română Conectarea drive-ului optic la computerul dvs. A. Conectaţi legătura cablului USB Y la computerul dvs. NOTE: • Legătura de cablu USB Y vine livrat cu dou - Asus SDRW-08D2S-U | SDRW-08D2S-U Quick Installation Guide 36 languages - Page 13
Slovenščina Povežite optični gonilnik z računalnikom. A. Povežite priložen USB Y kabel z vašim računalnikom. OPOMBE: • Priložen USB Y kabel je opremljen z dvema USB-priključkoma in enim mini USB priključkom. Priporočamo, da priključite oba USB priključka v dvoje USB vrat na vašem računalniku, da - Asus SDRW-08D2S-U | SDRW-08D2S-U Quick Installation Guide 36 languages - Page 14
A USB Y USB Y 2개의 USB 1개의 mini-USB 2개 USB 포트에 USB A1 A2 USB B. USB Y mini-USB miniUSB B 참고 ) A USB Y USB Y USB USB USB 1 2 USB B USB Y USB USB Tiếng Việt Kết nối ổ đĩa quang với máy tính. A. Cắm cáp USB Y kết hợp vào máy tính. GHI CHÚ: • Cáp USB Y kết hợp đi kèm - Asus SDRW-08D2S-U | SDRW-08D2S-U Quick Installation Guide 36 languages - Page 15
detects the external optical drive. A. From your Windows® desktop, right-click My Compu ter, then click Properties > Hardware > Device Manager . B. Click before DVD/CD-ROM drives to unfold the list. When the external optical drive is detected, the name of the external optical drive appears in - Asus SDRW-08D2S-U | SDRW-08D2S-U Quick Installation Guide 36 languages - Page 16
Keras) > Device Manager (Manajer Piranti). B. Klik sebelum drive DVD/CD-ROM membuka daftar. Saat external optical drive terdeteksi, namanya akan muncul dalam daftar. Lietuvių Įsitikinkite, kad sistema atpažįsta išorinį optinį diską. A. „Windows®" darbalaukyje, dešiniu klavišu spustelėkite Mano - Asus SDRW-08D2S-U | SDRW-08D2S-U Quick Installation Guide 36 languages - Page 17
). B. Click înainte ca drive-ul DVD/CD-ROM să desfăşoare lista. Atunci când drive-ul optic extern este detectat, numele drive-ului optic extern apare în listă. Slovenščina Prepričajte se, da je vaš operacijski sistem zaznal zunanji optični gonilnik. A. Na vašem Windows® namizju, z desnim gumbom - Asus SDRW-08D2S-U | SDRW-08D2S-U Quick Installation Guide 36 languages - Page 18
A. 从 Windows B. 点选 DVD/CD-ROM 한국어 A B. DVD/CD-ROM A. Windows B. DVD/CD-ROM Қазақ A. Windows My Computer (Менің Properties Hardware Device Manager B DVD/CD-ROM Tiếng Việt Đảm bảo hệ thống của bạn nhận dạng được ổ đĩa quang ngoại vi. A. Từ màn hình nền Windows - Asus SDRW-08D2S-U | SDRW-08D2S-U Quick Installation Guide 36 languages - Page 19
the USB Y cable when the system is booting up or the LED indicator of the external optical drive is Français Retirer le lecteur optique en toute sécurité. Le lecteur optique externe supporte la norme Plug & Play. Suivez les étapes ci-dessous pour retirer le lecteur en toute sécurité. A. Dans la - Asus SDRW-08D2S-U | SDRW-08D2S-U Quick Installation Guide 36 languages - Page 20
& Play (csatold és játszik) funkciót. A meghajtó biztonságos eltávolítása érdekében kövesse a következő utasításokat: A. A számítógép Windows tá Play A B USB C USB Y USBY LED Bahasa Indonesia Melepaskan external optical drive dengan aman. External optical drive mendukung Plug & Play - Asus SDRW-08D2S-U | SDRW-08D2S-U Quick Installation Guide 36 languages - Page 21
LED zewnętrznego napędu optycznego. Română Îndepărtarea în siguranţă a drive-ului optic extern. Drive-ul optic extern suportă aplicaţia Plug & Play (Conectează & Redă). Urmaţi paşii de mai jos pentru a îndepărta în siguranţă drive-ul. A. Din bara dvs de sarcină a computerului dvs, click pe icoana - Asus SDRW-08D2S-U | SDRW-08D2S-U Quick Installation Guide 36 languages - Page 22
C USB Mass StorageDevice USB Y LED USB Y Svenska Säker borttagning av den externa optiska enheten. Den externa optiska enheten stödjer plug-and-play. Följ stegen nedan för att säkert ta bort enheten. A. Från aktivitetsfältet på datorn klickar du på ikonen "Säker borttagning av hårdvara - Asus SDRW-08D2S-U | SDRW-08D2S-U Quick Installation Guide 36 languages - Page 23
the computer USB Y USB Y Tiếng Việt Tháo an toàn ổ đĩa quang ngoại vi. Ổ đĩa quang ngoại vi hỗ trợ chuẩn Plug & Play (Cắm vào là chạy). Thực hiện theo các bước bên dưới để tháo an toàn ổ đĩa. A. A. Từ thanh tác vụ trên máy tính, click vào biểu tượng Safely Remove Hardware (Tháo phần cứng - Asus SDRW-08D2S-U | SDRW-08D2S-U Quick Installation Guide 36 languages - Page 24
the optical drive to your computer for details. 3. Turn on your computer. NOTE: For more technical service, contact your retailer or the ASUS Technical Support. Français Dépannage Si votre ordinateur ne parviens pas à détecter le lecteur optique externe, suivez les instructions suivantes - Asus SDRW-08D2S-U | SDRW-08D2S-U Quick Installation Guide 36 languages - Page 25
võtke ühendust ASUS'e tehnilise toega. 1 2 USB Y 2 3 ASUS. Bahasa Indonesia Pemecahan Masalah Jika komputer tidak mendeteksi external optical drive, ikuti langkah- PC-en for opplysninger. 3. Slå på PC-en. MERK: For mer teknisk service kan du kontakt forhandleren eller teknisk støtte hos - Asus SDRW-08D2S-U | SDRW-08D2S-U Quick Installation Guide 36 languages - Page 26
extern, urmaţi paşii de mai jos: 1. Închideţi computerul. 2. dacă este corespunzător conectat cablul USB Y. Vezi Pasul 2 Conectează drive-ul optic la computer pentru detalii. 3. Porniţi computerul. NOTĂ: Pentru detalii service mai tehnice, contactaţi vânzătorul sau Asistenţa Tehnică ASUS - Asus SDRW-08D2S-U | SDRW-08D2S-U Quick Installation Guide 36 languages - Page 27
简体中文 1 2. 检查 USBY 步骤 2 3 1 2. USB Y "스텝 2 3 ASUS 日本語 1 2. USB Y 3 ON ASUS Қазақ 1 2. USB Y 2 3 ASUS Tiếng Việt Khắc phục sự cố Nếu máy tính không thể nhận dạng ổ đĩa quang ngoại vi, hãy thực hiện các bước dưới đây: 1. Tắt máy tính. 2. Kiểm tra xem cáp - Asus SDRW-08D2S-U | SDRW-08D2S-U Quick Installation Guide 36 languages - Page 28
System requirements for playing Blu-Ray discs (for BluRay drive only) • Operating system: Windows® XP with Service Pack 2 installed or Windows® Vista or Windows® 7 • Processor: Pentium® D 945 (3.4 GHz) or higher • Memory: 1 GB or more is recommended • Graphics Card: NVIDIA® GeForce 7600 GT or
-
 1
1 -
 2
2 -
 3
3 -
 4
4 -
 5
5 -
 6
6 -
 7
7 -
8
-
9
-
10
-
11
-
12
-
13
-
14
-
15
-
16
-
17
-
18
-
19
-
20
-
21
-
22
-
23
-
24
-
25
-
26
-
27
-
28
 |
 |

Q9066
External Slim Optical Drive
Quick Installation Guide
In 36 Languages
v6.2
Published December 2014
Copyright © 2014 ASUSTeK Computer INC. All Rights Reserved.
15060-34310200
English
Dansk
Lietuvių
Svenska
한국어
Français
Nederlands
Bahasa Malaysia
ไทย
Deutsch
Eesti
Norsk
Türkçe
(Kurulum Kılav
uzu)
Italiano
Suomi
Polski
Tiếng Việt
Қазақ
Español
Ελληνικά
Português
Українська
Русский
Magyar
Română
繁體中文
български
Bahasa Indonesia
Slovensky
簡体中文
Česky
Latviski
Slovenščina
日本語
Model / нормативная модель :
SDRW-08D2S-U