Asus T91MT User Manual
Asus T91MT - Eee PC Manual
 |
UPC - 884840530039
View all Asus T91MT manuals
Add to My Manuals
Save this manual to your list of manuals |
Asus T91MT manual content summary:
- Asus T91MT | User Manual - Page 1
E4887 Eee PC User Manual Windows® XP Edition Eee PC T91 15G06Q142001 ESC F1 F2 F3 F4 F5 F6 F7 F8 F9 F10 F11 Num LK F12 Scr LK Pause Break Prt Sc Insert Delete SysRq ~ ! @ # $ % & ( ) 1 2 3 4 5 6 7 - Asus T91MT | User Manual - Page 2
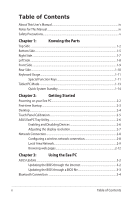
...2-8 Configuring a wireless network connection 2-8 Local Area Network 2-9 Browsing web pages 2-12 Chapter 3: Using the Eee PC ASUS Update...3-2 Updating the BIOS through the Internet 3-2 Updating the BIOS through a BIOS file 3-3 Bluetooth Connection ...3-4 ii Table of Contents - Asus T91MT | User Manual - Page 3
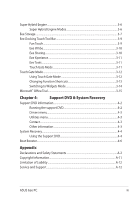
Drivers menu...4-3 Utilities menu...4-3 Contact...4-3 Other information 4-3 System Recovery...4-4 Using the Support DVD 4-4 Boot Booster...4-6 Appendix Declarations and Safety Statements A-2 Copyright Information...A-11 Limitation of Liability...A-12 Service and Support...A-12 ASUS Eee PC - Asus T91MT | User Manual - Page 4
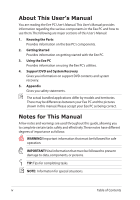
of this User's Manual: 1. Knowing the Parts Provides information on the Eee PC's components. 2. Getting Started Provides information on getting started with the Eee PC. 3. Using the Eee PC Provides information on using the Eee PC's utilities. 4. Support DVD and System Recovery Gives you information - Asus T91MT | User Manual - Page 5
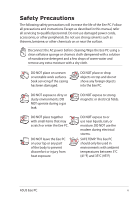
Eee PC. Follow all precautions and instructions. Except as described in this manual, refer all servicing to qualified personnel. Do not use damaged power place together with small items that may scratch or enter the Eee PC. DO NOT leave the Eee PC on your lap or any part of the body to prevent - Asus T91MT | User Manual - Page 6
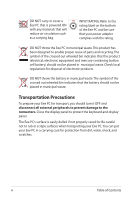
the battery should not be placed in municipal waste. Transportation Precautions To prepare your Eee PC for transport, you should turn it OFF and disconnect all external peripherals to prevent damage to the connectors. Close the display panel to protect the keyboard and display panel. The Eee PC - Asus T91MT | User Manual - Page 7
to use battery power, be sure to fully charge your battery pack before going on long trips. Remember that the power adapter charges the battery pack as long as it is plugged into the computer and an AC power source. Be aware that it takes much longer to charge the battery pack when the Eee PC is in - Asus T91MT | User Manual - Page 8
viii Table of Contents - Asus T91MT | User Manual - Page 9
Top Side Bottom Side Right Side Left Side Front Side Rear Side Keyboard Usage Tablet PC Mode 1 Knowing the Parts - Asus T91MT | User Manual - Page 10
Top Side Refer to the diagram below to identify the components on this side of the Eee PC. The top side may vary in appearance depending on model. 1 2 3 4 5 6 7 8 The keyboard differs for each territory. 1-2 Chapter 1: Knowing the Parts - Asus T91MT | User Manual - Page 11
opened. Power Indicator The power indicator lights when the Eee PC is turned ON and blinks slowly when the Eee PC is in the Save-to-RAM (Suspend) mode. This indicator is OFF when the Eee PC is turned OFF. 5 / Home Key Shortly Press this key to launch the Touch Gate touch screen interface. Press - Asus T91MT | User Manual - Page 12
battery power (95%-100%) Medium battery power (10%-94%) With Adapter Green ON Orange ON Low battery power Orange (0%-10%) Blinking Without Adapter Off Off Orange Blinking (Powered ON) Off (Standby Mode) Powered OFF High battery power (95%-100%) Medium battery power (11%-94%) Low battery power - Asus T91MT | User Manual - Page 13
HEAT. 1 Reset Button (Emergency) In case your operating system cannot properly turn OFF or restart, the reset button can be depressed with a pin or a straightened paper clip to restart the Eee PC. 2 Memory Compartment The memory module is secured in a dedicated compartment. ASUS Eee PC 1-5 - Asus T91MT | User Manual - Page 14
to an AC power source and maintains power to the Eee PC when AC power is not connected. This allows use when moving temporarily between locations. Battery time varies by usage and by the specifications for this Eee PC. The embedded battery pack is replaceable only by trained service personnel - Asus T91MT | User Manual - Page 15
USB 1.1) and 480Mbits/sec (USB 2.0). Also, the USB supports hot-swapping function. 6 LAN Port The eight-pin RJ-45 LAN port (10/100M bit) supports a standard Ethernet cable for connection to a local network. The built-in connector allows convenient use without additional adapters. ASUS Eee PC - Asus T91MT | User Manual - Page 16
to the Eee PC and battery pack, always use the supplied power adapter. CAUTION: MAY BECOME WARM TO HOT WHEN IN USE. BE SURE NOT TO COVER THE ADAPTER AND KEEP IT AWAY FROM YOUR BODY. 2 USB Port (2.0/1.1) 3 Disk-expander Slot The built-in disk-expander slot allows you to expand the system drive - Asus T91MT | User Manual - Page 17
Front Side Refer to the diagram below to identify the components on this side of the Eee PC. 1 1 Memory Card Slot The built-in memory card reader can read MMC/SD/SDHC cards. ASUS Eee PC 1-9 - Asus T91MT | User Manual - Page 18
charge indicator (LED) shows the status of the battery's power. Refer to the LED status table on pages 1-3 to 1-4. 4 Power Indicator The power indicator lights when the Eee PC is turned ON and blinks slowly when the Eee PC is in the Save-to-RAM (Suspend) mode. This indicator is OFF when the - Asus T91MT | User Manual - Page 19
your hot key locations do not match the manual. Zz Icon (F1): Places the Eee PC in suspend mode (Save-to-RAM). Radio Tower (F2): Wireless Models Only:Toggles the internal wireless LAN or Bluetooth (on selected models) ON or OFF with an on-screen-display. When enabled, the corresponding wireless - Asus T91MT | User Manual - Page 20
ON and OFF. Allows use of a larger portion of the keyboard for number entering. Scr Lk (F12): Toggles the "Scroll Lock" ON and OFF. Allows line. End (→): Press to move the pointer to the end of the line. Windows icon: Displays the start menu. Menu with pointer icon: Activates the properties menu - Asus T91MT | User Manual - Page 21
. 1. Firmly hold the edge of your 2. Rotate the display panel Eee PC, and then open the clockwise and vertically to a display panel to a 90° angle, as 180° angle. shown rotation. Some applications may not work properly under the desktop rotation angle of 90° and 270°. ASUS Eee PC 1-13 - Asus T91MT | User Manual - Page 22
Alt Ctrl Home PgDn End Quick System Standby You can quickly put your Eee PC into standby mode by swinging the touch pen nib above the hidden magnet near the status indicators. Slide rightward the power switch to wake up your Eee PC from standby mode. ESC F1 F2 F3 F4 F5 F6 F7 F8 F9 - Asus T91MT | User Manual - Page 23
Powering on your Eee PC First-time Startup Desktop Touch Panel Calibration ASUS EeePC Tray Utility Network Connection 2 Getting Started - Asus T91MT | User Manual - Page 24
Eee PC.You may damage both your battery pack and the Eee PC with a faulty AC-DC adapter. • When you open the display panel, do not force it down to the table or else the hinges may break! Never lift the Eee PC by the display panel! • Only use power adapters supplied with this Eee PC or specifically - Asus T91MT | User Manual - Page 25
First-time Startup For the first time you start your Eee PC, the Windows wizard will launch automatically and lead you through setting up your preferences and some basic information. Follow the wizard instructions to finish the initialization: 1. The Welcome message appears. Click Next to - Asus T91MT | User Manual - Page 26
PC by turning on Automatic Updates now to get the latest important updates and click Next to continue. 6. Type your computer's name in the Computer name box and click Next to continue. 7. Follow the onscreen instructions actual Desktop screen may vary according to different models. 2-4 Chapter - Asus T91MT | User Manual - Page 27
screen. Use the touch pen to tap the blinking symbols for touch screen calibration. You can also configure further touch panel settings using the Touch Panel Tool utility. To launch the utility, click Start > All Programs > Touch Panel Tool > Touch Panel Tool. Your Eee PC touch screen panel supports - Asus T91MT | User Manual - Page 28
power consumption and helps you adjust the display resolution easily. Enabling and Disabling Devices To disable or enable devices 1. Right-click the ASUS Bluetooth: Turns on and off the Bluetooth connection. Disable Camera: Enable or disable the built-in camera. 2. Select an option to turn it on or - Asus T91MT | User Manual - Page 29
Click the ASUS EeePC Tray Utility icon in the Notification area to adjust the display resolution. Select the resolution based on your needs. The CRT-related options are unavailable when there is no connected external monitors. When the display mode of your Eee PC is CRT Only and the power mode is - Asus T91MT | User Manual - Page 30
Network Connection Configuring a wireless network connection This device contains FCC ID: MSQT91NE785H and IC ID: 3568A-T91NE785H. 1. Double-click the crossed wireless network icon Notification area. in the If the wireless connection icon does not show in the Notification area. Activate the - Asus T91MT | User Manual - Page 31
Local Area Network To establish a wired network, follow the instructions below: Using a dynamic IP: 1. Right-click the network icon with a yellow warning triangle in the Internet Protocol 4. Click Obtain an IP address (TCP/IP) and click Properties. automatically and click OK. ASUS Eee PC 2-9 - Asus T91MT | User Manual - Page 32
Click Create a new 6. Click Next. connection to start the New Connection Wizard. 7. Select Connect to the Internet and click Next. 8. Select Set up my connection manually. 9. Select your connection type 10. Enter your ISP Name and click and click Next. Next. 2-10 Chapter 2: Getting Started - Asus T91MT | User Manual - Page 33
your service provider. 4. If needed, enter the preferred DNS Server address and alternative address. 5. After entering all the related values, click OK to build the network connection. Contact your Internet Service Provider (ISP) if you have problems connecting to the network. ASUS Eee PC 2-11 - Asus T91MT | User Manual - Page 34
the web page zooming bar Click to launch Handwriting/Keyboard Click to switch between different browser windows Visit our Eee PC homepage at http://eeepc.asus.com to obtain the latest information and register at http://vip.asus.com for full service of your Eee PC. 2-12 Chapter 2: Getting Started - Asus T91MT | User Manual - Page 35
ASUS Update Bluetooth Connection Super Hybrid Engine Eee Storage Eee Docking Touch Tool Bar Touch Gate Mode Microsoft® Office Trial 3 Using the Eee PC - Asus T91MT | User Manual - Page 36
the support DVD that comes with the Eee PC package. ASUS Update requires an Internet connection either through a network or an Internet Service Provider (ISP). Updating the BIOS through the Internet To update the BIOS through the Internet 1. Launch the ASUS Update utility from the Windows® desktop - Asus T91MT | User Manual - Page 37
> ASUS > ASUSUpdate for EeePC> ASUSUpdate. The ASUS Update main window appears. 2. Select Update BIOS from file from the drop‑down menu, then click Next. 3. Locate the BIOS file from the Open window, then click Open. 4. Follow the screen instructions to complete the update process. ASUS Eee PC 3-3 - Asus T91MT | User Manual - Page 38
Click My Bluetooth Places on the desktop and follow the onscreen instructions to finish initialization. Click Next to continue. 3. Name your Eee PC and select 4. To decide the Bluetooth the device type. Click Next to services this device offers, click continue. Next to continue. 5. Select the - Asus T91MT | User Manual - Page 39
interested in from the list have been created on the My and click Next to continue. Bluetooth Places screen of Windows Explorer. Click Ok to continue. 11. Click Skip to set up 12. Click Finish to complete the connection later and continue. initial bluetooth configuration. ASUS Eee PC 3-5 - Asus T91MT | User Manual - Page 40
your external monitor functions abnormally in Power Saving mode at a resolution of 1024 x 768 pixels or higher, press + repeatedly to switch the display mode to LCD Only or LCD + CRT Clone and reset the power mode to High Performance or Super Performance. 3-6 Chapter 3: Using the Eee PC - Asus T91MT | User Manual - Page 41
Hard Drive Service Agreement on Eee Storage official website. Eee Storage reserves the rights to modify or discontinue the provided web storage service with or without further notice. Visit the official website for details. To use Eee Storage 1. Click Start > All Programs > ASUS > Eee Storage > Eee - Asus T91MT | User Manual - Page 42
online space. Double-click Setup Your Eee Storage Account information to apply an account and setup a password if you need to use more advanced functions. This set of account and password is also indispensable when you use Eee Storage service with other computer. 3-8 Chapter 3: Using the Eee PC - Asus T91MT | User Manual - Page 43
. Notepad Notepad allows you to create a quick note using different pen tools. You can save and print your notes, export them to txt, jpg or pdf files, or send them via E-mail. ASUS Eee PC 3-9 - Asus T91MT | User Manual - Page 44
the full screen Widget mode. Eee @Vibe Eee Download Eee Download offers various software applications and multimedia enjoyment online. Refer to the help file in each function for more detailed instructions. Eee Sharing Data Sync Data Sync allows you to easily synchronize the data on your Eee PC with - Asus T91MT | User Manual - Page 45
Eee Xperience Eee Tools Live Update Keeps your Eee PC up-to-date by checking the online updates. Title Bar Setting Adjust the height of the window title bar for easy operation using the touch screen. Handwriting/Keyboard The handwriting utility allows you to enter texts on the touch screen with the - Asus T91MT | User Manual - Page 46
mode in two ways: • Tap the Touch Gate Mode icon ( ) from the Eee Docking Touch tool bar. • Press the Home Key ( ). Using Touch Gate Mode Tap the on-screen icons to operate the Touch Gate functions. Power switch Time format Device switch and messages Battery status and Super Hybrid Engine switch - Asus T91MT | User Manual - Page 47
Changing Function Shortcuts You may put up to five function shortcuts on the Touch Gate mode main screen. To do this: 1. Slide upward the function switch to show all hidden functions. 2. Rotate empty slot above the function an empty desktop space and list. release the icon. ASUS Eee PC 3-13 - Asus T91MT | User Manual - Page 48
Slide leftward to Windows mode Slide rightward to Touch Gate mode Tap Widget in the Eee Docking Touch tool bar to Widget mode 3-14 Slide rightward to Windows mode Tap the Touch Gate Mode icon from the Eee Docking Touch tool bar or Press the Home key to Touch Gate mode Chapter 3: Using the Eee PC - Asus T91MT | User Manual - Page 49
your product key and follow the onscreen instructions to finish the activation process before starting the free trial. If you want to use other applications in the Microsoft Office Suite, click start and point to All Programs > Microsoft Office to select a desired application. ASUS Eee PC 3-15 - Asus T91MT | User Manual - Page 50
3-16 Chapter 3: Using the Eee PC - Asus T91MT | User Manual - Page 51
Support DVD information System Recovery Boot Booster 4 Support DVD & System Recovery - Asus T91MT | User Manual - Page 52
can install to avail all the features. Running the support DVD Insert the support DVD in the external optical drive.The DVD automatically displays the Drivers menu if Autorun is enabled in your computer. Click an icon to display support DVD/ Eee PC information Click an item to install If Autorun is - Asus T91MT | User Manual - Page 53
drivers to activate the devices. Utilities menu The Utilities menu shows the applications that the Eee PC supports. Contact Click the Contact tab to display the ASUS contact information. Other information The icons on the top right corner of the screen provide additional information on the Eee PC - Asus T91MT | User Manual - Page 54
an external optical drive to your Eee PC and insert the Support DVD into the optical drive (System needs to be powered ON). 2. Press on bootup and the Please select boot device screen appears. Select USB: XXXXXX (may be labeled as the Please select boot device: SATA:PM-ASUS-JM S41 SSD - Asus T91MT | User Manual - Page 55
You will lose all your data during the system recovery. Ensure to back up your important data before recovering your system. 6. After the system recovery is completed, eject the the Support DVD from the optical drive and click OK to restart the Eee PC. ASUS Eee PC 4-5 - Asus T91MT | User Manual - Page 56
you MUST disable this BIOS item before you change any Eee PC components or perform system recovery (from USB flash disk, external optical drive or hidden partition). Follow the instructions below to disable Boot Booster: 1. Start the system and press on bootup to show the POST screen. Press - Asus T91MT | User Manual - Page 57
Declarations and Safety Statements Copyright Information Limitation of Liability Service and Support A Appendix - Asus T91MT | User Manual - Page 58
and, if not installed and used in accordance with the instructions, may cause harmful interference to radio communications. However, there is the nearby radio and television reception. It is essential that only the supplied power cord be used. Use only shielded cables to connect I/O devices to this - Asus T91MT | User Manual - Page 59
co-located or operating in conjunction with any other antenna or transmitter. The measured SAR levels evaluated are incompliance with the FCC RF exposure guidelines. Eee PC T91 Max. SAR Measurement (1g) AR5B95 (AW-NE785H) 11b: 0.844 W/kg 11g: 0.457 W/kg 11n 20M: 0.314 W/kg 11n 40M: 0.258 W/kg - Asus T91MT | User Manual - Page 60
antenna during transmitting. End users must follow the specific operating instructions for satisfying RF exposure compliance. Operation is subject to the licensed service (i.e. co-channel Mobile Satellite systems) this device is intended to be operated indoors and away from windows to provide - Asus T91MT | User Manual - Page 61
Eee PC T91 Max. SAR Measurement (1g) AR5B95 (AW-NE785H) 11b: 0.844 W/kg 11g: 0.457 W/kg 11n 20M: 0.314 W/kg 11n 40M: 0.258 W/kg This device Class [B] digital apparatus complies with Canadian ICES-003. Cet appareil numérique de la classe [B] est conforme à la norme NMB-003 du Canada ASUS Eee PC A-5 - Asus T91MT | User Manual - Page 62
property or on the private property of public persons, use is subject to a preliminary authorization procedure by the Ministry of Defense, with maximum authorized power of 100mW in the 2446.5-2483.5 MHz band. Use outdoors on public property is not permitted. In the departments listed below, for the - Asus T91MT | User Manual - Page 63
, for example, near a bath tub, wash bowl, kitchen sink or laundry tub, in a wet basement or near a swimming pool. • DO NOT use the Eee PC during an electrical storm. There may be a remote risk of electric shock from lightning. • DO NOT use the Eee PC in the vicinity of a gas leak. ASUS Eee PC A-7 - Asus T91MT | User Manual - Page 64
energy into electrical energy by an irreversible or reversible chemical reaction. • Do not dispose the Eee PC battery pack in a fire, as they may explode. Check with local codes for possible special disposal instructions to reduce the risk of injury to persons due to fire or explosion. • Do not - Asus T91MT | User Manual - Page 65
. Kassera använt batteri enligt fabrikantens instruktion. (Swedish) VAROITUS! Paristo voi räjähtää, jos se on virheellisesti asennettu. Vaihda paristo ainoastaan laitevalmistajan sousittelemaan tyyppiin. Hävitä käytetty paristo valmistagan ohjeiden mukaisesti. (Finnish) ASUS Eee PC A-9 - Asus T91MT | User Manual - Page 66
type ou d'un type équivalent recommandé par le constructeur. Mettre au rebut les batteries usagées conformément aux instructions du fabricant. (French) ADVARSEL! Eksplosjonsfare ved feilaktig skifte av batteri. Benytt samme batteritype eller en tilsvarende type anbefalt av apparatfabrikanten. Brukte - Asus T91MT | User Manual - Page 67
. SPECIFICATIONS AND INFORMATION CONTAINED IN THIS MANUAL ARE ASUS. ASUS ASSUMES NO RESPONSIBILITY OR LIABILITY FOR ANY ERRORS OR INACCURACIES THAT MAY APPEAR IN THIS MANUAL, INCLUDING THE PRODUCTS AND SOFTWARE DESCRIBED IN IT. Copyright © 2009 ASUSTeK COMPUTER INC. All Rights Reserved. ASUS Eee PC - Asus T91MT | User Manual - Page 68
duties under this Warranty Statement, up to the listed contract price of each product. ASUS will only be responsible for or indemnify you for loss, ASUS, ITS SUPPLIERS OR YOUR RESELLER IS INFORMED OF THEIR POSSIBILITY. Service and Support Visit our multi-language web site at http://support.asus
-
 1
1 -
 2
2 -
 3
3 -
 4
4 -
 5
5 -
 6
6 -
 7
7 -
8
-
9
-
10
-
11
-
12
-
13
-
14
-
15
-
16
-
17
-
18
-
19
-
20
-
21
-
22
-
23
-
24
-
25
-
26
-
27
-
28
-
29
-
30
-
31
-
32
-
33
-
34
-
35
-
36
-
37
-
38
-
39
-
40
-
41
-
42
-
43
-
44
-
45
-
46
-
47
-
48
-
49
-
50
-
51
-
52
-
53
-
54
-
55
-
56
-
57
-
58
-
59
-
60
-
61
-
62
-
63
-
64
-
65
-
66
-
67
-
68
 |
 |

15G06Q142001
Eee PC
User Manual
Windows
®
XP Edition
Eee PC T91
E4887
ESC
Tab
Q
W
E
R
T
Y
U
I
O
P
L
K
Alt
Alt
Ctrl
Ctrl
Fn
J
H
G
F
D
S
A
B
V
M
<
>
.
.
,
?
N
C
X
Z
Caps Lock
{
[
:
;
}
]
F1
F2
F3
F4
F5
F6
F7
F8
F9
F10
F11
F12
Pause
Break
Prt Sc
Insert
Delete
Enter
Backspace
=
)
0
(
9
8
7
7
8
9
4
5
6
1
0
2
3
5
%
4
$
3
2
!
&
Shift
Shift
1
6
Num LK
Home
PgUp
PgDn
End
Scr LK
#
@
~
SysRq