Asus U31SG User Manual - Page 61
Emergency eject, Removing an optical disc
 |
View all Asus U31SG manuals
Add to My Manuals
Save this manual to your list of manuals |
Page 61 highlights
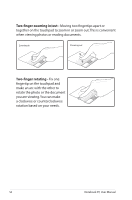
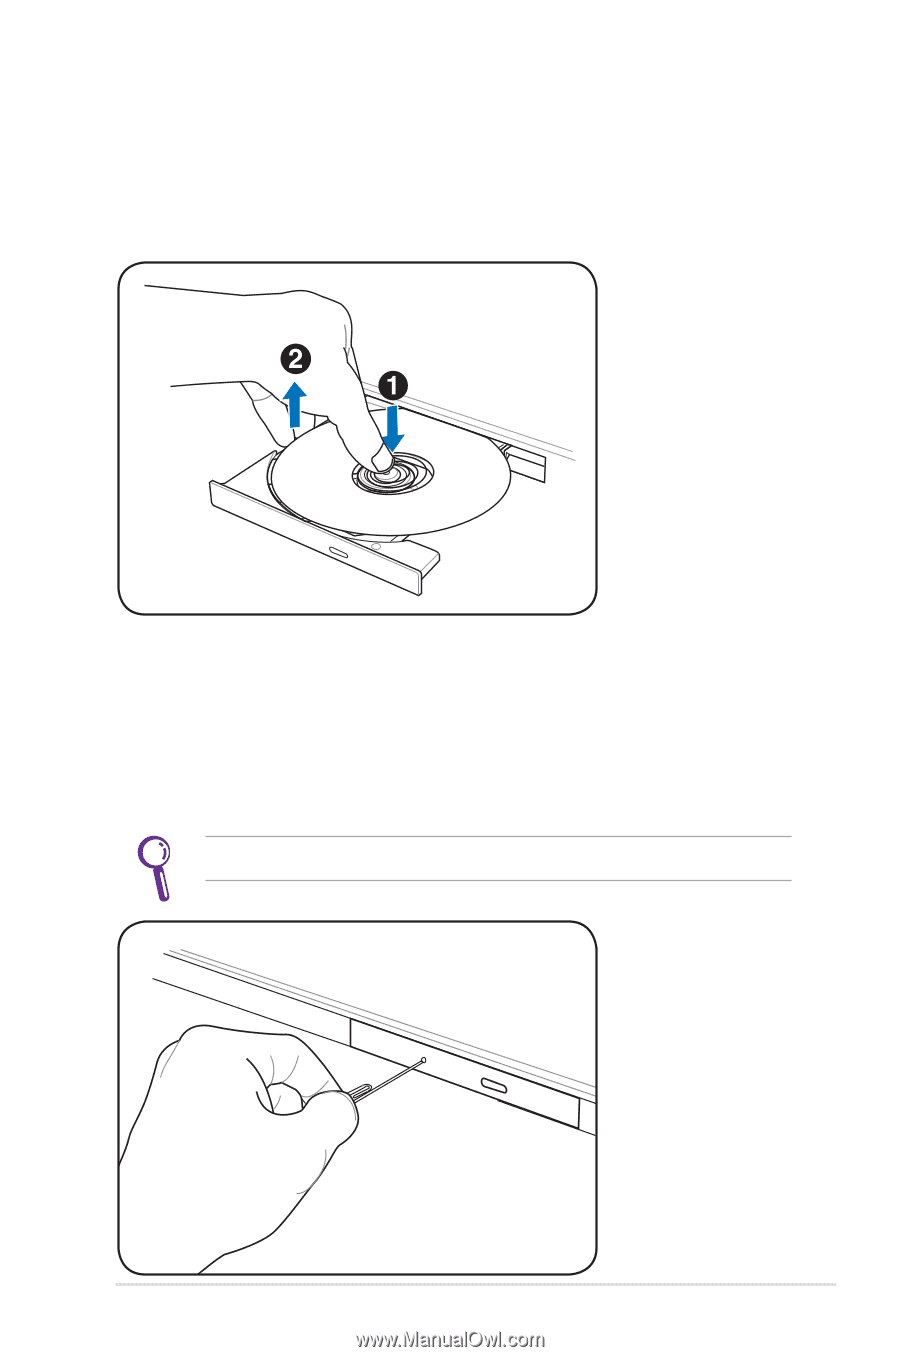
Removing an optical disc Eject the tray and gently pry the edge of the disc upwards at an angle to remove the disc from the hub. Emergency eject The emergency eject is located in a hole on the optical drive and is used to eject the optical drive tray in case the electronic eject does not work. Do not use the emergency eject in place of the electronic eject. Ensure not to stab the activity indicator located in the same area. Actual location will vary by model. Notebook PC User Manual 61
-
 1
1 -
2
-
3
-
4
-
5
-
6
-
7
-
8
-
9
-
10
-
11
-
12
-
13
-
14
-
15
-
16
-
17
-
18
-
19
-
20
-
21
-
22
-
23
-
24
-
25
-
26
-
27
-
28
-
29
-
30
-
31
-
32
-
33
-
34
-
35
-
36
-
37
-
38
-
39
-
40
-
41
-
42
-
43
-
44
-
45
-
46
-
47
-
48
-
49
-
50
-
51
-
52
-
53
-
54
-
55
-
 56
56 -
 57
57 -
 58
58 -
 59
59 -
 60
60 -
 61
61 -
 62
62 -
 63
63 -
 64
64 -
 65
65 -
 66
66 -
67
-
68
-
69
-
70
-
71
-
72
-
73
-
74
-
75
-
76
-
77
-
78
-
79
-
80
-
81
-
82
-
83
-
84
-
85
-
86
-
87
-
88
-
89
-
90
-
91
-
92
-
93
-
94
-
95
-
96
-
97
-
98
-
99
-
100
-
101
-
102
-
103
-
104
-
105
-
106
-
107
-
108
-
109
-
110
-
111
-
112
-
113
-
114
-
115
-
116
 |
 |
Notebook PC User Manual
61
Actual location will vary
by model.
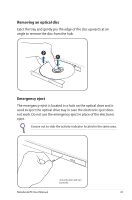
Emergency eject
The emergency eject is located in a hole on the optical drive and is
used to eject the optical drive tray in case the electronic eject does
not work. Do not use the emergency eject in place of the electronic
eject.
Ensure not to stab the activity indicator located in the same area.
Removing an optical disc
Eject the tray and gently pry the edge of the disc upwards at an
angle to remove the disc from the hub.