Asus VN247N VN247 Series User Guide for English Edition - Page 13
Detaching the arm/stand for VESA wall, mount - vn247 p
 |
View all Asus VN247N manuals
Add to My Manuals
Save this manual to your list of manuals |
Page 13 highlights
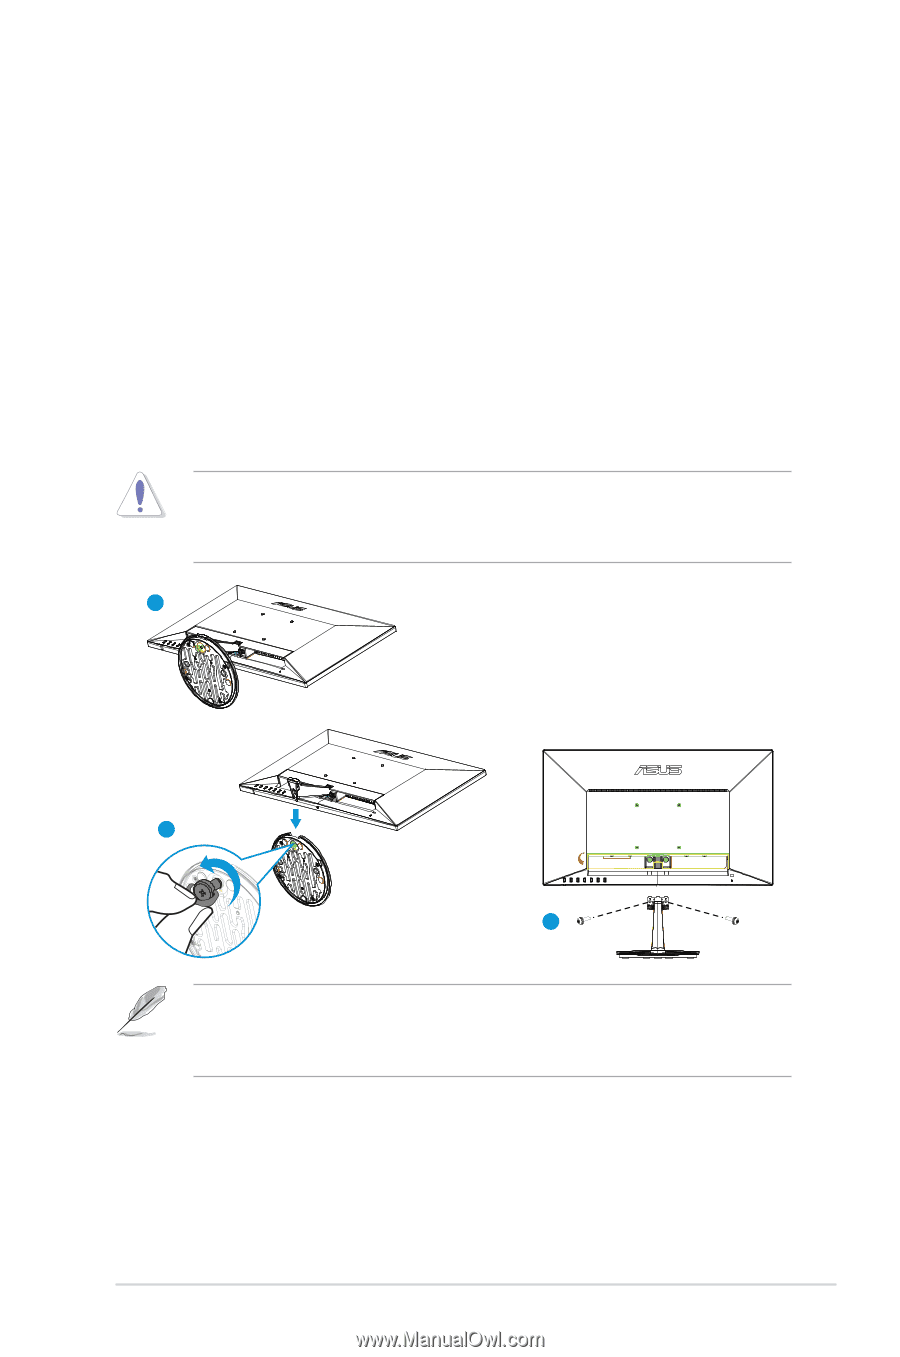
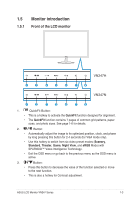
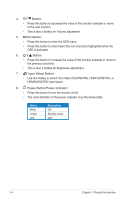
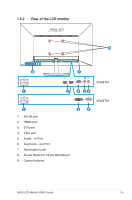
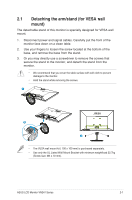
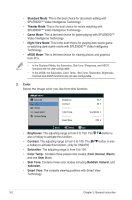
2.1 Detaching the arm/stand (for VESA wall mount) The detachable stand of this monitor is specially designed for VESA wall mount. 1. Disconnect power and signal cables. Carefully put the front of the monitor face down on a clean table. 2. Use your fingers to loosen the screw located at the bottom of the base, and remove the base from the stand. 3. Or you may directly use a screwdriver to remove the screws that secure the stand to the monitor, and detach the stand from the monitor. • We recommend that you cover the table surface with soft cloth to prevent damage to the monitor. • Hold the stand while removing the screws. 1 2 3 • The VESA wall mount kit ( 100 x 100 mm) is purchased separately. • Use only the UL Listed Wall Mount Bracket with minimum weight/load 22.7kg (Screw size: M4 x 10 mm). ASUS LCD Monitor VN247 Series 2-1
-
 1
1 -
2
-
3
-
4
-
5
-
6
-
7
-
 8
8 -
 9
9 -
 10
10 -
 11
11 -
 12
12 -
 13
13 -
 14
14 -
 15
15 -
 16
16 -
 17
17 -
 18
18 -
19
-
20
-
21
-
22
 |
 |