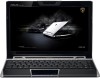
Asus VX6-PU17-WT User Manual
Asus VX6-PU17-WT Manual
 |
View all Asus VX6-PU17-WT manuals
Add to My Manuals
Save this manual to your list of manuals |
Asus VX6-PU17-WT manual content summary:
- Asus VX6-PU17-WT | User Manual - Page 1
E5849 Eee PC User Manual Windows® 7 Edition Eee PC VX6 - Asus VX6-PU17-WT | User Manual - Page 2
1-12 Chapter 2: Getting Started Powering on your Eee PC...2-2 First-time Startup...2-3 Desktop...2-5 Network Connection...2-6 Configuring a wireless network connection 2-6 Local Area Network 2-7 Browsing web pages 2-10 Chapter 3: Using the Eee PC ASUS Update...3-2 Updating the BIOS - Asus VX6-PU17-WT | User Manual - Page 3
A-4 CE Marking...A-4 IC Radiation Exposure Statement for Canada A-5 Wireless Operation Channel for Different Domains A-6 France Services A-9 Nordic Lithium Cautions (for lithium-ion batteries A-10 Copyright Information...A-12 Limitation of Liability...A-13 Service and Support...A-13 ASUS Eee PC - Asus VX6-PU17-WT | User Manual - Page 4
by models and territories. There may be differences between your Eee PC and the pictures shown in this manual. Please accept your Eee PC as being correct. Notes for This Manual A few notes and warnings are used throughout this guide, allowing you to complete certain tasks safely and effectively - Asus VX6-PU17-WT | User Manual - Page 5
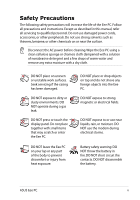
Safety Precautions The following safety precautions will increase the life of the Eee PC. Follow all precautions and instructions. Except as described in this manual, refer all servicing to qualified personnel. Do not use damaged power cords, accessories, or other peripherals. Do not use strong - Asus VX6-PU17-WT | User Manual - Page 6
Eee PC in municipal waste. This product has been designed to enable proper reuse of parts and recycling.The symbol of the crossed out wheeled bin indicates that the product (electrical, electronic equipment and mercury-containing button cell battery) should not be placed in municipal waste. Check - Asus VX6-PU17-WT | User Manual - Page 7
an AC power source. Be aware that it takes much longer to charge the battery pack when the Eee PC is in use. Remember to fully charge the battery (8 hours or more) before first use and whenever it is depleted to prolong battery life.The battery reaches its maximmum capacity after a few full charging - Asus VX6-PU17-WT | User Manual - Page 8
viii Table of Contents - Asus VX6-PU17-WT | User Manual - Page 9
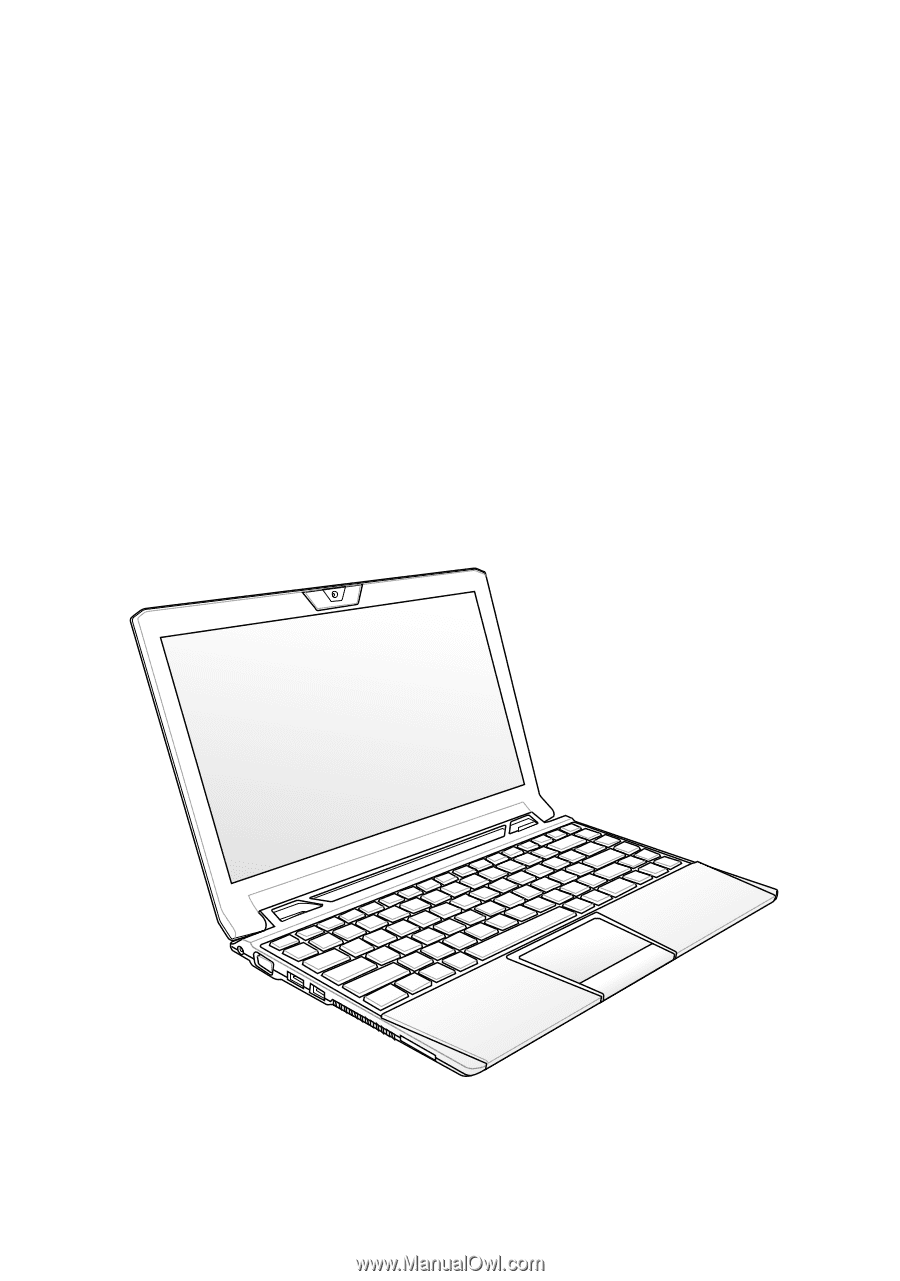
Top Side Bottom Side Front Side Right Side Left Side Keyboard Usage Touchpad Usage 1 Chapter 1: Knowing the Parts - Asus VX6-PU17-WT | User Manual - Page 10
Top Side Refer to the diagram below to identify the components on this side of the Eee PC. The top side may vary in appearance depending on models. 1 2 3 4 5 6 7 8 The keyboard differs for each territory. 1-2 Chapter 1: Knowing the Parts - Asus VX6-PU17-WT | User Manual - Page 11
the Eee PC is turned OFF. 6 Keyboard 7 Touchpad and Buttons 8 Status Indicators Power Indicator The power indicator lights when the Eee PC is turned ON and blinks slowly when the Eee PC is in the Save-to-RAM (Sleep) mode. This indicator is OFF when the Eee PC is turned OFF. ASUS Eee PC - Asus VX6-PU17-WT | User Manual - Page 12
10%) Orange Blinking Powered OFF / Standby mode Without Adapter Off Off Orange Blinking With Adapter High battery power (95%- 100%) Green ON Medium battery power (11%-94%) Orange ON Low battery power (0%-10%) Orange Blinking Without Adapter Off Off Off Hard Disk Drive (HDD) Indicator The - Asus VX6-PU17-WT | User Manual - Page 13
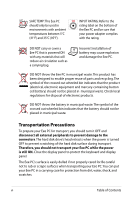
block the vents. DO NOT PUT THE Eee PC ON YOUR LAP OR OTHER PARTS OF THE BODY TO AVOID INJURY FROM THE HEAT. 1 Battery Pack Battery time varies by usage and by the specifications for this Eee PC.The battery pack cannot be disassembled and must be purchased as a single unit. ASUS Eee PC 1-5 - Asus VX6-PU17-WT | User Manual - Page 14
locks in place. To remove the battery pack, slide the battery lock inward. 3 Memory Compartment The memory module is secured in a dedicated compartment. Front Side Refer to the diagram below to identify the components on this side of the Eee PC. 1 1 Audio Speaker System Audio features are - Asus VX6-PU17-WT | User Manual - Page 15
side of the Eee PC. 12 3 45 1 Headphone Output Jack 2 Microphone Jack The microphone jack is designed to connect the bit) The eight-pin RJ-45 LAN port supports a standard Ethernet cable for connection to a local network. 5 Kensington® Lock port The Kensington® lock port allows the Eee PC - Asus VX6-PU17-WT | User Manual - Page 16
side of the Eee PC. 12 34 5 6 1 Power (DC) Input The supplied power adapter converts AC power to DC power for use with this jack. Power supplied through this jack supplies power to the Eee PC and charges the internal battery pack.To prevent damage to the Eee PC and battery pack, always use - Asus VX6-PU17-WT | User Manual - Page 17
5 Air Vents The air vents allow cool air to enter and warm air to exit the Eee PC. Ensure that paper, books, clothing, cables, or other objects do not block any of the air vents or else overheating may occur. 6 Memory Card Slot - Asus VX6-PU17-WT | User Manual - Page 18
your hot key locations do not match the manual. Zz Icon (F1): Places the Eee PC in suspend mode (Save-to-RAM). Radio Tower (F2) (Wireless Models Only):Toggles the internal wireless LAN or Bluetooth (on selected models) ON or OFF with an on-screen-display. When enabled, the corresponding wireless - Asus VX6-PU17-WT | User Manual - Page 19
icon: Displays the start menu. Menu with pointer icon : Activates the properties menu and is equivalent to right-clicking the touchpad/mouse on an object. ASUS Eee PC 1-11 - Asus VX6-PU17-WT | User Manual - Page 20
arc with the other to rotate the photo or the document you are viewing. You can make a clockwise or counterclockwise rotation based on your needs. 1-12 Chapter 1: Knowing the Parts - Asus VX6-PU17-WT | User Manual - Page 21
to swipe pages. Swipe from left to the right to view the next page or right to the left to return to the previous pages. ASUS Eee PC 1-13 - Asus VX6-PU17-WT | User Manual - Page 22
1-14 Chapter 1: Knowing the Parts - Asus VX6-PU17-WT | User Manual - Page 23
Powering on your Eee PC First-time Startup Desktop Network Connection 2 Chapter 2: Getting Started - Asus VX6-PU17-WT | User Manual - Page 24
your Eee PC These are only quick instructions for using your Eee PC. 1. Install the battery pack 2. Connect the AC power adapter 2 1 3 110V-220V 3. Turn ON the Eee PC Damage may occur if you use a different adapter to power the Eee PC. You may damage both your battery pack(s) and the Eee PC - Asus VX6-PU17-WT | User Manual - Page 25
time you start your Eee PC, the Windows wizard will launch automatically and lead you through setting up your preferences and some basic information. Follow the wizard instructions to finish the initialization: if you want. Click then click Next to continue. Next to continue. ASUS Eee PC 2-3 - Asus VX6-PU17-WT | User Manual - Page 26
5. Read the end user license 6. Click Use recommended agreement and check the settings to get the latest two boxs before I accept the important updates. license terms. Click Next to continue. 7. Specify the time zone you are 8. - Asus VX6-PU17-WT | User Manual - Page 27
-click them to launch the corresponding applications and enter the specified folders. Some applications would form minimized icons in the Notification area. The actual Desktop screen may vary according to different models. ASUS Eee PC 2-5 - Asus VX6-PU17-WT | User Manual - Page 28
Network Connection Configuring a wireless network connection 1. Click the wireless network icon with an orange star Windows® Notification area. in the If the wireless network icon with an orange star does not show in the Notification area, activate the wireless LAN function by pressing + ( + - Asus VX6-PU17-WT | User Manual - Page 29
Local Area Network To establish a wired network, follow the instructions below: Using a dynamic IP / PPPoE network connection: 1. Click the network icon with a yellow warning Change adapter settings in the left blue pane. 3. Right-click Local Area Connection and select Properties. ASUS Eee PC 2-7 - Asus VX6-PU17-WT | User Manual - Page 30
4. Click Internet Protocol Version 4(TCP/IPv4) and click Properties. 5. Click Obtain an IP address automatically and click OK. (Continue the following steps if using PPPoE) 6. Return to the Network and Sharing Center and then click Set up a new connection or network. 2-8 Chapter 2: Getting - Asus VX6-PU17-WT | User Manual - Page 31
name. Click Connect. 10. Click Close to finish the configuration. 11. Click the network icon in the taskbar and click the connection you just created. 12. Enter your user name and password. Click Connect to connect to the Internet. ASUS Eee PC 2-9 - Asus VX6-PU17-WT | User Manual - Page 32
connection. Contact your Internet Service Provider (ISP) if you have problems connecting to the network. Browsing web pages After you finish the network setup, click Internet Explorer on the desktop and start enjoying net surfing. Visit our Eee PC homepage (http://eeepc.asus.com) to obtain the - Asus VX6-PU17-WT | User Manual - Page 33
ASUS Update Bluetooth Connection (on selected models) Super Hybrid Engine Eee Docking 3 Chapter 3: Using the Eee PC - Asus VX6-PU17-WT | User Manual - Page 34
. This utility is pre-loaded in your Eee PC. ASUS Update requires an Internet connection either through a network or an Internet Service Provider (ISP). Updating the BIOS through the Internet To update the BIOS through the Internet 1. Launch the ASUS Update utility from the Windows® desktop by - Asus VX6-PU17-WT | User Manual - Page 35
> ASUS > ASUSUpdate for EeePC> ASUSUpdate. The ASUS Update main window appears. 2. Select Update BIOS from file from the drop‑down menu, then click Next. 3. Locate the BIOS file from the Open window, then click Open. 4. Follow the screen instructions to complete the update process. ASUS Eee PC 3-3 - Asus VX6-PU17-WT | User Manual - Page 36
need for cables for connecting Bluetooth-enabled devices. Examples of Bluetooth-enabled devices may be Notebook PCs, Desktop PCs, mobile phones, and PDAs. To connect to a Bluetooth-enabled device: 1. Press Connection and select View Bluetooth Network Devices. 3-4 Chapter 3: Using the Eee PC - Asus VX6-PU17-WT | User Manual - Page 37
4. Click Add a device to look for 5. Select a Bluetooth-enabled new devices. device from the list and click Next. 6. Enter the Bluetooth security code into your device and start pairing. 7. The paired relationship is successfully built. Click Close to finish the setting. ASUS Eee PC 3-5 - Asus VX6-PU17-WT | User Manual - Page 38
. The power saving modes control many aspects of your Eee PC to maximize performance versus battery time.The selected mode is shown on the display. To change the power mode • Click Start > All Programs > ASUS > EeePC > SuperHybridEngine > SuperHybridEngine. • Right-click the Super Hybrid Engine icon - Asus VX6-PU17-WT | User Manual - Page 39
, Live TV and Games, etc. The ASUS @Vibe service contents differ for each territory. Game Park Game Park includes multiple interesting games. ASUS AP Bank ASUS AP Bank offers various software applications and multimedia enjoyment online. ASUS WebStorage Eee PC users can enjoy free online space. With - Asus VX6-PU17-WT | User Manual - Page 40
and blue independently. Tools Live Update Live Update keeps your Eee PC up-to-date by checking the online updates. USB Charge+ USB Charge+ functions to you to choose from, Adapter Mode, or Adapter + Battery Mode. USB Charge+ is disabled while your Eee PC is powered on, and the USB port will be used - Asus VX6-PU17-WT | User Manual - Page 41
Font Resizer Font Resizer allows you to adjust the font/text size on your Eee PC screen. LocaleMe LocaleMe is a web mapping service application, offering easy search for streets or companies sorted by multiple categories all over the world. Locale Me requires an Internet connection to operate. - Asus VX6-PU17-WT | User Manual - Page 42
3-10 Chapter 3: Using the Eee PC - Asus VX6-PU17-WT | User Manual - Page 43
System Recovery Boot Booster 4 Chapter 4: System Recovery - Asus VX6-PU17-WT | User Manual - Page 44
Boot Booster in BIOS setup before you perform system recovery from USB flash disk, external optical drive or hidden partition. Ensure to connect your Eee PC to the AC system recovery automatically and follow the onscreen instructions to complete the recovery process. 4-2 Chapter 4: System Recovery - Asus VX6-PU17-WT | User Manual - Page 45
16GB. • Memory cards are not supported for this function. • A dialog box appears as a reminder if you have not connected the USB storage device for system recovery backup to your Eee PC. 3. Select a desired USB data beforehand 5. The system backup starts and click OK when done. ASUS Eee PC 4-3 - Asus VX6-PU17-WT | User Manual - Page 46
the Please select boot device screen appears. Select USB: XXXXXX to boot from the connected USB storage device. Please select boot device: HDD:SM-ASUS-PHISON SSD USB:XXXXXXXX ↑ and as drive"D". 6. Follow the onscreen instructions to complete the recovery process. 4-4 Chapter 4: System Recovery - Asus VX6-PU17-WT | User Manual - Page 47
you MUST disable this BIOS item before you change any Eee PC components or perform system recovery (from USB flash disk, external optical drive or hidden partition). Follow the instructions below to disable Boot Booster: 1. Start the system and press on bootup to show the POST screen. Press - Asus VX6-PU17-WT | User Manual - Page 48
4-6 Chapter 4: System Recovery - Asus VX6-PU17-WT | User Manual - Page 49
Declarations and Safety Statements Copyright Information Limitation of Liability Service and Support A Appendix - Asus VX6-PU17-WT | User Manual - Page 50
cause undesired operation. This equipment has been tested and found to comply with the limits for (FCC) rules. These limits are designed to provide reasonable protection against harmful interference installed and used in accordance with the instructions, may cause harmful interference to radio - Asus VX6-PU17-WT | User Manual - Page 51
maintain compliance with FCC RF exposure compliance requirements, please avoid direct contact to the transmitting antenna during transmitting. End users must follow the specific operating instructions for satisfying RF exposure compliance. ASUS Eee PC A-3 - Asus VX6-PU17-WT | User Manual - Page 52
for electromagnetic compatibility in [EN 301 489-1] & [EN 301 489-17] • Effective use of the radio spectrum as in [Article 3.2] • Radio test suites according to [EN 300 328-2] CE Marking CE marking for devices without wireless LAN/Bluetooth The shipped version of this device complies with the - Asus VX6-PU17-WT | User Manual - Page 53
the specific operating instructions for satisfying RF radio interference to the licensed service (i.e. co-channel Mobile Satellite CANADA. This Class [B] digital apparatus complies with Canadian ICES-003. Cet appareil numérique de la classe [B] est conforme à la norme NMB-003 du Canada ASUS Eee PC - Asus VX6-PU17-WT | User Manual - Page 54
: 01 Ain 05 Hautes Alpes 11 Aude 24 Dordogne 32 Gers 41 Loir et Cher 55 Meuse 60 Oise 64 Pyrénées Atlantique 02 Aisne 03 Allier 08 Ardennes 09 Ariège 12 Aveyron 25 Doubs 36 Indre 16 Charente 26 Drôme 37 Indre et Loire 45 Loiret 50 Manche 58 - Asus VX6-PU17-WT | User Manual - Page 55
use your wireless LAN card in more areas within France. Please check with ART for the latest information (www.art-telecom.fr) the Eee PC during an electrical storm. There may be a remote risk of electric shock from lightning. • DO NOT use the Eee PC in the vicinity of a gas leak. ASUS Eee PC - Asus VX6-PU17-WT | User Manual - Page 56
. • Do not dispose the Eee PC battery pack in a fire, as they may explode. Check with local codes for possible special disposal instructions to reduce the risk of injury published the chemical substances in our products at ASUS REACH website at http://csr.asus.com/english/REACH.htm. A-8 Appendix - Asus VX6-PU17-WT | User Manual - Page 57
Regulation Compliance and Declaration ASUS follows the green design concept to design and manufacture our products, and makes sure that each stage of the product life cycle of ASUS product is in line with global environmental regulations. In addition, ASUS disclose the relevant information - Asus VX6-PU17-WT | User Manual - Page 58
Lithium Cautions (for lithium-ion batteries) CAUTION! Danger of explosion if battery is incorrectly replaced. Replace only with the same or equivalent type recommended by the manufacturer. Dispose of used batteries according to the manufacturer's instructions. (English) ATTENZIONE! Rischio di - Asus VX6-PU17-WT | User Manual - Page 59
aux instructions du fabricant. (French) ADVARSEL! Eksplosjonsfare ved feilaktig skifte av batteri. Benytt samme batteritype eller en tilsvarende type anbefalt av apparatfabrikanten. Brukte batterier kasseres i henhold til fabrikantens instruksjoner. (Norwegian) (Japanese) Russian) ASUS Eee PC - Asus VX6-PU17-WT | User Manual - Page 60
of ASUSTeK COMPUTER INC. ("ASUS"). ASUS PROVIDES THIS MANUAL "AS IS"WITHOUT WARRANTY OF . SPECIFICATIONS AND INFORMATION CONTAINED IN THIS MANUAL ARE FURNISHED FOR INFORMATIONAL USE ONLY, ASUS. ASUS ASSUMES NO RESPONSIBILITY OR LIABILITY FOR ANY ERRORS OR INACCURACIES THAT MAY APPEAR IN THIS MANUAL - Asus VX6-PU17-WT | User Manual - Page 61
under this Warranty Statement, up to the listed contract price of each product. ASUS will only be responsible for or indemnify you for loss ASUS, ITS SUPPLIERS OR YOUR RESELLER IS INFORMED OF THEIR POSSIBILITY. Service and Support Visit our multi-language web site at http://www.asus.com ASUS Eee PC - Asus VX6-PU17-WT | User Manual - Page 62
Manufacturer Address, City Country Authorized Representative in Europe Address, City Country ASUSTek COMPUTER INC. No. 150, LI-TE RD., PEITOU, TAIPEI 112, TAIWAN R.O.C TAIWAN ASUS COMPUTER GmbH HARKORT STR. 21-23, 40880 RATINGEN GERMANY A-14 Appendix
-
 1
1 -
 2
2 -
 3
3 -
 4
4 -
 5
5 -
 6
6 -
 7
7 -
8
-
9
-
10
-
11
-
12
-
13
-
14
-
15
-
16
-
17
-
18
-
19
-
20
-
21
-
22
-
23
-
24
-
25
-
26
-
27
-
28
-
29
-
30
-
31
-
32
-
33
-
34
-
35
-
36
-
37
-
38
-
39
-
40
-
41
-
42
-
43
-
44
-
45
-
46
-
47
-
48
-
49
-
50
-
51
-
52
-
53
-
54
-
55
-
56
-
57
-
58
-
59
-
60
-
61
-
62
 |
 |
Eee PC
User Manual
Windows
®
7 Edition
Eee PC VX6
E5849