Audiovox CE710CR Owners Manual
Audiovox CE710CR - CE Clock Radio Manual
 |
UPC - 044476051296
View all Audiovox CE710CR manuals
Add to My Manuals
Save this manual to your list of manuals |
Audiovox CE710CR manual content summary:
- Audiovox CE710CR | Owners Manual - Page 1
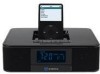
DOCKING DIGITAL MUSIC SYSTEM FOR iPod® ESTACIÓN DE SISTEMA DE MÚSICA DIGITAL PARA iPod® CONNEXION DU SYSTEME MUSICAL DIGITAL POUR iPod® OWNER'S MANUAL MANUAL DEL USUARIO/GUIDE DU PROPRIETAIRE CE710CR (iPod® Not Included/iPod® No Incluido/iPod® non inclus) PLEASE READ THIS OPERATING MANUAL COMPLETELY - Audiovox CE710CR | Owners Manual - Page 2
- Audiovox CE710CR | Owners Manual - Page 3
of Controls...6 iPod® Adaptors ...8 Radio Operation ...9 iPod Docking ...10 Docking 1st and 2nd Generation iPod Nanos 11 Video Out from the iPod® ...12 Auxiliary Input ...13 Clock and Calendar Settings ...13 Alarm Operations...14 Care and Maintenance ...15 Troubleshooting Guide ...16 Specifications - Audiovox CE710CR | Owners Manual - Page 4
des Maitieres Cher Client Audiovox...37 Instructions de Securite Importante...38 Conformite Avec des Reglements FCC...40 Product Features ...40 Installation ...41 Emplacement des Controles ...42 iPod® Adaptors ...44 Operations Radio...45 Radio Operation ...46 iPod Docking ...47 Branchement 1ère et - Audiovox CE710CR | Owners Manual - Page 5
DEAR AUDIOVOX CUSTOMER Selecting fine audio equipment such as the unit you've just purchased is only the start of your musical enjoyment. Now the space provided as a permanent record of your purchase to aid in identification in the event of theft of loss. Model Number: CE710CR Serial Number 1 - Audiovox CE710CR | Owners Manual - Page 6
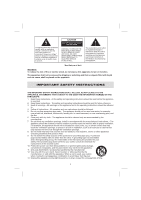
or splashing and that no objects filled with liquid such as vases, shall be placed on the apparatus. IMPORTANT SAFETY INSTRUCTIONS THE IMPORTANT SAFETY INSTRUCTIONS SHALL INCLUDE, AS APPLICABLE TO THE APPLIANCE, STATEMENTS THAT CONVEY TO THE USER THE INFORMATION ITEMIZED IN THIS PARAGRAPH: 1. Read - Audiovox CE710CR | Owners Manual - Page 7
to proper grounding of the mast and supporting structure, grounding of the lead-in wire instructions. All other servicing should be referred to qualified service personnel. 21. All markings are located on the exterior bottom enclosure of the apparatus. 22. CAUTION: Danger of explosion if battery - Audiovox CE710CR | Owners Manual - Page 8
the dealer or an experienced radio/TV technician for help. CAUTION: Changes or modifications not expressly approved by the party responsible for compliance could void the user's authority to operate the equipment. PRODUCT FEATURES CE710CR is an iPod® Docking Music System which incorporates the - Audiovox CE710CR | Owners Manual - Page 9
following the polarity markings shown on it. 3. Replace the battery door on the battery compartment. NOTE: Please disconnect the main power from the unit before replacing the clock back-up batteries. WARNING: • Be sure that the batteries are installed correctly. Wrong polarity may damage the unit - Audiovox CE710CR | Owners Manual - Page 10
® Dock 2. iPod® Docking Connector 3. POWER On/Off Button - To turn the unit on or off 4. VOLUME +/- Buttons - Adjust the volume level up or down 5. SNOOZE/LIGHT Button - Activate the snooze function; Turn the LCD backlight on or off 6. TUN +/- /iPod / Buttons - Tune the radio channel frequency up - Audiovox CE710CR | Owners Manual - Page 11
On/Off Button 6. SNOOZE/LIGHT Button 7. TUN Up/Down Buttons for Down, for Up 8. CH +/- Buttons 9. MEM Button 10. MODE Button 11. SLEEP Button 12. iPod® Skip/Search Forward/Backward Buttons for Backward, for Forward. 13. iPod® PLAY/PAUSE 14. Battery Compartment 7 - Audiovox CE710CR | Owners Manual - Page 12
® ADAPTORS Please see below for the iPod® Adaptor included in the package: iPod Models iPod Adaptor Docking Cover iPod® Nano (1st and 2nd Gen) iPod® Mini 3Gen iPod® 10/15GB 4Gen iPod® 20GB iPod® Photo 20/30GB 3Gen iPod® 30/40GB 4Gen iPod® 40GB iPod® Photo 40/60GB NOTE: No adaptors are provided - Audiovox CE710CR | Owners Manual - Page 13
FM Antenna Terminal as instructed in the section "INSTALLATION". Fully extend the FM Antenna Wire for maximum reception. Radio Tuning 1. Press the will stop scanning when a strong signal is reached. NOTE: Use manual tuning to select weaker stations that might be bypassed during automatic tuning. - Audiovox CE710CR | Owners Manual - Page 14
NOTE:The volume level cannot be adjusted by the volume control of your iPod® after being docked. 6. The iPod® is charging even during playback. NOTE:The recharge function still operates in Radio, iPod and AUX mode. 7. To remove the iPod® from the unit, press and hold the PLAY/PAUSE button for three - Audiovox CE710CR | Owners Manual - Page 15
bottom of the nano is positioned over the connector in the CE710CR dock prior to seating the nano. Carefully slide the nano down onto the connector in order to insure a secure connection. 2nd Generation iPod nano: Align your 2nd generation iPod® Nano in the RIGHT of the opening in the nano bracket - Audiovox CE710CR | Owners Manual - Page 16
Library and then press play. The slideshow will play on your device. Note: 1. For the initial docking of the iPod(3Gen) nano,iPod clasic and iPod touch, you may wait for the finish- ing of iPod authentication process then the video signal output to your TV screen on monitor. 2. The RCA Video input - Audiovox CE710CR | Owners Manual - Page 17
player, MP3 player or other non-dockable iPods to the unit. 1. Keep turning the adjust the volume using the CE710CR control. If you're connected using the CLOCK AND CALENDAR SETTINGS The clock and calendar can be set in Power Off mode. Clock Setting 1. Press the MODE button 3 times, the clock - Audiovox CE710CR | Owners Manual - Page 18
is in Power Off mode: 1. Press the MODE button once. The alarm clock display flashes now. 2. Press the TUN +/- button to set the alarm hour . • To stop the radio alarm sound immediately, press the ALARM On/Off button once. Wake to iPod® ( iPod) • Your docked iPod will automatically switch on when - Audiovox CE710CR | Owners Manual - Page 19
CARE AND MAINTENANCE • Do not subject the unit to excessive force, shock, dust or extreme temperature. • Do not tamper the internal components of the unit. • Clean your unit with a dry cloth only. Solvent or detergent should never be used. • Avoid leaving your unit in direct sunlight or in hot, - Audiovox CE710CR | Owners Manual - Page 20
TROUBLESHOOTING GUIDE Sympton Possible Problem The unit does not respond AC power plug is not plugged into a (no power) wall outlet Wall outlet is not functioning iPod® does not dock prop- Using wrong/no iPod® adaptor erly iPod® does not install properly. iPod® does not respond to iPod® is - Audiovox CE710CR | Owners Manual - Page 21
SPECIFICATIONS Power Requirement Input AC120V/60Hz Battery Back-up for Clock 2 x 1.5V 'AAA'(UM-4) Batteries Remote Control 1 x CR2032 Lithium Battery Frequency Range USA's Radio Broadcast System FM 87.5 MHz - 108 MHz, 0.1 MHz tuning step EU's Radio Broadcast System FM 87.5 MHz - 108 MHz, 0.05 - Audiovox CE710CR | Owners Manual - Page 22
generated static or noise, to correction of antenna problems, to costs incurred for installation, removal, or reinstallation EVENT, SHALL THE COMPANY'S LIABILITY EXCEED THE PURCHASE PRICE PAID BY PURCHASER FOR THE PRODUCT. This Warranty is Audiovox Electronics Corporation, Hauppauge, New York 11788 1-800-645- - Audiovox CE710CR | Owners Manual - Page 23
ESTIMADO CLIENTE DE AUDIOVOX Seleccionando una buena unidad de audio como la que compró recién es solamente el inicio de su entretenimiento musical. como registro permanente de su compra para ayudar la identificación en el caso de robo o pérdida. Número de Modelo: CE710CR Número de Serie 19 - Audiovox CE710CR | Owners Manual - Page 24
*Vea Parte Inferior de la Unidad ADVERTENCIA: Para reducir el riesgo de incendio o choque eléctrico, no exponga este aparato a lluvia o humedad. El aparato no será expuesto al goteo o no se pondrá el salpicar y ningunos objetos llenados del líquido, tal como floreros, en el aparato. INSTRUCCIONES DE - Audiovox CE710CR | Owners Manual - Page 25
INSTRUCCIONES DE SEGURIDAD IMPORTANTES 14. Llame por cualquier arreglo al personal capacitado del servicio. El servicio es necesario cuando el aparato ha sido dañado en cualquier forma, por ejemplo cuando el cable de energía o el enchufe está dañado, cuando han derramado líquido o han tirado - Audiovox CE710CR | Owners Manual - Page 26
causa interferencias dañinas a la recepción de radio o de televisión, la cual se puede determinar CE710CR es una Sistema de Música de Estación de iPod® que incorpora las siguientes características: • Reproductor / Cargador iPod® , iPod® Mini, iPod® 1ra a 3ra Generación nano, iPod® clásico y iPod - Audiovox CE710CR | Owners Manual - Page 27
INSTALACIÓN Instalación de Baterías de Refuerzo del Reloj 1. Abra la puerta del compartimiento de la batería ubicada en la parte inferior de la unidad. 2. Instale dos baterías DC1.5V 'AAA' (UM-4) (no incluidas) en el compartimiento siguiendo las marcas de polaridad en el mismo. 3. Vuelva a colocar - Audiovox CE710CR | Owners Manual - Page 28
Activa la función de postergación; enciende o apaga la luz trasera del LCD 6. Botones TUN +/-/iPod / - Sintoniza la frecuencia del canal de radio hacia arriba o abajo; Saltear/buscar en iPod®. Botones de Avance/Retroceso - para Retroceso, para Avance. 7. Botones CH +/- - Seleccione las estaciones de - Audiovox CE710CR | Owners Manual - Page 29
Canales CH +/9. Botones de MEMORIA 10. Botón de MODE (modo) 11. Botón de Apagado Automático (SLEEP) 12. Botones de Avance/Retroceso y Saltear/Búsqueda de iPod® - para Retroceso, para Avance. 13. REPRODUCCIÓN/PAUSA de - Audiovox CE710CR | Owners Manual - Page 30
® Por favor, vea abajo por el Adaptador de iPod® incluido en el paquete. Modelos iPod® Adaptador de iPod® Cobertor de Estación iPod® Nano (1st y 2nd Gen) iPod® Mini 3Gen iPod® 10/15GB 4Gen iPod® 20GB iPod® Photo 20/30GB 3Gen iPod® 30/40GB 4Gen iPod® 40GB iPod® Photo 40/60GB NOTA: No se proveen - Audiovox CE710CR | Owners Manual - Page 31
Función (FUNCTION) repetidas veces hasta llegar al modo "FM". 3. En modo de radio FM, si es necesario, presione el botón de modo (MODE) para seleccionar la cuando alcance una señal fuerte. NOTA: Utilice la sintonía manual para seleccionar estaciones débiles que se pasen sin detectar durante la - Audiovox CE710CR | Owners Manual - Page 32
no se puede ajustar con el control de volumen de su iPod® si ya está conectado a la estación. 6. El iPod® se carga aún está funcionando. NOTA: La función de recarga opera aún en modo Radio, iPod y Auxiliar. 7. Para quitar el iPod® de la unidad, mantenga presionado el botón PLAY/PAUSE por tres - Audiovox CE710CR | Owners Manual - Page 33
NANO DE 1RA Y 2DA GENERACIÓN Primero instale el soporte del iPod nano en la estación CE710CR. iPod nano de 1ra Generación: Alinear su iPod nado de 1ra generación al lado IZQUIERDO de la abertura en el soporte del nano (Figura 1). Asegúrese que el conector de 30 pines en - Audiovox CE710CR | Owners Manual - Page 34
de video compuesta (la mayoría de los televisores estándar con entrada de video). Salida de Video (Para iPods de 5ta generación con video, nano iPod 3Gen, iPod clásico e iPod toque SOLAMENTE). 1. Usted puede conectar esta unidad a un televisor u otra pantalla de video que tenga S-video o entrada de - Audiovox CE710CR | Owners Manual - Page 35
permite a los usuarios conectar a esta unidad su reproductor de CD, MP3 u otros iPods que no se acoplan a una estación. 1. Siga girando la Rueda del Cable Retrá , luego usted sólo puede ajustar el volumen usando del control del CE710CR. Si usted está conectado usando la Toma de Auriculares de su - Audiovox CE710CR | Owners Manual - Page 36
detener el sonido de radio de la alarma inmediatamente, presione una vez el botón ALARM On/Off, Despertar con iPod® (iPod) • Su iPod de la estación se 10 minutos y luego sonará nuevamente. • Esta operación de postergación manual se puede repetir solamente tres veces. Apagado Automático • El Apagado - Audiovox CE710CR | Owners Manual - Page 37
CUIDADOS Y MANTENIMIENTO • No deje que la unidad sufra fuerza excesiva, choque, polvo o temperaturas extremas. • No manosee los componentes internos de la unidad. • Limpie su unidad con una tela seca. Nunca se debe usar solvente o detergente. • Evite dejar su unidad a la luz del sol directa o en - Audiovox CE710CR | Owners Manual - Page 38
antes de colocarlo en la estación. Por favor, lea el manual de instrucción de su iPod®. El iPod® no se carga. El iPod® no está instalado adecuadamente. Quite su iPod® de la estación y verifique si algo obstruye los conectores en la estación o en su iPod®. Luego reinícielo en la estación. El - Audiovox CE710CR | Owners Manual - Page 39
5V 'AAA'(UM-4) Control Remoto 1 Batería de litio CR2032 Rango de Frecuencia Sistema de Transmisión de Radio de USA . . . . FM 87.5 MHz - 108 MHz, 0.1 MHz de pasos de sintonía Sistema de Transmisión de Radio de Europa . . FM 87.5 MHz - 108 MHz, 0,5 MHz de pasos de sintonía Sistema de Transmisión de - Audiovox CE710CR | Owners Manual - Page 40
GARANTÍA LIMITADA POR 90 DÍAS Cubre los Estéreos Portátiles de Audiovox AUDIOVOX ELECTRONICS CORPORATION (la Compañía) garantiza al comprador minorista original de este producto, que si este producto o cualquiera de sus partes, bajo uso y condiciones normales, se - Audiovox CE710CR | Owners Manual - Page 41
CHER CLIENT AUDIOVOX Sélectionner de l'équipement audio sophistiqué tel que l'appareil que vous venez d'acheter n'est que le début de votre divertissement en de votre achat et pour aider à l'identification au cas où il y aurait vol ou perte. Numéro de modèle: CE710CR Numéro de série 37 - Audiovox CE710CR | Owners Manual - Page 42
7. Ne bloquez pas des ouvertures de ventilation. Installez selon les instructions du fabricant - L'appareil ne doit être situé tel que son /accessoires spécifies par le fabricant. 12. N'utilisez qu'avec le charrette, le support, le trépied, les équerres ou la table spécifiés par le fabricant. - Audiovox CE710CR | Owners Manual - Page 43
LA MISE A TERRE SYSTEME DE MISE A TERRE ELECTRODE DE SERVICE D'ALIMENTATION (NEC ART 250.PART H) 18. Entrée délà de ce qui est permis par les instructions d'opération. Tout autre entretien doit ê la batterie est inexactement remplacée. Remplacez seulement par le même ou le type équivalent batterie. - Audiovox CE710CR | Owners Manual - Page 44
et utilisé en conformité avec ces instructions ; peut causer une interférence nuisible à la communication radio. Pourtant, il n'y a aucune CE710CR est un iPod® Docking Music System qui incorpore les fonctions suivantes: • iPod® , iPod® mini, iPod 1st to 3rd Generation nano, iPod classic and iPod - Audiovox CE710CR | Owners Manual - Page 45
INSTALLATION Installation de piles de secours de l'horloge 1. Ouvrez la porte du compartiment de piles situé en bas de l'appareil. 2. Installez deux piles DC1.5V 'AAA' (UM-4) (non inclus) dans le compartiment de piles en suivant les marques de polarité montrées dessus. 3. Remplacez la porte du - Audiovox CE710CR | Owners Manual - Page 46
d'arriere 17 18 19 10 11 12 9 16 21 22 23 20 1. iPod® Dock 2. iPod® Docking Connector 3. PUISSANCE En marche/en arrêt - pour mettre l'appareil en marche et iPod - Mettez les stations de radio et les réglages en mémoire; iPod® PLAY/PAUSE 12. Bouton FUNCTION - Sélectionnez la radio FM, mode iPod - Audiovox CE710CR | Owners Manual - Page 47
TUN Vers le haut/vers le bas pour le bas, pour le haut 8. Boutons CH +/9. Bouton MEM 10. Bouton MODE 11. Bouton SLEEP 12. Boutons iPod® Sauter/Chercher Avant/Arrière pour arrière, pour avant. 13 - Audiovox CE710CR | Owners Manual - Page 48
® ADAPTORS Veuillez voir ci-dessous pour iPod® Adaptor fourni avec l'appareil: iPod Models iPod Adaptor Docking Cover iPod® Nano (1st et 2nd Gen) iPod® Mini 3Gen iPod® 10/15GB 4Gen iPod® 20GB iPod® Photo 20/30GB 3Gen iPod® 30/40GB 4Gen iPod® 40GB iPod® Photo 40/60GB A NOTER: Aucun adaptateur - Audiovox CE710CR | Owners Manual - Page 49
pour mettre l'appareil en marche. 2. Appuyez sur le bouton FUNCTION de nouveau à nouveau jusqu'à ce que la mode FM est atteinte. 3. Dans la mode radio FM, si nécessaire, appuyez sur le bouton MODE pour sélectionner la réception STEREO (ST) ou MONO FM. 4. Pour syntoniser à la main, appuyez de nouveau - Audiovox CE710CR | Owners Manual - Page 50
iPod DOCKING Ce modèle comprend des adaptateurs pour adopter des modèles iPod® différents. Si le port de la reproduction. A NOTER:La function de recharge opera toujours dans la mode Radio, iPod et AUX. 7. Pour enlever le iPod® de l'appareil, appuyez et maintenez l'appui sur le bouton PLAY/PAUSE - Audiovox CE710CR | Owners Manual - Page 51
en bas du nano est positionné sur le connecteur dans le dock CE710CR avant d'asseoir le nano. Glissez doucement le nano dans le connecteur afin d'assurer un branchement sûr. 2ème génération iPod nano : Alignez votre iPod 2ème generation dans l'ouverture DROITE dans l'équerre nano (Figure 2). Assurez - Audiovox CE710CR | Owners Manual - Page 52
video composé (le plus commun sur des télévisions standardisées avec entrée vidéo). Sortie Vidéo (Pour 5ème génération iPods avec vidéo, iPod 3Gen nano, iPod classic et iPod touch UNIQUEMENT) 1. Vous pouvez brancher cet appareil à une télévision ou autre type d'affichage vidéo qui a un S-vidéo ou - Audiovox CE710CR | Owners Manual - Page 53
aux utilisateurs de brancher leur platine CD, MP3 ou du'autres imbranchables iPods à cet appareil. 1. Continuez à tourner votre roue de corde rétractante vous pouvez avoir besoin d'ajuster les deux contrôles de volume (CE710CR et l'engin externe) pour avoir le meilleur niveau de volume. Appuyez - Audiovox CE710CR | Owners Manual - Page 54
60 minutes et puis se mettra automatiquement en arrêt. • Pour arrêter l'alarme de la radio immédiatement; appuyez une fois sur le bouton ALARM On/Off. Wake to iPod® (iPod) • Votre iPod branché va se mettre automatiquement en marche lorsque l'heure de l'alarme est atteinte. Il commence doucement - Audiovox CE710CR | Owners Manual - Page 55
SOIN ET ENTRETIEN • Ne soumettez pas l'appareil à la force excessive, au choc, à la poussière et aux temperatures extrêmes. • Ne tripotez pas les composants internes de l'appareil. • Nettoyez votre appareil avec un tissue sec. N'utilisation jamais des solutions liquides ou des détergents. • Evitez - Audiovox CE710CR | Owners Manual - Page 56
cet appareil. Référez-vous à votre guide iPod® pour les détails. Enlevez votre iPod® du dock et verifies pour des obstructions sur les connecteurs du dock et sur votre iPod®. Puis, rassoyez-le dans le dock. Then reseat it in the dock. Assurez-vous que votre iPod® fonctionne correctement avant de le - Audiovox CE710CR | Owners Manual - Page 57
AC120V/60Hz Piles de secours pour l'horloge 2 x 1.5V 'AAA'(UM-4) Batteries Télécommande 1 x CR2032 Pile Lithium Gamme de Fréquence Système de transmission radio des Etats-Unis FM 87.5 MHz - 108 MHz, 0.1 MHz tuning step Système de transmission radio d'Union Européenne . . . . FM 87.5 MHz - 108 MHz - Audiovox CE710CR | Owners Manual - Page 58
Garantie limitée de 90 jours Applicable aux stéréos portables Audiovox Audiovox Electronics Corporation (la Société) garantit à l'acheteur en détail pouvez avoir d'autres droits qui varient d'état en état. Audiovox Electronics Corporation, Hauppauge, New York 11788 1-800-645-4994 54 128-4648D - Audiovox CE710CR | Owners Manual - Page 59
- Audiovox CE710CR | Owners Manual - Page 60
Audiovox Electronics Corporation 150 Marcus Blvd Hauppauge, New York 11788 © 2008 Audiovox Electronics Corporation PRINTED IN CHINA www.audiovox.com
-
 1
1 -
 2
2 -
 3
3 -
 4
4 -
 5
5 -
 6
6 -
 7
7 -
8
-
9
-
10
-
11
-
12
-
13
-
14
-
15
-
16
-
17
-
18
-
19
-
20
-
21
-
22
-
23
-
24
-
25
-
26
-
27
-
28
-
29
-
30
-
31
-
32
-
33
-
34
-
35
-
36
-
37
-
38
-
39
-
40
-
41
-
42
-
43
-
44
-
45
-
46
-
47
-
48
-
49
-
50
-
51
-
52
-
53
-
54
-
55
-
56
-
57
-
58
-
59
-
60
 |
 |
DOCKING DIGITAL MUSIC SYSTEM FOR iPod
OWNER’S MANUAL
CE710CR
PLEASE READ THIS OPERATING MANUAL COMPLETELY BEFORE OPERATING
THIS UNIT AND RETAIN THE BOOKLET FOR FUTURE REFERENCE
(iPod
®
Not Included/
iPod
®
No Incluido
/
iPod
®
non inclus
)
®
ESTACIÓN DE SISTEMA DE MÚSICA DIGITAL PARA iPod®
CONNEXION DU SYSTEME MUSICAL DIGITAL POUR iPod®
MANUAL DEL USUARIO/GUIDE DU PROPRIETAIRE
CE710CR IB
09/01/2009 VER 18.0
fold size: 148.5 x 210mm ( 15 pcs 297 x 210mm - 60PP)
printing color: Black (black on white / BK+BK)