Audiovox D1917ES User Manual
Audiovox D1917ES Manual
 |
View all Audiovox D1917ES manuals
Add to My Manuals
Save this manual to your list of manuals |
Audiovox D1917ES manual content summary:
- Audiovox D1917ES | User Manual - Page 1
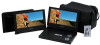
D1917ES PORTABLE 9" LCD MONITOR, DVD PLAYER AND EXTRA MONITOR - Audiovox D1917ES | User Manual - Page 2
the LCD panel or video monitor is used for television reception, video or DVD play, the LCD panel or video monitor must be installed so that these features . An LCD panel or video monitor used for television reception, video or DVD play that operates when the vehicle is in gear or when the parking - Audiovox D1917ES | User Manual - Page 3
Discs 18 M. Connecting to Other Electronic Equipment 20 N. Playing JPEG Files 21 O.Connecting the Monitor to a Game or Camcorder 22 P. Setup 23 Q. Specifications 26 R. Rechargeable Battery Installation and Use 26 S. Troubleshooting 29 3 - Audiovox D1917ES | User Manual - Page 4
D1917ES portable DVD player and extra monitor. The main features include two 9" Digital Screen (16:9 Aspect Ratio) Liquid Crystal Display (LCD) monitors and a DVD player 9" portable DVD player and extra monitor are used in accordance with the instructions and illustrations provided in this manual. 3. - Audiovox D1917ES | User Manual - Page 5
, candle etc. Replacing the battery incorrectly is hazardous. Replace the battery only with the same or equivalent type. electric shock and/or exposure to Laser Radiation. Contact qualified service personnel if your system needs repair. 5. Cleaning Unit When instructions supplied with the discs. 5 - Audiovox D1917ES | User Manual - Page 6
and DVD Player 2. 1 x 9'' LCD Monitor 3. 1 x Remote Control with battery (CR2025) 4. 1 x Audio/Video Adapter Cable (One to Three Female) 5. 1 x Audio/Video Adapter Cable (One to Three Male) 6. 1 x AC to DC Adapter 7. 1 x Y Type DC Power Adapter 8. 1 x Instruction Manual 9. 1 x Rechargeable Battery - Audiovox D1917ES | User Manual - Page 7
Note: Unplug the the unit from its power source and remove the rechargeable battery if the unit is not going to be used for a long time. 2. Powering the system in a car (Refer to Figure 2) Plug one end of the - Audiovox D1917ES | User Manual - Page 8
Strap Figure 3 1). Unfold the carry bag and place the DVD player on the bag beneath the elastic straps. Ensure that the unit's corners are secured by the elastic straps. 2). Secure the upper portion of the carry bag to headrest support - Audiovox D1917ES | User Manual - Page 9
the pouch to the headrest Option 2 Flat Surface (Refer to Figure 5) Figure 5 Rotate the base of Monitor backward and place on a flat surface. Adjust the screen for a proper viewing angle. This can be done with the Monitor inside or outside the pouch. 9 - Audiovox D1917ES | User Manual - Page 10
F. Controls, Indicators and Connectors 1. LCD Monitor and DVD Player (Refer to Figure 6) 1 11 2 4 12 5 13 14 6 15 7 89 10 16 17 18 19 20 Figure 6 1) Battery Release Button 2) DC 9V Input Jack 3) AV Jack 4) AV In/Out Switch 5) USB Port 6) Power ON/OFF Switch 7) SD/MMC/MS Card Slot 8) - Audiovox D1917ES | User Manual - Page 11
Switch to rotate the picture 180 degrees. image. NOTE:To view the monitor rotate the base backward and place it on a flat surface. Adjust the screen for a proper viewing angle. This can be done with the monitor inside or outside the pouch. 11 - Audiovox D1917ES | User Manual - Page 12
17) Subtitle Button 18) Audio Button 19) Play/Pause Button Figure 8 G. Loading and Playing a Disc a. After connecting power to the unit, power on the DVD player with the power switch. The power indicator will light. b. Open the disc tray by sliding the OPEN switch in the direction of the arrow - Audiovox D1917ES | User Manual - Page 13
on/off AUDIO Select the audio language SETUP Display the setup menu to select and set items, and exit the setup menu. WIDE On the player only: change between wide screen and 4:3 picture aspect ratio. 13 - Audiovox D1917ES | User Manual - Page 14
menu of the disc will appear on the screen of your TV or Monitor. The contents of the menu vary from disc to disc. Press MENU during playback to display the menu. Some DVDs only allow you to select disc playback options using the DVD root menu. J. Display 1. PLAYING TIME AND REMAINING TIME - Audiovox D1917ES | User Manual - Page 15
. The Subtitle display will disappear automatically if the 'SUBTITLE' button is not pressed again within 3 seconds. * Some DVDs only allow access to this function through the DVD menu. Subtitle 3. AUDIO During playback press 'AUDIO' to select the audio language you desire*, with the current Audio - Audiovox D1917ES | User Manual - Page 16
4. A-B REPEAT a. During playback press 'A-B' to set the Starting Point A. b. Press 'A-B' a second time to set the Ending Point B. The player will repeatedly play the part between Point A and Point B. c. Press A-B a third time to cancel A-B repeat and resume normal playback. A-B Repeat Starting - Audiovox D1917ES | User Manual - Page 17
Total Remain Single Elapsed When Playing Audio CDs Single Elapsed: The current track playing and elapsed playing time of that track is displayed on the screen. Single Remain: The current track playing and the amount of time left to play on the track. 17 - Audiovox D1917ES | User Manual - Page 18
been encoded in MP3 format are compatible with this system. When an MP3 disc is inserted into the unit, the menu screen appears automatically. You can use the menu screen to select your desired folders and songs or the system plays the songs in the order they were burned onto the disc - Audiovox D1917ES | User Manual - Page 19
1. Press the or button to choose a folder from the folder list on the left side of the screen. 2. Press ENTER to select the highlighted folder. The songs available in the folder will be listed. 3. Use the or button to choose a song from the - Audiovox D1917ES | User Manual - Page 20
Switch to the "Out" Position. b. Connect one end of the audio/video cable's black (1/8" plug) plug into the unit's DVD AV jack and connect the other end to the AUDIO INPUT jacks on your TV 2 jack on the right side of the DVD player or the Headphone jack on the monitor. ( Refer to Figure 10 and 11) 20 - Audiovox D1917ES | User Manual - Page 21
unit. 3) Connect the USB cable (not supplied) from a camera into the USB port on the left side of the unit. 4) Press the DVD/SD-USB button. Choose the folder N. Playing JPEG Files 1) Load the JPEG Disc into tray. 2) The DVD player will display a folder and the JPEGS contained within the folder in a - Audiovox D1917ES | User Manual - Page 22
(Refer to Figure 11) 1) Set POWER ON/OFF to the ON position. 2) Using the 1/8 to RCA A/V adapter cable connect the signal output from an auxiliary source such as Camcorder, Video Game, DVD Player, Video Cassette Recorder etc. to the AV IN Jack of the Monitor. 3) Use the BRIGHTNESS UP/DOWN control to - Audiovox D1917ES | User Manual - Page 23
an angle option is available). Off: The screen will not display the angle mark. c) Screen Saver On: Enables screen saver. Note: The DVD player will enter the Screen Saver mode after approximately five minutes if the same image remains on the screen. Off: Disables screen saver. d) Last Memory On: The - Audiovox D1917ES | User Manual - Page 24
Note: The Last Memory position function will only work when the disc tray is opened. 2.Video Quality Setup 1) In Setup menu, press the or button to select "Video Quality Setup" and is highlighted. Press ENTER to enter the video quality setup page. 2) Press the ENTER button, "Brightness" is - Audiovox D1917ES | User Manual - Page 25
in different languages. If the selected language is not available, the player will play and display on the screen the language that was originally recorded on the disc. d) Parental area and delete it from this manual. Some discs can be limited depending on the age of users while some discs cannot - Audiovox D1917ES | User Manual - Page 26
: NTSC Screen Size: 9 inch Power Supply: DC 9V Weight : 1.12lb (0.51kg) Dimensions (W x D x H): 10.0 X 8.49 X 0.53inches (246 x 208 x 13mm) R. Rechargeable Battery Installation and Use The player utilizes a set of long-life Li-ploymer batteries to provide portability. Li-ploymer batteries feature - Audiovox D1917ES | User Manual - Page 27
Please make sure you always use only the AC adapter included with the player to recharge your battery. The DC Power Adapter cannot be used to recharge the battery. 2. To charge the battery, please connect the power jack directly into the DVD player and leave the POWER switch in the OFF position. 27 - Audiovox D1917ES | User Manual - Page 28
to the player. Figure 12. Installing the DVD Player Battery Removing the Battery Pack: 1. Set the Power ON/OFF switch to the OFF position. 2. Press the release button on the side of battery. 3. Pull the battery away from the rear of the DVD player. Press Figure 13. Removing the DVD Player Battery 28 - Audiovox D1917ES | User Manual - Page 29
S. Troubleshooting PROBLEM No sound or distorted sound SOLUTION • Make sure your DVD is connected properly. Make sure all cables are securely on screen The feature or action cannot be completed at this time because: 1. The disc's software restricts it. 2. The disc's software doesn't support the - Audiovox D1917ES | User Manual - Page 30
Troubleshooting (Cont) PROBLEM IR sensor inoperative Disc won't play SOLUTION • Verify that the batteries in the remote are fresh. • Verify that the remote sensor eye is not obstructed. • Insert a disc with the label side facing up. • Check the type of disc you put into disc tray. This DVD only - Audiovox D1917ES | User Manual - Page 31
below. This Warranty does not extend to the elimination of externally generated static or noise, to correction of antenna problems, to you. This Warranty gives you specific legal rights and you may also have other rights which vary from state to state. U.S.A. : AUDIOVOX ELECTRONICS CORPORATION, - Audiovox D1917ES | User Manual - Page 32
© 2007 Audiovox Electronics Corporation 32 128-8056
-
 1
1 -
 2
2 -
 3
3 -
 4
4 -
 5
5 -
 6
6 -
 7
7 -
8
-
9
-
10
-
11
-
12
-
13
-
14
-
15
-
16
-
17
-
18
-
19
-
20
-
21
-
22
-
23
-
24
-
25
-
26
-
27
-
28
-
29
-
30
-
31
-
32
 |
 |

D1917ES
PORTABLE 9" LCD MONITOR, DVD PLAYER AND
EXTRA MONITOR