Audiovox FP1510 User Manual
Audiovox FP1510 Manual
 |
View all Audiovox FP1510 manuals
Add to My Manuals
Save this manual to your list of manuals |
Audiovox FP1510 manual content summary:
- Audiovox FP1510 | User Manual - Page 1
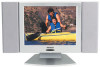
AUDIOVOX® ELECTRONICS CORP. FP1510 USER MANUAL Color TFT-LCD TV/MONITOR FP1510 128-6340 - Audiovox FP1510 | User Manual - Page 2
as they may touch dangerous voltage points or short out parts that could result in a fire or electric shock. NEVER spill liquid of any kind on the LCD TV. • DO NOT block any ventilation openings. Install in accordance with manufacture's instructions. Slots and openings in the cabinet and the back - Audiovox FP1510 | User Manual - Page 3
When the power-supply cord or plug is damaged. (b) If liquid has been spilled, or objects have fallen into the product. (c) If the product has been exposed to rain or water. (d) If the product does not operate normally after following the operating instructions. Adjust only those controls that are - Audiovox FP1510 | User Manual - Page 4
. Any mounting of this product should follow the manufacture's instructions, and should use a mounting accessory recommended by the manufacturer. • Do not apply excessive force to operate the switch, control key and connector. Disconnect the power plug from the AC outlet before you move the unit - Audiovox FP1510 | User Manual - Page 5
Contents 2. SYSTEM SETUP Top Panel & Remote Controller Function Assembly and Connections Input/Output Signal Connections 3. FP1510 OPERATING INSTRUCTIONS TV and AV Manual Operating Instructions Using the FP1510 as a Computer Monitor 4. REFERENCE Display Modes LCD Monitor Display Angle Wall-mounting - Audiovox FP1510 | User Manual - Page 6
you for choosing the AUDIOVOX FP1510 TFT-LCD Color TV/Monitor and for your continued support and use of our products. The FP1510 combines the features of a TV/MONITOR with a THIN FILM TRANSISTOR liquid crystal display (TFT-LCD). This new generation of TFT-LCD incorporates a high quality display - Audiovox FP1510 | User Manual - Page 7
low power consumption ; 50% more power saving than conventional TV • Super 9300° color temperature for LCD monitor Supports Video-On-Video ; VOV can display multiple video sources at one time. • Intelligent screen image setting Intelligent Window Control Surface to simplify function settings. • Power - Audiovox FP1510 | User Manual - Page 8
Package Contents Please check the FP1510 Package to make sure it contains the following items : SPEAKERS 15"TFT-LCD I I rkal.9-1 BASE TRANS Slim-type Remote Control Power Transformer Cord WITT.792F FP1510 USER MANUAL Color AL Power Cord VGA Cable User Manual 7 Hardware Kit - Audiovox FP1510 | User Manual - Page 9
: Increases volume POWER : Power Button : Power on/off control CH - : Channel down Button : Decreases setting channel CH + : Channel up Button : Increases setting channel IR : Remote IR detect window : Receives IR signal from remote control IR Remote Control Unit : 1 2 3 • • 4 5 21 - Audiovox FP1510 | User Manual - Page 10
Remote Control Buttons : 1 ED POWER Power On/Off CDO. ® 2 ®®® CD 'OED KEYPAD Press number key to select channel of TV 3 MUTE Turns volume off 4 CH+ Increase Nchannel setting 5 CH- Decrease N channel selling 6 ENTER Enters command keypad functions 7 VOL- Decreases volume setting 8 - Audiovox FP1510 | User Manual - Page 11
to attempting to operate the unit. Plastic ShippingTab Open CD CR202 3V U POTTERY CR2025 0 0 Change the Battery if the Remote Control no longer operates the FP1510. LITHIUM BATTERY CR2025 Caution : Only use CR2025 type Battery. Confirm the polarity(+/-) of battery before installing Removal the - Audiovox FP1510 | User Manual - Page 12
Remote Control Operating Instruction: The Remote Control Transmission consists of an Infrared (IR) Signal. Make sure the line-of-sight between Remote Control and FP1510 is clear of objects that could interfere with the remote IR signal. Always point the Remote Control directly at the FP1510 sensor. - Audiovox FP1510 | User Manual - Page 13
-LCD 1.3.Speaker 2.Monitor and 4.Stand DISPLAY BRACKET MOUNTING How to unfold the stand on the bottom when you mounting to wall. llillll 0000000 O O ■ Adaptor WALL MOUNTING NOTE : When mounting to wall please secure to wall stud. Caution : You must complete assembly prior to power application - Audiovox FP1510 | User Manual - Page 14
Input/Output Signal Connections 1 234 5 SPEAKER DC-IN R L o c-ci)c) TV-ANT EARPHONE 6 7 8 9 10 VGA IN VIDEO IN S-VIDEO IN •lazt•cpc>00 AUDIO IN R L 1. ANT CABLE INPUT 2. POWER ADAPTER INPUT 3. HEADPHONE OUTPUT 4. RIGHT SPEAKER OUTPUT 5. LEFT SPEAKER OUTPUT 6. VGA INPUT 7. A-VIDEO INPUT - Audiovox FP1510 | User Manual - Page 15
DC Power Socket 0 * 0 c) DC-IN • w • cl of Connecting Left and Right Speakers 0 *D* SPEAKER R L IT • w • O O cp O 14 - Audiovox FP1510 | User Manual - Page 16
Connecting to S-video terminal equipment such as DVD, VCR or Gaming Console. 0 (D oe S-VIDEO IN •Est•c,o(DO T \/ Li OUT VIDEO L R 0 888 S-VIDEO IN FROM ANT 0 OUT TO TV Connecting to 15-PIN VGA from a PC 0 @loc) •w•cl iolo 0 VGA-IN I 00O VGA-OUT 15 - Audiovox FP1510 | User Manual - Page 17
Connecting to AV-terminal equipment such as DVD, VCR, and Gaming Console. 0 (D ee VIDEO IN AUDIO IN igar•seeO AAA Yellow Red White Ye;White Red 'l S-VIDEO OUT (Deo VIDEO L R O IN FROM ANT• 0 OUT TO TV 16 - Audiovox FP1510 | User Manual - Page 18
TV and AV Operating Instructions MAIN DISP Press and release the Menu button to display the following Main Menu for TV and AV functions : Press and release the Menu button again to access the MAIN DISP menu : AUDIOVOX MAIN DISP U: . - AUDIO CLOSE CAPTION PARENT CONTROL OSD SETUP TV - Audiovox FP1510 | User Manual - Page 19
VOV) OFF 6.RETURN With the Main Menu displayed,Press and release the button to highlight SUB DISP AUDIOVOX MAIN DISP SUB DISP AUDIO CLOSE CAPTION PARENT CONTROL OSD SETUP TV SETUP BRIGHTNESS CONTRAST SATURATION HUE SHARPNESS RECALL EXIT 640X480 H:31.4KHZ V:59.8HZ Press and release - Audiovox FP1510 | User Manual - Page 20
With the Main Menu displayed, use the 0 button to select VOV ADJUST AUDIOVOX MAIN DISP : I VOV ADJUST AUTOTUNE CONTRAST BRIGHTNESS AUDIO COLOR QUALITY POSITION CLOSE CAPTION PARENT CONTROL OSD SETUP TV SETUP RECALL SAVE EXIT 800X600 H:53.6KHZ V:84.8HZ Then Press and release the - Audiovox FP1510 | User Manual - Page 21
NOTE : The following adjustments will effect the VOV only, not the Main display. AUDIOVOX VOV POSITION El=a_ CONTRAST SATURATION HUE SHARPNESS BORDER SIZE BORDER COLOR RETURN 800X600 H:53.6KHZ V:84.8HZ BRIGHTNESS CONTRAST 120 Press the UUbutton to - Audiovox FP1510 | User Manual - Page 22
MAIN DISP B DI P AUDIO CLOSE CAPTION PARENT CONTROL OSD SETUP 1V SETUP BRIGHTNESS CONTRAST SATURATION HUE SHARPNESS RECALL EXIT 640X480 H:31.4KHZ V:59.8HZ AUDIOVOX AUDIO CHANNEL SPEAKER ON/OFF GAIN BASS TREBLE LOUDNESS RETURN AUDIOVOX AV TV RETURN 640X480 H:31.4KHZ V:59.8HZ - Audiovox FP1510 | User Manual - Page 23
CAPTION. With the Main Menu displayed, Press and release the O button to highlight CLOSE CAPTION AUDIOVOX MAIN DISP SUB DISP AUDIO CLOSE CAPTION PARENT CONTROL OSD SETUP TV SETUP BRIGHTNESS CONTRAST SATURATION HUE SHARPNESS RECALL EXIT 640X480 H:31.4KHZ V:59.8HZ Press and release - Audiovox FP1510 | User Manual - Page 24
SETUP TV SETUP BRIGHTNESS CONTRAST SATURATION HUE SHARPNESS RECALL EXIT 640X480 H:31.4KHZ V:59.8HZ Input the four-digit Parent Control Password and confirm using the Menu button (Default Code is 3308) PARENT CONTROL After entering the Password, the following menu will appear : AUDIOVOX - Audiovox FP1510 | User Manual - Page 25
V-CHIP lock function by Selecting YES and disable by selecting NO. From the PANRENT CONTROL Main Menu. Press and release the() button to highlight CLASS OPTION on Main Parental Control Menu : TV-Y TV-Y7 TV-G TV-PG TV-14 TV-MA RETURN AUDIOVOX YES / NO YES / NO YES / NO YES / NO YES / NO YES / NO - Audiovox FP1510 | User Manual - Page 26
-13 R NC-17 X RETURN AUDIOVOX YES/NO YES/NO YES/NO YES/NO YES/NO YES/NO 640X480 H:31.4KHZ V:59.8HZ Select the desired rating level and press Menu. Select RETURN to return to the main parental control menu. CLASS OPTION a. TV-Y b. TV-Y7 c. TV-G d. TV-PG e. TV-14 f. TV-MA g. Return MPAA OPTION - Audiovox FP1510 | User Manual - Page 27
(OSD) SETUP : With the Main Menu displayed, Press and release the O button to highlight OSD SETUP AUDIOVOX MAIN DISP SUB DISP AUDIO CLOSE CAPTION PARENT CONTROL OSD SETUP TV SETUP BRIGHTNESS CONTRAST SATURATION HUE SHARPNESS RECALL EXIT 640X480 H:31.4KHZ V:59.8HZ Press and release - Audiovox FP1510 | User Manual - Page 28
With the MAIN MENU displayed, Select TV SETUP using the Menu button : AUDIOVOX MAIN DISP SUB DISP AUDIO CLOSE CAPTION PARENT CONTROL BRIGHTNESS CONTRAST SATURATION HUE SHARPNESS RECALL EXIT 640X480 H:31.4KHZ V:59.8HZ Select TV SETUP and highlight ERASE/ ADD then Press and release the Menu button. - Audiovox FP1510 | User Manual - Page 29
displayed (see screens below) BRIGHTNESS Adjusts the overall image and background screen brightness. BRIGHTNESS MAIN DISP AUDIOVOX SUB DISP AUDIO CLOSE CAPTION PARENT CONTROL OSD SETUP TV SETUP QM= CONTRAST SATURATION HUE SHARPNESS RECALL EXIT 640X480 H:31.4KHZ V:59.8HZ CONTRAST Adjusts the image - Audiovox FP1510 | User Manual - Page 30
With the MAIN MENU displayed, Select RECALL using the Menu button AUDIOVOX MAIN DISP SUB DISP AUDIO CLOSE CAPTION PARENT CONTROL OSD SETUP TV SETUP BRIGHTNESS CONTRAST SATURATION HUE SHARPNESS RECALL EXIT 640X480 H:31.4KHZ V:59.8HZ RECALL Automatically reset setting to factory defaults. RECALL YES - Audiovox FP1510 | User Manual - Page 31
EXIT Exits the on-screen-menu controls With the MAIN MENU displayed, EXIT using the MENU button to exit the MAIN MENU AUDIOVOX MAIN DISP SUB DISP AUDIO CLOSE CAPTION PARENT CONTROL OSD SETUP TV SETUP BRIGHTNESS CONTRAST SATURATION HUE SHARPNESS eall 640X480 H:31.4KHZ V:59.8HZ 30 - Audiovox FP1510 | User Manual - Page 32
POSITION OSD SETUP RECALL SAVE EXIT EXIT 800X600 H:53.6KHZ V:84.8HZ 4 VGA AVIDEO SVIDEO CATV TV RETURN AUDIOVOX 800X600 H:53.6KHZ V:84.8HZ NOTE : The CLOSE CAPTION and PARENT CONTROL options will not appear in the Main Menu until a TV program has been accessed using the SUB DISP menu. 31 - Audiovox FP1510 | User Manual - Page 33
With the Main Menu displayed,use then button to select AUTOTUNE AUDIOVOX MAIN DISP SUB DISP AUTOTUNE CONTRAST BRIGHTNESS AUDIO COLOR QUALITY POSITION Only worked when unit is connected to computer and the screen will appear "DOING" CONTRAST Adjusts the image brightness in relation to - Audiovox FP1510 | User Manual - Page 34
selected, Color can be manually adjusted by selecting the following displayed colors : 9300 7500 6550 USER RETURN AUDIOVOX RED GREEN BLUE RETURN AUDIOVOX 800X600 H:53.6KHZ V:84.8HZ 800X600 H:53.6KHZ V:84.8HZ When RED is highlighted, pressing the Menu button will display the following screen - Audiovox FP1510 | User Manual - Page 35
OSD SETUP RECALL SAVE EXIT EXIT 800X600 H:53.6KHZ V:84.8HZ AUDIOVOX ADV. TUNE FOCUS TEXT/GFX SHARPNESS RETURN 800X600 H:53.6KHZ V:84 stability. 2. SIZE - Adjusts image size relative to the screen. 3. FOCUS - Controls image clarity. 4. TEXT/GFX - Adjusts text sharpness when PC is in DOS mode - Audiovox FP1510 | User Manual - Page 36
EXIT 800X600 H:53.6KHZ V:84.8HZ Then Press and release the Menu button to access the following screen : AUDIOVOX CM= OSD POS. SPEED EN. SPEED ADJ. RETURN. 800X600 H:53.6KHZ V:84.8HZ AUDIOVOX HORIZONTAL VERTICAL CENTER RETURN 800)(600 H:53.6KHZ V:84.8HZ HORIZONTAL 51 VERTICAL 26 With SPEED EN - Audiovox FP1510 | User Manual - Page 37
would like the OSD control window to appear on your screen. Selecting OSD location allows you to manually adjust the position of the OSD control menu left, right, up the Main Menu. EXIT : Changes will not be saved. Use the(v) button to select EXIT AUDIOVOX MAIN DISP SUB DISP AUTOTUNE CONTRAST - Audiovox FP1510 | User Manual - Page 38
60 35 49.7 48.78 60.241 70 70 60 72 75 56.3 60.3 72.2 75 60 70 75 66.7 74.55 60 74.927 .J LCD Monitor Display Angle Vertical : Left 30 /Right 36 Horizontal : Up 30 /Down e 37 - Audiovox FP1510 | User Manual - Page 39
Operating Instructions O . 41 Q. Mounting Screws(Not supplied) WALL Wall mount template : Use provded guide to place hole in wall for mounting. 60mm (Center to Center) WARNING : When mounting to wall, please secure mounting screws into a secure wall stud. Please NOTE when cleaning the LCD Monitor - Audiovox FP1510 | User Manual - Page 40
causes of the problem before calling service personnel. A minor adjustment may eliminate the problem and restore your TV reception. Symptom Corrective Actions ..\ No pictureon screen 1. Check VGA cable connection wigth computer. 2. Check that power is turned on, or that power adapter lamp is - Audiovox FP1510 | User Manual - Page 41
x 2 Input Terminal AV Input Terminal Input A-Video, S-Video,15Pin D-sub (VGA),Coax ANT H/P (earphone) Display Language Power Adapter Enclosure V DIN 3.5 0 Hole English AC Input 100-240V DC Output 12V/3.0A Remote Control • Battery • AC Connections - VGA Cable AC Power Cord • User Guide .../ 40 - Audiovox FP1510 | User Manual - Page 42
Duplicate Page by Design OPTIONAL Wall-Mounting Instructions 11) Mounting Screws(Not supplied) Co' WALL Wall mount template : Use provded guide to place hole in wall for mounting. 60mm (Center to Center) WARNING : When mounting to wall, please secure mounting screws into a secure wall stud. 41 - Audiovox FP1510 | User Manual - Page 43
-
 1
1 -
 2
2 -
 3
3 -
 4
4 -
 5
5 -
 6
6 -
 7
7 -
8
-
9
-
10
-
11
-
12
-
13
-
14
-
15
-
16
-
17
-
18
-
19
-
20
-
21
-
22
-
23
-
24
-
25
-
26
-
27
-
28
-
29
-
30
-
31
-
32
-
33
-
34
-
35
-
36
-
37
-
38
-
39
-
40
-
41
-
42
-
43
 |
 |

AUDIOVOX®
ELECTRONICS
CORP.
FP1510
USER
MANUAL
Color
TFT-LCD
TV/MONITOR
FP1510
128-6340