Audiovox MMD70 Installation Manual
Audiovox MMD70 - DVD Player With LCD Monitor Manual
 |
UPC - 044476017230
View all Audiovox MMD70 manuals
Add to My Manuals
Save this manual to your list of manuals |
Audiovox MMD70 manual content summary:
- Audiovox MMD70 | Installation Manual - Page 1
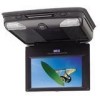
Owners and Installation Manual MMD70 7" LCD MONITOR & DVD PLAYER - Audiovox MMD70 | Installation Manual - Page 2
authorized by Macrovision Corporation. Reverse engineering or disassembly is prohibited. Warnings Do not use any solvents or cleaning materials when cleaning the video monitor. Do not use any abrasive cleaners, they may scratch the screen. Use only a lightly dampened lint free cloth to wipe the - Audiovox MMD70 | Installation Manual - Page 3
driver if the LCD panel or video monitor is used for vehicle information, system control, rear or side observation or navigation. If the LCD panel or video monitor is used for television reception, video or DVD play, the LCD panel or video monitor must be installed so that these features will only - Audiovox MMD70 | Installation Manual - Page 4
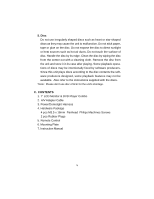
-in DVD player. The unit applies the latest state of the art electronics. The unit is constructed to provide years of reliable, trouble-free service. Please read the entire instruction manual supplied with this product prior to operation. The documentation will assist you in installing the system - Audiovox MMD70 | Installation Manual - Page 5
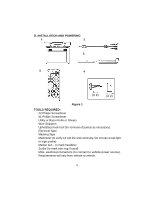
Please don't use disc of 8cm for the unit's shortage. C. CONTENTS 1. 7" LCD Monitor & DVD Player Combo 2. A/V Adapter Cable 3. Power/Domelight Harness 4. Hardware Package 4 pcs M3.5 x 18mm Panhead Philips Machines Screws 2 pcs Rubber Plugs 5. Remote Control 6. Mounting Plate 7. Instruction Manual 5 - Audiovox MMD70 | Installation Manual - Page 6
D. INSTALLATION AND POWERING 1. 2. 3. 5. 4. 3 (X 4) (X 2) Figure 1 TOOLS REQUIRED: #2 Philips Screwdriver #1 Philips Screwdriver Utility or Razor Knife or Shears Wire Strippers Upholstery hook tool (for removal of panels as - Audiovox MMD70 | Installation Manual - Page 7
be installed (i.e.: what components, VCP, Tuner, RF Modulator/external amp, remote headphones, DVD, etc.). 2) Review all manuals to Diagrams on page 10 of this manual as well as the wiring instructions for the individual components and accessory options being installed). Be sure that all wiring is - Audiovox MMD70 | Installation Manual - Page 8
Notes :The MMD70 video system is only intended for an overhead, drop down installation. It is manual will only focus on the installation of the video monitor and related console accessories. 3) Generally, the best location for the video monitor is where the vehicle's factory dome light is installed - Audiovox MMD70 | Installation Manual - Page 9
MOUNTING THE MMD70 Figure 2 NOTE: Two of the mounting holes are located under the domelight covers. 9 - Audiovox MMD70 | Installation Manual - Page 10
MMD70 (RED) (BLACK) Figure 3 1) Make the connections to the vehicle with the 5 pin wiring harness. 2) Connect the 5 pin harness to the mating connector on the Video NOTE: A VCP or other A/V Component can be connected to the video monitor system using an RCA A/V cable. This second harness would plug - Audiovox MMD70 | Installation Manual - Page 11
THE DOME LIGHTS The dome lights in the video monitor require three connections to the vehicle's wiring commonly found on General Motors and import vehicles. Note: Some vehicles which incorporate transistorized control of the dome light circuit, such as the 1999 Dodge Caravan, may require that the - Audiovox MMD70 | Installation Manual - Page 12
Lamp common Violet / brown - Lamp Auto To constant +12vdc Factory Dome light circuit To constant +12vdc Factory Door ajar switch or Body Control computer Figure 4 Negative Switched Dome lighting To 3 pin Red / black - Lamp on Black / red - Lamp common connector Violet / brown - Lamp Auto To - Audiovox MMD70 | Installation Manual - Page 13
E. Controls, Indicators, and Connectors 1. Unit View (Refer to Figure 5) Figure 6 1) AV 2 In 2) Headphone Jack 3) Auto/Off/On(Dome Light) 4) Power 13) IR Sensor and IR Transmitter for Wireless Headphones 14) Volume 15) Picture 16) Volume + 17) Play button 18) Eject button 19) Disc Insertion Slot 13 - Audiovox MMD70 | Installation Manual - Page 14
2. Remote Control View (Refer to Figure 7) 1) Power Button 2) Display Button 3) Angle Button 4) Subtitle Button 5) A-B Button 6) Slow Button 7) Pause Button 8) Fast Reverse Button 9) Stop Button 10) Picture Button 11) DVD /AV1 /AV2 12) Zoom Button 13) Eject Button 14) Numeric Buttons 15) Audio - Audiovox MMD70 | Installation Manual - Page 15
POWER PLAY SLOW PAUSE STOP FORWARD REVERSE UP/DOWN/LEFT /RIGHT ENTER NUMBERS RETURN MENU REPEAT A-B DISPLAY ANGLE SUBTITLE AUDIO ZOOM SETUP DVD/AV1/AV2 EJECT PICTURE VOLUMEVOLUME+ SKIPSKIP+ Turn the unit on/off Start Playback Play at 1/2,1/4,1/8, 1/16 times normal speed Still Picture (1 time - Audiovox MMD70 | Installation Manual - Page 16
playback to display the main menu. Some DVDs only allow you to select disc playback options using the DVD root menu. I. DISPLAY 1) DISPLAY MODE 5. The elapsed time of title. 16. Dolby audio mode. 6. The number of total chapters. 17. Current audio language selected. 7. The remaining time of title. - Audiovox MMD70 | Installation Manual - Page 17
SUBTITLE During disc playback press SUBTITLE* to select the desired subtitle language.(You can see item 12 and 15 in Picture 1 change) 6) AUDIO During disc playback press AUDIO* to select the desired audio language. (You can see item 10 and 17 change at the same time in Picture 1 change) *NOTE: Some - Audiovox MMD70 | Installation Manual - Page 18
7) ZOOM 'Zoom' in Display Mode 'Zoom' Display During playback press 'ZOOM' to enlarge the picture by 2x or 3x with the current zoom multiple displayed. 8) REPEAT 'Repeat' Display 18 - Audiovox MMD70 | Installation Manual - Page 19
and the repeat function is cancelled and normal playback resumes. Repeat mode sequence:Repeat Chapter/Repeat Title/Off. J. PLAYING AUDIO CDS When playing an audio CD the display will automatically display the disc playback information. The options below show you what information is displayed. Press - Audiovox MMD70 | Installation Manual - Page 20
CD-quality song is compressed into the MP3 format with no significant loss of audio quality. CD-R / RW discs that have been encoded in MP3 format are compatible with this device. Insert a MP3 Disc, the DVD player will initialize the disc and the directory (folder) will be shown on the monitor screen - Audiovox MMD70 | Installation Manual - Page 21
4. Use the ( NEXT ) button to move to the next song. Press the (PREVIOUS) button to move to the beginning of the song. USING THE REPEAT FEATURE The default mode for the Repeat feature is OFF. Pressing REPEAT consecutively changes the repeat options: • Repeat Single(repeat playback of a song) • - Audiovox MMD70 | Installation Manual - Page 22
M. SETUP Press 'SETUP' to display the Main screen of the SETUP Menu on the screen. Press 'SETUP' again to exit the SETUP Menu and the unit will resume it's last playback mode. Main 'SETUP' Menu Screen 1) Select 'LANGUAGE' page using the LEFT/RIGHT button. 'Language' Display Menu a. Select 'OSD Menu' - Audiovox MMD70 | Installation Manual - Page 23
using the UP/DOWN button, then press ENTER/LEFT to confirm the setting and exit. 'Subtitle' Display c. Select "Audio" using the UP/DOWN button, then press ENTER to enter the submenu. Select the audio language you desire using the UP/DOWN button, then press ENTER/LEFT to confirm the setting and exit - Audiovox MMD70 | Installation Manual - Page 24
/RIGHT button. 'Video' Display a. Select 'TV Display' using the UP/DOWN button, then press ENTER to enter the submenu. Select the TV display you desire using the UP/DOWN button, then press ENTER/LEFT to confirm the setting and exit. 'TV Display' Display * Normal/PS: When the player outputs signal to - Audiovox MMD70 | Installation Manual - Page 25
b. Select 'TV Type' using the UP/DOWN button, then press ENTER to enter the submenu. Select the TV type you desire using the UP/DOWN button, then press ENTER/LEFT to confirm the setting and exit . 'TV Type' Display c. Select 'Angle Mark' using the UP/DOWN button and then press ENTER to enter the - Audiovox MMD70 | Installation Manual - Page 26
off using the UP/DOWN button, then press ENTER/LEFT to confirm the setting and exit. 'Screen Saver' Display *On: Enables screen saver *NOTE: The DVD player will enter the Screen Saver mode after approximately five minutes if the same image remains on the screen. *Off: Disables screen saver (off) 26 - Audiovox MMD70 | Installation Manual - Page 27
want and press ENTER. Next time you can use these 4 new digital as your password. Rating:1.Kid Safe 2.G 3.PG 4.PG-13 5.PG-R 6.R 7.NC-17 8.Adult NOTE: For can record this default password in another area and delete it from this manual. Some discs can be limited depending on the age of users while - Audiovox MMD70 | Installation Manual - Page 28
N. Playing a Video Game (Refer to Figure 8) Change the source by pressing the DVD/AV1/AV2 button on the remote. AV2* is from unit (Part Number MMWHS). 2.Optional wireless headphone can also be used (Part Number MMIRHS). NOTE: Refer to the Owner's Manual with the headphones for complete instructions. - Audiovox MMD70 | Installation Manual - Page 29
DVD/CD/MP3 Color system: NTSC/PAL Screen size: 7" Frequency response: 20 Hz to 20 kHz Video output: 1 Vp-p/75 Ohm, unbalanced Audio output: 1.4Vrms/10kOhm Audio Q. Troubleshooting: SYMPTOM: REMEDY: No power at Video Monitor -Verify +12 VDC on Red wire at 2 pin Power Harness behind video monitor. - Audiovox MMD70 | Installation Manual - Page 30
will be repaired or replaced with reconditioned product (at the Company's option) without charge for parts and repair labor. A game controller, if supplied, generated static or noise, to correction of antenna problems, to costs incurred for installation, removal or reinstallation of the product, or - Audiovox MMD70 | Installation Manual - Page 31
© 2005 Audiovox Electronics Corp., 150 Marcus Blvd., Hauppauge, N.Y. 11788 128-6985A
-
 1
1 -
 2
2 -
 3
3 -
 4
4 -
 5
5 -
 6
6 -
 7
7 -
8
-
9
-
10
-
11
-
12
-
13
-
14
-
15
-
16
-
17
-
18
-
19
-
20
-
21
-
22
-
23
-
24
-
25
-
26
-
27
-
28
-
29
-
30
-
31
 |
 |
MMD70
7" LCD MONITOR & DVD PLAYER
Owners and Installation Manual