Audiovox NVX226 User Manual
Audiovox NVX226 - Automotive GPS Receiver Manual
 |
UPC - 044476034404
View all Audiovox NVX226 manuals
Add to My Manuals
Save this manual to your list of manuals |
Audiovox NVX226 manual content summary:
- Audiovox NVX226 | User Manual - Page 1
NVX226 Navigation System User's Manual 1287693 - Audiovox NVX226 | User Manual - Page 2
1 Charging the battery 1 Starting the AUDIOVOX NVX226 system 3 Using the AUDIOVOX NVX226 system buttons 5 Getting a GPS signal 5 Entering data on the AUDIOVOX NVX226 system 7 Moving through the screens 7 Working with the map 8 Map view 8 Maneuver detail 8 Panning the map 9 Route list - Audiovox NVX226 | User Manual - Page 3
install the map loader into your computer. You can install the map loader while the battery is charging. Charging the battery To charge the battery, plug the power cable into the AUDIOVOX NVX226 system and into a power outlet. Let the battery fully charge (approximately 4 hours). 1 User's Manual - Audiovox NVX226 | User Manual - Page 4
If the AUDIOVOX NVX226 system is being used for the first time, set the power ON/OFF slide switch on the bottom of the device to ON. The AUDIOVOX NVX226 screen appears. 2. The AUDIOVOX NVX226 system will auto start the Navigation program, and the following warning screen appears: 2 User's Manual - Audiovox NVX226 | User Manual - Page 5
3. Tap OK after you have read and agreed to the warning. The map view then appears and you are ready to set your first destination. 3 User's Manual - Audiovox NVX226 | User Manual - Page 6
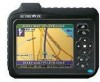
on/off Center: tap for OK Main Menu button Set destination button System On/Off button Acquiring a GPS signal To use the AUDIOVOX NVX226 system to guide you to a destination, the system's GPS antenna must be receiving GPS signals. These signals can be obstructed by ceilings, trees, and nearby tall - Audiovox NVX226 | User Manual - Page 7
Tap the left button: the screens appear in reverse order. Whichever current screen is displayed, tapping the OK button changes to the map screen. 5 User's Manual - Audiovox NVX226 | User Manual - Page 8
the keyboard appears: button, and the numeric Moving through the screens The AUDIOVOX NVX226 system shows you one screen at a time. Each time you tap a button, a new screen appears. If you want to return to the previous screen, tap the button in the center of the wheel button. 6 User's Manual - Audiovox NVX226 | User Manual - Page 9
in and out, and you can find information about specific locations. Map view If you have acquired a GPS signal, the map view on the AUDIOVOX NVX226 system shows you your current location, indicated by a green arrow. If the arrow is red, no GPS signal is being received, and if the arrow is yellow the - Audiovox NVX226 | User Manual - Page 10
to your destination, and your current speed. Panning the map You can pan the map by tapping and dragging the map. To return to the regular map view, press the center of the wheel button. on the list and then tapping Map will display the maneuver detail screen for that maneuver. 8 User's Manual - Audiovox NVX226 | User Manual - Page 11
Main menu and set destination button Every time, you press a Main Menu screen appears. Press , if you have set a destination, a Destination Options screen appears. If not, a Set Destination screen appears, and then you can set a destination using any of the following methods: 9 User's Manual - Audiovox NVX226 | User Manual - Page 12
to set a destination. Saving the location adds the location to your Favorites list (you'll learn more about Favorites later in this manual). To view location information: 1. To view information about a location on the map, press firmly on the map. The address information screen appears. 10 User - Audiovox NVX226 | User Manual - Page 13
Information. The Information screen appears, giving you block information about the location, including latitude and longitude. To view Point of Interest (POI) information: 1. To view information about POI on the map, press firmly on the icon on the map. The POI(S) screen appears. 11 User's Manual - Audiovox NVX226 | User Manual - Page 14
. The AUDIOVOX NVX226 system also offers an Itinerary feature, where you can enter up to 50 destinations and use the Itinerary screen to arrange and delete destinations from the list. Display the location on the panning map without calculating a route. Using an address as a destination When you Manual - Audiovox NVX226 | User Manual - Page 15
be asked to use City First. To enter an address as a destination using Street First: 1. Press . The Set Destination appears. 2. Tap Address. The Input Method screen appears. 3. If you need to change the region: • Tap Change. The Enter State Name - Audiovox NVX226 | User Manual - Page 16
screen appears. 5. Tap the letters to enter the name of the street. Tap OK when you have selected the street. The Enter House Number screen appears. 6. Select the address that matches the location you want to go to and tap . The map appears, and the guidance directions begin. 14 User's Manual - Audiovox NVX226 | User Manual - Page 17
Method screen appears. 3. If you need to change the region: • Tap Change. The Enter State Name screen appears. • Tap the letters to enter the name of the region, or tap the name of the region. • Tap OK when you have selected the region. You return to the Input Method screen. 15 User's Manual - Audiovox NVX226 | User Manual - Page 18
City Name screen appears. 5. Tap the letters to enter the name of the city. Tap OK when you have selected the city. The Enter Street screen appears. 6. Tap the letters to enter the name of the street. Tap OK when you have selected the street. The Enter House Number screen appears. 16 User's Manual - Audiovox NVX226 | User Manual - Page 19
OK when you have finished. The Select Address screen appears. 8. Select the address that matches the location you want to go to and tap . The map appears, and the guidance directions begin. Using an destination using Street First: 1. Press . The Set Destination screen appears. 17 User's Manual - Audiovox NVX226 | User Manual - Page 20
: • Tap Change. The Enter State Name screen appears. • Tap the letters to enter the name of the region, or tap the name of the region. • Tap OK when you have selected the region. You return to the Input Method screen. 4. Tap Street First. The Enter Street Name screen appears. 18 User's Manual - Audiovox NVX226 | User Manual - Page 21
appears. 6. Tap the letters to enter the name of the second street. Tap OK when you have selected the street. The Select Address screen appears. 7. Select the intersection that matches the location you want to go to and tap . The map appears, and the guidance directions begin. 19 User's Manual - Audiovox NVX226 | User Manual - Page 22
Method screen appears. 3. If you need to change the region: • Tap Change. The Enter State Name screen appears. • Tap the letters to enter the name of the region, or tap the name of the region. • Tap OK when you have selected the region. You return to the Input Method screen. 20 User's Manual - Audiovox NVX226 | User Manual - Page 23
screen appears. 5. Tap the letters to enter the name of the city. Tap OK when you have selected the city. The Enter Street Name screen appears. 6. Tap the letters to enter the name of the street. Tap OK when you have selected the street. The Enter 2nd Street Name screen appears. 21 User's Manual - Audiovox NVX226 | User Manual - Page 24
7. Tap the letters to enter the name of the second street. Tap OK when you have selected the street. The Select Address screen appears. 8. Select the intersection that matches the location you want to go to and tap . The map appears, and the guidance directions begin. 22 User's Manual - Audiovox NVX226 | User Manual - Page 25
point of interest include two for nearby POIs and two for all POIs in a region. To select a nearby POI as a destination: 1. Press . The Set Destination screen appears. 2. Tap Points of Interest. The Points of Interest screen appears. 23 User's Manual - Audiovox NVX226 | User Manual - Page 26
. Note: If you choose Restaurant, tap the letters to enter a type of restaurant. If you choose Hotel, there is no subcategory screen. Go to the next step. 4. Tap a subcategory. The POI Options screen appears. 5. To select a nearby POI from an alphabetical list: • Tap Alphabetical. The Enter POI Name - Audiovox NVX226 | User Manual - Page 27
OK when you have selected the POI. The POI Select screen appears, displaying the address of the POI. • Tap . The map appears, and the guidance directions begin. 6. To select a nearby POI by distance: • Tap By Distance. The POI List screen appears, listing the closest POIs first. • Tap the POI - Audiovox NVX226 | User Manual - Page 28
To select from all POI in a region: 1. Press . The Set Destination screen appears 2. Tap POI. The Points of Interest screen appears. 3. Tap a category. Usually a subcategory screen appears. Note: If you choose Restaurant, tap the letters to enter a type of restaurant. If you choose Hotel, there - Audiovox NVX226 | User Manual - Page 29
a POI from an alphabetical list: • Tap List All. The Enter POI Name screen appears. • Tap the letters to enter the name of the POI. Tap OK when you have selected the POI. The POI Select screen appears. • Tap . The map appears, and the guidance directions begin. 6. To select a POI by city: • Tap - Audiovox NVX226 | User Manual - Page 30
• Tap the letters to enter the name of the city and tap OK. The Enter POI Name screen appears. • Tap the letters to enter the name of the POI and tap OK. The POI Select screen appears. • Tap . The map appears, and the guidance directions begin. 28 User's Manual - Audiovox NVX226 | User Manual - Page 31
destination Favorite destinations are locations you add to a list on the AUDIOVOX NVX226 system. You can add locations to your Favorites list as you set a destination from the POI(S) screen, and from the Location Information screen. You can then easily select one of these locations as a destination - Audiovox NVX226 | User Manual - Page 32
screen appears 2. Tap Recent. The Recent screen appears. 3. Tap on the recent destination you want to go to and tap appears, and the guidance directions begin. . The map Using a City Center as a destination Sometimes you may want to use the AUDIOVOX NVX226 system in a region. 30 User's Manual - Audiovox NVX226 | User Manual - Page 33
To select a nearby City Center as a destination: 1. Press . The Set Destination screen appears 2. Tap City Center. The City Center screen appears. 3. To select a nearby city center from an alphabetical list: • Tap Alphabetical. The Enter City Name screen appears. 31 User's Manual - Audiovox NVX226 | User Manual - Page 34
the city. Tap OK when you have selected the city. The City Center screen appears. • Tap . The map appears, and the guidance directions begin. 4. To select a nearby POI by distance: • Tap By Distance. The City List screen appears, listing the closest city centers first. • Tap the city that you - Audiovox NVX226 | User Manual - Page 35
To select from all City Centers in a region: 1. Press . The Set Destination screen appears 2. Tap City Center. The City Center screen appears. 3. To select a city center from all available in a region: • Tap List All. The Enter City Name screen appears. 33 User's Manual - Audiovox NVX226 | User Manual - Page 36
the city. Tap OK when you have selected the city. The City Center screen appears. • Tap . The map appears, and the guidance directions begin. Adding detours and stopovers The detour feature lets you tell the AUDIOVOX NVX226 system about roads on a route that you do not want to use. Stopovers are - Audiovox NVX226 | User Manual - Page 37
2. Tap Detour. The Detour screen appears. 3. Mark any segments that you do not want included: • Tap on a route instruction to highlight it. • Tap Avoid. A do not enter symbol appears. 4. When you have finished marking segments, tap . Your route is recalculated, the map appears, and the guidance - Audiovox NVX226 | User Manual - Page 38
3. Set your stopover destination using any of the methods explained earlier in this section. To cancel a stopover: 1. Press . The Destination Options screen appears. 2. Tap Stopover. 3. Tap the in the top right corner. A confirmation message appears asking if you want to continue to your final - Audiovox NVX226 | User Manual - Page 39
The map appears and navigation continues. Managing your favorites list You can edit the destinations you add to your favorites list to give them descriptive names. You can also remove destinations from your favorites list. To manage your favorites list: 1. Press . The Set Destination screen appears - Audiovox NVX226 | User Manual - Page 40
screen appears. • Enter a descriptive name for this favorite. • Tap OK when you are done. 4. To delete a destination from your favorites list: • Tap on the favorite you want to delete. • Tap Del. The favorite is removed from the list. 5. Tap X to close the Favorites screen. 38 User's Manual - Audiovox NVX226 | User Manual - Page 41
many different options to customize the AUDIOVOX NVX226 system and make it work your way. These options include: • Display options • Route options • Volume • Localization Display options The display options give you control over the appearance of the map. You can change the following: • Orientation - Audiovox NVX226 | User Manual - Page 42
when you near your next maneuver. If you use the auto setting, the maneuver detail screen appears. The day/night setting controls the background of the screen. If you choose auto, the AUDIOVOX NVX226 system will automatically switch to a darker version of your color scheme soon after sunset, to - Audiovox NVX226 | User Manual - Page 43
your display settings: 1. Press . The main menu appears. 2. Tap Display Options. The Display Options screen appears. 3. Tap your Orientation preference: Heading or North. 4. Tap your Guidance preference: Auto or Manual. 5. Tap your Day/Night preference: Auto, Night, or Day. 6. Tap your POI Icons - Audiovox NVX226 | User Manual - Page 44
the POI Options screen appears. • Tap the categories you want displayed, tap OK. You return to the Display Options screen. 7. Tap your Color preference: Yellow, Grey, White, or Purple. over the appearance of the map. You can change the following: • Method • Ferries • Toll roads • Carpool - Audiovox NVX226 | User Manual - Page 45
you want to make more turns or less turns. To set your route settings: 1. Press . The main menu appears. 2. Tap Route Options. The Display Options screen appears. 43 User's Manual - Audiovox NVX226 | User Manual - Page 46
AUDIOVOX NVX226 system to the level most comfortable for you. You can also mute the sound. You can toggle the mute on and off by pressing the down side of the wheel button. There is also a Mute button on the Volume screen. To change the volume: 1. Press . The main menu appears. 44 User's Manual - Audiovox NVX226 | User Manual - Page 47
Language • Time zone • Units There are four language settings. When you change the language, all of the screen names and controls will be in the selected language. There are six time zone settings for the United States. miles and feet), Mi/Yd (miles and yards), or KM (kilometers). 45 User's Manual - Audiovox NVX226 | User Manual - Page 48
To set your localization settings: 1. Press . The main menu appears. 2. Tap Localization. The Localization screen appears. 3. Tap your Language preference: English, François, Español, or Chinese. 4. Tap your Time Yd, or KM. 6. When you have finished choosing your options, tap OK. 46 User's Manual - Audiovox NVX226 | User Manual - Page 49
System specifications The AUDIOVOX NVX226 has the following specifications: • SiRF Star III GPS chipset • Freescale M9328MX21 (ARM926EJ-S™) 266Mhz CPU • 64 MB SDRAM + 8 MB NOR flash onboard • 3.5-inch 26K Colors TFT LCD with touch panel • SD memory slot for map expansion • Build-in 1 W speaker with - Audiovox NVX226 | User Manual - Page 50
820006 Audiovox Electronics Corporation, 150 Marcus Blvd., Hauppauge, New York 11788 NVX226 Owner's Manual 1287693 48
-
 1
1 -
 2
2 -
 3
3 -
 4
4 -
 5
5 -
 6
6 -
 7
7 -
8
-
9
-
10
-
11
-
12
-
13
-
14
-
15
-
16
-
17
-
18
-
19
-
20
-
21
-
22
-
23
-
24
-
25
-
26
-
27
-
28
-
29
-
30
-
31
-
32
-
33
-
34
-
35
-
36
-
37
-
38
-
39
-
40
-
41
-
42
-
43
-
44
-
45
-
46
-
47
-
48
-
49
-
50
 |
 |

NVX226
Navigation System
User’s Manual
1287693