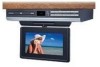
Audiovox VE727 Owners Manual
Audiovox VE727 - VE - 7" LCD TV Manual
 |
UPC - 044476040016
View all Audiovox VE727 manuals
Add to My Manuals
Save this manual to your list of manuals |
Audiovox VE727 manual content summary:
- Audiovox VE727 | Owners Manual - Page 1
- Audiovox VE727 | Owners Manual - Page 2
shock to persons. The exclamation point within the equilateral triangle is intended to alert the user to the presence of important operating and maintenance (servicing) instructions in this owner's manual. Caution marking is located on back enclosure of the unit. WARNING: TO REDUCE THE RISK - Audiovox VE727 | Owners Manual - Page 3
accordance with the instructions, may cause harmful television reception, which can be determined by turning the equipment off and on, the user dealer or an experienced radio/TV technician for help. WARNING: Should any trouble occur, disconnect the AC power cord and refer servicing to a qualified - Audiovox VE727 | Owners Manual - Page 4
any of the ventilation openings. Install in accordance with the manufacturer's instructions. 8. Do not install near any heat sources such as radiators, for long periods of time. 14. Refer all servicing to qualified service personnel. Servicing is required when the apparatus has been damaged in - Audiovox VE727 | Owners Manual - Page 5
Memory 20 DVD Programmable Memory 20 Viewing JPEG FILes 20 Play Modes for CD or JPEG Disc 21 Customizing the Function Settings 22-23 Language 22 Video 22 Default 23 Using the TV 24 TV Setup 25-27 Listening to the Radio 28 Troubleshooting Guide 29 Maintenance 30 Specifications 30 - Audiovox VE727 | Owners Manual - Page 6
determines the specific functions. Certain functions may not be available on some discs. Be sure to read the documentation provided with the DVD. Icons Used on DVDs Sample lcons Language selections for audio Language selections for subtitles Screen aspect ratio Multiple camera angles - Audiovox VE727 | Owners Manual - Page 7
of explosion if battery is incorrectly replaced. Replace only with the same or equivalent type. Notes: • Do not place the remote control near magnetic devices or magnetic cards. • If the remote control is not going to be used for a long time, remove the batteries to avoid corrosion damage caused by - Audiovox VE727 | Owners Manual - Page 8
GUIDE Remote Control 1) FUNCTION Button Use to select DVD, TV video presentation 7 when scenes with multiple camera angles are recorded on a DVD. 8 10) GOTO Button 9 SOUND Goes directly to a location on a DVD/ 10 11 FORMAT MTS CD. 11) AUDIO Button Selects audio soundtracks of a DVD - Audiovox VE727 | Owners Manual - Page 9
CONTROL REFERENCE GUIDE Remote Control PICTURE 1 4 7 EXIT 2 3 5 6 8 9 LAST CH 0 TV MENU RETURN DVD MENU MUTE STOP BAND FORMAT MTS SOUND 13) STANDBY/ON Button Turns on the unit and puts it in standby mode. 14) Number (0-9) Buttons 15) LAST CH Button Press to switch repeatedly - Audiovox VE727 | Owners Manual - Page 10
on the disc tray, label side up. 2) Display Window Displays system information. 3) POWER ON Indicators DVD : DVD indicator TV : TV indicator RADIO : RADIO indicator 4) Remote Sensor Receives the remote control unit signals. 5) POWER Button Turns the unit on and off. 6) OPEN/CLOSE Button Use - Audiovox VE727 | Owners Manual - Page 11
MOUNTING INSTRUCTIONS TOOLS NEEDED: 1) Electric drill with 1/4" bit; 2) Phillips-head (cross style) screwdriver. STEP 1 If your cabinet does NOT have an overhang: a) Place the Mounting Template in - Audiovox VE727 | Owners Manual - Page 12
MOUNTING INSTRUCTIONS (Continued from previous page) c) Insert the four selected screws through each hole from the inside of the cabinet going down (see Figure 5). e) Partially tighten each - Audiovox VE727 | Owners Manual - Page 13
OUT jacks on the rear of the unit to the VIDEO IN and R/L (right/left) jacks on your TV or other video equipment. FM ANTENNA TV or other Video Equipment (yellow) (white) (red) Audio/Video cable (not supplied) VIDEO IN L AUDIO IN R Connecting the Unit to a Stereo Receiver or Amplifier ANALOG - Audiovox VE727 | Owners Manual - Page 14
CONNECTIONS Plugging in the Unit Plug the AC power cord into the wall outlet a) Before plugging in the power cord, make sure the voltage of the unit matches your local voltage. b) Plug the power cord directly into the nearest wall outlet, and wrap the remaining cord around the cord storage knob at - Audiovox VE727 | Owners Manual - Page 15
screen. • Press the DVD/TV/RADIO button (the FUNCTION button on the remote control) to RADIO mode and the radio indicator lights up. After a short period of time, "TUNER" and the FM frequency will appear on the front panel display. SOUND SYSTEM Dolby Digital (for DVD) Dolby Digital is a technology - Audiovox VE727 | Owners Manual - Page 16
COOKING TIMER 1. Press the TIMER button. The "TIMER" indicator appears and the cooking time "10" blinks. 3. When the preset time elapses, the ALARM will sound. 2. Press the / buttons to select your desired time from 1-99 minutes. • Press the TIMER button repeatedly to select time: 10, 15, 30, 45 - Audiovox VE727 | Owners Manual - Page 17
DISC This owner's manual explains the basic instructions of this unit. Some DVDs are produced in a manner that allows specific or limited operation during playback. Such as, the unit may not respond to all operating commands. This is not a defect in the unit. Refer to the instruction notes of discs - Audiovox VE727 | Owners Manual - Page 18
discs on which subtitles have been recorded in multiple languages. • On some DVDs, subtitles are activated from the main menu of the DVD. Press the DVD MENU button to activate the main menu. Audio Selection On some discs, the sound is recorded in two or more formats. Follow the directions below to - Audiovox VE727 | Owners Manual - Page 19
/chapter on disc. Audio: The type of the audio currently selected is displayed DVD contains title/chapter/time numbers, you can locate a specific title/chapter/time by directly selecting a title/chapter/time number. 1. Press the GOTO button to display Title. 2. Press the or button on the remote - Audiovox VE727 | Owners Manual - Page 20
disc tray or turn the unit off. REPEAT PLAYBACK You can play a specific title or chapter repeatedly. Repeating a Chapter You can play the same chapter the window. While the disc is playing, use the and buttons on the remote to select "Repeat", then press the ENTER button to select Single/All/Off - Audiovox VE727 | Owners Manual - Page 21
DVD PROGRAMMABLE MEMORY DVD Programmed Playback You can combine your favorite titles/chapters and play them in the order you determine. 1. Press the MEMORY button on the remote control. 2. Use the or button to select the title you want, then press the ENTER button on the remote control to confirm. - Audiovox VE727 | Owners Manual - Page 22
, it should be in STOP mode. Clear the Programmed Tracks/Files • Press the STOP button twice to stop playback. 1. Use the and buttons on the remote to select "Edit mode" then press the ENTER button. 2. Use the or button to select "Program view", then press the ENTER button. The programmed tracks - Audiovox VE727 | Owners Manual - Page 23
Press the EXIT button to return to the normal screen. Note: Some DVDs may not include your pre-selected language. In this case, the DVD player automatically displays disc menus consistent with the disc's initial language setting. Video TV Shape 1. Press the SETUP button in stop mode. 2. Press the or - Audiovox VE727 | Owners Manual - Page 24
setting. • Select 16:9 to conform the LCD screen on the unit. Always be sure that your TV Shape conforms to the actual TV in use if you connect the unit to a TV. View Mode 1. Press the SETUP button in stop mode. 2. Press the or button to select VIDEO. 3. Press the button. Use the or button - Audiovox VE727 | Owners Manual - Page 25
DVD/TV/RADIO button (the FUNCTION button on the remote) to select TV mode. Manual searching for TV channels 1. Press the TV MENU button, then press the button to TV the sound is mute and the "L O" indicator always blinks on the LCD display until MUTE is pressed again or VOL is pressed. ATSC TV mode - Audiovox VE727 | Owners Manual - Page 26
2 to 4 to adjust other options. 6. To exit the TV SETUP MENU and return to the normal screen, press the EXIT button on the remote control. NOTE: You can also access these setting by pressing the SOUND button. Sound Mode Bass Treble Balance Audio Language Standard 50 50 0 English UP/DOWN ADJUST - Audiovox VE727 | Owners Manual - Page 27
options. 6. To exit the TV SETUP MENU and return to the normal screen, press the EXIT button on the remote control. OSD Duration Time Zone Day mode. Restore Setting: If you reset the TV to the factory settings, all your present settings on picture & sound will be erased and replaced by the factory - Audiovox VE727 | Owners Manual - Page 28
to adjust other options. 6. To exit the TV SETUP MENU and return to the normal screen, press the EXIT button on the remote control. NOTE: Channel No. : 2-69 and the Auto Scan Channels will be added. If you has selected CATV in TV CHANNEL SETTING, then you can select Cable System (AUTO / STD / HRC - Audiovox VE727 | Owners Manual - Page 29
RADIO Tuning in to a Station Manually 1. Press the DVD/TV/RADIO button (the FUNCTION button on the remote) until the radio frequency appears on the front panel display. 2. Press the STOP • BAND button to select AM or FM. 3. Press the TUNING desired station. buttons on the remote to tune in to - Audiovox VE727 | Owners Manual - Page 30
TROUBLESHOOTING GUIDE SYMPTOM No power. The remote does not function. DVD No sound or only a very low-level sound is heard. No picture CAUSE (AND REMEDY) • Ensure the AC power cord is connected. • The unit is not turned on. • Remove any obstacles between the remote and the unit. • Use the remote - Audiovox VE727 | Owners Manual - Page 31
A defective or soiled disc inserted into the unit can cause sound to drop out during playback. Handle the disc by holding the unit, remove the disc from the disc compartment. SPECIFICATIONS Power source: AC 120V ~ 60Hz Specifications and external appearance are subject to change without notice.
-
 1
1 -
 2
2 -
 3
3 -
 4
4 -
 5
5 -
 6
6 -
 7
7 -
8
-
9
-
10
-
11
-
12
-
13
-
14
-
15
-
16
-
17
-
18
-
19
-
20
-
21
-
22
-
23
-
24
-
25
-
26
-
27
-
28
-
29
-
30
-
31
 |
 |
