Audiovox VOD10PS2 Operation Manual
Audiovox VOD10PS2 - Car - 16:9 Flipdown Monitor Manual
 |
UPC - 044476068119
View all Audiovox VOD10PS2 manuals
Add to My Manuals
Save this manual to your list of manuals |
Audiovox VOD10PS2 manual content summary:
- Audiovox VOD10PS2 | Operation Manual - Page 1
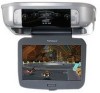
VOD10PS2 10.2" OVERHEAD LCD MONITOR WITH SONY PS2 PLAYER MENU / ENTER OPERATION MANUAL 128-8667A - Audiovox VOD10PS2 | Operation Manual - Page 2
driver if the LCD panel or video monitor is used for vehicle information, system control, rear or side observation or navigation. If the LCD panel or video monitor is used for television reception, video or DVD play, the LCD panel or video monitor must be installed so that these features will only - Audiovox VOD10PS2 | Operation Manual - Page 3
AUDIOVOX VOD10PS2 Player with Drop-Down Video / Monitor. The VOD10PS2 has been designed to give you and your family many years of video entertainment in the mobile environment. Please read the directions that follow to familiarize yourself with the product to ensure that you obtain the best results - Audiovox VOD10PS2 | Operation Manual - Page 4
VOD10PS2 on by pressing the power button. NOTE: If a blue screen is present, press the green RESET key on the remote control or the PlayStation2. 10. If a DVD is played press the PLAY key on the remote control, or the "X" key on the game controller or the Menu/Enter key on the front of the overhead - Audiovox VOD10PS2 | Operation Manual - Page 5
in each headphone. Turn the volume to minimum before turning them on. Once they are turned on, place them on your head (pay attention to R/L earpieces) and slowly adjust the volume to a comfortable listening level. 12. When listening to the system over the vehicle radio: a. Using the remote control - Audiovox VOD10PS2 | Operation Manual - Page 6
the dark directional buttons (q p u t ) to select an icon. When the desired icon is selected, press the button. NOTE: The Control Panel may appear at the end of some DVD movies. For complete instructions regarding the functions provided by the Control Panel refer to the PlayStation2 User's Guide. 6 - Audiovox VOD10PS2 | Operation Manual - Page 7
Use this button to access SYSTEM MENU and select system menu items. 8 9 10 MEMORY CARD FORCE LINK MEMORY CARD FORCE LINK 4. Infrared Transmitter and Sensor 13 Transmits audio to wireless headphones, allows the remote control to operate the unit and to control other accessories in the 14 - Audiovox VOD10PS2 | Operation Manual - Page 8
tray. 15. OPEN () The disc tray opens. 16. RESET ( ) ON/Standby and RESET indicator. CONTROL FUNCTION DESCRIPTION (SIDE VIEW) 1 2 34 R AUDIO L VIDEO 1. HEADPHONE JACK For wired headphone with a 1/8" (3.5mm) plug. 2. Auxiliary Audio Right Input 3. Auxiliary Audio Left Input 4. Auxiliary - Audiovox VOD10PS2 | Operation Manual - Page 9
Install Two "AAA" batteries. Make sure that proper polarity (+ or -) is observed. 3) Align the cover tabs with the remote control and slide the cover until it locks. The remote control MENU RETURN ENTER L1 L3 SELECT L2 MUTE FMM ON/OFF SYSTEM MENU R3 R1 START R2 VOLUME PIX FMM SELECT SOURCE - Audiovox VOD10PS2 | Operation Manual - Page 10
remote control, that control the other functions of the unit. PLAYSTATION CONTROLS (P1-P36) (Dark Gray Buttons) NOTE: PlayStation2 controls (refer to the SONY PlayStation2 manual changes DVD viewing angle options. P5. PROGRAM Displays the Program Setup screen. P6. SUBTITLE Displays and changes DVD - Audiovox VOD10PS2 | Operation Manual - Page 11
to locate a particular scene. P10. PLAY Starts playback. P11. DISPLAY Displays the Control Panel of the PlayStation2. P12. TOP MENU Displays the disc menu of DVD-Video discs. The content varies from disc to disc. P13. BUTTON: DVD MENU Selects the item to be changed. P14. ENTER Executes the item - Audiovox VOD10PS2 | Operation Manual - Page 12
( ) using fast reverse or fast forward playback. P20. SELECT Displays the control panel of the PlayStation2. P21 START Press to Play/Pause disc playback. P22. P26. BUTTON: CANCEL / - Audiovox VOD10PS2 | Operation Manual - Page 13
PlayStation2 console in standby mode. On :Press Once. Reset :Press for about one second. Standby mode :Press and Hold down for more than three seconds. OVERHEAD MONITOR CONTROLS (M1-M11) (Light Gray Buttons)) M1. POWER Press this button to turn the unit ON and OFF. 13 - Audiovox VOD10PS2 | Operation Manual - Page 14
for picture controls, FM Modulator Select, screen mode etc. M5. FMM SELECT Selects the FM Modulator Frequency. M6. SOURCE Each time the button is pressed, the audio/video source will change: PS2, AV1 and AUX. M7. IR ON/OFF Turns the Infrared Transmitter power ON/OFF for IR Wireless Headphones. M8 - Audiovox VOD10PS2 | Operation Manual - Page 15
as they might leak dangerous chemicals. The wireless transceivers are pre-installed in the controller ports on your PlayStation2 system. Turning On the Controller: 1. Turn on your PlayStation2 system. Press the green reset button on the remote control if the PlayStation2 does not come on when - Audiovox VOD10PS2 | Operation Manual - Page 16
will not be used for a long period of time to preserve battery life. If Your Controller Does Not Synchronize: Joy Sticks 1. If the red MODE LED indicator on your wireless controller does not activate, switch the controller off, wait three seconds, and switch it back on using the ON/OFF switch on - Audiovox VOD10PS2 | Operation Manual - Page 17
the MENU/ENTER button to exit System Menu. NOTE: System Menu can be controlled via unit and remote control. Press the SYSTEM MENU button for access. (Items selected in the menu will have a green background) PICTURE CONTROL (REMOTE CONTROL) When watching a DVD or playing a game, the picture quality - Audiovox VOD10PS2 | Operation Manual - Page 18
to factory default settings.) FMM FMM ON/OFF options - Turns the wireless FM Modulator on or off. 1) Press the SYSTEM MENU on the remote control, the following screen will appear: SYSTEM MENU PICTURE CONTROL FMM OSD LANGUAGE SOURCE DEFAULT PS2 SCREEN MODE 2) Use the light gray q (down) arrow on the - Audiovox VOD10PS2 | Operation Manual - Page 19
up) or q (down) arrow on the remote control to highlight FMM ON and press the light the light gray q (down) arrow on the remote control to highlight FMM SELECT and press the ENTER button q (down) t (left) u (right) buttons on the remote control to select a frequency not used by a radio station in the - Audiovox VOD10PS2 | Operation Manual - Page 20
default mode of operation. • Selection of Source default can only be made from within the system menu. SYSTEM MENU SOURCE DEFAULT PS2 PICTURE CONTROL ON FMM OSD LANGUAGE OFF SOURCE DEFAULT PS2 SCREEN MODE SCREEN MODE This allows the user to change the screen format (aspect ratio 4:3, 16 - Audiovox VOD10PS2 | Operation Manual - Page 21
The hinge friction will hold the screen in position while the system is in use. 2. Pressing the power button* on the unit or the remote control will turn the system on and off. When in use the internal backlighting will illuminate the controls. 3. After the unit has been turned on and is displaying - Audiovox VOD10PS2 | Operation Manual - Page 22
wireless headphones. WIRED HEADPHONES (OPTIONAL) There is one 1/8" headphone jack on the unit that can be used with any standard wired stereo headphones with a 1/8" plug. This jack is controlled by the volume up/down buttons on the remote control or the t (left) u (right) buttons on the overhead - Audiovox VOD10PS2 | Operation Manual - Page 23
installation. AUX The AUX input (located on th right side of the unit) may be connected to a external video source, video game system, or other audio / video devices. To access the audio / video inputs, turn the unit on and press the S (source) button or the Source button on the remote control - Audiovox VOD10PS2 | Operation Manual - Page 24
TROUBLESHOOTING PROBLEM IR remote inoperative Disc won't play Play starts, but then stops immediately No sound or distorted sound Can't advance through a movie SOLUTION Verify that the batteries in the remote are fresh. Verify that the remote sensor eye is not obstructed. Insert a disc with the - Audiovox VOD10PS2 | Operation Manual - Page 25
able to. This part of the movie is often programmed to prohibit skipping through it. Service and Repair Warranty on all components in this system ( VOD10PS2, Remote Control, Game Controllers and built-in Sony PlayStation2) is handled by Audiovox Electronics Corporation. For service call 1-800-225 - Audiovox VOD10PS2 | Operation Manual - Page 26
PARTS Remote Control Wireless Controller 136-4926 136-5007 SPECIFICATIONS LCD Backlighting LED Resolution 800 (RGB) x 480 Pixels 1,152,000 Operation Temperature 32 ~131º F (0 ~ 50º C) Storage Temperature -4 ~ 158º F (-20 ~ 70º C) Backlit life 10,000 Hours Video Display System - Audiovox VOD10PS2 | Operation Manual - Page 27
AUDIOVOX LIMITED WARRANTY Applies to Audiovox Mobile Video Products AUDIOVOX ELECTRONICS CORP. (the Company) warrants to the original retail purchaser of this product that, should this product or any part thereof (except game controllers), under normal use and conditions, be proven defective in - Audiovox VOD10PS2 | Operation Manual - Page 28
© 2010 AUDIOVOX,150 Marcus Blvd. Hauppauge, NY 11788 128-8667A
-
 1
1 -
 2
2 -
 3
3 -
 4
4 -
 5
5 -
 6
6 -
 7
7 -
8
-
9
-
10
-
11
-
12
-
13
-
14
-
15
-
16
-
17
-
18
-
19
-
20
-
21
-
22
-
23
-
24
-
25
-
26
-
27
-
28
 |
 |
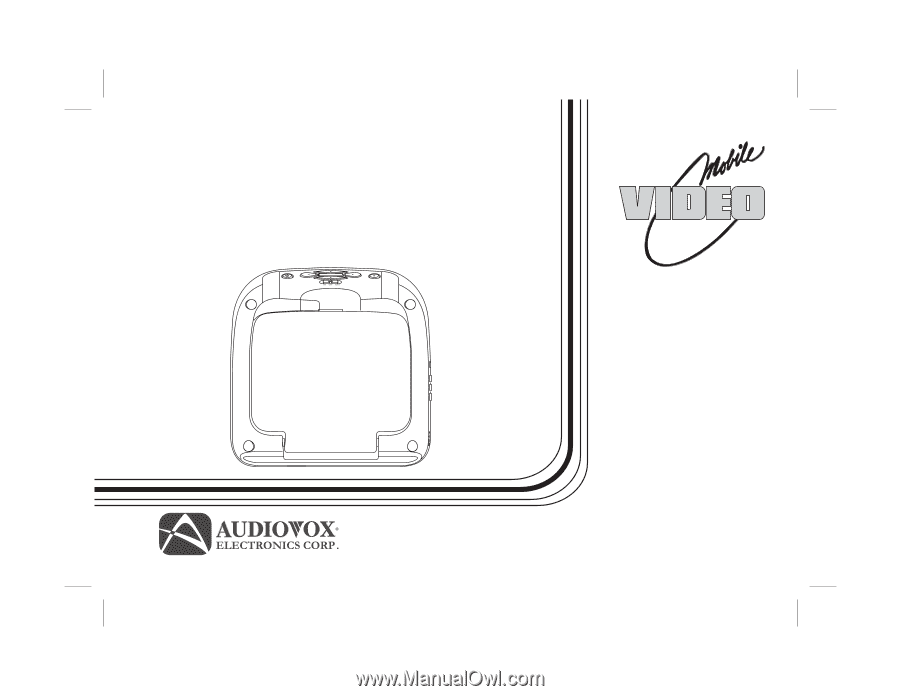
OPERATION
MANUAL
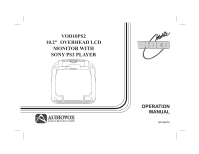
VOD10PS2
10.2" OVERHEAD LCD
MONITOR WITH
SONY PS2 PLAYER
128-8667A