Audiovox VOD122 Installation Guide
Audiovox VOD122 - DVD Player With LCD Monitor Manual
 |
UPC - 044476032479
View all Audiovox VOD122 manuals
Add to My Manuals
Save this manual to your list of manuals |
Audiovox VOD122 manual content summary:
- Audiovox VOD122 | Installation Guide - Page 1
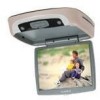
® VOD122 12.1" OVERHEAD LCD MONITOR WITH DVD PLAYER Installation Guide - Audiovox VOD122 | Installation Guide - Page 2
box is available. The Audiovox part number is SIRSWB and it plugs into the 1/8" jack located next to the FM antenna on the side of the chassis. This relay box is installed between the vehicle antenna and the car radio to provide the best possible FM reception of the DVD player audio. When the SIRSWB - Audiovox VOD122 | Installation Guide - Page 3
: 1) VOD122 TV / Video Monitor with DVD - (1pc) 2) 12 Pin Power / Signal harness (P/N 112-3483) - (1pc) 3) 2 Pin Power Wire Harness with (1pc), Pewter - (1pc) 7) Remote Control (P/N 136-4196) - (1pc) 8) Wireless Game Controller (P/N 136-4197) (1pc) 9) Mounting Bracket (P/N 108-3930) - (1pc) 10 - Audiovox VOD122 | Installation Guide - Page 4
Pry Tool catch (A) Begin by hooking area "A" (above) over the dome light and slide the cover over the pod. The cover will snap in place. Installing The Screen Cover (B) (B) Open the screen and hook the two tabs "B" on the bottom edge of the screen. Snap the opposite side over the hinge 2 - Audiovox VOD122 | Installation Guide - Page 5
Removing The Snap On Cover (Shroud) From The Housing Work on a soft surface to avoid damaging the plastic. Insert the supplied pry tool between the Housing and Snap On Cover (Shroud), then press the pry tool to release the Snap On Cover (Shroud). 1 2 3 Removing The Snap On Cover (Screen Back) - Audiovox VOD122 | Installation Guide - Page 6
and also a good ground generally, these wires can be found at the ignition switch or fuse-box. 2) The mounting method and location will vary from vehicle to vehicle, so this manual will only focus on the installation of the VOD122 and related console accessories. 3) Generally, the best location for - Audiovox VOD122 | Installation Guide - Page 7
the user. FMM 88.3MHz AUX/GAME FMM OFF DVD M1 M2 IRT ON IRT OFF Notes: There are a few options that can be added as follows: a) Wired relay box for wireless FM Modulator (P/N SIRSWB). b) Pod TVT2 TV Tuner. The VOD122 video system is only intended for an overhead, drop down installation. It - Audiovox VOD122 | Installation Guide - Page 8
used in this installation are not over tightened, and that the video monitor and trim ring are mounted in such a way that the assembly does not distort (or bend) when the mounting screws are tightened. An alternate method is to use the mounting bracket. First secure the mounting bracket to the cross - Audiovox VOD122 | Installation Guide - Page 9
MOUNTING THE TRIM RING Roof Roof Support Headliner Mounting Bracket Self-drilling Screws Trim Ring Video Unit M5 Screw 7 - Audiovox VOD122 | Installation Guide - Page 10
DVD 2. AUX/Game 3. AV1 (DIN1) 4. AV2/ TV - Supplied 9 Pin to 3 RCA Jack Pigtail is used for AV2 input. Optional TV Tuner (PODTVT2) is used TV input. *NOTE: If the optional relay box P/N SIRSWB is installed, it recommended that the antenna for the wireless FM Modulator be unplugged. See VOD122 Wiring - Audiovox VOD122 | Installation Guide - Page 11
Out-R (Red) Line Out-V (Yellow) VOD122 (Optional) TV Antenna (AN-400) To See Antenna Note on the previous page 12 Pin Power / Signal harness Accessory Harness - Optional (P/N:8010730) (Optional) Red RCA (Audio Right) Installations Item# 5 FUSE DC IN ANT.IN RF OUT OUT Dome Light - Audiovox VOD122 | Installation Guide - Page 12
1999 Dodge Caravan, may require that the purple / brown (Lamp auto) wire be connected to the door pin switch wire, as the additional current draw of the Monitor's lights may not be supported by the output of the vehicles body control computer. Positive Switched Dome Lighting To 12 pin connector on - Audiovox VOD122 | Installation Guide - Page 13
Control computer To constant Troubleshooting: SYMPTOM: No power at Video Monitor REMEDY: Verify +12 VDC on Red wire CH down. Verify antenna mounting and connections to the remote functions Check batteries in the hand held remote. Verify that the IR LED for VCP (or other components) (page 9 Wiring - Audiovox VOD122 | Installation Guide - Page 14
For Customer Service Visit Our Website At WWW.audiovox.com Product Information, Photos, FAQ's Owner's Manuals 128-7664 © Copyright 2006 Audiovox Electronics Corp. 150 Marcus Blvd. Hauppauge, NY 11788
-
 1
1 -
 2
2 -
 3
3 -
 4
4 -
 5
5 -
 6
6 -
 7
7 -
8
-
9
-
10
-
11
-
12
-
13
-
14
 |
 |
