Audiovox VOD8521P Installation Guide
Audiovox VOD8521P - Overhead LCD Monitor Manual
 |
UPC - 044476028045
View all Audiovox VOD8521P manuals
Add to My Manuals
Save this manual to your list of manuals |
Audiovox VOD8521P manual content summary:
- Audiovox VOD8521P | Installation Guide - Page 1
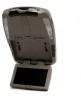
® ELECTRONICS CORP . VOD8521 / VOD8521S / VOD8521P DVD PLAYER WITH DROP-DOWN VIDEO MONITOR PICTURE SELECT P SOURCE S ON OF F AUT O FM VOLUME SELECT LR AUDIO H EAD PH O NE S INPUT VIDEO IR Installation Guide - Audiovox VOD8521P | Installation Guide - Page 2
an optional relay box is available. The Audiovox part number is SIRSWB and plugs into the 1/8" jack on the side of the chassis. This relay box is installed between the vehicle antenna and the car radio to provide the best possible FM reception of the DVD player audio. When the SIRSWB is installed it - Audiovox VOD8521P | Installation Guide - Page 3
: 1) VOD8521 TV/Video Monitor with DVD (1pc) 2) 12 Pin Power / Signal harness (P/N 112-3483) (1 pc) 3) 2 Pin Power Wire Harness with choke (P/ N 112B3143) (1 pc) 4) Hardware Package #4 x 3/8" Screws (9 pcs) #8 x 5/8" Self Drilling Screws (4 pcs) #8 Washers (4 pcs) 5) Remote Control (1363855) (1pc - Audiovox VOD8521P | Installation Guide - Page 4
external amp, wireless headphones, VCP, etc.). 2) Review all manuals to become familiar on pages 6 of this manual as well as the wiring instructions for the individual components and : a) Wireless Headphones (P/N MVIRHS). b) Wired relay box for wireless FM Modulator. The VOD8521 video systems are - Audiovox VOD8521P | Installation Guide - Page 5
these wires can be found at the ignition switch or fuse-box. 2) The mounting method and location will vary from vehicle to vehicle, so this manual will only focus on the installation of the video monitor and related console accessories. 3) Generally, the best location for the video monitor is where - Audiovox VOD8521P | Installation Guide - Page 6
MINI CONSOLE INSTALLATION: This page only covers special installation considerations for the mini-console installation. If the video monitor is to be installed in a vehicle with the mini console, this console may need to be trimmed to fit the contour of the vehicle headliner. 1) In this installation - Audiovox VOD8521P | Installation Guide - Page 7
MOUNTING THE MINI-CONSOLE Roof Roof Support Headliner 12"x9"x3/4" Plywood Block (4) Self-Tapping Screws (not supplied) Mini-Console Video Unit (5) #8 Flat Washers (5) #8x3/4" Self-Tapping Screws -5- - Audiovox VOD8521P | Installation Guide - Page 8
VOD8521 monitor system using a second source component harness (purchased separately, part number: 8010730). This harness would plug into the Mini-Din (Mini-Din on main PCB) 2= AUX-IN (VCP, Game or future DVD etc...) 3= Built-in DVD 4= TV (TV Tuner) *NOTE: If the original relay box P/N SIRSWB - Audiovox VOD8521P | Installation Guide - Page 9
/ brown (Lamp auto) wire be connected to the door pin switch wire, as the additional current draw of the Monitor's lights may not be supported by the output of the vehicles body control computer. Positive Switched Dome lighting To 12 pin connector on Monitor Red / black - Lamp on Black / red - Audiovox VOD8521P | Installation Guide - Page 10
To constant Troubleshooting: SYMPTOM: heard over headphones. If problem is limited to the dash radio, verify radio is tuned to the correct channel, and that power to the wired RF modulator is on. (Refer to instructions remote func- -Check batteries in the hand held remote - Audiovox VOD8521P | Installation Guide - Page 11
For Customer Service Visit Our Website At WWW.audiovox.com Product Information, Photos, FAQ's Owner's Manuals 128-7258A © Copyright 2004 Audiovox Electronics Corp. 150 Marcus Blvd. Hauppauge, NY 11788
-
 1
1 -
 2
2 -
 3
3 -
 4
4 -
 5
5 -
 6
6 -
 7
7 -
8
-
9
-
10
-
11
 |
 |

Installation Guide
®
ELECTRONICS CORP .
VOD8521 / VOD8521S /
VOD8521P
DVD PLAYER WITH DROP-DOWN
VIDEO MONITOR
SOURCE
VOLUME
FM
SELECT
ON
OFF
AUTO
PICTURE
SELECT
H
E
A
D
P
H
O
N
E
S
I
N
P
U
T
A
U
D
I
O
L
R
V
I
D
E
O
I
R
S
P